You are using an out of date browser. It may not display this or other websites correctly.
You should upgrade or use an alternative browser.
You should upgrade or use an alternative browser.
Raptor SD 54" Deck Discharge kit.
- Thread starter DJ660
- Start date
More options
Export threadmhavanti
Well-Known Member
- Joined
- Oct 12, 2014
- Threads
- 12
- Messages
- 924
Thanks Mr. Mower. Soon as I sand off the ugliness and give the outside a nice smooth coat it won't look bad at all. By they way, works like a charm. Much stronger than the over the top deal as the leading edge is re-enforced.
Another way to have done that would have been to take a piece of 10 gauge flat stock, welded it below the front and rear opening after cutting out the bar. Would buckle slightly if you hit something hard enough. But then, that would still keep the front from folding quite so easily.
Thanks again.
Max
Mr. Mower
Well-Known Member
- Joined
- Sep 1, 2016
- Threads
- 8
- Messages
- 254
Thanks Mr. Mower. Soon as I sand off the ugliness and give the outside a nice smooth coat it won't look bad at all. By they way, works like a charm. Much stronger than the over the top deal as the leading edge is re-enforced.
Another way to have done that would have been to take a piece of 10 gauge flat stock, welded it below the front and rear opening after cutting out the bar. Would buckle slightly if you hit something hard enough. But then, that would still keep the front from folding quite so easily.
Thanks again.
Max
Have to inquire about this.....did you prime the area(s) prior to re-painting, touch-up, etc. to work as an undercoat for the paint applied?
Exactly what primer did you use?
Also, exactly what paint match did you use?
Last....after you finished re-painting the areas did you use any type of "spray coating" over the areas painted to protect the paint for non-stick, easy wipe off, etc. if so what did you use?
mhavanti
Well-Known Member
- Joined
- Oct 12, 2014
- Threads
- 12
- Messages
- 924
Mr. Mower,
I did prime the area to be painted. I used Rustoleum Bare Metal Prime in White.
I used Rustoleum Marigold.
The mowing test went off today. I only put paint on for the mowing test. I am amazed at the modification as not one clipping touched the lowered reinforcement. I purposely left the rear four or four and half inches about .050 higher than the front in order to see if any part of the reinforcement bar would capture any wet grass / weeds.
The final section of the video I shot today, 06/18/2018 shows the paint as staying put due to not being pounded by the fodder being thrown over the bar instead of the bar being pummeled as usual. There is a bit of green colorization on the higher area telling me if the .050 is removed, the reinforcement bar is then not being hit at all.
Considering this modification isn't one I felt is a necessity for a Raptor, I won't be lowering the extra .050 as for my use, I'm satisfied and especially since there is still a safety factor that is lost when entirely cutting out the reinforcement bar.
I'll most likely clean the area with the green stain, shoot the paint with a few coats of clear coat.
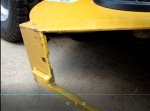
The second photo is altered with some black lines drawn in to demonstrate how the straight line would have looked if I'd not chosen to raise the rear of the cut. Since the altered photo makes it look so much better. May have to lower the rear for aesthetics purposes only.


Mr. Mower
Well-Known Member
- Joined
- Sep 1, 2016
- Threads
- 8
- Messages
- 254
I see.
On another entirely different subject, did you ever look into adding a "Fuel Gauge" to your specific model Hustler mower?
Did you research or call Hustler Corp. and speak to one of their Engineers to inquire about it?
It's more than likely that it's going to require adding an electrical harness to the mower's electrical system as well as possibly either replacing the entire "Full Tank" with a "Fuel Sending Unit" or maybe just adding a "Fuel Sending Unit" to your existing Fuel Tank along with the actual "Fuel Gauge" to complete the process?
Just saying.
mhavanti
Well-Known Member
- Joined
- Oct 12, 2014
- Threads
- 12
- Messages
- 924
Mr. Mower,
I have not as of yet. I have several other modifications to do videos on which include: Anderson quick connect battery connector, adding an eight circuit fuse panel in order to add things such as front and rear lights, motorcycle type flashing lights in the event some idiot uses this particular mower after dark also in the event they are mowing right next to the street. I don't know any such idiots, thank goodness. If so, I'm going to knock on their door and ask them kindly to put that damned mower away until after breakfast. lol. Adding a 12 volt power socket, and a few other fused circuits in order to make sure nothing is left unprotected.
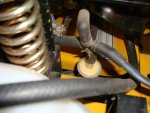
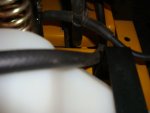
I have not as of yet. I have several other modifications to do videos on which include: Anderson quick connect battery connector, adding an eight circuit fuse panel in order to add things such as front and rear lights, motorcycle type flashing lights in the event some idiot uses this particular mower after dark also in the event they are mowing right next to the street. I don't know any such idiots, thank goodness. If so, I'm going to knock on their door and ask them kindly to put that damned mower away until after breakfast. lol. Adding a 12 volt power socket, and a few other fused circuits in order to make sure nothing is left unprotected.


Attachments
Mr. Mower
Well-Known Member
- Joined
- Sep 1, 2016
- Threads
- 8
- Messages
- 254
Mr. Mower,
I have not as of yet. I have several other modifications to do videos on which include: Anderson quick connect battery connector, adding an eight circuit fuse panel in order to add things such as front and rear lights, motorcycle type flashing lights in the event some idiot uses this particular mower after dark also in the event they are mowing right next to the street. I don't know any such idiots, thank goodness. If so, I'm going to knock on their door and ask them kindly to put that damned mower away until after breakfast. lol. Adding a 12 volt power socket, and a few other fused circuits in order to make sure nothing is left unprotected.
View attachment 38628View attachment 38629View attachment 38630View attachment 38631View attachment 38632
:laughing::laughing::laughing:
Yes very funny indeed! I guess that puts me in that catagory since my Raptor Flip Up has factory LED lighting.
I really like those upgrades.
Keep adding and keep us all posted on the outcome of them all.
Thanks.
mhavanti
Well-Known Member
- Joined
- Oct 12, 2014
- Threads
- 12
- Messages
- 924
Thanks,
run by the Youtube channel, subscribe, thumbs up and hit the notifications tab to receive new videos as they come out. Have one almost ready on the deck bar lowering. Soon as I learn how to blur a bit of content, it will be going up.
https://www.youtube.com/channel/UCKGtOepm7R0526XE2HPZUDg/featured?view_as=subscriber
Thanks in advance,
Max
BoylermanCT
Well-Known Member
- Joined
- Jun 7, 2016
- Threads
- 12
- Messages
- 164
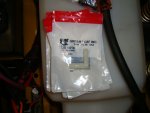
Here is what you get with the deck modification kit. Nice heavy duty plate and a bag of bolts. They want you to drill several 0.41" holes. Had to get out my calculator - works out to be a 13/32 drill bit (0.40625)
View attachment 38539
View attachment 38540
View attachment 38541
I am trading in my Raptor SD for a 2017 X-One, so I have no need for the RSD deck modification kit. This kit lets you cut off the lower bar that goes across the deck discharge opening. I cut off the bar on my deck, but before I could install the kit, sent the deck in for warranty replacement due to peeling paint. While in for warranty work, the dealer let me demo a lightly used X-One and I am going to keep it. I paid $70 for the deck modification kit. Comes with the heavy duty plate shown in the pics, plus all bolts, hardware and instructions. I paid $70 for the kit. I am selling it for $55 including shipping. PM me if interested. Thanks!
BoylermanCT
Well-Known Member
- Joined
- Jun 7, 2016
- Threads
- 12
- Messages
- 164
I am trading in my Raptor SD for a 2017 X-One, so I have no need for the RSD deck modification kit. This kit lets you cut off the lower bar that goes across the deck discharge opening. I cut off the bar on my deck, but before I could install the kit, sent the deck in for warranty replacement due to peeling paint. While in for warranty work, the dealer let me demo a lightly used X-One and I am going to keep it. I paid $70 for the deck modification kit. Comes with the heavy duty plate shown in the pics, plus all bolts, hardware and instructions. I paid $70 for the kit. I am selling it for $55 including shipping. PM me if interested. Thanks!
Deck modification kit is sold.


