You are using an out of date browser. It may not display this or other websites correctly.
You should upgrade or use an alternative browser.
You should upgrade or use an alternative browser.
Export thread
Raptor SD 54" Deck Discharge kit.
#1
D
DJ660
D
DJ660
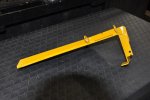
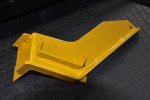
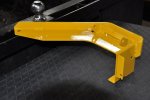
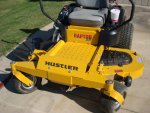
Just released Hustler Kit converts previous and current 54" Raptor SD"s to SDX "open" style deck. This makes sense as the SDX is gone for '18
Attachments
#2
K
Kremeneon
I'm interested, looks like the pictures show an angle iron brace across the top of the opening, and then the existing brace cut out.
K
Kremeneon
Just released Hustler Kit converts previous and current 54" Raptor SD"s to SDX "open" style deck. This makes sense as the SDX is gone for '18
I'm interested, looks like the pictures show an angle iron brace across the top of the opening, and then the existing brace cut out.
#3
K
kraky
K
kraky
Whew! Years of customer grumbling ( and possibly seeing lower-priced competition lol)....finally getting through!
#5

mhavanti
mhavanti
Beytill,
Don't you think that piece Hustler is adding to the top is for some of us idiots that run the leading edge of the deck into some immovable, overly dense object to keep from bending the front back into the blade?
Although in theory it should work, I'm betting there is someone in this forum than can more than likely bend a deck regardless of the over the top addition and leave the original stiffener in place. What ya wanna bet? lol
I have seen several folks cut out the stiffener and then state they wish they hadn't because it turns out the discharge was absolutely fine. That's the reason mine is still in place. Not worth the effort plus creating a starting point for rust to begin.
Jersey577, what can you add to this?
#6
B
BEYTILL
B
BEYTILL
Sure.....I’ve been running it that way for just about 2 years now, over 200 hours and some pretty rough terrain with no problems. I had also bought the mulching kit early last year but after a few weeks just wasn’t impressed. So I took
the separaters off, cut the welds off the blocking piece that held the curved piece and reinstalled the flat top piece and run it open till the end off the year and rebolt the curved piece for mulching leaves. Does a hell of a job.
the separaters off, cut the welds off the blocking piece that held the curved piece and reinstalled the flat top piece and run it open till the end off the year and rebolt the curved piece for mulching leaves. Does a hell of a job.
#7
B
BEYTILL
B
BEYTILL
Also......what height do you run you deck at? I run mine at 3 3/4” and at 3 1/4” for mulching.
And as for the idiots, you said it, not me, if you can’t stop your machine before your deck hits/runs into whatever.......maybe, just maybe you should fine someone else to do your mowing.
And as for the idiots, you said it, not me, if you can’t stop your machine before your deck hits/runs into whatever.......maybe, just maybe you should fine someone else to do your mowing.
#8
M
Markzont
M
Markzont
Hi so does this mean the 2018 RSD decks come standard with the open style deck? Any info on 2018 updates / upgrades would be great as I'm looking to get a RSD 54" cheers
#9

mhavanti
mhavanti
BEYTILL,
My apologies for not replying sooner. I have no idea why I haven't seen your question before now.
I run my height at 3 1/2 for cutting season and then when fall begins to set in, I begin cutting back to two inches in increments of an inch the first cutback, then a half inch for the next and usually last. Looks good and doesn't make the ole Bermuda up and try to leave the country.
Max
#10
A
ariens87
A
ariens87
I was also wondering about the discharge chute bar, if it will be standard since the sdx is now gone. Let me know, only reason why I won't buy one yet
#11

mhavanti
mhavanti
ariens87,
I've had my SD60 for four years this coming February. It only has 32 or so hours on it, however, I have no idea why anyone has had any problems with the bottom piece of metal at the discharge area. I've mowed wet, dry, long and short. Have not had one bit of discharge problems except when I was 15 years old and 10 shots of penicillin in 10 days to the buttockal area took care of that. lol Well then, if you think about it, that was much worse than any discharge I've ever experienced on a Hustler Raptor SD. lol
I will admit I haven't had to cut any of the trash grass of Florida and the rest of the South East that is supposedly so thick and grows as fast Kudzoo and that it is like washing a black car. Soon as you get back to where you began washing, that black sucker is dusty and dirty requiring another rag bath. That may be exactly the kind of grass that would cause me to plow up the yard and plant Bermuda.
If you are in need of a new mower, that bar shouldn't be a problem for you if it remains on the newer model Raptor SD.
Good luck Sir,
Max
#12
K
Kremeneon
K
Kremeneon
The only discharge issue I have is clumping problems in grass swollen with moisture. I think the clippings collect at the bar there until they flip off over the top and come out as a clump. I'm really considering cutting the bar out as they have shown in the PDF.
#13
K
Kremeneon
K
Kremeneon
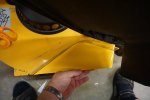
Ok, so I cut the bar out about a week and a half ago and have mowed three times since. Here is my handiwork and paint, already re-dirty:
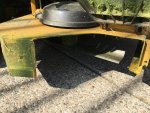
The 3rd mow was last night, after raining ALL day here in Louisville on Saturday (I'm sure many of you saw it on TV). We had sun about half of Sunday and then more rain all night. Monday was clear and sunny all day and I mowed Monday night. I'm trying to setup here that the grass was thick and well hydrated, but blades and soil surface were dry. I did my best to try to get it to clump out of the discharge. I even mowed half of the yard making only right turns, blowing clippings on top of clippings on top of uncut grass. I couldn't get it to blow clumps, just an increasing fan of clippings out of the chute. Enough on my last passes to settle into a windrow suitable to bale. There were clumps among this but they were grass snowballs kicked up by the discharge blast that rolled up into piles, but again the chute discharge was clump-free. I mowed in similar conditions two weeks ago before the modification and there were clumps everywhere.
Turf is mostly a fescue mix, I've thrown down some bluegrass to see if it will creep a bit to reduce me having to add seed every year.
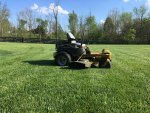
Here is my victory shot from last night, this is my normal discharge chute angle. Held up just enough to be just a few degrees up instead of pointing down.
Belly pics showing minimal accumulation on the underside despite being well hydrated grass and the Gator blades' propensity to pulverize.
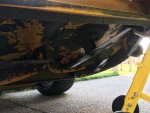
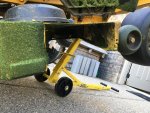
I'm gonna have to pull the deck and do a coating of something on it soon I think.

The 3rd mow was last night, after raining ALL day here in Louisville on Saturday (I'm sure many of you saw it on TV). We had sun about half of Sunday and then more rain all night. Monday was clear and sunny all day and I mowed Monday night. I'm trying to setup here that the grass was thick and well hydrated, but blades and soil surface were dry. I did my best to try to get it to clump out of the discharge. I even mowed half of the yard making only right turns, blowing clippings on top of clippings on top of uncut grass. I couldn't get it to blow clumps, just an increasing fan of clippings out of the chute. Enough on my last passes to settle into a windrow suitable to bale. There were clumps among this but they were grass snowballs kicked up by the discharge blast that rolled up into piles, but again the chute discharge was clump-free. I mowed in similar conditions two weeks ago before the modification and there were clumps everywhere.
Turf is mostly a fescue mix, I've thrown down some bluegrass to see if it will creep a bit to reduce me having to add seed every year.
Here is my victory shot from last night, this is my normal discharge chute angle. Held up just enough to be just a few degrees up instead of pointing down.

Belly pics showing minimal accumulation on the underside despite being well hydrated grass and the Gator blades' propensity to pulverize.


I'm gonna have to pull the deck and do a coating of something on it soon I think.
#14
B
bertsmobile1
B
bertsmobile1
It is a right royal PIA to apply but POR 15 chassis coat is the absolute best thing to coat the inside of a deck with.
Once it is fully cured, bullets bounce off it.
Only down side is it is not UV stable but that should not be a problem with the under side of a deck.
You can top coat it with almost anything if you like and from then on the deck will never ever rust.
Used by most professional vehicle restoreres to protect the chassis of cars for decades.
#15

mhavanti
mhavanti
Kreme,
That's one of the best bar removal reviews we've seen in the 4 years I've owned my Raptor SD. Great job Sir! I thought when Jersey did his report and review that it was a fantastic review. I believe between the two of you, there is no doubt that castrating the deck in order to make it better serve your need is exactly the right thing to do. lol
What the H, I believe its testicle cutting time at the Garaj Mahal for my SD60.
Also, Bert is absolutely correct about the POR15. We sold it for years in our Auto Parts Distribution to body shops and restoration shops. Can't remember ever getting a bad report or review on it. I also use it inside fuel tanks to cure the rust problem inside. Once done, its done.
Great job fellas,
Max
#16
K
Kremeneon
K
Kremeneon
The POR-15 is what I've been looking at. Do you apply just the base product or the top coat also? I think I'd want something other than black for easier viewing of debris under there. I see it is available in silver, and the top coat spray can be had in white.
IMHO so far the bar removal is easily the best thing for the mower for cutting performance. I think having the bar in place effectively makes it into a default semi-mulcher by either backpressure of air, or restriction of clipping exit. I think when I take the deck off I'll be adding a piece of bar over the top like the SDX's have, and weld it to the right anti-scalp bracket, which is a beefy piece. Then I can paint the top and coat the bottom in one step without burning anything off I'll have to repair later.
Be careful exactly where you cut. Map it out by feeling/looking at the welds in the interior of the deck first and mark your cuts on the exterior unless you have a welder to repair if you go too far. I overcut by a hair on both the front and rear of the opening, I cut right down the weld instead of just on the inside of it. I had my neighbor lay a bead to re-join the baffle and exterior pieces I separated by cutting the weld.
#17

mhavanti
mhavanti
I'd use both coats and go for the lighter as it makes it easier to see when the deck is up in the air.
Also, be very careful of where your toes are located since you removed that toe guard. The blade tips comes out from under the deck about two inches and although I can't foresee you operating your deck with you off the mower, you can't help but know there will be some Forest Gump run up and want to hold a conversation while sticking his toes under the deck. Oh Lort, that will for sure screw up a paint job. Even worse, the smell this time of year because you're so busy getting ole Forest to the emergency room the mower probably won't get a good cleaning for a while.
Several people have cut too far and had to do an emergency stitching on their decks. You're in good company. What color did you go with as it is hard to tell with all the wet fescue if the paint matches or not.
Again, great job.
Max
#20
K
Kremeneon
K
Kremeneon
This stuff:
https://parts.cat.com/en/catcorp/4C-4200
I didn’t prime it, just two light coats with about 30 seconds between, then one heavy coat. It dries really fast. Might be a better match with a white primer.
https://parts.cat.com/en/catcorp/4C-4200
I didn’t prime it, just two light coats with about 30 seconds between, then one heavy coat. It dries really fast. Might be a better match with a white primer.
#21
B
BoylermanCT
B
BoylermanCT
Has anyone installed the deck mod kit? Curious what exactly is included and how to do it - weld it, drill holes and use screws etc. Was mowing yesterday and this morning, and even though the weather was dry all day Thursday and Friday, it had rained Tuesday and Wednesday, the grass was not wet to the touch, but wet enough on the inside that it was clumping and partially clogged multiple times, burping out a football size mass of wet grass and completely clogged the chute two times so I had to stop and clean it out by hand. Grass is growing like crazy, mowed on Monday, and by this morning (Sat) it was tall enough and thick enough to really work the mower. Cutting out the bar across the chute seems like the answer for me, and I want to do it the right way according to Hustler and not simply attack the deck with my grinder.
#22
K
Kremeneon
K
Kremeneon
I don't know that anyone on here has. From what I can tell the kit comes with a cutting template for the bar, a drilling template for the reinforcing angle iron piece on the top of the deck, that reinforcing piece, and two sets of nuts and bolts to secure it.Has anyone installed the deck mod kit? Curious what exactly is included and how to do it - weld it, drill holes and use screws etc.
I used a metal blade on a sawzall, just took a few minutes. A cutting wheel would work great for the top part of the rear opening but that beefy bar at the bottom may test your mettle with a grinder. And it may cook off a bit more paint that you need to.Was mowing yesterday and this morning, and even though the weather was dry all day Thursday and Friday, it had rained Tuesday and Wednesday, the grass was not wet to the touch, but wet enough on the inside that it was clumping and partially clogged multiple times, burping out a football size mass of wet grass and completely clogged the chute two times so I had to stop and clean it out by hand. Grass is growing like crazy, mowed on Monday, and by this morning (Sat) it was tall enough and thick enough to really work the mower. Cutting out the bar across the chute seems like the answer for me, and I want to do it the right way according to Hustler and not simply attack the deck with my grinder.
#23
D
DJ660
D
DJ660
I have on a 60" RSD. For the most part your cutting lower bar out from discharge area (Same as others have been doing on here) and installing the reinforcing plate across the top of the deck. I've priced it out both ways and the KIT is by far CHEAPER than buying just the reinforcing plate.
#24
B
BoylermanCT
B
BoylermanCT
I ordered the kit and will tell everyone about it when it comes next week. I did jump the gun and used my sawzall and cut out the existing bar this morning.
I have thought about adding some plate metal to cover the opening at the top of the deck. Makes me nervous that the only thing preventing me from stepping into the spinning blades is the plastic discharge chute which I cut back to the minimum length to reduce clogs (and lets me mow close to trees, posts, fences etc on both sides ot the deck). The only down side is I could never buy the bagger, but I have no plans to do that.
I have thought about adding some plate metal to cover the opening at the top of the deck. Makes me nervous that the only thing preventing me from stepping into the spinning blades is the plastic discharge chute which I cut back to the minimum length to reduce clogs (and lets me mow close to trees, posts, fences etc on both sides ot the deck). The only down side is I could never buy the bagger, but I have no plans to do that.
#25

mhavanti
mhavanti
I was "made fun of" for showing the cardboard templates of the deck filler for the top and front (leading edge of the deck discharge chute). I know, I took it as it was meant, funnin'.
Anyhow, here are some photos of the templates taped into place to get an idea how it will look and I don't believe there is any reason to have the over the top angle iron in place if the filler plate is welded into place.
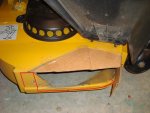
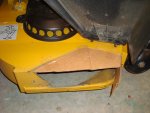
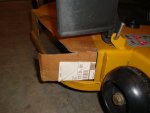
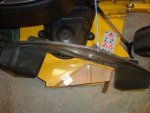
The piece of cardboard sticking out of the front wasn't trimmed back when I had the brilliant idea of shooting those photos as you can see. Interesting side note: I forgot to remove those when I did the first mow this season and the stinking cardboard was still in place until I opened the chute to blow out the deck and put the mower away. It was barely hanging on, however, still there. That is some mighty fine packing tape.
Welder isn't in the new location as of yet. Soon as the rascal is in the shop. That large gap is GONE. However, leaving the rubber chute diverter. Hope the welding is nearly as good as the packing tape.
Go for it Boyler!
Max
Anyhow, here are some photos of the templates taped into place to get an idea how it will look and I don't believe there is any reason to have the over the top angle iron in place if the filler plate is welded into place.


The piece of cardboard sticking out of the front wasn't trimmed back when I had the brilliant idea of shooting those photos as you can see. Interesting side note: I forgot to remove those when I did the first mow this season and the stinking cardboard was still in place until I opened the chute to blow out the deck and put the mower away. It was barely hanging on, however, still there. That is some mighty fine packing tape.
Welder isn't in the new location as of yet. Soon as the rascal is in the shop. That large gap is GONE. However, leaving the rubber chute diverter. Hope the welding is nearly as good as the packing tape.
Go for it Boyler!
Max
#26
B
BoylermanCT
B
BoylermanCT
Mhavanti, I think you have the right idea. That's exactly what I was thinking I would like to do. Thanks for the pics. How would you cut the plate steel in the correct shape?
#27

mhavanti
mhavanti
You can cut 7 gauge to 10 gauge fairly easily with a 4 1/2" thin grinding wheel or even better, a 7" or 9" thin cutting wheel if you have a larger grinder. You can also cut it with a sawzall metal blade. You will just have to go slow and steady. Then grind it to a final fit. I've got so many things going on at this time I can't get to it right now. It is coming along with several other modifications.
I do intend to install the flex forks I just received though.
Have fun with it.
I do intend to install the flex forks I just received though.
Have fun with it.
#28
B
BoylermanCT
B
BoylermanCT
I have flex forks on my SD, and I just mowed my father-in-laws place with his Fastrak without flex forks. His ride was brutal. I am guessing his tire pressure is also much higher than mine, I run mine at 8 PSI, and the ride is much softer than the Fastrak.
My Hustler dealer called me today that the deck modification kit is in. I will pick it up on Saturday and report back.
My Hustler dealer called me today that the deck modification kit is in. I will pick it up on Saturday and report back.
#29
K
Kremeneon
I'd be quite interested in a scan or good photos of the instructions.
K
Kremeneon
My Hustler dealer called me today that the deck modification kit is in. I will pick it up on Saturday and report back.
I'd be quite interested in a scan or good photos of the instructions.
#30

mhavanti
mhavanti
Boyler,
Installed my flex forks today. Couldn't wait for the paint to dry and got out on it and ran it across curbs, sharp edged concrete, sprinkler valve indentions, etc.
Glad I put them on. Between the forks and the suspension seat kit from Seat Warehouse, now the stinking thing seems as though it is sitting still. Now I've got to put a set of 3400 hydros on it to make it feel like it is getting anyplace. lol
I had to paint them as the black on the flex forks makes me think of a Cub Cadet. Ummm, NAH!
Max

#31
B
BoylermanCT
B
BoylermanCT
Do you mow with your SD? I don't think mine was that clean when I got it from the dealer!
I've been reading up on the seat upgrades, and am thinking I need one!
I'll post the instructions when I pick them up on Saturday.
I've been reading up on the seat upgrades, and am thinking I need one!
I'll post the instructions when I pick them up on Saturday.
#32

mhavanti
mhavanti
I actually got nice and wet a couple of days ago when it started raining cats and dogs. I'm talking deluge. I finished the last part which was probably only about 2000 sq. ft.
It was a mess and I shot some footage of the poor ole RSD60 and the comments were about why I don't mow when wet. I cleaned it immediately because I don't allow the deck to have wet media sit on it.
I may have to upload to youtube in order for you to see it to prove that mower does mow and by the way, not one clump, wind row, just a perfect cut. So, I don't understand why everyone has so much trouble with their Raptor decks clumping.
Link to video forth coming.
Max
#33

mhavanti
mhavanti
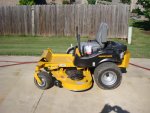
Here you go! Proof the ole SD60 gets dirty. Ain't it a shame?!!
The two pictures were on purpose as a joke and to see if I could get the grass to clump or wind row. Sucker refused to do either just like in this video.
I backed it outside and gave it a quick rinse off a little while after the rain stopped and made a video to show I clean the machine soon as it is used. My Yardman is a '96 model and clean as a pin. One deck belt, one drive belt front and rear in 22 years. One set of blades and the only reason I had to replace those was because I tried to tear out a dog tie down in my brother's yard that was hidden by 2 foot crap weeds. That stopped me so quickly I bent the steering wheel with my chest. lol
https://www.youtube.com/watch?v=xgDL4H3_gmc&feature=youtu.be
The two pictures were on purpose as a joke and to see if I could get the grass to clump or wind row. Sucker refused to do either just like in this video.
I backed it outside and gave it a quick rinse off a little while after the rain stopped and made a video to show I clean the machine soon as it is used. My Yardman is a '96 model and clean as a pin. One deck belt, one drive belt front and rear in 22 years. One set of blades and the only reason I had to replace those was because I tried to tear out a dog tie down in my brother's yard that was hidden by 2 foot crap weeds. That stopped me so quickly I bent the steering wheel with my chest. lol


https://www.youtube.com/watch?v=xgDL4H3_gmc&feature=youtu.be
#34
K
Kremeneon
I viewed your video and the other about the burning (which the heat shield solves perfectly!) hopefully your grass is much thicker now from what is in those videos, I really don't see how that pictured thin turf could generate the volume of cut debris to cause the clumping issue.
K
Kremeneon
I actually got nice and wet a couple of days ago when it started raining cats and dogs. I'm talking deluge. I finished the last part which was probably only about 2000 sq. ft.
It was a mess and I shot some footage of the poor ole RSD60 and the comments were about why I don't mow when wet. I cleaned it immediately because I don't allow the deck to have wet media sit on it.
I may have to upload to youtube in order for you to see it to prove that mower does mow and by the way, not one clump, wind row, just a perfect cut. So, I don't understand why everyone has so much trouble with their Raptor decks clumping.
Link to video forth coming.
Max
I viewed your video and the other about the burning (which the heat shield solves perfectly!) hopefully your grass is much thicker now from what is in those videos, I really don't see how that pictured thin turf could generate the volume of cut debris to cause the clumping issue.
#35

mhavanti
mhavanti
Kreme,
It gets really thick after it has had some growing time. This season has started slowly so far. Had tons of weed killer on it and that seems to be getting the weeds, however, it also seems to have stunted the Bermuda's growth so far as well.
More fertilizer, and probably should have laid on more lime in December as well.
It gets very thick in the front by the way. I'll be letting it grow out to 3 1/2 inches to give the ground some shade and allow the Bermuda to run and reseed also. I was up at 2 3/4 in this video. First two cuts were at 1 1/2 so it will take another month to be at full stand probably.
Never any clumping when at full thickness though.
Max
#36
K
Kremeneon
Ok good. I didn't want to sound like I was disparaging your turf or anything.
Mine clumped like mad here in Kentucky and I have not generated any clumps since removing the chute bar.
K
Kremeneon
Kreme,
....Never any clumping when at full thickness though.
Max
Ok good. I didn't want to sound like I was disparaging your turf or anything.
Mine clumped like mad here in Kentucky and I have not generated any clumps since removing the chute bar.
#38
B
BoylermanCT
B
BoylermanCT
I decided not to install the deck modification kit. Hustler just approved me for a new deck due to paint failure. New deck should be here in a week or so. The dealer will remove my spindles and all other parts from my deck and install them on the new deck. Then I will install the kit on the new deck!
Here's my paint failure - nothing major, but I figured it would not hurt to ask about the warranty the next time I was at the dealer.


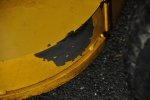
Once the deck is replaced, I am going to inquire about a trade in towards a Fastrak. I love the SD, especially once the deck modifications were done, but I want to mow faster. My father-in-law's Fastrak is 8-10 years old, but is significantly faster than my SD. Not sure if the new ones are as fast as the old ones. My SD is reasonably fast, but his Fastrak is crazy fast!
Here's my paint failure - nothing major, but I figured it would not hurt to ask about the warranty the next time I was at the dealer.


Once the deck is replaced, I am going to inquire about a trade in towards a Fastrak. I love the SD, especially once the deck modifications were done, but I want to mow faster. My father-in-law's Fastrak is 8-10 years old, but is significantly faster than my SD. Not sure if the new ones are as fast as the old ones. My SD is reasonably fast, but his Fastrak is crazy fast!
#39

mhavanti
mhavanti
Boyler,
Rather than trade, purchase the third valve for the hydro, pull the hudros and install the third valve in each hydro and wala! You now have a 3100 rather than a 2800 and you are a Fastrak speedster.
I'm going to have to look very hard now to find you the hydro repair videos that shows the difference between a 2800 and 3100. There are three valves in the 3100, if you leave out one of the three, it is then a 2800. I ran across that early last year and my intentions are to do the upgrade come winter. There are three Fastraks on my block. One Super Z, One X-One and my Raptor SD. Yes sir, I'm the slum of the neighborhood. However, I have the largest yard with the stupid property lines and as have stated before. I get my yard done in less time than the other fellas simply due to the deck width and I'm not afraid of a bit of forward stick.
By the way, none of these folks mow professionally or for other folks. The dealer just talked them into the higher money. One of the fella's mower didn't come with the suspension seat. I questioned it and it turns out the mower had 71 hours on it. It was the demo and they sold the suspension seat off it. lol. Now that mine has the flex forks and suspension seat. The fella wants to trade. lol. He didn't notice I'd painted and installed the flex forks. I just offered to let him try my suspension seat. Only thing I said to him was, see if you can make it go any faster? lol
Now, three valves may cost you 40 bucks or less. I wouldn't be at all surprised if Bert could give us an estimate of the valves in the 2800 and 3100 hyrdos. Bert?
Max
#40
B
BoylermanCT
B
BoylermanCT
Max, definitely interested in the valve hack!
I am guessing the new Fastrak's are slower than the older ones. My FIL's older Fastrak has 3100's in it as do the current models, but the new ones weigh 800lbs, and his is similar in size to my SD at 600 lbs. Having 3100's and 200lbs lighter would make for a much faster mower!
I am guessing the new Fastrak's are slower than the older ones. My FIL's older Fastrak has 3100's in it as do the current models, but the new ones weigh 800lbs, and his is similar in size to my SD at 600 lbs. Having 3100's and 200lbs lighter would make for a much faster mower!
#41

mhavanti
mhavanti
Boyler,
After watching two hydro rebuild videos from start to end and strange enough they both mentioned the "only difference between 2800 and 3100" is the extra valve. Mine is getting the valves.
The Fastrack across the street I rode, I used the GPS to see what his ground speed was. It is supposed to move at 9 mph. It will only move at 8.8 but then, he could use some tweaking on his sticks and adjustment rods more than likely. His hydros don't whine as loudly as mine either.
My SD only moves at 6.8 mph and it is supposed to move at 7.5. I also have not tweaked mine for the extra speed. Although I did tweak the left side to speed up to the right. There seems to be enough travel on all the adjustment areas of the rods and the brackets at the hydros to get the speed it is supposed to run. May do that sometime this summer if I can find the time for it. I don't like being outrun and I don't care what it is on. I don't like finishing second. lol
If I can get mine to 9, I'll be happy at that time, however, after it sees 9, I'm probably going to want to see 10.5 mph.
I really want is forty foot wheelies, but, don't foresee that anytime soon with a 24 horse motor. lol.
Max
#42
B
BoylermanCT
B
BoylermanCT
Max, I got the same speed on my RSD with GPS. I was highly disappointed that I only got 6.5mph or so when they claimed 7.5mph. I took it back to the dealer to have them adjust the levers and hydros, and they were able to get 6.8mph. Still disappointed about the speed to this day. I figured they had a 90lb woman driving the RSD during their speed tests!
What is involved in adding a 3rd valve? Drilling holes in two perfectly good hydros worries me!
What is involved in adding a 3rd valve? Drilling holes in two perfectly good hydros worries me!
#43

mhavanti
mhavanti
From my recollection of watching those videos last year. You pick up the extra valve, drop it in, button up the hydro and it is a done deal. There wasn't any drilling, grinding etc.
The video explained there can be any combination of two of the three valves placed into a hydro and by only installing two of the three valves, you just created a 2800. If you install all three, you have created a 3100 hydro.
I found that very interesting. I had to reinstall my Windows and lost all my favorites or it would be as simple as open favorites and click on it. Now it is researching youtube for it. Hopefully that won't be too hard to find again. Last time, stumbled across it looking for something else.
#44
B
BoylermanCT
B
BoylermanCT
Here are the instructions from the deck modification kit. You have to cut out the triangle on the rear of the discharge area, cut out the bar across the bottom of the discharge chute and cut the welds holding the mount for the plastic discharge chute Then drill some holes for the bolts. Have not done it yet, waiting for my new mower deck to be installed.
View attachment DOC.PDF
View attachment DOC.PDF
#45

mhavanti
mhavanti
Send me a private message with your email address and I'll send you what I've done to my ole SD60. I like my modification and will not require any upper support and will maybe save someone's toes or better, the blade and spindle in the event the open deck gets into the curve of the upper deck with something you would prefer not to.
I'll be posting a video as soon as I get another grinder to make this pretty and get it repainted.
Max
I'll be posting a video as soon as I get another grinder to make this pretty and get it repainted.
Max
#46
K
Kremeneon
Oh wow, the kit isn't just an angle piece across the top, it is a big plate with the bar attached, and the whole thing sisters up around the entire opening.
I'm considering it now....
K
Kremeneon
Here are the instructions from the deck modification kit. You have to cut out the triangle on the rear of the discharge area, cut out the bar across the bottom of the discharge chute and cut the welds holding the mount for the plastic discharge chute Then drill some holes for the bolts. Have not done it yet, waiting for my new mower deck to be installed.
View attachment 38526
Oh wow, the kit isn't just an angle piece across the top, it is a big plate with the bar attached, and the whole thing sisters up around the entire opening.
I'm considering it now....
#47

mhavanti
mhavanti
Kreme,
Hang on until you see what I've done to mine. All of this so you fellas have an alternative to butchering your decks. lol.
Send me your email address in the private messages and I'll send you a clip of the upcoming video so you can see what it is I've done.
Max
Hang on until you see what I've done to mine. All of this so you fellas have an alternative to butchering your decks. lol.
Send me your email address in the private messages and I'll send you a clip of the upcoming video so you can see what it is I've done.
Max
#49

mhavanti
mhavanti
Shame that doesn't cover up the boom-a-rang cut out on top of the deck.
Gonna run over in the morning to the fair grounds in the 40 inch weed and feed lot and run thru about a 1/4 acre of that mess to see if the deck modification works as well as I believe it will. If not, since it is cut this far, I'll slide and dice the deck to oblivion or at least until the front and rear of the lowered portion of the deck you've seen in the video.
Don't foresee any addition to the top of the deck though other than putting in the scab to close up the boom-a-rang cut out. That in itself will take care of any alleged weakness.
Stay tuned.
Max
#50

mhavanti
mhavanti
Alright, here is what I've done to get the deck blade guard down below the blade to make the guard doesn't encumber the exiting clippings. The paint on the outside of the guard is temporary and that surface was not prepared for paint. Thus, it has some masking tape still on it. You'll see it in the video when it is finished and published in the MaxsGarajMahal YouTube Channel.
I would upload the highlights here, however I've not figured out how to do that without a url. I'm only guessing that url stands for ugly reality live but I really don't know.
If the paint will stay on the cut surface during this 24" to 42" weed cutting test later today, I'll sand the outside of the guard and give it a nice cover to smooth it out and make it not so Yugly. As one of the dealers here in Arkansas once said: "Don't buy no ugly truck." Just tranpose that to 'mower'.
Max


#52

mhavanti
mhavanti
Thanks Mr. Mower. Soon as I sand off the ugliness and give the outside a nice smooth coat it won't look bad at all. By they way, works like a charm. Much stronger than the over the top deal as the leading edge is re-enforced.
Another way to have done that would have been to take a piece of 10 gauge flat stock, welded it below the front and rear opening after cutting out the bar. Would buckle slightly if you hit something hard enough. But then, that would still keep the front from folding quite so easily.
Thanks again.
Max
#53

Mr. Mower
Have to inquire about this.....did you prime the area(s) prior to re-painting, touch-up, etc. to work as an undercoat for the paint applied?
Exactly what primer did you use?
Also, exactly what paint match did you use?
Last....after you finished re-painting the areas did you use any type of "spray coating" over the areas painted to protect the paint for non-stick, easy wipe off, etc. if so what did you use?
Mr. Mower
Thanks Mr. Mower. Soon as I sand off the ugliness and give the outside a nice smooth coat it won't look bad at all. By they way, works like a charm. Much stronger than the over the top deal as the leading edge is re-enforced.
Another way to have done that would have been to take a piece of 10 gauge flat stock, welded it below the front and rear opening after cutting out the bar. Would buckle slightly if you hit something hard enough. But then, that would still keep the front from folding quite so easily.
Thanks again.
Max
Have to inquire about this.....did you prime the area(s) prior to re-painting, touch-up, etc. to work as an undercoat for the paint applied?
Exactly what primer did you use?
Also, exactly what paint match did you use?
Last....after you finished re-painting the areas did you use any type of "spray coating" over the areas painted to protect the paint for non-stick, easy wipe off, etc. if so what did you use?
#54

mhavanti
mhavanti
Mr. Mower,
I did prime the area to be painted. I used Rustoleum Bare Metal Prime in White.
I used Rustoleum Marigold.
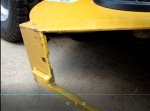
The mowing test went off today. I only put paint on for the mowing test. I am amazed at the modification as not one clipping touched the lowered reinforcement. I purposely left the rear four or four and half inches about .050 higher than the front in order to see if any part of the reinforcement bar would capture any wet grass / weeds.
The final section of the video I shot today, 06/18/2018 shows the paint as staying put due to not being pounded by the fodder being thrown over the bar instead of the bar being pummeled as usual. There is a bit of green colorization on the higher area telling me if the .050 is removed, the reinforcement bar is then not being hit at all.
Considering this modification isn't one I felt is a necessity for a Raptor, I won't be lowering the extra .050 as for my use, I'm satisfied and especially since there is still a safety factor that is lost when entirely cutting out the reinforcement bar.
I'll most likely clean the area with the green stain, shoot the paint with a few coats of clear coat.
The second photo is altered with some black lines drawn in to demonstrate how the straight line would have looked if I'd not chosen to raise the rear of the cut. Since the altered photo makes it look so much better. May have to lower the rear for aesthetics purposes only.


#55

Mr. Mower
Mr. Mower
I see.
On another entirely different subject, did you ever look into adding a "Fuel Gauge" to your specific model Hustler mower?
Did you research or call Hustler Corp. and speak to one of their Engineers to inquire about it?
It's more than likely that it's going to require adding an electrical harness to the mower's electrical system as well as possibly either replacing the entire "Full Tank" with a "Fuel Sending Unit" or maybe just adding a "Fuel Sending Unit" to your existing Fuel Tank along with the actual "Fuel Gauge" to complete the process?
Just saying.
#56

mhavanti
mhavanti
Mr. Mower,
I have not as of yet. I have several other modifications to do videos on which include: Anderson quick connect battery connector, adding an eight circuit fuse panel in order to add things such as front and rear lights, motorcycle type flashing lights in the event some idiot uses this particular mower after dark also in the event they are mowing right next to the street. I don't know any such idiots, thank goodness. If so, I'm going to knock on their door and ask them kindly to put that damned mower away until after breakfast. lol. Adding a 12 volt power socket, and a few other fused circuits in order to make sure nothing is left unprotected.
I have not as of yet. I have several other modifications to do videos on which include: Anderson quick connect battery connector, adding an eight circuit fuse panel in order to add things such as front and rear lights, motorcycle type flashing lights in the event some idiot uses this particular mower after dark also in the event they are mowing right next to the street. I don't know any such idiots, thank goodness. If so, I'm going to knock on their door and ask them kindly to put that damned mower away until after breakfast. lol. Adding a 12 volt power socket, and a few other fused circuits in order to make sure nothing is left unprotected.


Attachments
#57

Mr. Mower
:laughing::laughing::laughing:
Yes very funny indeed! I guess that puts me in that catagory since my Raptor Flip Up has factory LED lighting.
I really like those upgrades.
Keep adding and keep us all posted on the outcome of them all.
Thanks.
Mr. Mower
Mr. Mower,
I have not as of yet. I have several other modifications to do videos on which include: Anderson quick connect battery connector, adding an eight circuit fuse panel in order to add things such as front and rear lights, motorcycle type flashing lights in the event some idiot uses this particular mower after dark also in the event they are mowing right next to the street. I don't know any such idiots, thank goodness. If so, I'm going to knock on their door and ask them kindly to put that damned mower away until after breakfast. lol. Adding a 12 volt power socket, and a few other fused circuits in order to make sure nothing is left unprotected.
View attachment 38628View attachment 38629View attachment 38630View attachment 38631View attachment 38632
:laughing::laughing::laughing:
Yes very funny indeed! I guess that puts me in that catagory since my Raptor Flip Up has factory LED lighting.
I really like those upgrades.
Keep adding and keep us all posted on the outcome of them all.
Thanks.
#58

mhavanti
mhavanti
Thanks,
run by the Youtube channel, subscribe, thumbs up and hit the notifications tab to receive new videos as they come out. Have one almost ready on the deck bar lowering. Soon as I learn how to blur a bit of content, it will be going up.
https://www.youtube.com/channel/UCKGtOepm7R0526XE2HPZUDg/featured?view_as=subscriber
Thanks in advance,
Max
#59
B
BoylermanCT
I am trading in my Raptor SD for a 2017 X-One, so I have no need for the RSD deck modification kit. This kit lets you cut off the lower bar that goes across the deck discharge opening. I cut off the bar on my deck, but before I could install the kit, sent the deck in for warranty replacement due to peeling paint. While in for warranty work, the dealer let me demo a lightly used X-One and I am going to keep it. I paid $70 for the deck modification kit. Comes with the heavy duty plate shown in the pics, plus all bolts, hardware and instructions. I paid $70 for the kit. I am selling it for $55 including shipping. PM me if interested. Thanks!
B
BoylermanCT
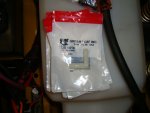
Here is what you get with the deck modification kit. Nice heavy duty plate and a bag of bolts. They want you to drill several 0.41" holes. Had to get out my calculator - works out to be a 13/32 drill bit (0.40625)
View attachment 38539
View attachment 38540
View attachment 38541
I am trading in my Raptor SD for a 2017 X-One, so I have no need for the RSD deck modification kit. This kit lets you cut off the lower bar that goes across the deck discharge opening. I cut off the bar on my deck, but before I could install the kit, sent the deck in for warranty replacement due to peeling paint. While in for warranty work, the dealer let me demo a lightly used X-One and I am going to keep it. I paid $70 for the deck modification kit. Comes with the heavy duty plate shown in the pics, plus all bolts, hardware and instructions. I paid $70 for the kit. I am selling it for $55 including shipping. PM me if interested. Thanks!
#60
B
BoylermanCT
Deck modification kit is sold.
B
BoylermanCT
I am trading in my Raptor SD for a 2017 X-One, so I have no need for the RSD deck modification kit. This kit lets you cut off the lower bar that goes across the deck discharge opening. I cut off the bar on my deck, but before I could install the kit, sent the deck in for warranty replacement due to peeling paint. While in for warranty work, the dealer let me demo a lightly used X-One and I am going to keep it. I paid $70 for the deck modification kit. Comes with the heavy duty plate shown in the pics, plus all bolts, hardware and instructions. I paid $70 for the kit. I am selling it for $55 including shipping. PM me if interested. Thanks!
Deck modification kit is sold.
#61

mhavanti
mhavanti
Here is the scale up of the soon to be available removable Raptor grass catcher deck filler block off plate. The plate will have either 5 or 6 tabs that a screw will go thru, then thru the deck and into a welded nut on a full tab below the deck. This is for those that have totally removed the reinforcement bar and those that would like to give themselves a bit more safety to help keep posts, legs, etc. out of the open indention above the blade.
This plate is simply a scale up. It is incomplete as far as the bolt on tabs.
Give me your thoughts on the product that I should have ready in the next few days.
Max
This plate is simply a scale up. It is incomplete as far as the bolt on tabs.
Give me your thoughts on the product that I should have ready in the next few days.
Max

#62
K
Kremeneon
K
Kremeneon
Looks good Max!
Now that I have the reinforcement plate kit I might have my neighbor with a welder extend it out like that, both for safety and so I can run with the chute up if I need to and not have clippings flying straight up like a grass volcano.
Now that I have the reinforcement plate kit I might have my neighbor with a welder extend it out like that, both for safety and so I can run with the chute up if I need to and not have clippings flying straight up like a grass volcano.
#64

mhavanti
mhavanti
I received a call from them last Tuesday I think it was. There are going to be changes for the 2019 model Raptors and don't be surprised if you don't see several of my designs on the new model. Just think deck enclosure may change as of August 1st. July 31st is their fiscal year change and design is already in place from the conversation.
There is a conversation about R&D although I would guess that isn't going to happen. Did bring to their attention how much liability they are assuming by advocating folks remove the enforcement bar rather than just removing the upper 3/4 of it without filling in the scallop. They did listen and the new design should fix that they assured me. We'll see.
Worked on the hour gauge only running while engine runs. On a Kawasaki, a walk in the park. There is a couple of items I want to incorporate in the connection therefore, I will wait until I find them to shoot the video.
Now if I can get the manufacturer send pieces to alter and return to them as well as sending mowers to review, you may see some upgrades coming for the X-One!
Max
#65
K
Kremeneon
Hey Max, Get me in on that list too if you ever do!
K
Kremeneon
Now if I can get the manufacturer send pieces to alter and return to them as well as sending mowers to review, you may see some upgrades coming for the X-One!
Max
Hey Max, Get me in on that list too if you ever do!
#66

mhavanti
mhavanti
Kreme,
If it comes to fruition, you can run your butt over to Arkansas and be in on the R&D. Between you, Boyler which has left the fold, and myself, we can design a Raptor that not only can, also will kick the high dollar boy's butts.
I'll already put my RSD against the Fastraks, X-1s and the others as long as we keep the land speed to less than 7.5. If I hadn't driven all over the lawn today spreading vermin killer and the lawn service had driven over it spreading weed killer and fertilize, it looks like a carpet. Little over 3/4 acre in 26 minutes. If I can get the 7.5 mph out of it, I think I beat that. I think it will do it in 22 -24 minutes. That's a whole bunch better than the hour plus it was taking on the ole '96 Yardman All Wheel Steer.
Matter of fact, Kreme, you can run on over tonight and I'll let you get in on the video. I've done the introduction as well as the tools to be used layout. I'll be headed back out to the Garaj Mahal to begin the circuit testing to show where and how to connect to the Kawasaki engine for run only hours and minutes recording. Come on over, we'll put you in front of the lens instead of me.
Max
#67

mhavanti
mhavanti
Kreme,
Here is a video of the test run I did on the Grass Catcher Scallop Block Off Plate. The material was taken from the last nose piece from my circle track car. It was in need of doing something seriously important, therefore, it is now doing duty as a seemingly indestructible discharge chute. lol
I'm going to run it into some varying items other than the house rear steps. The brick on the steps did NOT like it at all. The new block off plate didn't seem to give a shyte. It rebounded while the brick chipped. Thought I bought really good brick too.
Be sure to watch to the end as there is an announcement about the 500th subscriber milestone give away drawing.
Enjoy
https://www.youtube.com/watch?v=_52qRVIuSjg
#68
K
Kremeneon
K
Kremeneon
I dig it Max. I'm not sure if I'm going to install the hustler reinforcement plate now. Or consider asking my neighbor to weld the bar back on, but lowered 3/4 of its thickness so it is below the blade.
Not in the video, but you have mentioned it... Where did you find diode protected alternator output to move the hour meter feed to? or did you add a diode?
Not in the video, but you have mentioned it... Where did you find diode protected alternator output to move the hour meter feed to? or did you add a diode?
#69

mhavanti
mhavanti
Kreme,
I just cut that video down to an 'Abridged Version' so everyone doesn't have to sit thru that entire thing. You can see my cut down enforcement bar in the video in conjunction with the Deck Scallop Block Off Plate. How you like that for a long arsed name for a piece of plastic? lol
I have a tendency to salvage diodes from large machinery because the Radio Shacks are all gone and I don't want to purchase a hundred or more at a time to get a couple of diodes. Any office machine repair company will give you all the calculator, copier or pretty much any office machine mother boards that have been taken out of machines they repaired. Pick up a few, run home, get out the soldering iron, remove one end of a diode, test it and if good, remove and save it.
That's all you need to make sure power only travels in one direction.
I really like this block off plate. Even with the wind blowing in that video, the cut down on blow-back was well worth the time to design, figure the fastener location for best retention spreading the load of the clippings in heavy grass which mine isn't. The weeds at the fairgrounds are pretty stinking heavy though. Would you mind running by here and shooting a bit of video while I sneak back over there and cut some more 4 foot tall smelly weeds with this block off plate in place?
Max
#70
K
Kremeneon
I'm not sure where you are but coming from Kentucky I'm 6 hours drive to Memphis and 10 to Texarkana.
K
Kremeneon
Kreme,
Would you mind running by here and shooting a bit of video while I sneak back over there and cut some more 4 foot tall smelly weeds with this block off plate in place?
Max
I'm not sure where you are but coming from Kentucky I'm 6 hours drive to Memphis and 10 to Texarkana.
#71

mhavanti
mhavanti
That's definitely a drive. I'm almost dead center of Arkansas. Searcy.
That would be about 7 1/2 hour drive. Don't recon we'd get into any trouble mowing on the fair grounds do you? lol Ronno, you can run up here from the M state and keep a watch out. lol
I'll even set the deck down to KILL and scalp that rascal before they catch us.
Max
That would be about 7 1/2 hour drive. Don't recon we'd get into any trouble mowing on the fair grounds do you? lol Ronno, you can run up here from the M state and keep a watch out. lol
I'll even set the deck down to KILL and scalp that rascal before they catch us.
Max

