Edit:
2 Year update 10/18/2021 - the needle bearings worked great for 2 years. I disassembled for re-greasing and found that they HAVE caused some minor damage and mushrooming to the drive shaft especially on the left side where the transmission sits and pulls against the shaft to tension the belt. Basically the thin needle bearings seem harder than the shaft and "pushed" the metal out around them to the outside edges. I simply removed this with a dremel, but clearly it's far from ideal. At this point I think the best recommendation is the stock bushings with an extra dust seal added to the wheel side. Another likely good option is to swap the plastic bushings for Oilite bushings and still add that extra dust seal.
Hey guys,
I've been working for a while on my mower (hrr216k8vya) trying to permanently fix the "can't pull backwards" issue. The problem is always inside the adjuster bushings. They get dust and gunk in them and start to seize up. I've tried adding a zerk fitting and that was moderately successful until it got so full of gunk / plugged up that it would simply push the dust seal out.
Looking at the typical consumer Honda design it seems to me there are potentially two issues:
1) Plastic bushings - are these REALLY the best plan or just the cheapest?
2) The dust seal is ONLY on the deck side of the mower. Any dust blowing around inside the wheel cover / drive gear area can go straight into the bushing with no seal. The HRX217 series it seems they have a seal on BOTH sides of the bushing.
I'm currently testing my latest idea - replace the bushings with needle bearings AND add a second dust seal. So far after one mow, it seems to be working great and doesn't need to be re-greased / refreshed (unlike the Zerk fitting which required constant greasing to keep the bushing lubed)
I figured I'd share what I've got in case it helps anyone - keep in mind I've NOT performed extensive testing with it yet, but I'd argue that it rolls backwards better than any of the new Honda's in the store... so I'm hoping I'm on to something. The real test is if I can get through a season without messing with it.
To convert to bearings
Required parts / tools:
The idea is pretty simple, there are no bearings that fit inside the adjuster so we have to modify the adjuster housing to accept them.
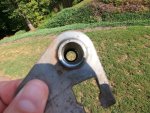
1) AFTER pushing out the existing plastic bushings, Drill out the existing adjuster from the OUTSIDE (wheel side) in, leaving about 3mm un-drilled on the deck side. This un-drilled side will ensure we get the "best" dust seal fit on the deck side of the mower.

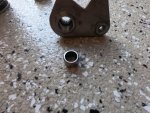
2) Put two bearings down inside the adjuster and CAREFULLY use epoxy to secure them. Do not get epoxy in the bearings

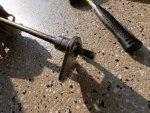
3) Epoxy the dust seals in place on both the inside and outside of the adjuster. I recommend using the transmission shaft to ensure alignment of the outside dust seal since that's the side we've drilled from and it will NOT self align.

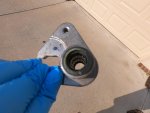
4) Allow epoxy to set up. It should look about like this when you're done.

5) Grease the bearings and reassemble. I used a dry lube around the dust seals and tried to avoid getting grease around the dust seals. Basically grease will grab any dirt / dust so I tried to avoid that.
Good luck and I'll update the thread with the good (or bad) results as I get more use out of this setup. Frankly if this doesn't work (provide at least a solid season of trouble free mowing) I'm ditching this mower and getting something else.
2 Year update 10/18/2021 - the needle bearings worked great for 2 years. I disassembled for re-greasing and found that they HAVE caused some minor damage and mushrooming to the drive shaft especially on the left side where the transmission sits and pulls against the shaft to tension the belt. Basically the thin needle bearings seem harder than the shaft and "pushed" the metal out around them to the outside edges. I simply removed this with a dremel, but clearly it's far from ideal. At this point I think the best recommendation is the stock bushings with an extra dust seal added to the wheel side. Another likely good option is to swap the plastic bushings for Oilite bushings and still add that extra dust seal.
Hey guys,
I've been working for a while on my mower (hrr216k8vya) trying to permanently fix the "can't pull backwards" issue. The problem is always inside the adjuster bushings. They get dust and gunk in them and start to seize up. I've tried adding a zerk fitting and that was moderately successful until it got so full of gunk / plugged up that it would simply push the dust seal out.
Looking at the typical consumer Honda design it seems to me there are potentially two issues:
1) Plastic bushings - are these REALLY the best plan or just the cheapest?
2) The dust seal is ONLY on the deck side of the mower. Any dust blowing around inside the wheel cover / drive gear area can go straight into the bushing with no seal. The HRX217 series it seems they have a seal on BOTH sides of the bushing.
I'm currently testing my latest idea - replace the bushings with needle bearings AND add a second dust seal. So far after one mow, it seems to be working great and doesn't need to be re-greased / refreshed (unlike the Zerk fitting which required constant greasing to keep the bushing lubed)
I figured I'd share what I've got in case it helps anyone - keep in mind I've NOT performed extensive testing with it yet, but I'd argue that it rolls backwards better than any of the new Honda's in the store... so I'm hoping I'm on to something. The real test is if I can get through a season without messing with it.
To convert to bearings
Required parts / tools:
Bench Vice
Drill
11/16th drill bit (hard to find, check Amazon)
(4) 1/2 x 11/16 x 1/2 bearings (hard to find, check Amazon)
(4) Honda 12.7mm dust seals
Your existing adjusters for modification
Quick Set Epoxy - I used Harbor Freight cheap stuff
The idea is pretty simple, there are no bearings that fit inside the adjuster so we have to modify the adjuster housing to accept them.
1) AFTER pushing out the existing plastic bushings, Drill out the existing adjuster from the OUTSIDE (wheel side) in, leaving about 3mm un-drilled on the deck side. This un-drilled side will ensure we get the "best" dust seal fit on the deck side of the mower.

2) Put two bearings down inside the adjuster and CAREFULLY use epoxy to secure them. Do not get epoxy in the bearings

3) Epoxy the dust seals in place on both the inside and outside of the adjuster. I recommend using the transmission shaft to ensure alignment of the outside dust seal since that's the side we've drilled from and it will NOT self align.

4) Allow epoxy to set up. It should look about like this when you're done.

5) Grease the bearings and reassemble. I used a dry lube around the dust seals and tried to avoid getting grease around the dust seals. Basically grease will grab any dirt / dust so I tried to avoid that.
Good luck and I'll update the thread with the good (or bad) results as I get more use out of this setup. Frankly if this doesn't work (provide at least a solid season of trouble free mowing) I'm ditching this mower and getting something else.
Last edited:
