Honda GXV140 - something loose in piston assembly

CM-NC

Member
Joined
Mar 12, 2013
Threads
2
Messages
11
Sure sounds like it; keep soaking, and maybe some heat? Be sure the mower is FULLY drained of all fuel and oil!
The engine is fully drained, and I captured everything (not to be reused, but around these parts you cant just dump it out back, especially since we are all on wells around here!). I am trying to get a small propane torch, since I have a feeling the rather massive propane weed burner will be too imprecise and just make a mess/bake everything onto the chassis.

The problem I am having is that the blade holder started to slightly deform and it *still* won't budge (even after 'tapping' with a hammer). When I first noticed this, I backed it off and the blade holder returned to it's initial state, so I rotated the gear puller (so I didn't pull on the exact same spot as last time), reapplied with more force, applied more PB-blaster, 'tapped' it, and it still won't budge.

I just thought of something. Does your machine have a BBC? (blade brake clutch)
The mower does not have a BBC. Question: I have no other bolts sitting about that will fit into the PTO end, what is the worst that could happen with using the original bolt? (I had already started before I read this, and have already put a minor dent into the top of the original bolt.)

Bwdbrn1, thanks for the photo. It has been soaking for 4 days now, with oil applied from both ends of the blade holder. I am not sure about the difference between a harmonic gear puller and the one I am using right now, this one seems to be just a generic one rented from Advance Auto?
 

bwdbrn1

Well-Known Member
Joined
Nov 23, 2011
Threads
15
Messages
383
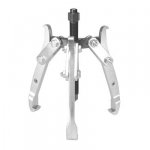
If you rented one, it's probably something like this.
 

CM-NC

Member
Joined
Mar 12, 2013
Threads
2
Messages
11
Not quite, more like this:
 

Attachments

  • gear%20puller.jpg
    gear%20puller.jpg
    6.6 KB · Views: 6

CM-NC

Member
Joined
Mar 12, 2013
Threads
2
Messages
11
Guys! Great news, I got it off, and confirmed that the connecting rod bolts had backed off maybe 3/8ths of an inch, as happened to someone else on this forum.

I have some pictures to post here for the record, so that if anyone else comes across this thread in the future via search or whatever, they can see what may be involved to fix it.

For starters, the blade holder was SERIOUSLY rusted on. After many failed attempts at making it budge (in a manner that didn't break anything), and after sitting in PB blaster for 1.5 weeks, I finally decided to get violent with it. The general procedure was to get the largest ratchet I had, tighten the forcing screw with as much force as can be managed, then pull the hammer and start striking upwards from the bottom of the holder. Of course, this much force caused the heavy steel blade holder to start to warp, but I knew I would be replacing it going in. Care just needs to be taken so that this is the only part needing replacing. Also, at the earliest stages, when the most force needs being applied, the retaining bolt for the holder should probably be nearly all the way in, to give it maximum thread to push against when you start applying these huge forces.

Effectiveness was gauged by how much 'progress' I could make in turning the forcing screw. 'Tapping' the forcing screw was nearly useless. I would make 'forceful strikes' against the bottom of the holder, maybe 10 to 12, distributed around the rim of the holder, before I would stop making progress and had to take up the slack in the forcing screw.

After 8 or so iterations of this, and realizing I was finally starting to make progress (about 2mm worth of progress, but I had been making none before), my resolve was strengthened. This wasn't just some guy removing a stuck blade holder from his mower engine, this was a MAN laying waste to an enemy that had defeated him repeatedly over the past week or so.

Eventually, after moving it about 4mm, I found that I could 'almost' move it entirely without the hammer (at this point I had an enormous breaker bar on the forcing screw and a 2 foot lever that rested against my knee so that it wouldn't move on me as a heaved against the breaker bar). All of the sudden - BOOOM!!!! My ears were ringing and as I realized what happened, I was looking around for what had broken (and hoping it wasn't attached to the rented gear puller). Imagine my surprise when I noticed the blade holder had moved a 1/4 inch! :wink: After picking up the breaker bar (which flew into my knee) and the lever I was using to brace it (which flew across the shop), I got back to work!

Four 'Boom!'s later (all of which were considerably quieter), I had the thing off!!! :smile:

Pics below, and even one of the culprit head bolts. I imagine they underestimated the torque specs on these babies - I have never heard of any kind of connecting rod bolt backing off. Guessing that these are probably torque-to-yield, so I will probably just check the crank for damage, then retighten them to spec (since it took years to back off on us, not much to gain by overtightening).

Thanks guys!
~CM-NC

vfrf1UVl.jpg

UVI5wi3l.jpg

nmAjZMrl.jpg

D16YRkJl.jpg
 

bwdbrn1

Well-Known Member
Joined
Nov 23, 2011
Threads
15
Messages
383
Congratulations! That's gotta' make you feel pretty darn good getting that thing off!

Yep, the one I had looked pretty much like that when I opened it up. Bolts were backed out about 1/4" or so. Check the bearing surface on the connecting rod, and the crank to see what they look like. Connecting rod bolts get torqued to 9 ft lbs.

New pan gasket and lower oil seal, and you should be good if everything else inside is O.K. I found it easier to put one of those oil seals in after the engine is back together than to put the seal in the pan and slip it on over the crankshaft. The inner lips of the seal tend to want to fold out too easily otherwise.
 

chance123

Well-Known Member
Joined
Aug 14, 2012
Threads
11
Messages
824
You might want to check if any of the aluminum from the rod has transfered to the crank. If so, DON'T use sandpaper/emery cloth. Soak it in Muratic acid (same as swimming pool acid.) This will eat the aluminum off of the steel crank. I would recommend replacing the con rod because the rod cap threads "might" be stretched and the bolts might back out again. The cost of a new rod assembly pales in contrast to the work to do it all over again.
 

CM-NC

Member
Joined
Mar 12, 2013
Threads
2
Messages
11
Congratulations! That's gotta' make you feel pretty darn good getting that thing off!
Oh man, you have no idea! Success is sweeter than wine.

Yep, the one I had looked pretty much like that when I opened it up. Bolts were backed out about 1/4" or so. Check the bearing surface on the connecting rod, and the crank to see what they look like. Connecting rod bolts get torqued to 9 ft lbs.

New pan gasket and lower oil seal, and you should be good if everything else inside is O.K. I found it easier to put one of those oil seals in after the engine is back together than to put the seal in the pan and slip it on over the crankshaft. The inner lips of the seal tend to want to fold out too easily otherwise.
I was REALLY happy to hear I wasn't the only person that this happened to (the whole strength-in-numbers thing), so this is why I am trying to take so many pictures - just in case there are any others! Everything looks okay as far as I can tell, and there was no metal particulate in the oil. I have hi-res pictures attached, I am curious if these are good to go. The bearing surface has no discernible impact marks, but does have grooves from normal wear. I lighted the bearings with relief to make all grooves/aberrations/marks on the bearing surfaces stand out in the pictures. I estimate them to be about 20 thousandths deep at the maximums.

Also, I didn't manage to take a photo of the camshaft alignment, and I removed it to get at the rod bolts :ashamed: Would you happen to know how to align the camshaft?

Chance123, The crankshaft is actually entirely smooth. I didn't take a picture of it, but, although the cap/rod have small grooves in them, the crank is entirely smooth to the touch. As far as the threads stretching, I may be wrong, but wouldn't stretching be something you might expect on a steel conn rod? I had always thought that aluminum was stiffer than steel.

So here is the parts list on order:
Oil Pan Gasket
Head Cover Gasket (removed it to make sure the valves and such were not worn)
Oil Seal (didn't look damaged, but the mower was starting to slowly leak oil recently...)
Blade Holder (I kinda trashed this)

The bolts look fine, and at 9 ft-lbs, I don't imagine the bolts would be stretched, but a picture is attached just in case.

SqP0R1yl.jpg

E8bN2y5l.jpg

vwwP9fRl.jpg


~CM-NC
 

bwdbrn1

Well-Known Member
Joined
Nov 23, 2011
Threads
15
Messages
383
With regard to what Chance said, there should be obvious signs of aluminum material adhering to it. Mine didn't have any on it when I got it apart, and it's a little hard to tell, but the scoring on the connecting rod ends looked to be about the same as mine did too. To be on the safe side, you might call a Honda, or small engine mechanic and ask if they'd mind looking at it to give their opinion.

So far as returning the cam to it's rightful spot, and getting the timing correct, here's what you do. Take a look back at the pictures in your previous post showing the cam shaft in place. There should be a very thin thrust washer on the crankshaft. Take that off, and look very very closely at the flat surface that was under that thrust washer. You may even have to shine a flashlight across it to help see it, but you will find a very faint "0" scribed on the flat. That lines up with that indentation that looks like a punch mark on the cam shaft. Don't forget to put the thrust washer back on.
 
Last edited:

CM-NC

Member
Joined
Mar 12, 2013
Threads
2
Messages
11
  • / Honda GXV140 - something loose in piston assembly
Okay, the rebuild went well! I just wanted to thank all who had chimed in, you guys were immensely helpful. She starts, she runs, and she doesn't make weird noises.

One final question however, what is the gap for the ignition coil? When I reinstalled the coil, I set it all the way back for safety, but I don't want the spark to be any weaker than it needs to.

I am about to go put the mower to work ^^

Thanks again,
-Cm-NC
 

robert@honda

Lawn Addict
Joined
Nov 2, 2011
Threads
97
Messages
1,791
  • / Honda GXV140 - something loose in piston assembly
One final question however, what is the gap for the ignition coil?

For the GXV140 engine: ignition coil air gap is 0.2~0.5 mm (0.008~0.002 inch)
 
Top