Briggs 5HP IC Generator

bertsmobile1

Lawn Royalty
Joined
Nov 29, 2014
Threads
65
Messages
24,995
Valve seats are either cut at 45 deg or 46 deg
The logic is you cut to 46 and get a knife edge contact which either you can lap to the desired sealing width or just run & let it wear in by itself.
 

Mkala

Well-Known Member
Joined
Jan 5, 2019
Threads
5
Messages
140
Yes, I think it's quite a good way to do it, but I don't have valve and seat cutters (and don't plan to buy some for just engine - I'm not in the business, just an hobby).

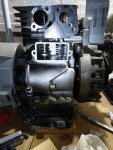
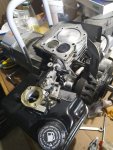
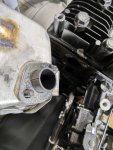
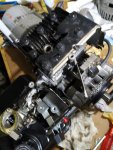
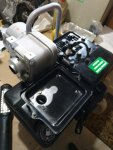
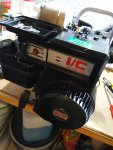
So I filed down the valve stem until having the good clearance, reassembled the valve springs and retainers, put back breather assembly.
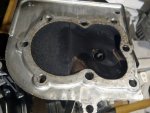
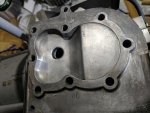
Re-linked the carb to the governor - including hooking the spring, remounted the tank and cleaned the head !
Next will be to remount the control panel, re-wire the kill switch / oil safety kill, re assemble the head (but did not received my torque wrench yet... ), the air guide and the shroud with the recoil - and after I will be able to fire it up :cool:

IMG_20190221_180901_resized.jpg IMG_20190221_213825_resized.jpg IMG_20190221_213908_resized.jpg IMG_20190222_210616_resized.jpg
 

Fish

Lawn Pro
Joined
Aug 2, 2013
Threads
11
Messages
5,143
Valve seats are either cut at 45 deg or 46 deg
The logic is you cut to 46 and get a knife edge contact which either you can lap to the desired sealing width or just run & let it wear in by itself.

Looks like on this block, the intake is 30 degrees, so the seat is cut at 31.
 

Mkala

Well-Known Member
Joined
Jan 5, 2019
Threads
5
Messages
140
Yes it's probably that, have not measured but at a a glance looks like this !
By the way guys you are very focused on valve seats :laughing:

On my side pretty happy with the new clean head, cylinder and adjusted spark plug, should help to run better.
Checking the valve clearance was a good thing to do too, as they were half of what they should be.
 

Fish

Lawn Pro
Joined
Aug 2, 2013
Threads
11
Messages
5,143
Yes it's probably that, have not measured but at a a glance looks like this !
By the way guys you are very focused on valve seats :laughing:

On my side pretty happy with the new clean head, cylinder and adjusted spark plug, should help to run better.
Checking the valve clearance was a good thing to do too, as they were half of what they should be.

Yeah, that is usual. The block area there warps away with use/heat, thus making the clearances closer, and the seating area not seal as well, thus creating more heat, and so on.

I have had a few that the seats were cocked so badly, that it was not fixable.
 

Mkala

Well-Known Member
Joined
Jan 5, 2019
Threads
5
Messages
140
Ha yes, I was wondering why clearance always getting closer over time. Yes bad seating valves, if you don't solve it quickly this can make a lot of damage I believe you.

Finished motor assembly - started with remounting the head, with proper torquing sequence (all is in L-Head Briggs manual).
Than mounted the muffler with new OEM gasket - that should seat way better now. After this, put back the control panel and torqued all the screw of the tank. Next is time to rewire the kill switch and oil sefaty switch. Tested it again with grounding it's terminal to block, light blink and no spark when pulling the rope. After ungrounding, nice spark at plug as oil is already in the crankcase.

Now I can remount the recoil, looks now the ratchet mecanisim works perfelty after some spry of WD40 in it - thanks for the tip. Time to remounte air cleaner assembly too.
All is shiny and ready, pre-filter washed and drying, just have to put it back with air filter and put fuel in the tank ! can't wait to test it, and try to adjust RPM :cool:

IMG_20190223_210647_resized.jpg IMG_20190223_210700_resized.jpg IMG_20190223_213027_resized.jpg IMG_20190223_213047_resized.jpg
 

bertsmobile1

Lawn Royalty
Joined
Nov 29, 2014
Threads
65
Messages
24,995
Yep the most common internal problem on the L heads is the exhaust valve not sealing properly because the gap has closed up to zero.
Because yo have to pull the carb and in many case the muffler as well even workshops declare then dead whan all they need is a little removed from the valve stem & a touch up on the seat.
There is a reason why SV engines have remained in use for over 100 years.
They just run forever.
And if it wasn't for the idiot morons in the EPA making regulations for no other reason than to protect their own jobs we would still be making them.
But they decided to make pollution worse by banning SV engines.
 

Fish

Lawn Pro
Joined
Aug 2, 2013
Threads
11
Messages
5,143
You have an EPA down there too?
 

bertsmobile1

Lawn Royalty
Joined
Nov 29, 2014
Threads
65
Messages
24,995
You have an EPA down there too?

Yup,
And they are every bit as blinkered and incapable of understanding the big picture as the ones you have over there.
We are about to instigate tier II as of July 1 this year
Already regulated 2 stroke engines out of production.
Apparently engines are made of fairy dust in factories run by pixies that produce no pollution in their own right and use materials that produced no pollution.
Thus the only pollution an engine is responsible for is what comes out the exhaust.
 

Mkala

Well-Known Member
Joined
Jan 5, 2019
Threads
5
Messages
140
Yes an engine like this will last forever... even if you are drunk you can't do too much harm because he won't run without oil :laughing:
But cast iron bore, crankshaft bearings and all in metal camshaft are really good choices for a long lasting one. Even air filter cover, all metallic and chromed, smells quality - a lot more than my other china clone generator with already a broken tab...
If you can't do it yourself it's clear it takes a bit of time to remove muffler (add more time if you break a bolt), carburetor and fuel tank to be able to access to breather cover. Then you can check clearance, and if you have to adjust more time to remove head and valves. Than reassemble. But at the end, for an engine in nice condition, it worth it - because you don't have a quick a dirty made cheap china engine (even if they work great for the price, most of the time).

So I put back the air filter, half tank of fuel and after a few pulls it started ! Now I know how governor / carburetor works, when I remove the choke I push on it to let it rev lower, like 2000-2500 to let it warm up a bit. But when I release it it rev up to 3500RPM, still to high. And already at minimum speed with speed screw.
I do what Boudreaux said - I bent the tab back quite a bit to fall just below 3000 with no load. Tried 700W and 1600W load (two stages fan heater) and adjusted the screw up, and the best I could to be close to 230V - 50 Hz - 3000 RPM :
No load 3100 RPM - 237V - 52Hz
1600W 2950 RPM - 217V - 49Hz

The engine run nice, it is way more stable/even than before and handle well the load ! Proper spark gap and no more head gasket leak helps a lot I think.
If someone want to I can try to make a small video clip.

I will change the air filter and prefilter (not sure if I buy original or cheap one), than I will double check the mixture even if it run nice. It looks like he love the fuel by the way :licking: :laughing:

Thanks all for your help and advice on my little project, it's quite satisfying to learn things and ending up with a neat generator ready on hand :thumbsup:
 
Top