You are using an out of date browser. It may not display this or other websites correctly.
You should upgrade or use an alternative browser.
You should upgrade or use an alternative browser.
Export thread
Briggs 5HP IC Generator
#1

Mkala
Mkala
Hello :biggrin:
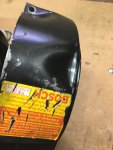
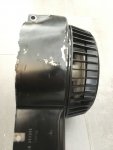
I just bought for cheap this old Briggs and Stratton 5HP flathead generator ! Gen head is a bosch unit, 2150W
Engine feature cast iron bore, double crankshaft bearings, oil guard.
Its a 132237 0363-01 engine, year 87. Was able to find both owner manual and part list on B&S web site.
If someone as good documentation about this particular engine, please post it. I have the general B&S L-Head engine doc, but some things seems specific to this 132200 serie.
Same for bosh generator, information welcome
Just tried the engine a few minutes, it's revving too high (3500-3600, should be 3000 here for 50 hertz) and was not able to adjust it, have to look how to do governors adjustments.
On the electrical side, voltage look strange, should be 230V but no load was 310V... way too high. Will check this later.
Otherwise, engine is in pretty nice looking condition (except a dent on recoil assembly and some scratches).
Compression seem low, but perhaps generator weight mitigate the sensation of compression. Have to check recoil too, sometimes it latch/does not rewind.
Already changed the oil and check oil guard, working fine. Oil was nasty... Air filter looks ok, prefilter to wash.
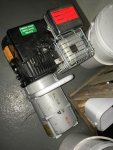
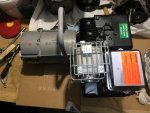
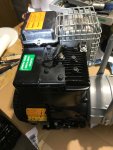
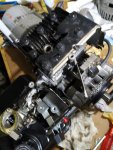
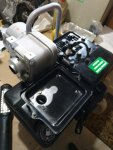
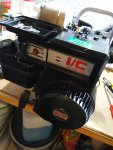
Some pics
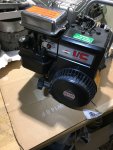
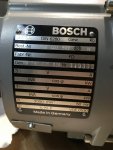
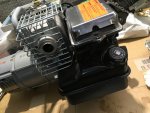


#2
A
(Account Closed)
A
(Account Closed)
I believe, (especially from looking at the date plate) on the generator itself, "3000 is the min" for 50 HZ.
I take this to be 3,000 minimum for 50HZ
Most generators run at 3,600...
I take this to be 3,000 minimum for 50HZ
Most generators run at 3,600...
#3

Fish
Fish
Put up some pics of the linkages on the bottom under the fuel tank.
There is a spring on the inner side that controls the rpms. It is @ 1 inch away from the oil drain plug.
Just bending the bracket lessening the spring's tension will lower the rpms.
There is a spring on the inner side that controls the rpms. It is @ 1 inch away from the oil drain plug.
Just bending the bracket lessening the spring's tension will lower the rpms.
#5
A
(Account Closed)
A
(Account Closed)
Have to check recoil too, sometimes it latch/does not rewind.
. QUOTE]
Re the starter.
Two issues there, both easy fixes..
Pull the cover off. For the rope not fully re-winding, simply pull some rope outwards, then place another "loop" around where the rope coils up at. This will tighten up the re-coil spring beneath it. A touch of oil in the center (under the plastic) will also make spinning it easier and loosen up any rust.
For the starter NOT "catching". Stand the engine upwards so the pull starter is facing the ceiling. There's a squarish part that spins, and catches (when turned clockwise) in the middle.
Holding that piece in is a round "disc/plate" with a lip on the outside. Simply pry that plate up and off. You'll see (as I re-call) five ball bearings (not small). The squarish part in the middle will easily pull upwards off the shaft as well..
Over time, inside there gets gummed up, the balls stick, etc. Clean any goo out (Brake cleaner is fine) of everywhere and oil those parts up. A touch of grease on the crank shaft extension wouldn't hurt..
For re-assembly, put the center square piece back on the shaft, drop the bearings in each of the slots and tap that cover back on. Done.
*The way that works is when you pull the starter, one of the balls "catches" the outer part of the assembly and allows you to crank the engine. Once started, centrifugal force throws the balls outwards and they don't touch anything and mind their own business until you go to re-start the engine..
You can remove that entire unit and do the above procedure on the bench (regular thread), but it's not necessary and more time consuming...
#6
R
Rivets
R
Rivets
According to the service manual, your engine should run at 3600 RPM with no load. When you put a load on, your RPM should be a minimum of 3000 RPM when you have a hertz reading of 50. On generators it is more important to have the voltage and hertz within specs, than having a specific RPM. To get the unit within specs you must have a meter which will read both volts and hertz. This is how I adjust generators. Start the engine, put a load on the engine of about 50% unit rating, adjust the governor until I have a hertz reading of specs +/- 1 hertz and a voltage reading of specs +/- 5 volts. You must be very close to specs on both or you could burn out a equipment you are powering. This manual has the steps for adjusting your governor. See section 5, page 17, basic engine number 132200 generator. https://drive.google.com/file/d/0B6NaqjIxWV1ycG8wd0s3Z2Q2X00/view
#7

Boudreaux In Eunice La.
Boudreaux In Eunice La.
Mkala............ Are you saying in Switzerland you need to be at 50 Hertz and not 60 Hertz ??????
In the states we have 60 for the norm.......... I do know in the UK and other places that the receptacles are different and tourists have to use adapters for their blow dryers and such............
In the states we have 60 for the norm.......... I do know in the UK and other places that the receptacles are different and tourists have to use adapters for their blow dryers and such............
#8

Boudreaux In Eunice La.
Boudreaux In Eunice La.
Mkala .............. Here'a link to a video on how to do what Scott mentioned ........ Enjoy Mon Ami ~!~!
https://youtu.be/lmODx4b8WQ0
https://youtu.be/lmODx4b8WQ0
#9
R
Romore
R
Romore
230VAC 50Hz is the standard for most if not all of Europe. Odd to have a generator that is putting out less than 10 amps. Move the governor arm from the idle, throttle closed, to wide open position. Now loosen the clamp on the shaft and turn the shaft in the same direction as far as it will go and tighten the clamp. Now start the engine and bend the tang the spring is attached to until the engine reaches approximately 3150 rpm no load. That should allow it to reach 3,000 rpm with a 50% load.
#10
B
bertsmobile1
240 V x 50 Hz is standard power supply for the entire world except for 1 mob that refuses to do anything the same as the rest of the world.
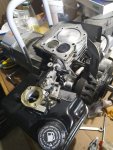
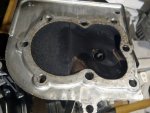
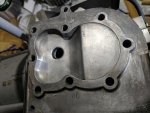
B
bertsmobile1
Mkala............ Are you saying in Switzerland you need to be at 50 Hertz and not 60 Hertz ??????
In the states we have 60 for the norm.......... I do know in the UK and other places that the receptacles are different and tourists have to use adapters for their blow dryers and such............
240 V x 50 Hz is standard power supply for the entire world except for 1 mob that refuses to do anything the same as the rest of the world.
#11
A
(Account Closed)
A video is worth a thousand words (and then some!)
Enjoy Mon Ami!
A
(Account Closed)
Mkala .............. Here'a link to a video on how to do what Scott mentioned ........ Enjoy Mon Ami ~!~!
https://youtu.be/lmODx4b8WQ0
A video is worth a thousand words (and then some!)
Enjoy Mon Ami!
#12

Russ2251
Russ2251
Once again the USA are the bad guys.1 mob that refuses to do anything the same as the rest of the world.
#13

Mkala
Mkala
Thank you all for all advices, link and explanations ! :thumbsup: really cool.
I think I will discuss thinks by topics, as many replied for same subject...
First, about 50Hz and power. Yes most of people here have habit for 120V / 60Hz, while a big part of the world is 240V 50Hz.
I don't care who's right and who is wrong (if any), that's not really the subject. In our case it just mean speed for a two poles generator has to be 3000 rpm (50Hz) or 3600 rpm (60Hz). We don't discuss inverter here as the generator speed has not to match with output frequency in this case.
About power, this gen put out 2150 watt, even if it is a bit less than 10 Amps this give the same power as 20 Amps 120V. Yes it's a small one, but it's all I need.
By the way, one advantage of 60Hz is you have more power with the same engine, especially with old one they like revving But this make more noise too....
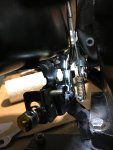
About the speed adjustment, here are some pictures. Tried to adjust with the thumbnut (which has yellow paint) but does not seem to vary a lot. I checked the linkage and all is free / moving correctly. If I understand correctly, when I turn the screw to move the little black plastic to the left RPM should decrease ? This release the spring behind (second pic).
Will try again as pictured (should be low speed), if not I have to adjust the governor arm as described by Rivet.
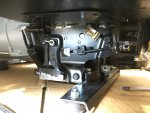
For the recoil start / ratchet mechanism, thanks for explanation and video Boudreaux In Eunice La. and SRTsFZ6 !
Was able to spray some WD40 in mechanism and magic happened... seem free for the moment, can clean all later if necessary (easy shroud removal with 3 bolt, not an issue).
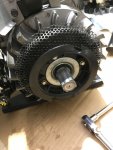
Forgot to mention unfortunately some traces on bolts of head, crankcase cover. Someone worked on it before, even if I prefer when not its not a big surprise for a 30y old engine.
Also checked the plug, it's a RCJ8 and the owner manual (but dated of 1997) mention RJ19LM. Seem to be same plugs with different hex size ?
Don't understand the heat rating, no chart mention one for direct replacement to the other. But it has paint on it, should be the original one. The gap was horribly wrong by the way... about 0.40mm. Adjusted to 0.70-0.80 now.
I think I will discuss thinks by topics, as many replied for same subject...
First, about 50Hz and power. Yes most of people here have habit for 120V / 60Hz, while a big part of the world is 240V 50Hz.
I don't care who's right and who is wrong
About power, this gen put out 2150 watt, even if it is a bit less than 10 Amps this give the same power as 20 Amps 120V. Yes it's a small one, but it's all I need.
By the way, one advantage of 60Hz is you have more power with the same engine, especially with old one they like revving
About the speed adjustment, here are some pictures. Tried to adjust with the thumbnut (which has yellow paint) but does not seem to vary a lot. I checked the linkage and all is free / moving correctly. If I understand correctly, when I turn the screw to move the little black plastic to the left RPM should decrease ? This release the spring behind (second pic).
Will try again as pictured (should be low speed), if not I have to adjust the governor arm as described by Rivet.


For the recoil start / ratchet mechanism, thanks for explanation and video Boudreaux In Eunice La. and SRTsFZ6 !
Was able to spray some WD40 in mechanism and magic happened... seem free for the moment, can clean all later if necessary (easy shroud removal with 3 bolt, not an issue).

Forgot to mention unfortunately some traces on bolts of head, crankcase cover. Someone worked on it before, even if I prefer when not its not a big surprise for a 30y old engine.
Also checked the plug, it's a RCJ8 and the owner manual (but dated of 1997) mention RJ19LM. Seem to be same plugs with different hex size ?
Don't understand the heat rating, no chart mention one for direct replacement to the other. But it has paint on it, should be the original one. The gap was horribly wrong by the way... about 0.40mm. Adjusted to 0.70-0.80 now.
#14
A
(Account Closed)
A
(Account Closed)
Yes, that little "thumb nut" should allow you to raise and lower the high speed RPM's.
Usually, turning the adjustment CLOCKWISE (as you look at it from the flat end) , raises the top end speed. If you don't have a tachometer attached, you may not be able to hear the difference. There's a limited RPM range that adjuster /governor is designed to keep the engine at..
Looking at the pic with the adjuster, (the paint missing on the threads), it appears to be turned counterclockwise(lowering the RPMs)
Also, the spark plug gap should be .030". (.760mm or so)
Lastly, you may want to take a torque wrench to the head. The three bolts closest to the exhaust valve tend to loosen over time.
#15

Mkala
Mkala
Thanks Scott for information. :smile:
I have a small RPM counter / hour meter, the simple one you wind 5 turn on the spark plug cable. It's not the more practice but works great on all my single cylinder engine (checked factory settings on my new ones, adjusted the idle of my old briggs 2.25HP). I tried to turn the nut but was not able to lower or rise the speed.... so now I turned on position I believe it's the lowest RPM (as on picture).
But perhaps I find why : on the carburetor idle screw is fully tightened against spring, perhaps it can lead to 3500 rpm with no load ? So in this case adjusting the tension on spring with thumb nut has no effect... will see.
For the spark plug, it's exactly where I gaped it. I say 0.70-0.80mm because I can put the 0.70 mm gauge but not the 0.80mm - so I should be on
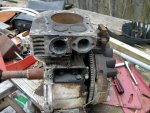
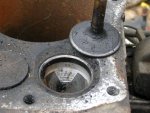
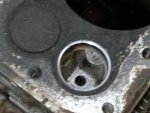
Ok for the head bolt, the 3 longer one of the exhaust.. they where not tight at all. While in, I decided to remove the head to know more on this engine state. Good new, despite some minors scratches (can see on pic, hard to feel event with nail), the cylinder bore looks in very good condition ! Crosshatch still present, so perhaps not so many hours ?
Piston has no slack at all.
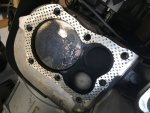
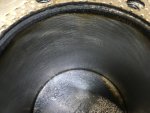
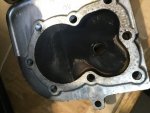
So my low compression feeling should not be true, or not come from cylinder.
I plan to check valve clearance too, I have to remove the fuel tank and will clean it in the same time (can see som debris in it). Will check screen of suction tube but I don't plan to open the carb yet (will do later if the motor does not run properly).
I have a small RPM counter / hour meter, the simple one you wind 5 turn on the spark plug cable. It's not the more practice but works great on all my single cylinder engine (checked factory settings on my new ones, adjusted the idle of my old briggs 2.25HP). I tried to turn the nut but was not able to lower or rise the speed.... so now I turned on position I believe it's the lowest RPM (as on picture).
But perhaps I find why : on the carburetor idle screw is fully tightened against spring, perhaps it can lead to 3500 rpm with no load ? So in this case adjusting the tension on spring with thumb nut has no effect... will see.
For the spark plug, it's exactly where I gaped it. I say 0.70-0.80mm because I can put the 0.70 mm gauge but not the 0.80mm - so I should be on
Ok for the head bolt, the 3 longer one of the exhaust.. they where not tight at all. While in, I decided to remove the head to know more on this engine state. Good new, despite some minors scratches (can see on pic, hard to feel event with nail), the cylinder bore looks in very good condition ! Crosshatch still present, so perhaps not so many hours ?
Piston has no slack at all.


So my low compression feeling should not be true, or not come from cylinder.
I plan to check valve clearance too, I have to remove the fuel tank and will clean it in the same time (can see som debris in it). Will check screen of suction tube but I don't plan to open the carb yet (will do later if the motor does not run properly).
#16
R
Rivets
R
Rivets
If my memory is still any good, that engine is a constant speed engine. You will not have any idle, just full speed. When you tried to adjust the governed top speed, did you unlock that nut as shown in the manual I posted, section 5 page 17. If you don’t unlock it you can’t make any adjustments.
#19
A
(Account Closed)
A
(Account Closed)
240 V x 50 Hz is standard power supply for the entire world except for 1 mob that refuses to do anything the same as the rest of the world.
+1 ^^^, the US is not like the rest of the world, NO apologies either...
Don't believe that for 1 second.................
+1 ^^^, the US is not like the rest of the world, NO apologies either...
#20

Russ2251
Neither do I...I was being sarcastic (post 12).
Quite frankly, I'm tired of the negative comments.
Russ2251
+2Don't believe that for 1 second.................
Neither do I...I was being sarcastic (post 12).
Quite frankly, I'm tired of the negative comments.
#21

Ronno6
I kinda sorta figgered that.......:thumbsup:
Ronno6
+2
Neither do I...I was being sarcastic (post 12).
I kinda sorta figgered that.......:thumbsup:
#22

Mkala
Mkala
Thanks guy for help, pictures 
About power distribution, frequency and voltages.... if someone want to discuss that (technically - not politically) please open a thread. It can be very interesting.
But for now, we just have to use the power we have where we live this mean I have to be able to run my engine at 3000 RPM :wink:
I
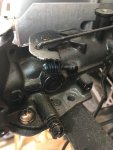
Thanks Scott for the picture, I already read this passage but not sure I understood all. Have to check how this regulation works. Will be easier with removed tank, and here is a pic of fully turned idle scew :
I removed the tank, it's pretty clean ! :thumbsup: Dumped the residual fuel, have to rinse the tank and clean the "bowl" ? (don't know the name of the top part where fuel is pumped for the carb ? )
So was able to check valve clearances... they are not good. Have 0.10mm IN and the same for EX... should be 0.10mm IN and 0.25 EX. So a bit of extra work for me :tongue:
But I never adjusted side valves, will read how I have to do. I heard of two "methods", the "right" one with valve removal tool, check if they seat properly - lap them if not - and grind the valve until clearance if fine. The other is to put a small file between valve and pushrod and file until clearance is good.
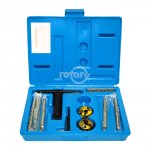
Have no tools (side valve spring compressor, lapping tool) so if I want to do it right I have to find some I think.
But another this mean I have to remove carb (dont want to break or bend pickup tube) and for this I have to remove exhaust... and I'm about worried to break exhaust bolt ?
About power distribution, frequency and voltages.... if someone want to discuss that (technically - not politically) please open a thread. It can be very interesting.
But for now, we just have to use the power we have where we live
I
Thanks Scott for the picture, I already read this passage but not sure I understood all. Have to check how this regulation works. Will be easier with removed tank, and here is a pic of fully turned idle scew :

I removed the tank, it's pretty clean ! :thumbsup: Dumped the residual fuel, have to rinse the tank and clean the "bowl" ? (don't know the name of the top part where fuel is pumped for the carb ? )
So was able to check valve clearances... they are not good. Have 0.10mm IN and the same for EX... should be 0.10mm IN and 0.25 EX. So a bit of extra work for me :tongue:
But I never adjusted side valves, will read how I have to do. I heard of two "methods", the "right" one with valve removal tool, check if they seat properly - lap them if not - and grind the valve until clearance if fine. The other is to put a small file between valve and pushrod and file until clearance is good.
Have no tools (side valve spring compressor, lapping tool) so if I want to do it right I have to find some I think.
But another this mean I have to remove carb (dont want to break or bend pickup tube) and for this I have to remove exhaust... and I'm about worried to break exhaust bolt ?


#23
A
(Account Closed)
I know and I agree with you 100%.
No reason for it, period..
A
(Account Closed)
+2
Neither do I...I was being sarcastic (post 12).
Quite frankly, I'm tired of the negative comments.
I know and I agree with you 100%.
No reason for it, period..
#24
A
(Account Closed)
A
(Account Closed)
Those diaphram carbs don't varnish up often but junk and nasty fuel collects in the tanks (short, little "cup"). That carb should come off easily but may destroy the intake gasket, so either or.
As the motor ran fine before I'd probably just give a cleaning while it was still attached.
I wouldn't touch the muffler. That carb tube is pretty flexible and frankly, it shouldn't be much in the way. (If so, yank the carb-(less likely the mounting bolts will be an issue).
*Should you "attack" the muffler, if the bolts don't budge with some serious leaning on them, STOP... Smack the head of the bolts, maybe some penetrating oil. Once cracked loose, back and forth with the wrench till bolts come out easily.
If your tach was reading 3,000, (If I understand correctly), aren't you at the correct RPM (about 3,000) for the proper HZ for your location? IE, any reason to adjust it?
#25

Mkala
Mkala
Thanks again Scott !
Yes that why I'm worried about these muffler bolts, they offen snap as I have seen on repair videos...
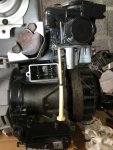
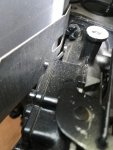
But as you see on picture, seem hard to reach the carb bolt just near the muffler. So I will try to work when leave it like this, as you suggest.
For the RPM I was reading 3400-3600, I have to set to 3000 (perhaps I said it wrong on posts above)
So, I have to order a side valve spring compressor I think :smile:
For tank and small cup on top, almost clean. The screen on pick up tube too. Just a few "sediments" in main tank, cleaned. No rust, pretty great condition :thumbsup:
#26
A
(Account Closed)
Sounds like your making great headway.
I'm not familiar with that particular style governor, so I'm pretty much guesstimating there..
My last Briggs 5 HP horizontal engine I owned, was in the early 1970's, on a mini bike (as a 13/14 year old). Different air filter, different governor (made for various speeds, top RPM 3,600) which was removed completely any way!. The rest the same.
Strongest engine for that bike, could do burn outs, probably run 35 MPH @WOT (I'm guessing 6,500 RPM's-not all the time, )
)
One of my favorite engines, super dependable and fast!!..
A
(Account Closed)
Thanks again Scott !
Yes that why I'm worried about these muffler bolts, they offen snap as I have seen on repair videos...
But as you see on picture, seem hard to reach the carb bolt just near the muffler. So I will try to work when leave it like this, as you suggest.
For the RPM I was reading 3400-3600, I have to set to 3000 (perhaps I said it wrong on posts above)
So, I have to order a side valve spring compressor I think :smile:
For tank and small cup on top, almost clean. The screen on pick up tube too. Just a few "sediments" in main tank, cleaned. No rust, pretty great condition :thumbsup:
Sounds like your making great headway.
I'm not familiar with that particular style governor, so I'm pretty much guesstimating there..
My last Briggs 5 HP horizontal engine I owned, was in the early 1970's, on a mini bike (as a 13/14 year old). Different air filter, different governor (made for various speeds, top RPM 3,600) which was removed completely any way!. The rest the same.
Strongest engine for that bike, could do burn outs, probably run 35 MPH @WOT (I'm guessing 6,500 RPM's-not all the time,
One of my favorite engines, super dependable and fast!!..
#27

Mkala
Mkala
Thank's Scott ! Yes for the moment it's going well !
Yes for sure you can't know all governor styles, including this old particular one...
What I just try to do is thinking and try to understand what was wrong or not set right; so when I fire it up I can quickly find the right setting.
But will see, now I removed the plate I see on the back the shut-off switch where the wire come (but not on this particular one, because its on the panel where the choke is) so I know for sure the low RPM setting (and that what we said just before).
Yes I see this engine is appreciated for racing ! It is one good strong choice for sure, and is the basis for the old Raptor racing engine
I think your mini bike was really fun
So finally I changed my mind... as I seen the muffler was already removed (bent tabs), I see it's leaking too... so I decided to give it a try to remove it. Fortunately it's was way easier to remove than I expected, not so tight, small back & forth movement to start and increasing range and voila ! And now I understand why it is leaking : there is no gasket anymore... and there is two gaskets on the intake side, strange not ? I think it's the first time that carburator is removed, no traces on screw, nor on carburetor (adjust or where the diaphragm is)
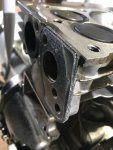
So now I have all access to valve springs. The exhaust one looks pretty tight, should no be a big problem with appropriate tool.
Took the time to clean carbon deposits too. Checked bore, it's in spec so was not re-bored.
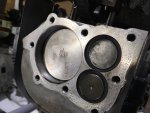
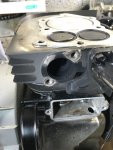
By the way someone know the meaning of marking on the piston ?
Yes for sure you can't know all governor styles, including this old particular one...
What I just try to do is thinking and try to understand what was wrong or not set right; so when I fire it up I can quickly find the right setting.
But will see, now I removed the plate I see on the back the shut-off switch where the wire come (but not on this particular one, because its on the panel where the choke is) so I know for sure the low RPM setting (and that what we said just before).
Yes I see this engine is appreciated for racing ! It is one good strong choice for sure, and is the basis for the old Raptor racing engine
I think your mini bike was really fun
So finally I changed my mind... as I seen the muffler was already removed (bent tabs), I see it's leaking too... so I decided to give it a try to remove it. Fortunately it's was way easier to remove than I expected, not so tight, small back & forth movement to start and increasing range and voila ! And now I understand why it is leaking : there is no gasket anymore... and there is two gaskets on the intake side, strange not ? I think it's the first time that carburator is removed, no traces on screw, nor on carburetor (adjust or where the diaphragm is)

So now I have all access to valve springs. The exhaust one looks pretty tight, should no be a big problem with appropriate tool.
Took the time to clean carbon deposits too. Checked bore, it's in spec so was not re-bored.


By the way someone know the meaning of marking on the piston ?
#28
A
(Account Closed)
A
(Account Closed)
I have no idea about the markings on the piston...
As most of the muffler was leaking between the block and muffler, you want to put a straight edge on the mounting surface of the muffler. That may be bent / not flat (maybe not, ??)
I'd never seen two intake gaskets (factory) but check the manual, if it shows.. One may very well be a "heat shield / barrier" as the upper right edge is indented (from the factory).
As someone definitly had the muffler off, it's very possible they left it off (dropped it, lost it, ?). There should have been some remnants left....
#29

Boudreaux In Eunice La.
Boudreaux In Eunice La.
The marking on the piston is 13 for 13 cu. inch.......... I have seen those quite a few times when I was building racing engines way back in the day..........
Plus Tard Mes Amies ~!~!
Plus Tard Mes Amies ~!~!
#33

Boudreaux In Eunice La.
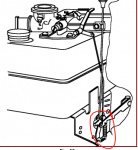
Mkala you see that tang inside the circle ???? That is your main governor adjustment........ Bending it up will decrease your RPM's......
That adjustment knob is more or less a fine tuner .................
Ok just like the instructions in the manual says.........
Step 1 release spring tension on nut..... ETC ETC.............
By bending the tang you are getting the RPM's close to what you need then you fine tune it to your RPM and Hertz / Cycles with the speed adjusting nut..............
I hope this kind of clears it up a little bit for you.......
Plus Tard Mon Ami ~!~!
The diagram is on post #17 I think ~!~!
#34

Mkala
Mkala
Scott, the muffler looks almost straight... and there is a plate between it and the block (the plate the come in front to lock bolts with bending tabs).
But on the part chart the gasket between the plate and the block is missing. And there is some remnants on this plate, exactly.
For the carburetor double gasket, looks like they a factory but I find that strange too ! again carburetors mounting screws looks new. I'll try to replace with only one...
Boudreaux In Eunice La ha yes it's for the cubic inches ! Nice explanation thanks ! I did not think at this at all, cubic inches does not speak to me... don't have the habit of this unit. For me it's a 206cc, but its a 12.6cu in too This has probably something to do in the model serie naming : 130000
Thanks for the information for setting the governor too ! Yes I see this tang, ok I understood. It's probably while I turned the thumb nut it was only making small changes !
The last mystery thing is this tang has no mark on it, so never modified I think. But while releasing spring tension with bending it I can lower RPM. Yes I checked the posted diagram and have stored the L-Head manual, it's quite handy
Merci mon ami !
Fish, I posted clearances a few post ago, but here what I measured :
Exhaust between 0.10 and 0.15mm (can put 0.10mm feeler gauge but not the 0.15)
Intake almost 0.15mm (gauge is tight, should be more free)
So I have to increase EX to 0.25, and do a small touch on intake. From what I know EX is more prone to "move", so it make sense ?
By the way I use two feeler gauge sets, one good but with low resolution (0.10mm) and one cheap with more feelers, and they both match. Of course I check that with piston at TDC, on compression stroke.
But on the part chart the gasket between the plate and the block is missing. And there is some remnants on this plate, exactly.
For the carburetor double gasket, looks like they a factory but I find that strange too ! again carburetors mounting screws looks new. I'll try to replace with only one...
Boudreaux In Eunice La ha yes it's for the cubic inches ! Nice explanation thanks ! I did not think at this at all, cubic inches does not speak to me... don't have the habit of this unit. For me it's a 206cc, but its a 12.6cu in too
Thanks for the information for setting the governor too ! Yes I see this tang, ok I understood. It's probably while I turned the thumb nut it was only making small changes !
The last mystery thing is this tang has no mark on it, so never modified I think. But while releasing spring tension with bending it I can lower RPM. Yes I checked the posted diagram and have stored the L-Head manual, it's quite handy
Merci mon ami !
Fish, I posted clearances a few post ago, but here what I measured :
Exhaust between 0.10 and 0.15mm (can put 0.10mm feeler gauge but not the 0.15)
Intake almost 0.15mm (gauge is tight, should be more free)
So I have to increase EX to 0.25, and do a small touch on intake. From what I know EX is more prone to "move", so it make sense ?
By the way I use two feeler gauge sets, one good but with low resolution (0.10mm) and one cheap with more feelers, and they both match. Of course I check that with piston at TDC, on compression stroke.
#35

Boudreaux In Eunice La.
Boudreaux In Eunice La.
Mkala .......... The tang shouldn't have marks on them if it was done right..... Post 17 in the bottom diagram you can see the tang bending tool on the tang....... Briggs sells those tools..... I had one years ago..... I just use my Snap on needle nose pliers to adjust the tangs now......
Yes the 13 cu. inch has to do with the Model Number...... All Briggs engines do that..... Vanguard 366776 = 36 cu. inch 18 HP........
Plus tard ........
Yes the 13 cu. inch has to do with the Model Number...... All Briggs engines do that..... Vanguard 366776 = 36 cu. inch 18 HP........
Plus tard ........
#36

Mkala
Mkala
Ok, yes I see the right tool with the fork style to bend the tang... but when I see the crankcases bolts I think the guy was working on before me was in hurry or not that careful ! :thumbdown: So perhaps it had the tool... probably not 
Interesting, never think with the cubic inches. I saw the size increase with number, but now as a more clear signification ! It's nice to learn things thank for sharing ! :smile:
A plus mon ami
Interesting, never think with the cubic inches. I saw the size increase with number, but now as a more clear signification ! It's nice to learn things thank for sharing ! :smile:
A plus mon ami
#37

Boudreaux In Eunice La.
Boudreaux In Eunice La.
If you want to........ Try this radio station to listen to ...... It's Cajun French music, Swamp Pop and well a good variety of music.....
KBON.com On their website hit Listen Live ......... It's a radio station not far from me here in town.... I do a Thursday night show with Todd Ortego from 6 P.M. till 10 P.M. We have a blast on that show......
KBON.com On their website hit Listen Live ......... It's a radio station not far from me here in town.... I do a Thursday night show with Todd Ortego from 6 P.M. till 10 P.M. We have a blast on that show......
#38
A
(Account Closed)
Boudreaux or another member should know about the intake gasket. Maybe it's designed that way?
Someone will respond and know for certain...
A
(Account Closed)
Scott, the muffler looks almost straight... GOOD and there is a plate between it and the block (the plate the come in front to lock bolts with bending tabs).
But on the part chart the gasket between the plate and the block is missing. And there is some remnants on this plate, exactly. OK, GOOD, GUESS IT BLEW OUT OVER TIME..
For the carburetor double gasket, looks like they a factory but I find that strange too ! again carburetors mounting screws looks new. I'll try to replace with only one...
Boudreaux or another member should know about the intake gasket. Maybe it's designed that way?
Someone will respond and know for certain...
#39

Mkala
Mkala
Boudreaux, I'll check, but with 7 hours difference will be difficult to listen I think 
Scott, perhaps found an explanation on a part site : that for another gasket, but they say stacking two is better to insulate the carb from block heat. Make sense, as all is aluminum heat conductivity is good.
I just orderd the compressor tool for valve springs and the muffler gasket.
Now I wonder if I have to lap the valve. I don't wont to order the good briggs part, to expensive for my occasional use, I'm not a pro.
But I can find plastic or wood handle lapper for cheap. About the compound I dont know what I need ? Found these two available on ebay, any thougts about them ?
https://ebay.us/TZmapd
https://ebay.us/WtGxGh
#40

Boudreaux In Eunice La.
Boudreaux In Eunice La.
Mkala ........... Get both coarse and fine lap compound.......... I hardly use the coarse...... yes you can find the lapping tools cheaper at local parts stores or NAPA stores..........
The one I have is a double ender and the small end is 1/2 inch..... Perfect for the newer small valves that are concaved...
The Briggs lapper is 5/8 inch and doesn't fit on the small valves well........
KBON is a 24 hour station but only has live Dee Jays from 6 AM till 10 PM at night .............. Saturday and Sunday mornings are mostly french music............
Plus tard Mon Ami ~!~!
#41

Fish
Fish
I seldom lap the valves, it destroys the good seal made by properly cutting the valves has made. I will do just a light touch, to see that the seal is good.
#42

Mkala
Mkala
Thanks for information !
Permatex did not give grit... from some review they say it's quite coarse. I don't have local shop to buy this kind of thing so I have to look online (not in habit here to have auto shop unfortunately ).
Which grit should I use about you think ?
Exactly, I will just check if this make a nice little circle all around. Don't plan to do a big / aggressive lapping - just want to be sure all is seating properly why I'm in.
See you :smile:
#44

Ronno6
Use the stuff with a good mouth wash in it and your generator's exhaust will smell so sweet..............
Ronno6
A real "light" grit would be TOOTH PASTE...
Use the stuff with a good mouth wash in it and your generator's exhaust will smell so sweet..............
#45

Mkala
Mkala
This is a good idea Scott  ! I'll try as soon as I got tools (valve spring compressor & lapping tool)
Ronno6 I prefer burned gasoline smell :tongue: (for the engine exhaust :laughing: )
Ronno6 I prefer burned gasoline smell :tongue: (for the engine exhaust :laughing: )
#48
B
bertsmobile1
The abrasive in tooth paste is calcium carbonate which is way softer than both the valves & seats.
Fine for paint and brass or alumium parts but all it will do on a valve seat is fill the voids so it looks better.
OTOH getting it into the bore will remove glazing.
Calcium carbonate was the abrasive in Bon-Ami & an old bodge was to toss some into a glazed bore if the rings did not seat.
Tooth paste is around .05 to 1 micron and way too fine for lapping valves.
Brasso might work but that is 4-8 microns which is again too fine for lapping.
A sort of comparrision would be trying to remove deep rust with 2000 grade wet & dry.
You can do it but it will take a very long time.
B
bertsmobile1
A real "light" grit would be TOOTH PASTE...
The abrasive in tooth paste is calcium carbonate which is way softer than both the valves & seats.
Fine for paint and brass or alumium parts but all it will do on a valve seat is fill the voids so it looks better.
OTOH getting it into the bore will remove glazing.
Calcium carbonate was the abrasive in Bon-Ami & an old bodge was to toss some into a glazed bore if the rings did not seat.
Tooth paste is around .05 to 1 micron and way too fine for lapping valves.
Brasso might work but that is 4-8 microns which is again too fine for lapping.
A sort of comparrision would be trying to remove deep rust with 2000 grade wet & dry.
You can do it but it will take a very long time.
#49

Boudreaux In Eunice La.
Boudreaux In Eunice La.
Mkala ............... Clover makes the lapping compound for Briggs..... It'a double sided container.... Course on the top and fine on the bottom .... Or the other way around LOL.....
Look clover up and see what you find Mon Ami ~!~!
Plus tard ..............
Look clover up and see what you find Mon Ami ~!~!
Plus tard ..............
#50

Mkala
Mkala
Thanks Fish, but until I find very bad seats I dont plan to re-cut them.
bertsmobile1 It will just be for checking if I'm not sure they are seating correctly ... if I need to grind them for sure I have to buy the right thin as Boudreaux In Eunice La. suggested : Loctite clover. But I wait the valve removal, for now I see Loctite Clover Fin& Corse (280 & 120 Grit) @ 20$ + 20$ ship on eBay.
bertsmobile1 It will just be for checking if I'm not sure they are seating correctly ... if I need to grind them for sure I have to buy the right thin as Boudreaux In Eunice La. suggested : Loctite clover. But I wait the valve removal, for now I see Loctite Clover Fin& Corse (280 & 120 Grit) @ 20$ + 20$ ship on eBay.
#51

Boudreaux In Eunice La.
Mkala....... See if you can get it from Briggs in your area, it will be cheaper and it will be the right grit for your small engines....
The internet is full of different grits so you might not be ordering the right stuff.......
Plus tard Mon Ami ~!~!
Boudreaux In Eunice La.
Thanks Fish, but until I find very bad seats I dont plan to re-cut them.
bertsmobile1 It will just be for checking if I'm not sure they are seating correctly ... if I need to grind them for sure I have to buy the right thin as Boudreaux In Eunice La. suggested : Loctite clover. But I wait the valve removal, for now I see Loctite Clover Fin& Corse (280 & 120 Grit) @ 20$ + 20$ ship on eBay.
Mkala....... See if you can get it from Briggs in your area, it will be cheaper and it will be the right grit for your small engines....
The internet is full of different grits so you might not be ordering the right stuff.......
Plus tard Mon Ami ~!~!
#52
B
bertsmobile1
B
bertsmobile1
Fine will usually be all that is needed.
Valve grinding paste comes in a lot of different grades but most will be OK.
It is a lawnmower engine, not a F1 racer
With modern carbide valve seat cutters, no one uses coarse grit any more.
If you still are using the old stones to dress the valves & seats then you need to start with the coarse then go over to the fine as soon as you get a complete grey ring on both the valve & the seat.
Modern tooling like a Neway cutter will be OK to use without any lapping in a mower engine.
The important thing is that the paste is water so you can wash all of the grit & the grinding debris completely away.
#53

Mkala
Mkala
Ok thanks for information bertsmobile1 ! :smile:
Still wait on ma springs compressor, after I will be able to see the state of valve and seat, and decide if I have anything to to to them.
Still wait on ma springs compressor, after I will be able to see the state of valve and seat, and decide if I have anything to to to them.
#54

Mkala
Mkala
Hi there,
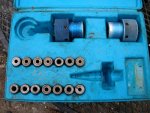
Received my tool to play with !
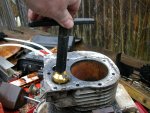
Its a bit less easy to use than what I think. The spring on exhaust side is strong, but once the tool is installed it easy to remove the in of the valve.
On the intake side spring is more soft, I was able to quickly remove the retainer without it... but will be helpful to re-installation of both !
The valves looks nice, seats too. Don't plan to do anything on them except cleaning and adjusting lash.
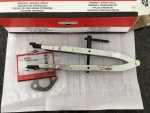
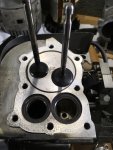
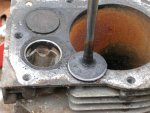
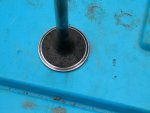
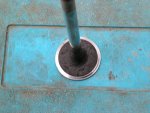
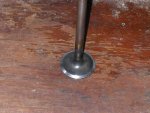
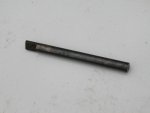
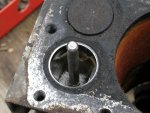
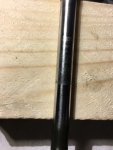
EDIT : intake valve and guide are fine, but I have some play on exhaust valve. Don't have the tool to check bushing, but I can see an feel some marks on the valve stem :
Received my tool to play with !
Its a bit less easy to use than what I think. The spring on exhaust side is strong, but once the tool is installed it easy to remove the in of the valve.
On the intake side spring is more soft, I was able to quickly remove the retainer without it... but will be helpful to re-installation of both !
The valves looks nice, seats too. Don't plan to do anything on them except cleaning and adjusting lash.


EDIT : intake valve and guide are fine, but I have some play on exhaust valve. Don't have the tool to check bushing, but I can see an feel some marks on the valve stem :

#55
R
Romore
R
Romore
A little side to side play is normal, without it the valve will seize in the guide when the engine gets hot.
#56

Fish
Fish
You ought to call around and see if a shop could cut the valves and seats cheaply if you brought in the block and valves, it may be done fairly cheaply.
#60

Fish
Fish
You get the correct size guide, and put it together like this. You have to clamp the end of the stem in a vice, protecting the valve with an old piece of fuel hose or something, and pulling and rotating the cutter to cut the valve.
This is an antique model, I think the have a fancier setup these days.
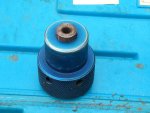
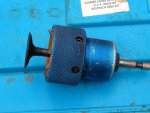
This is an antique model, I think the have a fancier setup these days.


#64

Mkala
Mkala
Thanks Romore ! It has more play than intake, but yes make sense because exhaust valve become more hot.
I was able to determine valve guide is less than 6.40mm (but close).
Thanks Fish for test and pictures ! This tool looks to work very nicely !
Machining is not an option, don't know a shop near me. And now with cheap stuff I doubt lot of shops will still machine blocks, cut valves and things like this :/
On the other hand, even if tis long do something, I have all the time that the job need because I do this on my free time, and I don't count hours :smile:
EDIT :
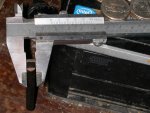
Found the reject tool is 0.265" / 6.73mm. So my guide is in perfect state. Factory bore is 6.35mm if I understand correctly.
http://ppeten.com/forums/viewtopic.php?f=3&t=2255&start=10
#65

Fish
Fish
I didn't notice that you were in Switzerland, the seats are usually what is way out of whack, as the block gets hot and the block/seats tend to warp away, cocking the seats.
The seat cutters cut them at 46 and 31 degrees, and that 1 degree makes a tight seal, which is why you don't really want to lapp the valves, as that will destroy the "interference' fit.
Really some neat tools. Anyone that is a Briggs and Stratton dealer should have at least the Neway seat cutter set.
#66

Fish
Fish
Here is the seat cutter set that I have...
https://www.ezbore.net/Neway-LG-1000-Briggs19237-Valve-Seat-Cutter-Kit-p/newklg1000.htm
Somewhere....
https://www.ezbore.net/Neway-LG-1000-Briggs19237-Valve-Seat-Cutter-Kit-p/newklg1000.htm
Somewhere....
#67

Mkala
Mkala
Yes this is definitely a nice kit. But for professionals; I don't plan to buy a lot of tool, especially specific / expensive one 
In the BS flathead manual, they talk about this kit but they talk about lapping too - as the final way to make valve and seat fit together.
In the BS flathead manual, they talk about this kit but they talk about lapping too - as the final way to make valve and seat fit together.
Reface Valves and Seats
Valve faces can be resurfaced on a commercially
available valve grinding tool. Briggs & Stratton does
not recommend this practice as a high quality repair
procedure. Valve replacement is recommended for
damaged or worn valves. Valve seats are cut using
Tool #19237 or #19343, Neway Valve Seat Cutter Kit,
to 45° on exhaust and some intake seats. Other intake
seats are cut to 30°. Valve and seat are lapped in using
Tool #19258, Valve Lapping Tool, and Part #94150,
Valve Lapping Compound, to assure a good seal
between the valve face and the seat.
#70

Mkala
Mkala
Thnaks for the pictures !
Great tool you have there to cut seat an valve !
Ha yes the gauge can you confirm the diameter of it ?
Thanks
And by the way yes, I'm from Switzerland. This mean not really the country of small engines, at least less than North America. And for spares and tools, you can double the price in the USA and add shipping... it's like this
Great tool you have there to cut seat an valve !
Ha yes the gauge
Thanks
And by the way yes, I'm from Switzerland. This mean not really the country of small engines, at least less than North America. And for spares and tools, you can double the price in the USA and add shipping... it's like this
#74

Mkala
Mkala
Its not easier to tell me the value ?
I can display the image full size, thanks, i know - but the front side on the scale is still on full shadow...
By the way, you have all the range of B&S tools it's look like
I can display the image full size, thanks, i know - but the front side on the scale is still on full shadow...
By the way, you have all the range of B&S tools it's look like
#77
B
bertsmobile1
B
bertsmobile1
yup
0.200"
+.050 ( 2 full graduations of .025" each)
+.022 read off the top scale
0.272"
0.200"
+.050 ( 2 full graduations of .025" each)
+.022 read off the top scale
0.272"
#78

Mkala
Mkala
Many thanks to both of you, it's close to what I read on other forum. 
So the valve guide is really in perfect shape, just a few scoring on the exhaust valve stem (I already sand/polished it - this remove protruding material, even if it wont fill the missing material...).
Now waiting valve lapping tool (can be long...) and I find someone that can give me a little bit of lapping paste/compound.
No major progress these days... but lot of other things to do - and no hurry - this is is side project :wink:
#80

Mkala
Mkala
I continue my monologue :laughing:
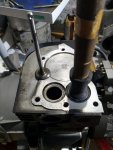
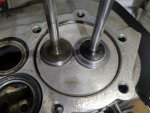
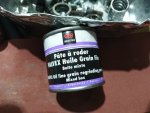
Was able to borrow a valve lapping set, with fine paste and asmall suction cup that just fit on my small briggs valves !
So do a quick lapping, ring is not a the same place on exhaust and intake... more inside on exhaust valve and more outside on intake valve. But they are both continuous nice rings so it should be fine ?


#81
B
bertsmobile1
B
bertsmobile1
Valve seats are either cut at 45 deg or 46 deg
The logic is you cut to 46 and get a knife edge contact which either you can lap to the desired sealing width or just run & let it wear in by itself.
The logic is you cut to 46 and get a knife edge contact which either you can lap to the desired sealing width or just run & let it wear in by itself.
#82

Mkala
Mkala
Yes, I think it's quite a good way to do it, but I don't have valve and seat cutters (and don't plan to buy some for just engine - I'm not in the business, just an hobby).
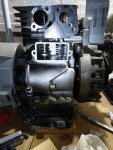
So I filed down the valve stem until having the good clearance, reassembled the valve springs and retainers, put back breather assembly.
Re-linked the carb to the governor - including hooking the spring, remounted the tank and cleaned the head !
Next will be to remount the control panel, re-wire the kill switch / oil safety kill, re assemble the head (but did not received my torque wrench yet... ), the air guide and the shroud with the recoil - and after I will be able to fire it up


#83

Fish
Looks like on this block, the intake is 30 degrees, so the seat is cut at 31.
Fish
Valve seats are either cut at 45 deg or 46 deg
The logic is you cut to 46 and get a knife edge contact which either you can lap to the desired sealing width or just run & let it wear in by itself.
Looks like on this block, the intake is 30 degrees, so the seat is cut at 31.
#84

Mkala
Mkala
Yes it's probably that, have not measured but at a a glance looks like this !
By the way guys you are very focused on valve seats :laughing:
On my side pretty happy with the new clean head, cylinder and adjusted spark plug, should help to run better.
Checking the valve clearance was a good thing to do too, as they were half of what they should be.
By the way guys you are very focused on valve seats :laughing:
On my side pretty happy with the new clean head, cylinder and adjusted spark plug, should help to run better.
Checking the valve clearance was a good thing to do too, as they were half of what they should be.
#85

Fish
Yeah, that is usual. The block area there warps away with use/heat, thus making the clearances closer, and the seating area not seal as well, thus creating more heat, and so on.
I have had a few that the seats were cocked so badly, that it was not fixable.
Fish
Yes it's probably that, have not measured but at a a glance looks like this !
By the way guys you are very focused on valve seats :laughing:
On my side pretty happy with the new clean head, cylinder and adjusted spark plug, should help to run better.
Checking the valve clearance was a good thing to do too, as they were half of what they should be.
Yeah, that is usual. The block area there warps away with use/heat, thus making the clearances closer, and the seating area not seal as well, thus creating more heat, and so on.
I have had a few that the seats were cocked so badly, that it was not fixable.
#86

Mkala
Mkala
Ha yes, I was wondering why clearance always getting closer over time. Yes bad seating valves, if you don't solve it quickly this can make a lot of damage I believe you.
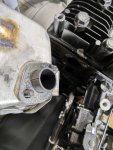
Finished motor assembly - started with remounting the head, with proper torquing sequence (all is in L-Head Briggs manual).
Than mounted the muffler with new OEM gasket - that should seat way better now. After this, put back the control panel and torqued all the screw of the tank. Next is time to rewire the kill switch and oil sefaty switch. Tested it again with grounding it's terminal to block, light blink and no spark when pulling the rope. After ungrounding, nice spark at plug as oil is already in the crankcase.
Now I can remount the recoil, looks now the ratchet mecanisim works perfelty after some spry of WD40 in it - thanks for the tip. Time to remounte air cleaner assembly too.
All is shiny and ready, pre-filter washed and drying, just have to put it back with air filter and put fuel in the tank ! can't wait to test it, and try to adjust RPM


#87
B
bertsmobile1
B
bertsmobile1
Yep the most common internal problem on the L heads is the exhaust valve not sealing properly because the gap has closed up to zero.
Because yo have to pull the carb and in many case the muffler as well even workshops declare then dead whan all they need is a little removed from the valve stem & a touch up on the seat.
There is a reason why SV engines have remained in use for over 100 years.
They just run forever.
And if it wasn't for the idiot morons in the EPA making regulations for no other reason than to protect their own jobs we would still be making them.
But they decided to make pollution worse by banning SV engines.
#89
B
bertsmobile1
Yup,
And they are every bit as blinkered and incapable of understanding the big picture as the ones you have over there.
We are about to instigate tier II as of July 1 this year
Already regulated 2 stroke engines out of production.
Apparently engines are made of fairy dust in factories run by pixies that produce no pollution in their own right and use materials that produced no pollution.
Thus the only pollution an engine is responsible for is what comes out the exhaust.
B
bertsmobile1
You have an EPA down there too?
Yup,
And they are every bit as blinkered and incapable of understanding the big picture as the ones you have over there.
We are about to instigate tier II as of July 1 this year
Already regulated 2 stroke engines out of production.
Apparently engines are made of fairy dust in factories run by pixies that produce no pollution in their own right and use materials that produced no pollution.
Thus the only pollution an engine is responsible for is what comes out the exhaust.
#90

Mkala
Mkala
Yes an engine like this will last forever... even if you are drunk you can't do too much harm because he won't run without oil :laughing:
But cast iron bore, crankshaft bearings and all in metal camshaft are really good choices for a long lasting one. Even air filter cover, all metallic and chromed, smells quality - a lot more than my other china clone generator with already a broken tab...
If you can't do it yourself it's clear it takes a bit of time to remove muffler (add more time if you break a bolt), carburetor and fuel tank to be able to access to breather cover. Then you can check clearance, and if you have to adjust more time to remove head and valves. Than reassemble. But at the end, for an engine in nice condition, it worth it - because you don't have a quick a dirty made cheap china engine (even if they work great for the price, most of the time).
So I put back the air filter, half tank of fuel and after a few pulls it started ! Now I know how governor / carburetor works, when I remove the choke I push on it to let it rev lower, like 2000-2500 to let it warm up a bit. But when I release it it rev up to 3500RPM, still to high. And already at minimum speed with speed screw.
I do what Boudreaux said - I bent the tab back quite a bit to fall just below 3000 with no load. Tried 700W and 1600W load (two stages fan heater) and adjusted the screw up, and the best I could to be close to 230V - 50 Hz - 3000 RPM :
No load 3100 RPM - 237V - 52Hz
1600W 2950 RPM - 217V - 49Hz
The engine run nice, it is way more stable/even than before and handle well the load ! Proper spark gap and no more head gasket leak helps a lot I think.
If someone want to I can try to make a small video clip.
I will change the air filter and prefilter (not sure if I buy original or cheap one), than I will double check the mixture even if it run nice. It looks like he love the fuel by the way :licking: :laughing:
Thanks all for your help and advice on my little project, it's quite satisfying to learn things and ending up with a neat generator ready on hand :thumbsup:
#91

Boudreaux In Eunice La.
Boudreaux In Eunice La.
Mkala ............... Congrats on getting your engine refreshed...... If I can get my hands on a engine like yours I'll make a video just for adjusting the governor system.......
Plus Tard Mon Ami ~!~!
Plus Tard Mon Ami ~!~!
#92

Mkala
Mkala
Merci Boudreaux :smile:
It thanks to you and all the others sharing the knowledge here, on this forum, this really help ! I learned a lot and I'm more than happy to have one of these good old flat head in my little "small engine fleet"
One last question, I have the air-filter retainer in plastic, like this : https://goo.gl/images/85yPRr
This is part 643A on the view : https://www.firedog.com/catalog/bri...299/132232-0363-01/mufflers-air-cleaners-fuel
I find this thing useless, the filter seem to seat better without it; perhaps I have not understood something ?
See you
#94
B
bertsmobile1
B
bertsmobile1
You will find it very handy.
Mine spent more time in other club members garages than mine.
The shorter the handle the greater the feel and the lower the chance of stripping threads
Mine spent more time in other club members garages than mine.
The shorter the handle the greater the feel and the lower the chance of stripping threads
#95

Mkala
Mkala
Yes it's nice small addition to my little toolbox !
It click quite well, especially over 10Nm. Under, you have to be careful, has torque is easily reach.
I think avoid stripping threads in aluminum blocks or broke bolt is worth it !
It click quite well, especially over 10Nm. Under, you have to be careful, has torque is easily reach.
I think avoid stripping threads in aluminum blocks or broke bolt is worth it !
#96

Scrubcadet10
Scrubcadet10
Just be sure you don't drop the torque wrench or bang it around...
I have have one of those harbor freight 12 dollar torque wrench, never have broke a bolt or stripped one and none have loosened. :thumbsup::thumbsup:
I have have one of those harbor freight 12 dollar torque wrench, never have broke a bolt or stripped one and none have loosened. :thumbsup::thumbsup:
#97

Mkala
Mkala
No worries, I take care of my engines and of my tools too! :smile:
Not pictured, but it comes with the plastic protection box to store it.
I always loose the tension on the spring and put it in it's the box, like my other one. This way it should last forever for my use.
It even comes with a calibration certificate (chinese one) and it is in 3% (max 5 advertised for the product) so better than my hand, even for this 30$ one.
#98
B
bertsmobile1
B
bertsmobile1
Unless you are working in critical regions like aerospace the actual numbers are not important.
Published torques are fro brand new bolts in a new clean hole or with a fresh nut.
Then there is wet & dry torques.
On a mower, 22 vs 24 vs 30 will make no difference.
What is important is all of the bolts are the same so when hot there is no "weak spot" where a leak can happen.
Even critical applications like con rod bolts +/- 25 % is no big deal.
Deflection wrenched read lower over time because the bar that bends slowly work hardens.
Mine is 40 years old and for laugh I got it tested at a tool shop promotion & it was 8% out ( low ).
The short 1/2" was 3% low, however the long ( 300 ft.lbs) wrench was a screaming 36% out.
The latter was a ratchet , spring loaded type & the tester simply said it was due to being left set to a high torque and spring loaded wrenches must be backed off to a zero reading when ever stored.
Despite being there to promote a brand of spring loaded wrenches, he admitted that deflection wrenches always read closer and spring wrenches required regular calibration, adjustments & spring replacement.
#99

Mkala
Mkala
Ha yes for small engines and all of my work they are even overkill - totally agree !
But it's nice to know all is corretly tight and as you say uniformly - quite important for gaskets.
Thanks for sharing you story, does not have wrenches that old, but one day I will test them with a luggage scale (easy to calculate Nm)
But it's nice to know all is corretly tight and as you say uniformly - quite important for gaskets.
Thanks for sharing you story, does not have wrenches that old, but one day I will test them with a luggage scale (easy to calculate Nm)

