You are using an out of date browser. It may not display this or other websites correctly.
You should upgrade or use an alternative browser.
You should upgrade or use an alternative browser.
Export thread
Westwood T1200
#1
C
clicon357
C
clicon357
The deck on my Westwood T1200 was a bit worse for wear.
I opted just to repair a section of the rim so fab'd a channed o/of some 2mm steel:
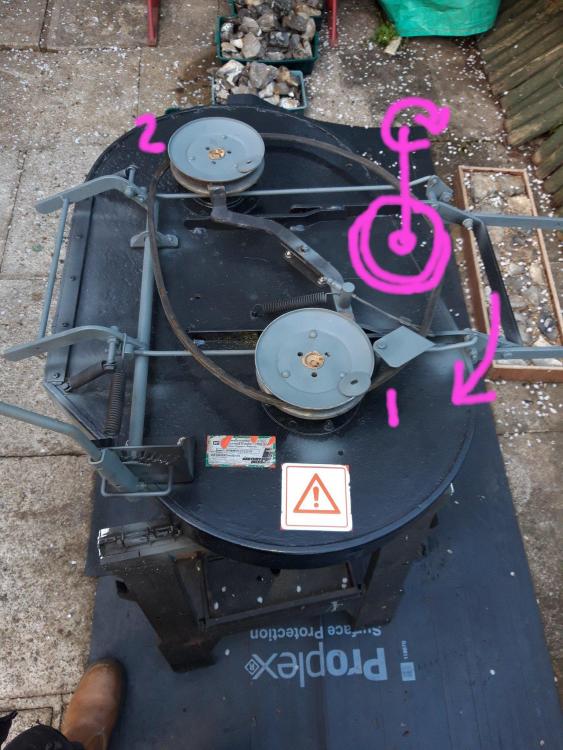
Picture below shows the repaired deck pre refitting. I've added on in pink the drive pulley on the bottom of the engine. When fitted, the belt runs anti clockwise. The original pullies that turn the blades are shown at 1 & 2. They are stiffer to turn than I'd like. If, with the deck on I engage the cutter the belt jumps and slaps at 1. I think what is happening is that the drive pulley feeds the belt onto 1 which turns relatively freely. When it gets to 2, because that is stiffer to turn the belt "backs up". New bearings ordered!

#2
B
bertsmobile1
B
bertsmobile1
Nice fix
You have that backwards.
Belts pull only so all of the slack will be at 1 which is where a tensioning pulley would be if fitted to take up any slack in the belt .
Make sure that the brake pads are not touching either pulley with the beck engaged.
If the belt is falpping there badly then you either have a belt that is too long or the engagement needs some adjusting
#3
C
clicon357
C
clicon357
Thanks.
1) Option at the front of 4 holes each side on the two prongs that come from the deck. Can't remember which holes were used before we took the deck off.
2) At the rear two horizontal rods, threaded at the end with a 1/2" AF nut on.
I've raised / levelled the deck a bit and it runs better but the belt still slaps. I'll video it later
#4
C
clicon357
C
clicon357
Tried starting it just now on the pull cord, to video the belt slap it but no dice. Was starting fine yesterday!
Anyway, ref the deck/belt. After refitting the deck the belt was smoking like Hell on trying engaging the cutter, blade pullies weren't turning and the belt was "slapping " terribly at 1, marked pink, above.
We adjusted at the back here:
And it's in these holes at the front, (before it was 1 hole back):
After adjusting as above the belt smoking stopped pretty much and the cutting pullies seemed to be trying to turn.
Deck fully raised, belt is level:
Deck fully down, belt looks at too steep an angle to me:
The belt is wearing here:
Grateful for any pointers.
Cheers
#5
B
bertsmobile1
B
bertsmobile1
What the bottom photo shows is belt burn and that is caused by the belt slipping on a pulley that is not moving.
Two reasons for that
Too much resistance on the pulley
Belt too long so not tight enough .
Your belt run looks about right, the mid height setting usually has the belt running close to level .
The lowest cut height should never be used as it is generally under 1" so would only be used where you want to kill our lawn. or were mowing a putting green.
#6
C
clicon357
Thanks for that. As I said at the start of the thread I think stiff pullies can't be helping much. New bearings coming tomorrow hopefully. I'll report back!
C
clicon357
What the bottom photo shows is belt burn and that is caused by the belt slipping on a pulley that is not moving.
Two reasons for that
Too much resistance on the pulley
Belt too long so not tight enough .
Your belt run looks about right, the mid height setting usually has the belt running close to level .
The lowest cut height should never be used as it is generally under 1" so would only be used where you want to kill our lawn. or were mowing a putting green.
Thanks for that. As I said at the start of the thread I think stiff pullies can't be helping much. New bearings coming tomorrow hopefully. I'll report back!
#7
B
bertsmobile1
B
bertsmobile1
With the blade brake off and the belt off you should be able to spin the blades with your little finger.
If this can not happen the spindle has too much resistance
I am still a bit confused about that deck
It is very rare to have a 3 pulley set up without a spring loaded tensioning pulley in there somewhere.
Unfortunately the only West wood I service has no deck and is used to tow a cart.
Westwood still are making mowers so do you have the approximate year of your mower & I will see if we can dig up a parts list.
Something seem wrong with that deck.
#8
C
clicon357
Thanks.
Little finger? No, grab pulley with a gloved hand and it takes some effort with tight spots to rotate them.
Westwood kindly sent me a PDF manual and spares list. I could make available here if any use?
C
clicon357
With the blade brake off and the belt off you should be able to spin the blades with your little finger.
If this can not happen the spindle has too much resistance
I am still a bit confused about that deck
It is very rare to have a 3 pulley set up without a spring loaded tensioning pulley in there somewhere.
Unfortunately the only West wood I service has no deck and is used to tow a cart.
Westwood still are making mowers so do you have the approximate year of your mower & I will see if we can dig up a parts list.
Something seem wrong with that deck.
Thanks.
Little finger? No, grab pulley with a gloved hand and it takes some effort with tight spots to rotate them.
Westwood kindly sent me a PDF manual and spares list. I could make available here if any use?
#9
B
bertsmobile1
B
bertsmobile1
You won't be able to post the IPL on here because of file size limits.
I have found the owners manual on the Westwood web site to confirm the belt run & adjustments.
It seems that there was a counter rotating deck as well as the mulching one you have which explains the bad belt run as the other deck has 2 deck belts and a double pulley which would have the PTO belt running at a better angle.
#10

tom3
tom3
How about a couple more pictures of the mower. Curious about this machine, never heard of one. Inquiring minds........
#11
B
bertsmobile1
B
bertsmobile1
A UK manufacturer that did not get gobbled up by the EU Global Garden Products ( formally known as Stiga ) conglomerate and according to their web page , now part of Ariens .
When Husqvarna split off it triggered a massive reorganization of the EU lawn & garden factories .
Husqvarna bought a lot of their contract manufacturers so you had the same situation as the USA when Husqvarna bought AYP .
So all of the smaller factories had to either merge or become uneconomic .
IF you want to get an idea of just how many brands were made in Europe then go to Ebay Italy, France or Germany and search for mowers
#12
C
clicon357
Common as muck in these parts. This one was a freebie for me. They will literally be lying abandoned pretty much in peoples gardens.
C
clicon357
How about a couple more pictures of the mower. Curious about this machine, never heard of one. Inquiring minds........
Common as muck in these parts. This one was a freebie for me. They will literally be lying abandoned pretty much in peoples gardens.
#13
C
clicon357
C
clicon357
Well...the repaired mower deck is good but the mower gearbox isn't well. Factory filled apparently with (mega expensive) Bentonite lubricant and then the casing sealed with "Permatex 599 Ultra Gray". It changes up/down OK but it feels like something is slipping in the gearbox, it's SO slow. Belt is not slipping.
Went off to a neighbours yesterday to rescue the seemingly good gearbox from an abandoned mower that hit a stump and has the front end all bent up. (Social distancing on a 5 acre plot is not an issue btw ). There were in fact two similar mowers there. Both in a very sorry state. I had permission to turn both over on their bonnets.
The salvaged Peerless (American made) "crash" gearbox c/w wheels/tyres removed and back home sitting atop my mower after a cursory jet wash and attempt to pump the tyres up. The nuts and bolts that attach the gearbox have been put in an open topped plastic bag and lowered into the citric acid barrel for it to work it's magic. Of the two salvaged wheels one pumped up OK to 10psi the other is all cracked and leaking like a sieve.
![[IMG] [IMG]](https://live.staticflickr.com/65535/49878695112_fcfb4d43ff_b.jpg)
Typically as is the case with these mowers the n/s rear wheel was seized solid on the shaft of this salvaged gearbox/axle. (People will bin them just for this). Lucky tbh it's not both wheels stuck as was the case with my mower under the tarp. I managed way back to get the o/s wheel off as it's that you have to remove to access the brake caliper. I still have to get the n/s off of mine, not done as its a mission but I'll have to now. Sods Law the stuck wheel on the salvage axle had the perished tyre. The stuck wheel on my mower has the good tyre!
So that was one problem to sort. Sat it upright with copious amounts 3 in 1 & penetrating oil on the end of the shaft hoping it'd seep down. Left it a couple of hours then the stuck wheel came off after some persuasion involving a pair of trestles, two pieces of 4x2, a drift and a hammer. Actually easier than with the gear box in situ. Shafts all emery clothed and lubed. Bosses in the citric acid bath.
![[IMG] [IMG]](https://live.staticflickr.com/65535/49879405191_219c83b6dc_b.jpg)
Next problem:
The gear change rod attaches to this lug atop the gearbox (yellow gearbox filler bung just behind):
![[IMG] [IMG]](https://live.staticflickr.com/65535/49878374471_4031909a5a_b.jpg)
That won't move for me to check the gear changes until I can un-seize the brake which is solid.:
![[IMG] [IMG]](https://live.staticflickr.com/65535/49878379176_ef366b2878_b.jpg)
It was this that stumped me for a while on mine until a mate in the States kindly sourced me a new caliper from over there. That's on, working a treat and all lubed up on my mower with the now suspect gearbox. Needs to likely come off and go on this salvaged one. The problem is the aluminium caliper and two fixing bolts etc become "one" through the corrosion. Last time I sheared the heads of both bolts I'm pointing to. Again I've lubed it up with penetrating oil and I'll come back to it.
Just waiting for the brake to free up! Might end up barrowing it to another neighbour and trying his oxy torch on it if MAPP gas doesnt help.
Tried getting the rusted pulley off the gearbox but the circlip just disintegrated and the pulley wouldn't budge. More penetrating oil, more waiting, can't find my really big gear puller either!
#14
C
clicon357
C
clicon357
Before deciding to change the gearbox I propped the rear of mine up on axle stands then took the rear o/s wheel off exposing the brake / clutch. Started her up and changed gear. You can see the shaft speeding up/slowing down as you change gear. All looks good.
However...when driving, 1, 2, 3 & 4 are so slow its painful. 5th gear shows promise but it sort of kangaroos a bit. If you hold the gear select lever down a tad it goes faster in 5th gear and doesn't kangaroo. I wonder if there's wear where the gear linkage attaches to the gearbox. Or whether i need to adjust the brake rod?

#15
B
bertsmobile1
B
bertsmobile1
The box is a constant mesh, not crash and changing gears while moving will usually break the tabs off the shift keys .
When this happens, the mower usually goes nowhere but occasionally will drive very slow till the last remenants of the keys are ground away .
The shift keys and most gears are still available.
Next time you pull a brake off, leave the arm in place and just undo the caliper.
The bolt in the center is for adjusting the brake
Chances are your old box will be repairable at a reasonable cost.
Get your gear greas from a tractor or farm supply shop it will be a lot cheaper from them than an auto parts store or mower shop.
Bentonite grease is what most axel greases are, the stuff that is yellow/brown in colour & smells bad.
#16
C
clicon357
Thanks for that. Not sure if it helps in diagnosing but I propped the rear of mine up on axle stands then took the rear o/s wheel off exposing the brake / clutch. Started her up and changed up / down through the gears. You can see the shaft speeding up/slowing down as you change gear. All looks good.
However...when driving, as in under load 1, 2, 3 & 4 are so slow its painful. 5th gear shows promise but it sort of kangaroos a bit. If you hold the gear select lever down a tad it goes faster in 5th gear and doesn't kangaroo. I wonder if there's wear where the gear linkage attaches to the gearbox. Or whether i need to adjust the brake rod?
C
clicon357
The box is a constant mesh, not crash and changing gears while moving will usually break the tabs off the shift keys .
When this happens, the mower usually goes nowhere but occasionally will drive very slow till the last remenants of the keys are ground away .
The shift keys and most gears are still available.
Next time you pull a brake off, leave the arm in place and just undo the caliper.
The bolt in the center is for adjusting the brake
Chances are your old box will be repairable at a reasonable cost.
Get your gear greas from a tractor or farm supply shop it will be a lot cheaper from them than an auto parts store or mower shop.
Bentonite grease is what most axel greases are, the stuff that is yellow/brown in colour & smells bad.
Thanks for that. Not sure if it helps in diagnosing but I propped the rear of mine up on axle stands then took the rear o/s wheel off exposing the brake / clutch. Started her up and changed up / down through the gears. You can see the shaft speeding up/slowing down as you change gear. All looks good.
However...when driving, as in under load 1, 2, 3 & 4 are so slow its painful. 5th gear shows promise but it sort of kangaroos a bit. If you hold the gear select lever down a tad it goes faster in 5th gear and doesn't kangaroo. I wonder if there's wear where the gear linkage attaches to the gearbox. Or whether i need to adjust the brake rod?
#17
B
bertsmobile1
B
bertsmobile1
Do yourself a favour and download a copy of the Tecumseh/ peerless technical manual .
You can get one from the K & T parts Warehouse Web page .
IPL's are a bit harder to come across.
When there is no load on the rear wheels the box works as it should but when there is load on it, it slips.
Split your box apart, it is not difficult but it helps if you give it a good scrub or bath from a pressure washer first .
There are leverage points cast into the box , just take your time and you will be fine.
When you see how they work it will be blindingly obvious but trying t explain them never works.
They ae quite similar to a motorcycle gear box which is also constant mesh .
Last time I did a set of shift keys I charged the customer $ 30 ( Aus ) for the keys & $ 100 for labour .
I use lighter grease in the box which I buy from Tractor Supply in 25 L drums for the same price as 2 x 1kg tubs from Super Cheap & Nasty Car parts.
THe top pulley can stay in place as it comes out with the top cover and once apart you can get stuck into the shaft to remove the pulley.
THe pulley is still available as is the input shaft although I got mine from the UK because including freight it was 1/2 the price of buying retain in OZ .
Getting back to the brake,
The disc is on a spline and works on the layshaft.
With the belt on the input shaft and the layshaft locked then the diff also locks so one wheel turns in each direction so you go nowhere .
The pins do rust solid in the caliper over time
I generally take the caliper off then press them out while applying liberal amounts of heat.
On the subject of head, liberal aoplications to the box should free up those caliper bolts as well
Install with some never sieze to prevent them rusting in solid or replace with marine grade stainless ones.
The pins need to be polished smooth the lubed with some dry lithium chassis grease , CRC does the best then allowed to dry off before assembly .
Also make sue yu do not loose the shim which sits behind the inner brake pad ,
#18
C
clicon357
C
clicon357
Managed to shear one caliper bolt flush with the gearbox ? Other one sheared but enough sticking out so I can get mole grips on it. It'll move left/right a bit but won't turn. Drilling / retapping now. Off to find the easy outs. At least I can see the gearbox ID plate that's still on there.
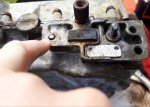
Edit: Just sheared the second bolt!

Edit: Just sheared the second bolt!
#19
C
clicon357
C
clicon357
Well this mower is fighting me all the way!
Seems that although the gearboxes are the same, my original one has tapped fixing holes into the ali gearbox. On the donor gearbox these are pilot drilled (I hope to the right size) and not tapped as the gearbox attaches a different way.
And to boot they're UNC. Just hoping I have the taps!
This is mine. One bolt came out OK. The remaining one feels like it's going to shear. Not the end of the World as it'll be sheared in the duff gearbox which is to go on the bench for stripping and I can drill it out and re tap at my leisure.
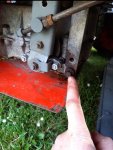
This is the donor, holes need tapping:
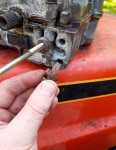
Managed to drill out the caliper bolts and re tap. I think they're 1/4" 20tpi UNC originally. Got some plated 1/4" BSW bolts (off an old bunk bed) that fit near as and what I used on the brake on my own mower, cut down as projecting studs with a couple of nuts on.
I presume when splitting these gearboxes it's ok to use one of the instant gaskets like this?
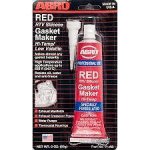
Seems that although the gearboxes are the same, my original one has tapped fixing holes into the ali gearbox. On the donor gearbox these are pilot drilled (I hope to the right size) and not tapped as the gearbox attaches a different way.
And to boot they're UNC. Just hoping I have the taps!
This is mine. One bolt came out OK. The remaining one feels like it's going to shear. Not the end of the World as it'll be sheared in the duff gearbox which is to go on the bench for stripping and I can drill it out and re tap at my leisure.

This is the donor, holes need tapping:

Managed to drill out the caliper bolts and re tap. I think they're 1/4" 20tpi UNC originally. Got some plated 1/4" BSW bolts (off an old bunk bed) that fit near as and what I used on the brake on my own mower, cut down as projecting studs with a couple of nuts on.
I presume when splitting these gearboxes it's ok to use one of the instant gaskets like this?

#20
C
clicon357
C
clicon357
Looking at re tapping the bolts into the gearbox this morning.
The removed bolt measures 5/16" outside diameter. Teeth per inch is 18. So from my trusty Zeus book that makes it 5/16" BSW or 5/16-18 UNC. This Peerless gearbox being American I'd go for it being UNC.
(BSW have 55deg and UNC 60deg thread angles. In the rough and ready circles it's considered acceptable to interchange bolts as all but the 1/2" size interchange from memory. 1/2" BSW is 12tpi, 1/2" UNC is 13tpi. There's other differences in the thread tips are pointed on one and rounded on the other).
I only have taps for UNC but likely to be one bolt down anyway if (when) this next one shears.
The holes in the gearbox measures up 9/32" as far as I can tell. So 7.32mm in new money.
Recommended tapping hole sizes are 6.4/6.5mm for BSW and 6.5/6.6mm for UNC. I'm guessing these holes have grown a bit through corrosion.
I'm tempted to drill out the 7.32mm holes to 8.2mm and re tap at M10 metric coarse. Not sure that tapping M8 will be "grippy" enough in there. M8 requires a 6.8mm tapping hole and I'm at 7.32mm.
Thinking M10 will be a bit "chunkier".
Or I get some UNC bolts...
Any thoughts to push me one way or the other?
#21
B
bertsmobile1
B
bertsmobile1
Bolts are loaded in shear so thicker would be better
Don't forget the stabilizing brackets at the front that prevent it from rotating
Don't forget the stabilizing brackets at the front that prevent it from rotating
#22
C
clicon357
C
clicon357
Old gearbox off but I sheared 3 out of the 4 bolts holding it on. I'll drill out and retap.
The same bolt positions on the new gearbox I've drilled a bit bigger and tapped M10.
I had to swap the gear change plates over as different lengths.
Next I need to swap the pullies over as mine, the more orange, less rusty one has an extra hole for the pto to drive the grass box flails. Remaining wheel still refusing to budge!

#23
B
bertsmobile1
B
bertsmobile1
Support the wheel on some saw horses or similar with the box hanging down
heat the wheel and hit the axle with an air hammer
The 20,000 small blows a minute work a lot better than 1 big bang from a heavy hammer
Be careful not to flare the end of the axle
You can lay full body weight on the hammer before you pull the trigger.
I do them on mower with a pair of scissor jacks between the wheels & the body to put some weight on the axle and take the load off the internals .
Some have taken better than a day to shift.
They really rust on tight
#24
C
clicon357
Thanks. Did exactly that on the first wheel that was seized on the new axle minus the air hammer. The wheel stuck now is on my original axle and proving tougher!
At the mo it's upended on saw horses and after copious amounts of penetrating oil the wheel dish is now filled with citric acid solution at about 19:1, water to powder. I keep a 72 litre barrel of the stuff on the go as my goto for stress free derusting. All the removed gearbox fixings are in there along with the tray that protects the u/side of the gearbox.
Strictly speaking I don't need to take this wheel off right now as I have the new gearbox with shafts all cleaned up and two wheels (holding air) sitting there ready to go. I will though so I can drill and tap out the sheared bolts. Still need to swap the pullies.
This "new" gearbox. Do you reckon I should spilt the casing now for any reason or just give it a little more lubrication with say some 75/90 on top of whatever's in there?
Was thinking to sand blast and paint the casing?
C
clicon357
Support the wheel on some saw horses or similar with the box hanging down
heat the wheel and hit the axle with an air hammer
The 20,000 small blows a minute work a lot better than 1 big bang from a heavy hammer
Be careful not to flare the end of the axle
You can lay full body weight on the hammer before you pull the trigger.
I do them on mower with a pair of scissor jacks between the wheels & the body to put some weight on the axle and take the load off the internals .
Some have taken better than a day to shift.
They really rust on tight
Thanks. Did exactly that on the first wheel that was seized on the new axle minus the air hammer. The wheel stuck now is on my original axle and proving tougher!
At the mo it's upended on saw horses and after copious amounts of penetrating oil the wheel dish is now filled with citric acid solution at about 19:1, water to powder. I keep a 72 litre barrel of the stuff on the go as my goto for stress free derusting. All the removed gearbox fixings are in there along with the tray that protects the u/side of the gearbox.
Strictly speaking I don't need to take this wheel off right now as I have the new gearbox with shafts all cleaned up and two wheels (holding air) sitting there ready to go. I will though so I can drill and tap out the sheared bolts. Still need to swap the pullies.
This "new" gearbox. Do you reckon I should spilt the casing now for any reason or just give it a little more lubrication with say some 75/90 on top of whatever's in there?
Was thinking to sand blast and paint the casing?
#25
B
bertsmobile1
B
bertsmobile1
Well it is easier to split the cases now than it will be after it goes in.
And yes some fresh lubricant never hurts because the old stuff gets dry & hard if it remains in there at all.
A lick of paint never hurt anything
And yes some fresh lubricant never hurts because the old stuff gets dry & hard if it remains in there at all.
A lick of paint never hurt anything
#27
C
clicon357
Cheers
Is the aim to remove the old stuff?
Is there an ideal viscosity for the lubricant?I've got access to various oils and greases, open gear greases that behave a bit like oil etc!
C
clicon357
Well it is easier to split the cases now than it will be after it goes in.
And yes some fresh lubricant never hurts because the old stuff gets dry & hard if it remains in there at all.
A lick of paint never hurt anything
Cheers
Is the aim to remove the old stuff?
Is there an ideal viscosity for the lubricant?I've got access to various oils and greases, open gear greases that behave a bit like oil etc!
#28
B
bertsmobile1
You can not use a jaw puller on a welded pressed or spun pulley as it will destroy it.
You need to be able to clamp on the boss under the pulleywhci you can do some times using progressively bigger gear separators till the pulling points are outside the pulley rim
B
bertsmobile1
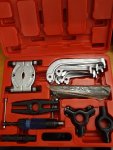
Borrowing this hydraulic puller that should make short work of the pulley changeover!
View attachment 52368
You can not use a jaw puller on a welded pressed or spun pulley as it will destroy it.
You need to be able to clamp on the boss under the pulleywhci you can do some times using progressively bigger gear separators till the pulling points are outside the pulley rim
#29
B
bertsmobile1
No idea of what it should be like.
If there are seals then it was a liquid If there are no seals then it was a heavy grease.
When I open a box I can generally work out what was in there originally bu the color & smell
B
bertsmobile1
Cheers
Is the aim to remove the old stuff?
Is there an ideal viscosity for the lubricant?I've got access to various oils and greases, open gear greases that behave a bit like oil etc!
No idea of what it should be like.
If there are seals then it was a liquid If there are no seals then it was a heavy grease.
When I open a box I can generally work out what was in there originally bu the color & smell
#30
C
clicon357
C
clicon357
I'd like to get this wheel off the axle and the orange pulley off the old gearbox:

I've tried MAPP gas on the pulley as per this video:
No dice. I think the gearbox in the video is larger than mine. No way can I get a bit of 4x2 in there! (Pretty sure in the video he whacks his finger at about 6.10 in...ouch!)
Tried the gear puller but it started bending the pulley flanges as predicted by @bertsmobile1
Going to try supporting the pulley on solid steel bars sat on metal builders stands rather than my plastic saw horses.
As for the wheel, that's equally stuck. Filled up the well with citric acid solution which has at least derusted the end of the shaft.
#31
B
bertsmobile1
B
bertsmobile1
use a pick or small drill bit to dig the grot out from the end of the key way in the axle
Then tap the key with a punch see if you can shift it about 1/2" to 1/4"
This will then allow a pathway for whatever goo you want to use to break the rust bond
Then tap the key with a punch see if you can shift it about 1/2" to 1/4"
This will then allow a pathway for whatever goo you want to use to break the rust bond
#32
C
clicon357
C
clicon357
I win!
Finally got the pullies off both gearboxes!
Heat with MAPP gas, rub a candle over the shaft and the wax gets sucked in. Beat it with a bfo knocking stick and punch. Repeat.
Pretty sure having it all on the sturdier trestles / angle iron helped. Exactly as the lad showed on YouTube tbh.
The orange, better looking pulley took two evenings. The rusty as Hell pulley on the new gearbox about 2 minutes!
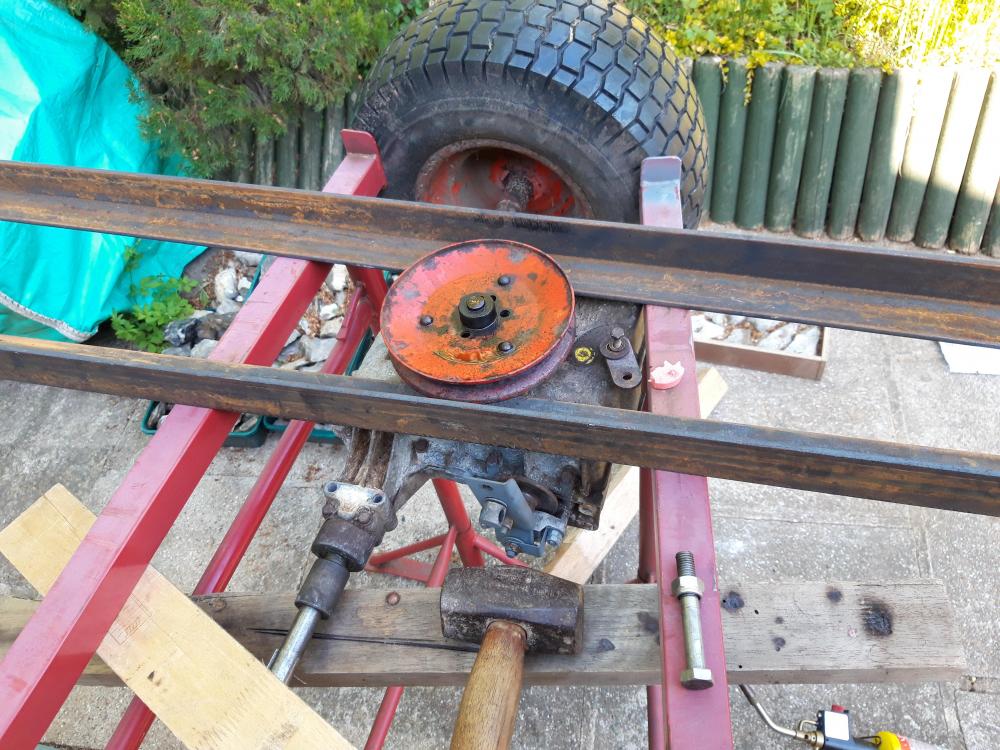
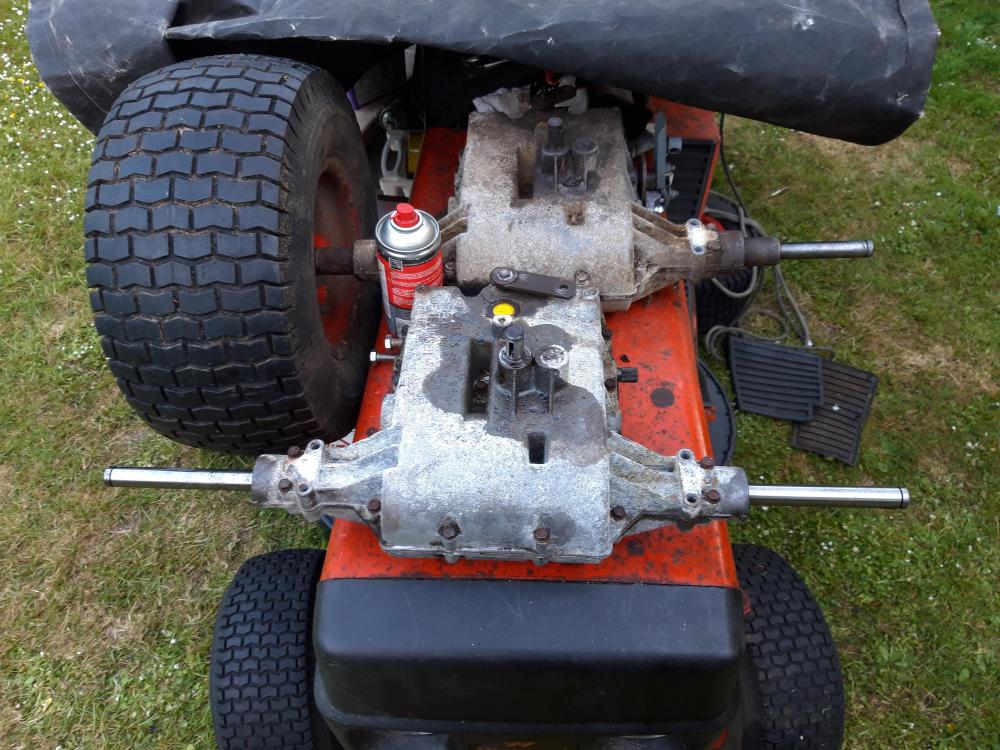
Pullies degreased and in the citric acid bath to derust now.
Still got to do the wheel ?
Finally got the pullies off both gearboxes!
Heat with MAPP gas, rub a candle over the shaft and the wax gets sucked in. Beat it with a bfo knocking stick and punch. Repeat.
Pretty sure having it all on the sturdier trestles / angle iron helped. Exactly as the lad showed on YouTube tbh.
The orange, better looking pulley took two evenings. The rusty as Hell pulley on the new gearbox about 2 minutes!


Pullies degreased and in the citric acid bath to derust now.
Still got to do the wheel ?
#33
B
bertsmobile1
B
bertsmobile1
FWIW I have been using Liquid Electrical Tape for decades on battery terminals to stop them corroding.
last year I started putting it on the top of pulleys like those where they can fill with water to prevent water getting in.
This is on top of the never seize or grease on the shaft.
last year I started putting it on the top of pulleys like those where they can fill with water to prevent water getting in.
This is on top of the never seize or grease on the shaft.
#34
C
clicon357
That's a good shout. Best I have here is Denso tape.
C
clicon357
FWIW I have been using Liquid Electrical Tape for decades on battery terminals to stop them corroding.
last year I started putting it on the top of pulleys like those where they can fill with water to prevent water getting in.
This is on top of the never seize or grease on the shaft.
That's a good shout. Best I have here is Denso tape.
#35
B
bertsmobile1
B
bertsmobile1
This stuff is a rubberised paint.
If you can remember the soft plastic cover on sharp tools that was obviously applied by dipping, then this is the stuff.
It will peel right off when you need to replace the pulley but sit there water tight.
The problem with anything that is fluidin any way is certripidal forces will cause it to get tossed off.
#36
C
clicon357
C
clicon357
The wheel still refuses to budge. Time to admit defeat and take a trip to use the neighbours oxy I think!
Took the gearbox shield out of the citric acid bath along with the bolts and gave them a quick coat of zinc and in the case of the guard some VW Brilliant Orange. What original paint wouldn't come off.....stayed on there. Not going for concours! Yes I know the match is way off, yes I know I should have picked a Ford colour! ?
I salvaged the fixings as they're odd sizes to what I usually play with (UNC). They'll get lubed before fitting.
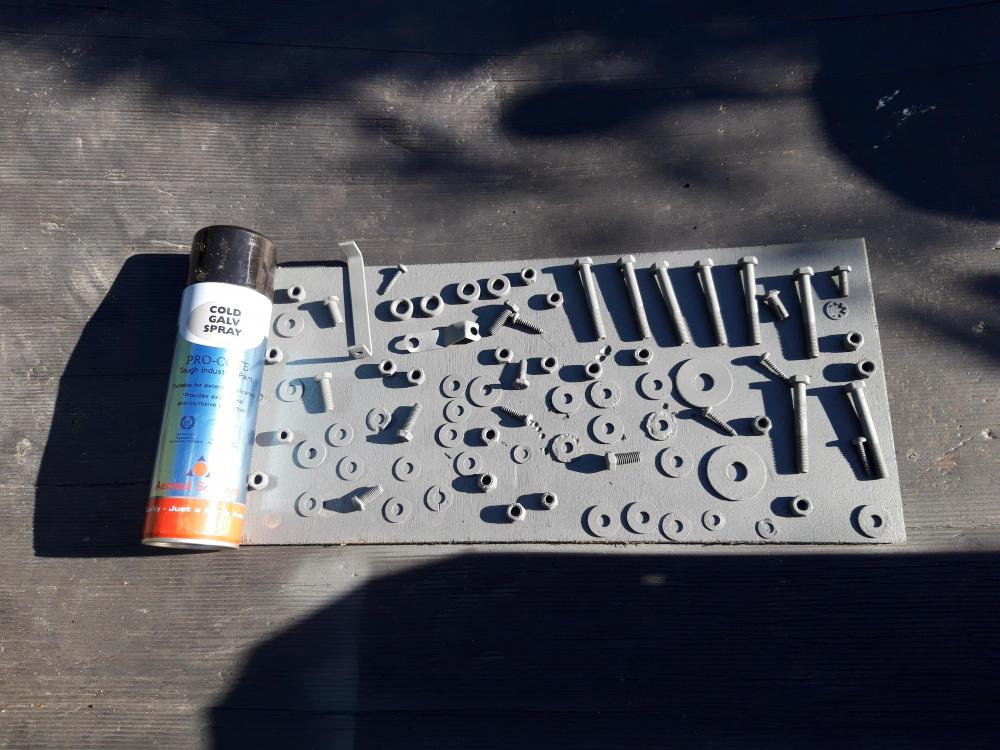
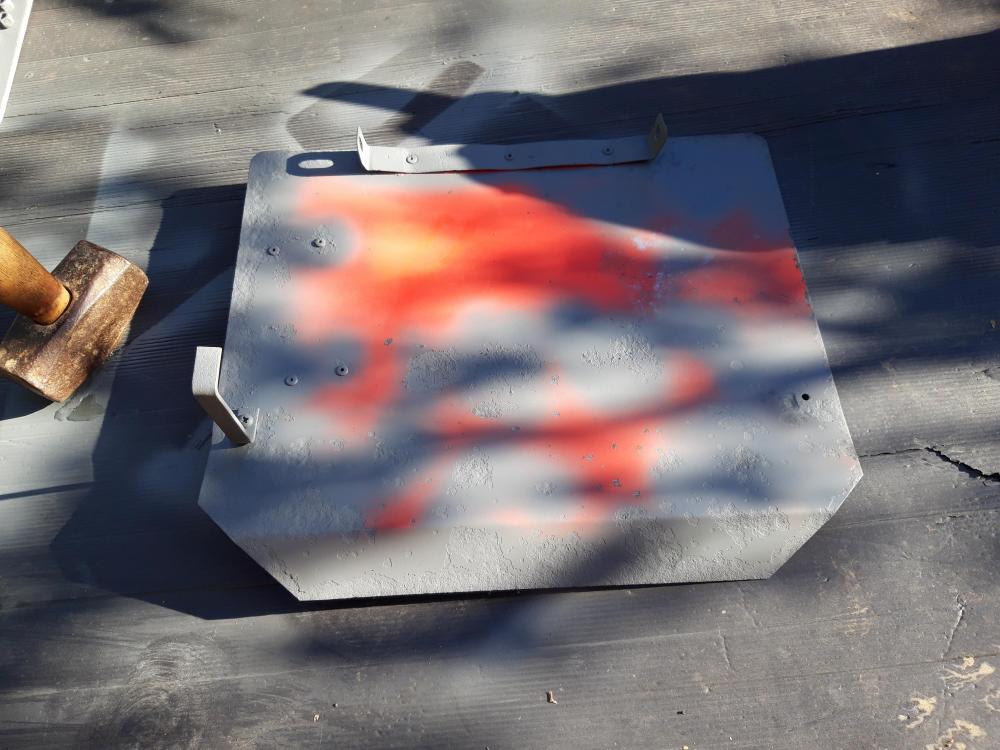
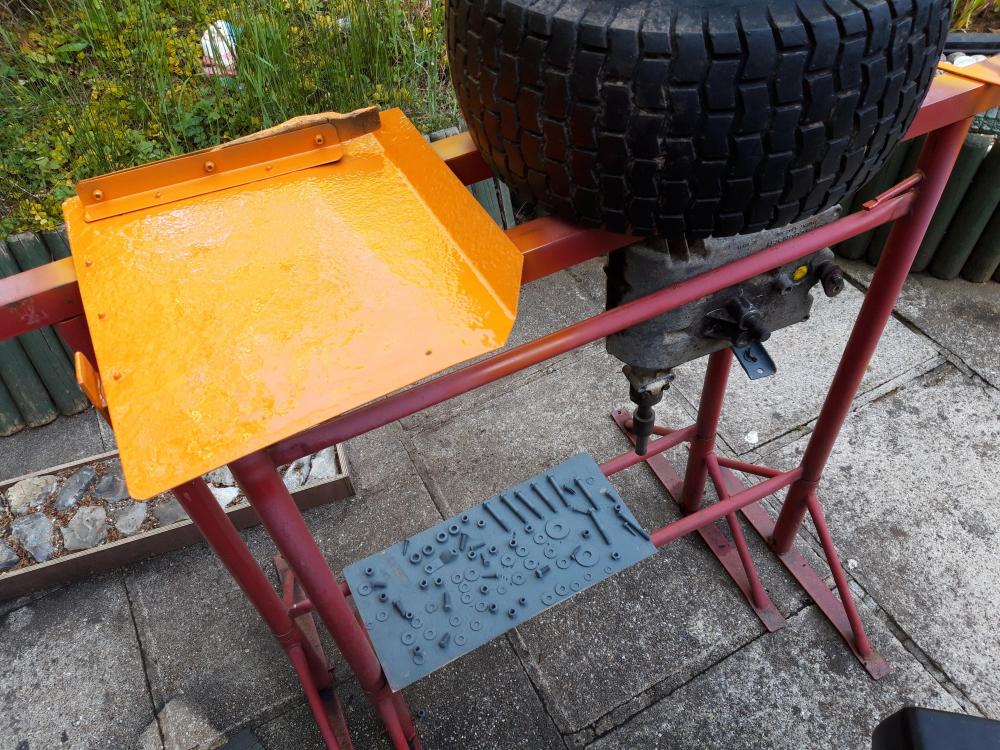
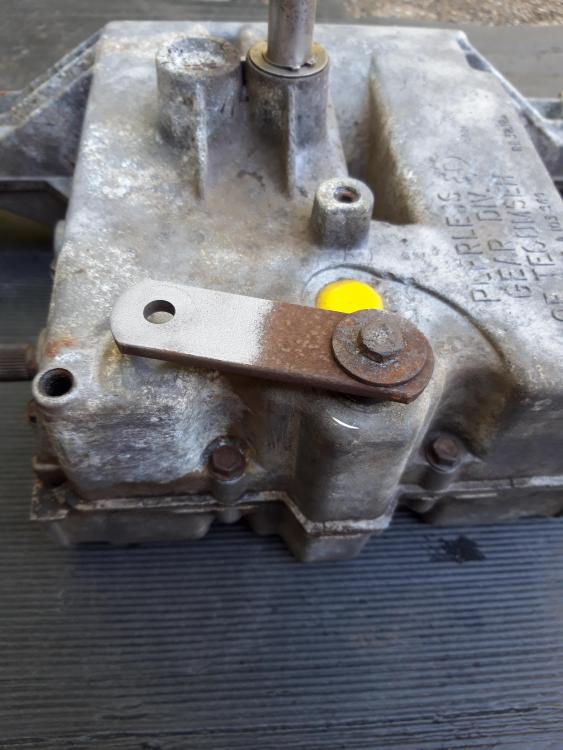
Started sand blasting the gearbox but had very little medium to start with. It's got promise, just look at the two halves on the gearbox lever! I'm not prepared to use ordinary sand either, don't want silicosis!
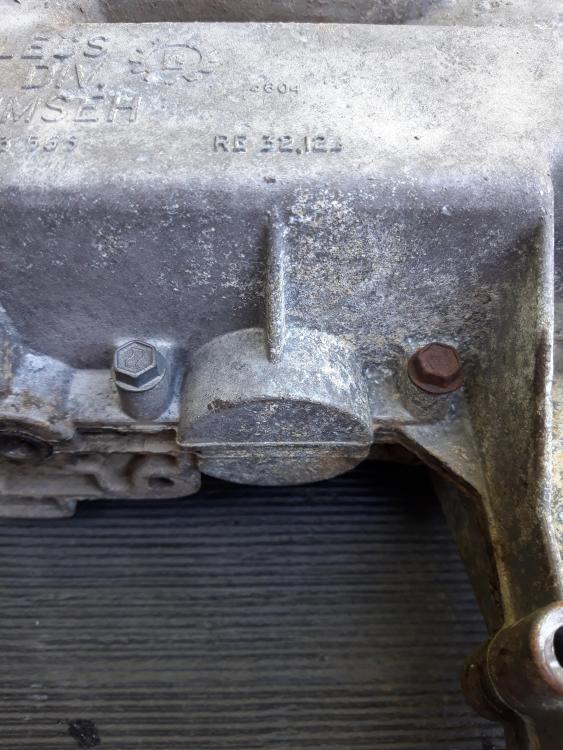
Compare bolts left (blasted) and right (untouched):
Took the gearbox shield out of the citric acid bath along with the bolts and gave them a quick coat of zinc and in the case of the guard some VW Brilliant Orange. What original paint wouldn't come off.....stayed on there. Not going for concours! Yes I know the match is way off, yes I know I should have picked a Ford colour! ?
I salvaged the fixings as they're odd sizes to what I usually play with (UNC). They'll get lubed before fitting.


Started sand blasting the gearbox but had very little medium to start with. It's got promise, just look at the two halves on the gearbox lever! I'm not prepared to use ordinary sand either, don't want silicosis!

Compare bolts left (blasted) and right (untouched):

#37
B
bertsmobile1
B
bertsmobile1
Alloy castings respond well to soda blasting and that is not only cheap but not toxic so no chance of silicosis .
I have been using a soda blaster for 3 or 4 years now on carburettors with great success
I have been using a soda blaster for 3 or 4 years now on carburettors with great success
#38
C
clicon357
Can I ask what kit you use? A mate is interested in DIY blasting his oak beams.
C
clicon357
Alloy castings respond well to soda blasting and that is not only cheap but not toxic so no chance of silicosis .
I have been using a soda blaster for 3 or 4 years now on carburettors with great success
Can I ask what kit you use? A mate is interested in DIY blasting his oak beams.
#39
B
bertsmobile1
B
bertsmobile1
Made a pop bottle soda blaster as per one of those You Tube videos.
Bought a 25kg bag of animal food grade soda ( sodium bicarbonate ) from the local farm supply to see if it works
Works like a dream save for the tendency of the soda to cake, even with a water filter on the air line.
Have not bothered to play with blast pressures, my set up is at 120 psi for the air tools.
Animal feed grade is a little coarser grained than the food grade you buy at the supermarket but not as large as the blast grade from a tool supply.
OTOH it was about 50¢ / kg
Totally by accident I used a bent shaft air duster , cause I had a box full of them bought cheap at a clearing auction.
The bent bit is good as it stops the bottle rotating around the duster shaft and I use a little ( lot ) of hot glue as well to seal it off.
After that it was a case of trial & error
The feed hole is a bit bigger and I am now using a flavoured milk bottle as the wider mouth makes easier to fill.
The bottle pressurizes a little so when you want to stop you have to turn it upside down or you blow 1/2 the contents out .
And because of the same thing, when the soda cakes & stops flowing a quick flick of the trigger will have it cleared .
Just take a bit of getting used to .
Don't know how it would go on wood but really good on plastic and soft metals but needs a dip in boiling water to clean it out
and so I found, a wipe down with slightly acid ( dilute vinegar ) solution if you want to paint over it or the paint does not take.
The stock feed soda also cakes really badly so I seive an ice cream containers worth which is kept sealed so I have some ready to use when needed.
IT has saved me a fortune in cans of carb cleaner & degreaser .
The landlord bought a blasting kit and it will not work with anything other than the expensive blast grade as it clogs badly.
The gravity spray gun type set up works beautifully
#40
C
clicon357
C
clicon357
As I've run out of blast medium here I asked and was quoted locally, £50 to soda blast his piddly little gearbox. FFS!
So I approached the shot blasting and painting outfit that the first company I worked for in 1983 used to used to paint our machines.
Chap down there will do me a 25kg bag of crushed glass shot shotblast media for £20. I'm going to take 2. Should have thought of them first!
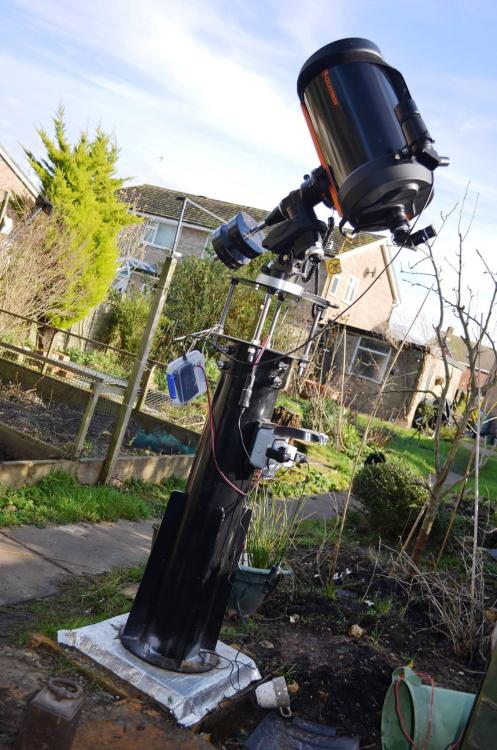
Off topic I know but back in 2016 I had them shot blast, zinc flame spray and 2 pack paint the astronomy pier I designed and built for my brother:

#41
B
bertsmobile1
B
bertsmobile1
Well if you can make a telescope like that , a soda blasting gun should not stretch your abilities.
BE careful with the glass as it will embed into the aluminium if you get too close.
For that price I would be using it myself although I would normally used crushed net shells or soda as I do my blasting outside.
BE careful with the glass as it will embed into the aluminium if you get too close.
For that price I would be using it myself although I would normally used crushed net shells or soda as I do my blasting outside.
#42
C
clicon357
C
clicon357
Off down another rabbit hole.....prompted by @bertsmobile1 ?
As aforementioned I ran out of blasting media for my cheapo Lidl Parkside sandblaster. It's OK but you have to give it a shake now and then.
Then the suggestion here I search out "pop bottle soda blaster" builds on YouTube.
I tried at first putting soda crystals through the Parkside gun but it clogged/didn't work.
![[IMG] [IMG]](https://live.staticflickr.com/65535/49926567698_7e5ab6cff9_5k.jpg)
So...after a rummage in the garage and delve into the collected scrap and I came up with:
- a cheapo blow gun
- a copper tap connector, 15 down to 10mm
- an airline connector
- the plastic bottle the blasting grit came in from Lidl
![[IMG] [IMG]](https://live.staticflickr.com/65535/49927381852_c60a68d944_5k.jpg)
I found if I unscrewed the end of the blow gun then an airline adapter screws in being the same thread.
![[IMG] [IMG]](https://live.staticflickr.com/65535/49927075221_38975c3233_5k.jpg)
I cut the tap connector down roughly at where it narrows down and found that slotted over pretty well, the airline connector.
![[IMG] [IMG]](https://live.staticflickr.com/65535/49926545683_1891b2fe9c_5k.jpg)
I figured if I heated up the copper flare with the MAPP torch I could tap the airline connector into it.....and that's where it all went wrong! The copper bent like a banana!
![[IMG] [IMG]](https://live.staticflickr.com/65535/49927439802_815a7ce8ab_5k.jpg)
Plan B!
Another rummage came up with some heavy wall chrome steel tube.
![[IMG] [IMG]](https://live.staticflickr.com/65535/49927437247_e0a3bb7a44_5k.jpg)
The airline connector taps home nicely into the end of the steel tube. This junction mind is NOT airtight but we have a solution to that I think!
![[IMG] [IMG]](https://live.staticflickr.com/65535/49927136071_137bad0fc3_5k.jpg)
More later!
#43
B
bertsmobile1
B
bertsmobile1
Some people just have to build a better mouse trap don't they 
Sorry I did not mention that a conventional open bucket sand blaster won't work.
The soda is not heavy enough and cloggs the feed line but I see you have already worked that one out for yourself.
The cheapskate soda bottle works because it is essentially gravity fed but the slight pressurization of the bottle aids in clog prevention.
I am guessing that real blast soda will flow a lot better but I won't know that for a couple of years yet till I empty the bag of feed soda
Because the soda is not very agressive you can get away with plain old mechanics rubber gloves remembering that compressed air should never ever be blown onto bare skin.
#44
C
clicon357
I remember the lectures as an apprentice about "gas gangrene" from dirt and grease pushed in through cuts or bodily orifices etc by compressed air ?
C
clicon357
compressed air should never ever be blown onto bare skin.
I remember the lectures as an apprentice about "gas gangrene" from dirt and grease pushed in through cuts or bodily orifices etc by compressed air ?
#45
C
clicon357
C
clicon357
Just read you said sodium bicarbonate! It's washing soda crystals I have here bought for electrolysis derusting. Someone else pointed out that might not be the best blasting medium 
I drew up the assembled gun/adapter/pipe junction in CAD and had my lad 3D print me two halves to clamp the lot together and mount the h.duty bottle the blasting grit came in with my cheapo sand blasting gun from Lidl:
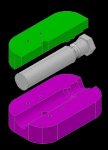
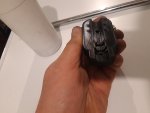
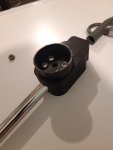
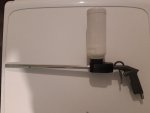
Got to lop the top off the bottle and drill through into the pipe.
Problems might be the internal diameter of the "barrel" is too big and I'll use up media like there's no tomorrow. Also the fact the barrel isn't not secured to the compressor attachment overly other than by the clamping action. A blockage might see it fire off the end!
SWMBO creating a bit over the height of the grass so I've had to put the box back on pre blasting. All bolts new and/or greased up so it should be easy to take off again. I'll test the blaster on the old box before I bench strip that to see what's wrong inside.
I drew up the assembled gun/adapter/pipe junction in CAD and had my lad 3D print me two halves to clamp the lot together and mount the h.duty bottle the blasting grit came in with my cheapo sand blasting gun from Lidl:


Got to lop the top off the bottle and drill through into the pipe.
Problems might be the internal diameter of the "barrel" is too big and I'll use up media like there's no tomorrow. Also the fact the barrel isn't not secured to the compressor attachment overly other than by the clamping action. A blockage might see it fire off the end!
SWMBO creating a bit over the height of the grass so I've had to put the box back on pre blasting. All bolts new and/or greased up so it should be easy to take off again. I'll test the blaster on the old box before I bench strip that to see what's wrong inside.
#46

tom3
tom3
I might be missing something here, probably. But what's to stop the compressed air from blowing back up into the feed bottle? Would need an ejector or something to draw the medium into the air stream. Pretty neat to 'print' out that adapter for sure!
#47
C
clicon357
Won't the mass of medium above in the "hopper" mean that the main, horizontal air flow through the bigger diameter barrel strips the medium as it drops into the barrel?
One way to find out!
C
clicon357
But what's to stop the compressed air from blowing back up into the feed bottle?
Won't the mass of medium above in the "hopper" mean that the main, horizontal air flow through the bigger diameter barrel strips the medium as it drops into the barrel?
One way to find out!
#48
C
clicon357
C
clicon357
As aforementioned I've put the gearbox back on (pre grit blasting / painting it). As much to test it out as get SWMBO off my back!
Brake assembly swapped from my mower to the new gearbox.
Drives forward and back aok. 1,2,3,4,5 and reverse all there after some playing with the gear linkage rod adjuster.
(It even cuts grass but some rattles I need to sort. Might be blade balancing...tba).
The pto wasn't working so the grass flail wasn't rotating. Traced to a plastic tension pulley having seized then the belt having worn a groove in the pulley.
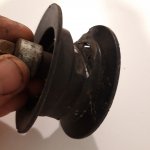
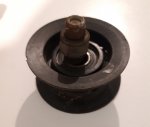
Around £25 plus VAT plus p&p for a new one from a cursory search.
Went back to the two donor mowers and on one was the same tensioner pulley albeit in steel and one big lump of rust. Knocked the loose rust off and into the citric acid bath for a loosen up. Guess the steel one was an earlier incarnation?
Brake assembly swapped from my mower to the new gearbox.
Drives forward and back aok. 1,2,3,4,5 and reverse all there after some playing with the gear linkage rod adjuster.
(It even cuts grass but some rattles I need to sort. Might be blade balancing...tba).
The pto wasn't working so the grass flail wasn't rotating. Traced to a plastic tension pulley having seized then the belt having worn a groove in the pulley.


Around £25 plus VAT plus p&p for a new one from a cursory search.
Went back to the two donor mowers and on one was the same tensioner pulley albeit in steel and one big lump of rust. Knocked the loose rust off and into the citric acid bath for a loosen up. Guess the steel one was an earlier incarnation?
#49
B
bertsmobile1
B
bertsmobile1
If there is nothing inside the air tube to deflect the air stream then it will follow the path of least resistance , ie:- go out the end.
The air rushing past the hole in the bottle will draw soda ot of the bottle according to the venturi effect, exactly the same as air rushing through a carb draws fuel out of the float bowl.
The bottle does slightly pressurize and when you stop the air flow this pressure causes a lot of soda to be pushed out the tube which is why I invert it so the excess air just leaves the bottle.
?
It is virtually the same as those cheap sand blasters where you get a gun with a tube that you place into a bucket of sand.
Cliccon has done a bang up job. I am very impressed
When can we buy one at Wallys ?
#50
B
bertsmobile1
Well the plastic ones would be a lot cheaper than the steel ones to make and it is all about cutting cost not making the mower better.
By the time I get to buy them there is very little difference in price and that would indicate that the logistical costs are a bigger percentage of the final cost than the manufacturing costs,
Rule of thumb is new idlers every 2nd or 3rd belt & change the lot
B
bertsmobile1
As aforementioned I've put the gearbox back on (pre grit blasting / painting it). As much to test it out as get SWMBO off my back!
Brake assembly swapped from my mower to the new gearbox.
Drives forward and back aok. 1,2,3,4,5 and reverse all there after some playing with the gear linkage rod adjuster.
(It even cuts grass but some rattles I need to sort. Might be blade balancing...tba).
The pto wasn't working so the grass flail wasn't rotating. Traced to a plastic tension pulley having seized then the belt having worn a groove in the pulley.
View attachment 52490View attachment 52491
Around £25 plus VAT plus p&p for a new one from a cursory search.
Went back to the two donor mowers and on one was the same tensioner pulley albeit in steel and one big lump of rust. Knocked the loose rust off and into the citric acid bath for a loosen up. Guess the steel one was an earlier incarnation?
Well the plastic ones would be a lot cheaper than the steel ones to make and it is all about cutting cost not making the mower better.
By the time I get to buy them there is very little difference in price and that would indicate that the logistical costs are a bigger percentage of the final cost than the manufacturing costs,
Rule of thumb is new idlers every 2nd or 3rd belt & change the lot
#51
C
clicon357
C
clicon357
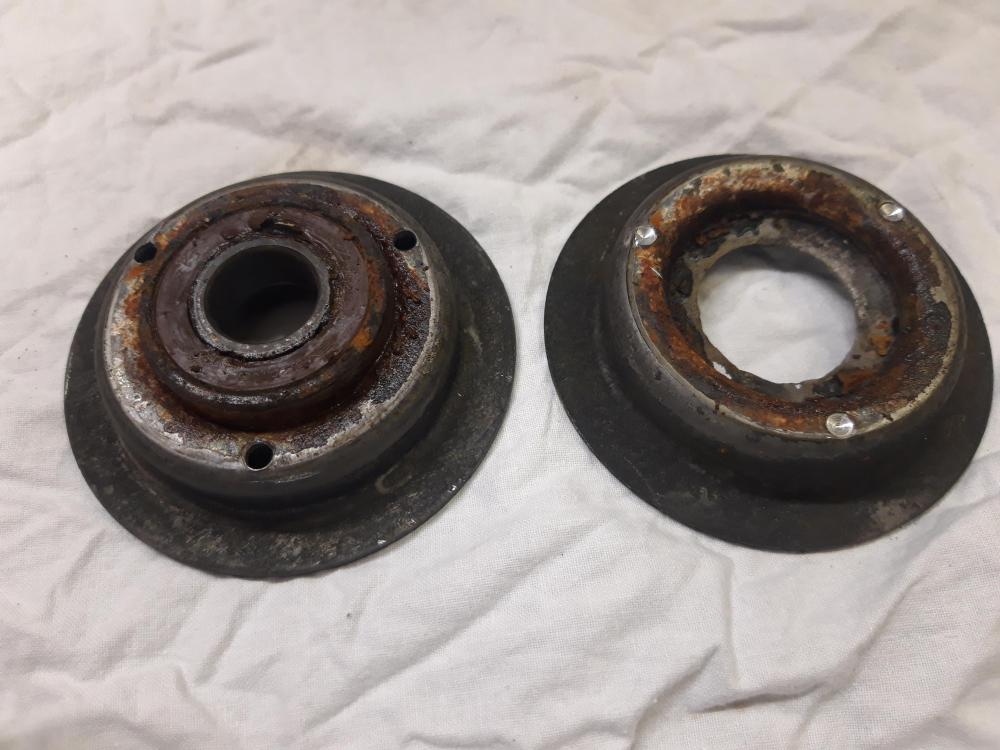
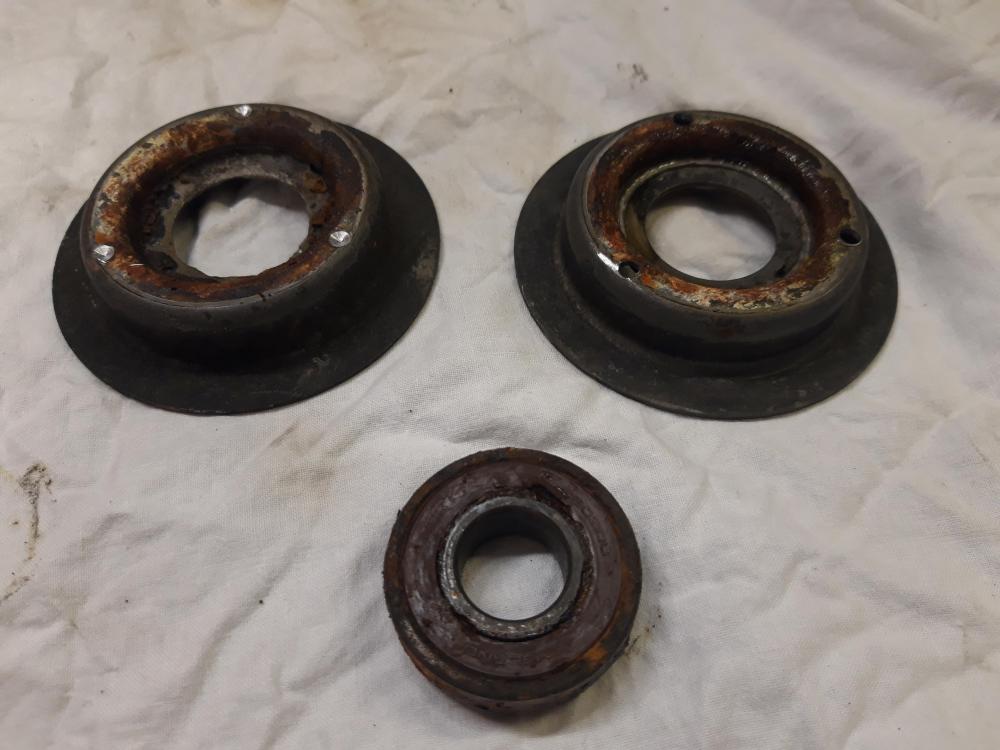
Managed to get the tensioner pulley all apart just now, some more chipping and scraping and back in the barrel for a final 24hr dip. It's salvageable. Bushed rather than a bearing again just like the plastic one. The bush sits in some resilient compound like on a suspension arm. A bit of zinc spray and packing with grease and it'll be good to go.
You should have seen it before it went in the acid!
![[IMG] [IMG]](https://forum.buildhub.org.uk/uploads/monthly_2020_05/20200527_165046.thumb.jpg.1a5da83597fe7e5b6b877254c10d4668.jpg)
![[IMG] [IMG]](https://forum.buildhub.org.uk/uploads/monthly_2020_05/20200527_165059.thumb.jpg.a2bbc1a69f9882cc020ae1024f58840c.jpg)
![[IMG] [IMG]](https://forum.buildhub.org.uk/uploads/monthly_2020_05/20200527_174132.thumb.jpg.9a2d8b0010612e46f43d91c976f4a96c.jpg)
![[IMG] [IMG]](https://forum.buildhub.org.uk/uploads/monthly_2020_05/20200527_175044.thumb.jpg.e7beb30fd08ebcd46d27e97dbb205aff.jpg)
#52
C
clicon357
C
clicon357
Just collected circa 50kg of crushed glass blasting medium:
Had a wander whilst waiting for it to be bagged up. Fascinating (to me anyway):
Oak?
Something from Narnia:
Something from Narnia in front of some really big pipes:
And I thought my sliding gate was big:
Bet they've lost count of how many of these done over the years:
![[IMG] [IMG]](https://forum.buildhub.org.uk/uploads/monthly_2020_05/20200527_152831.thumb.jpg.6d25084cf43acf705aacc0b1b3418da4.jpg)
#53
B
bertsmobile1
B
bertsmobile1
Bad news with that pulley
The bush is not there for spinning on , it is a spacer there to make up the space between the inner race of the deep groove ball bearing and the mounting bolt.
Under the raised section you will find a deep groove ball bearing.
The pulley is made from 2 pressings ( or spinnings ) then bearing is inserted and the two halves are welded together.
Give it a blast with your new glass beads and the spot welds will become apparent.
On some of the mowers the deck idlers can go near $ 100 ( aus ) so it is a reasonable use of time to drill out the welds & replace the bearing.
Most of the aftermarket mower parts suppliers have listings of pulleys by size, so measure yours and find one that is as close to the dimensions as possible
The only ones you need to match are the major & minor diameters and the width of the working face.
All of the others don't matter as you can make a new spacer bush to get near enough to work
#54
C
clicon357
C
clicon357
@bertsmobile1 you're dead on there!
Just out of the acid and what I thought was resilient material around the bush is in fact the blown seal of the bearing. More obvious the other side where the seal is more intact. Pulley is indeed in two halves spot welded together. You can just see one of the 3 spots under the pen tip.
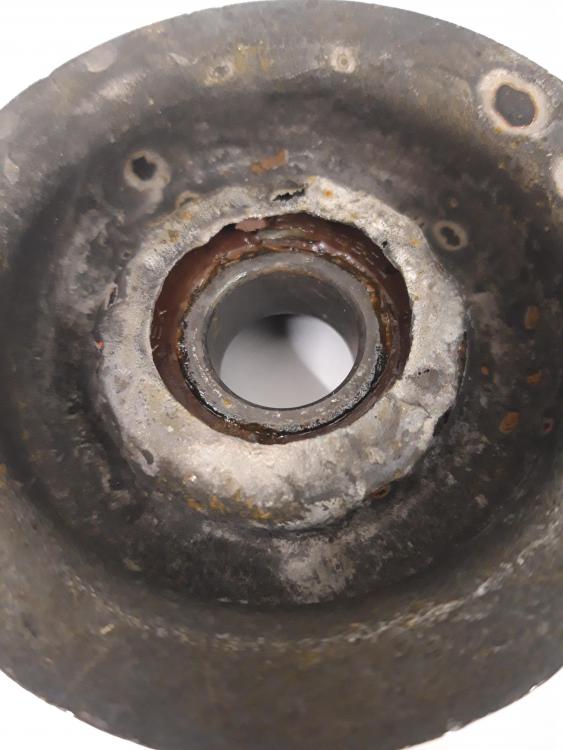
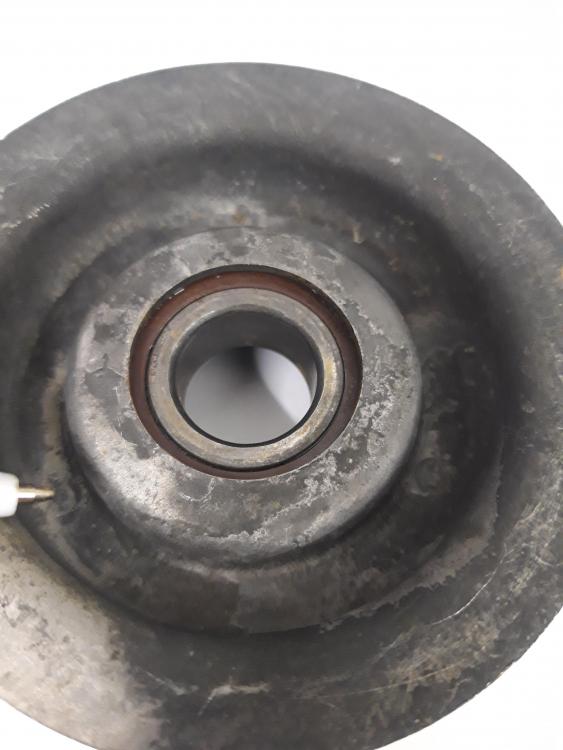
Off to the pillar drill to split it.
Just out of the acid and what I thought was resilient material around the bush is in fact the blown seal of the bearing. More obvious the other side where the seal is more intact. Pulley is indeed in two halves spot welded together. You can just see one of the 3 spots under the pen tip.


Off to the pillar drill to split it.
#56
B
bertsmobile1
B
bertsmobile1
Just be really careful when joining the 2 halves together that the running surface is true to the inner race or the pulley will ossillate
#57
C
clicon357
C
clicon357
It was suggested this might happen. One school said gravity would overcome the potential issue. Another predicted it to a tee. So @tom3 wins tonight's star prize! ?
Little video link:
Seems all too familiar for some reason... ?
The Lidl gun kept clogging. Haven't drained the air tank for a while thinking about it. Really should get an inline moisture trap maybe?
When the (Lidl) gun did work with the crushed glass then the blasting effect was, imo, outstanding:

Picking up a new bearing tomorrow.
Little video link:
Seems all too familiar for some reason... ?
The Lidl gun kept clogging. Haven't drained the air tank for a while thinking about it. Really should get an inline moisture trap maybe?
When the (Lidl) gun did work with the crushed glass then the blasting effect was, imo, outstanding:
Picking up a new bearing tomorrow.
#58
B
bertsmobile1
B
bertsmobile1
Did you cut the bottom off that bottle or did it blow out ?
The bottom must remain on the bottle.
If you go back to the previous posts you will see a mention of the bottle pressurizing which can only happen if it is closed.
The bottom must remain on the bottle.
If you go back to the previous posts you will see a mention of the bottle pressurizing which can only happen if it is closed.
#60
C
clicon357
Whoops...I cut the bottom off.
C
clicon357
Did you cut the bottom off that bottle or did it blow out ?
The bottom must remain on the bottle.
If you go back to the previous posts you will see a mention of the bottle pressurizing which can only happen if it is closed.
Whoops...I cut the bottom off.
#62
C
clicon357
? Luckily it came with two bottles of grit! Just got to find the other one!
Worst case I find another bottle style.
These Lidl Parkside tools like the sand blasting gun are one off special deals. Rarely repeated. Zero chance of spares etc.
C
clicon357
Well you will just have to learn plastic welding or buy another bottle of beads.
? Luckily it came with two bottles of grit! Just got to find the other one!
Worst case I find another bottle style.
These Lidl Parkside tools like the sand blasting gun are one off special deals. Rarely repeated. Zero chance of spares etc.
#63
B
bertsmobile1
B
bertsmobile1
Spares are no problem for me.
Every time I mow the verge I get a big bag full of plastic bottles kindly donated from the passing cars
Every time I mow the verge I get a big bag full of plastic bottles kindly donated from the passing cars
#64
C
clicon357
C
clicon357
@bertsmobile1 evening, still undecided on how/if to repair this corroded half of the pulley. Do you reckon, rather than rewelding it, I could bolt together with x3 M4 bolts?
#65
B
bertsmobile1
B
bertsmobile1
No bolts will not do the job because the 2 halves are too thin unless packed out
Bigger ones are riveted together
rotate the two halves so the holes on one side are mid way between the holes on the other side
Then you have 6 lap joints were you can weld
Note that is real weld using a steel filler rod.
If you try to braize with a brass or bronze rod it will split in use.
Found that out the expensive way
#66
C
clicon357
C
clicon357
Thanks. I was planning to MIG it.
Labouring the point here I know...
I'm struggling to see a way to build up the weld on this rotted half without say inserting a brass round the same diameter as the bearing to weld against.
I drilled the spots out with a 4mm drill. I only went thru one half. Debating whether I could get rivnuts in there. Nothing ventured etc.
#67

tom3
tom3
I'd say it's time to head down to the local supply house and get a new idler. Should be fairly simple to match up one with what you have. Can do just so much with some really moth eaten parts, been there myself many times.
#68
C
clicon357
A bit late.....its back together with rivnuts and M4 bolts! On the mower and first cut done:
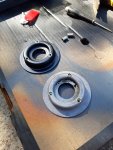
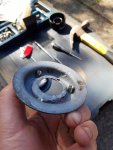
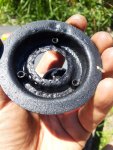
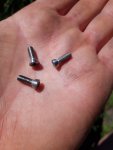
C
clicon357
I'd say it's time to head down to the local supply house and get a new idler. Should be fairly simple to match up one with what you have. Can do just so much with some really moth eaten parts, been there myself many times.
A bit late.....its back together with rivnuts and M4 bolts! On the mower and first cut done:


#69
C
clicon357
C
clicon357
Recovered the dead mower battery! Cleaned with bicarbonate of soda solution about 10% bicarb. That reacts & cleans all the cr@p off the plates. Then filled with 12% epsom salt solution and trickle charged for 24 hours. Up to about 13V and starts the mower no problem. That's with the Epsom salt solution still in and no acid.

![[IMG] [IMG]](https://forum.buildhub.org.uk/uploads/monthly_2020_05/20200527_152625.thumb.jpg.76f63fdf3b16a4c198c4db0e14fff524.jpg)
![[IMG] [IMG]](https://forum.buildhub.org.uk/uploads/monthly_2020_05/20200527_151212.thumb.jpg.9714f90269173b567ea1250fdd51ea18.jpg)
![[IMG] [IMG]](https://forum.buildhub.org.uk/uploads/monthly_2020_05/20200527_151205.thumb.jpg.6f9c9e403f62666424eb89b8cf098e6b.jpg)
![[IMG] [IMG]](https://forum.buildhub.org.uk/uploads/monthly_2020_05/20200527_152342.thumb.jpg.d6645c7d2b9c064c71e5c1252064f0c6.jpg)
![[IMG] [IMG]](https://forum.buildhub.org.uk/uploads/monthly_2020_05/20200527_152940.thumb.jpg.7ddd9a9892d8eab8babc2acfdf37b0c0.jpg)
![[IMG] [IMG]](https://forum.buildhub.org.uk/uploads/monthly_2020_05/20200527_152916.thumb.jpg.837842c6e1e3286b27d1d612cc0a8e7b.jpg)
