The Daily Yardman Thread

NorthBama

Well-Known Member
Joined
May 28, 2014
Threads
9
Messages
936
Re: MTD Yardman Transaxle Rebuild

Super sunny Sunday morning today....gonna hit 90, so I am going out to enjoy the day before it gets too flippin hot

Same here going up to the 90 and high humility. I was out yesterday morning around 11 doing a few things and I was soaked with sweat in only a few minutes. Hope you guys have a good day. Later
 

Roger B

Lawn Addict
Joined
Oct 19, 2016
Threads
11
Messages
1,656
Re: MTD Yardman Transaxle Rebuild

They are more accurately called "rooster comb" shots as some variations have been made from that part of the bird.
The shots do not sit well with anyone who has an egg or chicken allergy...

Nowadays the substance is synthesized which does not affect those with the allergies....

I am hesitant to proceed with the treatment if it has a finite number of treatments, if
following this path brings the necessity of more drastic medical (surgical) options closer....

Ron,

It sounds like that stuff they inject that they say does offer relief for a limited time and that it can only be used for a certain number of times and after that time frame you must proceed to whatever is next. However, I don't think the stuff exacerbates your situation, but it doesn't 'fix' it, it simply covers it up for a while. The damage is already done and eventually something more dramatic must be considered.

Let me know if after you get the shots you find your knee waking up at dawn and crowing to get going... (I'd even take that for a while!) I'd love to find something that would get me though deer season this year.

Roger
 

Roger B

Lawn Addict
Joined
Oct 19, 2016
Threads
11
Messages
1,656
Yamaha Water Pump Kit

Sunday was a beautiful day here, although I understand it got quite hot inland. It hit about 80 here along the coast. After doing some more work on grand daughters curio cabinet, I had to let glue dry, so I decided to start my yearly maintenance on my outboard. I got the engine oil and filter changed, (it's a four stroke), then replaced the fuel and water separating filter and the on-board engine fuel filter. I hadn't bought any spark plugs yet and didn't want to change the lower unit lube until I had replaced the water pump impeller, so I tackled that.

There are some great videos on YouTube showing you what you need to do, so I watched one again and then started removing bolts. The lower unit came off the engine fairly easily and I had made a sort of 'jig' out of a large plastic bucket to support it while I worked on it. I took it in the shop and intended to take pictures as the work progressed, but honestly, it was so simple I never got beyond the first two pictures of what it looked like before I started.

You may note in the first picture a small black plastic pipe at the front of the unit, sticking a few inches straight up. That connects to a pipe like a fish tank air line that runs all the way to the Yamaha gauge cluster. There is a tiny orifice in the leading edge of the lower unit below the cavitation plate, which I would call a "pitot tube". The pipe connects it to a bourdon tube, or some other sort of pressure sensor in the gauge cluster. Water pressure from the lower unit passing through the water at speed pressurizes the air in the pipe and the bourdon tube (or electronic pressure sensor) causes a readout on the gauge to change that pressure information into speed. However, my speedometer hasn't worked for three years or more. The opening in the pitot tube was plugged and although I had made several half-hearted attempts to clear it, I hadn't been successful. With the lower unit removed from the engine I was determined to clean it out once and for all!

Long story-short, I discovered that the tiny orifice penetrated into the lower unit housing a total of nearly 1-1/2" before entering a larger cavity that the plastic pipe was connected to and the entire inch and a half was plugged solid with detritus of one sort or another. I was able to remove it with a tiny drill bit and finally blow HP air through it, so now my dashboard speedometer will probably work again! (I didn't need it as the GPS provides a much more accurate speed readout.)

Feeling quite pleased with myself for having replaced the water pump so easily (I had purchased a "kit" that replaced everything, not just the impeller) and having finally cleaned out the speedometer tube, that I took the lower unit out to reinstall it on the engine full of confidence. That was short lived, as the unit would not slide all the way up against the engine body! I worked at it for over half an hour without making any headway at all and I could not see what was hitting. There are three things that must slide together in order for the unit to go back into position, the drive shaft, which is splined on top, the shift lever, also splined, and the water pump outlet tube, which slides through the white plastic coupling that can be seen in the picture and then into a rubber fitting. I suspected that was the cause of my problem, but as I had greased everything with either marine grease or pure silicone grease (for rubber) I couldn't understand what was holding everything from going together.

Finally in desperation I caught the threads of two of the bolts and gently tightened them until there was quite a strain, when suddenly something went "thunk" and everything slid into place! Hopefully nothing was damaged!! I will water test the engine as soon as I have replaced the spark plugs and lower unit lube.

It was 5:30 PM before I had myself and all my tools cleaned up. So much for the 'easy' job I watched on YouTube!! LOL

Roger
 

Attachments

  • DSCN2053_923.jpg
    DSCN2053_923.jpg
    124.7 KB · Views: 6
  • DSCN2054_924.jpg
    DSCN2054_924.jpg
    133.1 KB · Views: 8

Roger B

Lawn Addict
Joined
Oct 19, 2016
Threads
11
Messages
1,656
Number of Views - Update

Today, we have jumped ahead again and by Oct. 31st the current estimate is 105,142.

Roger
 

willys55

Lawn Addict
Joined
Nov 11, 2016
Threads
8
Messages
1,053
Re: Yamaha Water Pump Kit

Sunday was a beautiful day here, although I understand it got quite hot inland. It hit about 80 here along the coast. After doing some more work on grand daughters curio cabinet, I had to let glue dry, so I decided to start my yearly maintenance on my outboard. I got the engine oil and filter changed, (it's a four stroke), then replaced the fuel and water separating filter and the on-board engine fuel filter. I hadn't bought any spark plugs yet and didn't want to change the lower unit lube until I had replaced the water pump impeller, so I tackled that.

There are some great videos on YouTube showing you what you need to do, so I watched one again and then started removing bolts. The lower unit came off the engine fairly easily and I had made a sort of 'jig' out of a large plastic bucket to support it while I worked on it. I took it in the shop and intended to take pictures as the work progressed, but honestly, it was so simple I never got beyond the first two pictures of what it looked like before I started.

You may note in the first picture a small black plastic pipe at the front of the unit, sticking a few inches straight up. That connects to a pipe like a fish tank air line that runs all the way to the Yamaha gauge cluster. There is a tiny orifice in the leading edge of the lower unit below the cavitation plate, which I would call a "pitot tube". The pipe connects it to a bourdon tube, or some other sort of pressure sensor in the gauge cluster. Water pressure from the lower unit passing through the water at speed pressurizes the air in the pipe and the bourdon tube (or electronic pressure sensor) causes a readout on the gauge to change that pressure information into speed. However, my speedometer hasn't worked for three years or more. The opening in the pitot tube was plugged and although I had made several half-hearted attempts to clear it, I hadn't been successful. With the lower unit removed from the engine I was determined to clean it out once and for all!

Long story-short, I discovered that the tiny orifice penetrated into the lower unit housing a total of nearly 1-1/2" before entering a larger cavity that the plastic pipe was connected to and the entire inch and a half was plugged solid with detritus of one sort or another. I was able to remove it with a tiny drill bit and finally blow HP air through it, so now my dashboard speedometer will probably work again! (I didn't need it as the GPS provides a much more accurate speed readout.)

Feeling quite pleased with myself for having replaced the water pump so easily (I had purchased a "kit" that replaced everything, not just the impeller) and having finally cleaned out the speedometer tube, that I took the lower unit out to reinstall it on the engine full of confidence. That was short lived, as the unit would not slide all the way up against the engine body! I worked at it for over half an hour without making any headway at all and I could not see what was hitting. There are three things that must slide together in order for the unit to go back into position, the drive shaft, which is splined on top, the shift lever, also splined, and the water pump outlet tube, which slides through the white plastic coupling that can be seen in the picture and then into a rubber fitting. I suspected that was the cause of my problem, but as I had greased everything with either marine grease or pure silicone grease (for rubber) I couldn't understand what was holding everything from going together.

Finally in desperation I caught the threads of two of the bolts and gently tightened them until there was quite a strain, when suddenly something went "thunk" and everything slid into place! Hopefully nothing was damaged!! I will water test the engine as soon as I have replaced the spark plugs and lower unit lube.

It was 5:30 PM before I had myself and all my tools cleaned up. So much for the 'easy' job I watched on YouTube!! LOL

Roger
nice job Rob, it's fun right? Although I don't really remember having that much fun with my boat........ever replace the gimbal bearings? loads of fun there
 

willys55

Lawn Addict
Joined
Nov 11, 2016
Threads
8
Messages
1,053
Re: MTD Yardman Transaxle Rebuild

tried real hard to do things yesterday, hit 91 degrees by lunch time and I just couldn't get anything done....however I have one hell of a farmers tan
 

willys55

Lawn Addict
Joined
Nov 11, 2016
Threads
8
Messages
1,053
Re: MTD Yardman Transaxle Rebuild

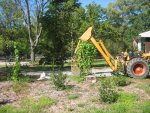
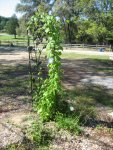
IMG_5572.jpgIMG_5569.jpgI planted holly bushing and a few rose bushes this spring after I took down the trees and they are all doing well...need to get a dump truck load of mulch tomorrow
 

Ronno6

Lawn Addict
Joined
Apr 8, 2016
Threads
24
Messages
1,933
Re: MTD Yardman Transaxle Rebuild

Hey, Roger,
What Yamaha OB do you have??
I used to have a 50HP Hi Thrust on a pontoon boat back in Fla.
I still have the spare prop............... I believe it is a 13.5 x 17
It needs a new home.
 

Boobala

Lawn Pro
Joined
Feb 15, 2015
Threads
200
Messages
7,000
Re: MTD Yardman Transaxle Rebuild

Hey Goomba, I'm NOT trying to rain on your parade BUT, when I worked in the marinas and overhauling OUTDRIVES, ( mostly OMC & VOLVO's I have worked on some EATON and MERCRUISER ( UuuuullK Cruiser) (LOL ) I THINK I remember on some units , BEFORE you "marry" the lower unit to the upper housing , you have to make sure the lower unit is in FWD gear, and the gearshift in the boat had to be in FWD gear also, Sorry it's been 40 plus years since THOSE days, and I don't have a clue about any of the models after 1981, just thought I'd mention it, and suggest you find a manual so you can double check, sometimes a thunk is good, but I'd hate to see ya have to re-do the job over after you install it on the boat . I've been busy helping the wifey with winter clean-out ( purge all the schitt to make room for more schitt )..( LOL )
well you guys act INTELLIGENT while I'm gone , bring no disgrace to this terrific thread we have goin !! ..:laughing:..:laughing:
 

BlazNT

Lawn Pro
Joined
Apr 26, 2012
Threads
28
Messages
6,973
Re: MTD Yardman Transaxle Rebuild

97,000 views for Oct 31
 
Top