You are using an out of date browser. It may not display this or other websites correctly.
You should upgrade or use an alternative browser.
You should upgrade or use an alternative browser.
Export thread
Opposed Twin Restoration Project
#1

TylerFrankel1
TylerFrankel1
Hello everyone! I haven't posted here for a while. Back last spring I restored my Troy-Bilt Bronco Tractor and posted a bit about it here. I ended up getting a job as a tech at a local mower shop which I've had for the past 8 months. Between my experiences at the shop and working on my own equipment at home, I've become pretty well-versed in small engine repair. Recently a customer gave us (most of) an opposed-twin engine. It's a model 42A707-1237-01 from 1993. When we got it, the cylinder heads/gaskets and blower shroud were off, starter and ignition coil were missing, airbox/filter housing and cylinder head cooling shrouds were missing, the bolts for the blower housings/shrouds were all missing, 2 head bolts were broke off in the block, some light rusting was present at the tops of the cylinders, etc. Bossman didn't want it (obviously, it's got a lot wrong with it, not worth shop time). I took it with me because I've never worked on an opposed twin and wanted to try a rebuild on it. Problem is, it's missing parts, and since I haven't worked on one before there could be parts missing I don't even know about. I'm creating this thread to share the process for anyone interested and to ask general questions for those knowledgeable about this engine.
I decided to check the internals before deciding whether or not it was worth fixing. I stripped it down and sure enough, everything looks pretty good. I kept track of which piston/rod/rod cap was from the upper and lower cylinders, and where each valve piece came from. The entire inside of the block does have a 'film' of brown crispiness to it as if it was running hot at some point, but the connecting rod bearings/crank journals are beautiful, and the cylinder isn't bad at all. The rings are in good shape. Camshaft is in decent shape. Piston skirts have light scoring, which is odd because the cylinder and rings are in such good shape. Some carbon buildup is present in ring grooves. At the very least I may be able to sell these parts. So far I've been cooking everything in my ultrasonic cleaner, getting parts to look nice. Then I'll order parts that are a bare necessity to get it to crank off some starting fluid:
Starter/bolts, Coil/Bolts, New Crank Seals/Oil Pan Seals.
From there, if it hits off nicely, I'll go through the carb, get the intake pieces and air baffles that I need, etc.
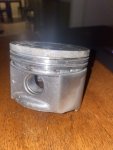
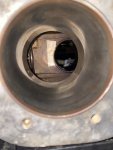
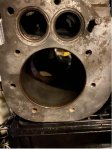
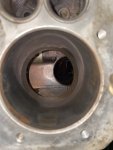
Here are pictures of the block and parts after cleaning (I think the con rods look almost brand new)
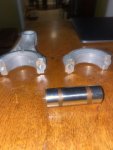
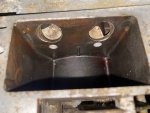
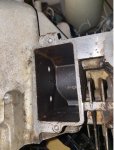
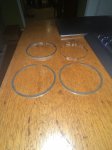

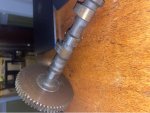
I was also wondering if anyone has advice/thoughts regarding:
The lack of compression release on this engine (seems as though cam has no mechanism to achieve this)
Will the slight markings on the lobes of the cam be an issue? (see photos)
when looking up PTO/Flywheel seals there is an option for a kit that includes "shims", or something. What is that and is it necessary?
Why do only intake valves have seals on this motor? Do they absolutely need replacement? I'm not sure if I can get them still.
How should I best clean the valve guides (assuming they aren't shot, I haven't checked)
Are the upper and middle piston rings the same? There are no identifying marks and they seem to be exactly the same in construction, thickness, etc.
Mixing connecting rod bolts isn't a big deal right (hehe)?
The little tabs on the side of the connecting rod and rod caps are match marks, and the rod is installed in the piston with the "42" number facing the same way as the notch in the piston, and the notch points at the flywheel, correct?
Removing Carbon from Ring Grooves
Removing Brownish film/sludge from sump and engine block
Cleaning intake/exhaust ports and valves of surface rust
Removing broken head bolts/exhaust manifold bolt/bottom air baffle screws
If cylinder honing is necessary (see photos)
What the "extra holes" are in one of the valve spring chambers (see photos)
What size bolts to get for starter/top blower housing/ignition coil
How to remove 'bands' of deposits around wrist pins where no contact was made with either rod or piston (see photos)
I've been using 'super heavy-duty degreaser' mixed 20:1 with water. Just noticed it says "do not leave tools exposed to cleaner for more than 5 minutes." This stuff won't eat through steel parts will it!? Hope I haven't damaged the metals.
Anything I might be missing or forgetting? Parts/procedures necessary?
Thanks!
I decided to check the internals before deciding whether or not it was worth fixing. I stripped it down and sure enough, everything looks pretty good. I kept track of which piston/rod/rod cap was from the upper and lower cylinders, and where each valve piece came from. The entire inside of the block does have a 'film' of brown crispiness to it as if it was running hot at some point, but the connecting rod bearings/crank journals are beautiful, and the cylinder isn't bad at all. The rings are in good shape. Camshaft is in decent shape. Piston skirts have light scoring, which is odd because the cylinder and rings are in such good shape. Some carbon buildup is present in ring grooves. At the very least I may be able to sell these parts. So far I've been cooking everything in my ultrasonic cleaner, getting parts to look nice. Then I'll order parts that are a bare necessity to get it to crank off some starting fluid:
Starter/bolts, Coil/Bolts, New Crank Seals/Oil Pan Seals.
From there, if it hits off nicely, I'll go through the carb, get the intake pieces and air baffles that I need, etc.
Here are pictures of the block and parts after cleaning (I think the con rods look almost brand new)


I was also wondering if anyone has advice/thoughts regarding:
The lack of compression release on this engine (seems as though cam has no mechanism to achieve this)
Will the slight markings on the lobes of the cam be an issue? (see photos)
when looking up PTO/Flywheel seals there is an option for a kit that includes "shims", or something. What is that and is it necessary?
Why do only intake valves have seals on this motor? Do they absolutely need replacement? I'm not sure if I can get them still.
How should I best clean the valve guides (assuming they aren't shot, I haven't checked)
Are the upper and middle piston rings the same? There are no identifying marks and they seem to be exactly the same in construction, thickness, etc.
Mixing connecting rod bolts isn't a big deal right (hehe)?
The little tabs on the side of the connecting rod and rod caps are match marks, and the rod is installed in the piston with the "42" number facing the same way as the notch in the piston, and the notch points at the flywheel, correct?
Removing Carbon from Ring Grooves
Removing Brownish film/sludge from sump and engine block
Cleaning intake/exhaust ports and valves of surface rust
Removing broken head bolts/exhaust manifold bolt/bottom air baffle screws
If cylinder honing is necessary (see photos)
What the "extra holes" are in one of the valve spring chambers (see photos)
What size bolts to get for starter/top blower housing/ignition coil
How to remove 'bands' of deposits around wrist pins where no contact was made with either rod or piston (see photos)
I've been using 'super heavy-duty degreaser' mixed 20:1 with water. Just noticed it says "do not leave tools exposed to cleaner for more than 5 minutes." This stuff won't eat through steel parts will it!? Hope I haven't damaged the metals.
Anything I might be missing or forgetting? Parts/procedures necessary?
Thanks!
#2

TylerFrankel1
TylerFrankel1
Update 01/27/2021
Yesterday I attempted removing the head bolts. Unfortunately, the bad day box had to come out, and I drilled/tapped the holes. I feel pretty good about the result, if I throw some loc-tite on them they should hold just fine. When drilling/fixing the threads, a small chunk came out of the block for one, but it was on the outside/by cooling fins. As long as the bolt isn't stressed badly it shouldn't cause any issues as far as I know. Also got the exhaust manifold bolt extracted. I've filled the oil pan with gas to dissolve the nastiness in there. Also got the cylinders lightly honed.
Regarding the wrist pins, there's not much of a ridge to that 'band' of deposits, and rather than risk damaging the pins by trying to remove the deposits I'm just going to leave them as-is. I ran a wire brush through the intake/exhaust ports and they look pretty good. Today I'm ordering the gaskets/seals that I know I need, as well as the ignition coil. Hopefully, by next week I can have this thing running off starter juice. Then, carburetor work. Ideally, the ultrasonic cleaner brings that around.
#4
B
Born2Mow
>> All valve trains will show some wear. Expecting zero wear would be unrealistic. So you are really trying to determine how much wear and can the engine still operate correctly.
To see if your cam lobes are adversely affected, take a micrometer and compare their heights... intake lobe to intake lobe. That is, measure the height from the base circle to the very top of the lobe. They should be with several thou of each other. Some manuals will give you the ideal factory-new height. You can also look at the lifter faces. They should be smooth with no ridges that can catch a finger nail. They may not be perfectly flat, but a little wear is to be expected. (I would NOT try and re-surface them, as that will only increase the valve lash.)
Another way to tell is to look at the assembled "valve lash" measurements. Inordinate differences between the same function valves will give you a good idea as well. You may even need to mix and match valves and lifters at assembly to achieve consistent valve lash clearances.
Hope this helps.
B
Born2Mow
>> The tops of the cam lobes have the toughest job of all. This is expressly why some engines require an API rated oil of SF/SG, which has the "zinc package". The zinc is an anti-wear compound that was added precisely for cam lobes. (Later on the zinc was removed by the EPA when it was found to have an adverse affect on catalytic converters... which lawn tractors obviously don't use.) So that's the story on cam lobe lubrication and "how & why" wear got there.Will the slight markings on the lobes of the cam be an issue? (see photos)
>> All valve trains will show some wear. Expecting zero wear would be unrealistic. So you are really trying to determine how much wear and can the engine still operate correctly.
To see if your cam lobes are adversely affected, take a micrometer and compare their heights... intake lobe to intake lobe. That is, measure the height from the base circle to the very top of the lobe. They should be with several thou of each other. Some manuals will give you the ideal factory-new height. You can also look at the lifter faces. They should be smooth with no ridges that can catch a finger nail. They may not be perfectly flat, but a little wear is to be expected. (I would NOT try and re-surface them, as that will only increase the valve lash.)
Another way to tell is to look at the assembled "valve lash" measurements. Inordinate differences between the same function valves will give you a good idea as well. You may even need to mix and match valves and lifters at assembly to achieve consistent valve lash clearances.
Hope this helps.
#6

TylerFrankel1
Much appreciated everyone! I'll take a closer look into it. I feel like there's a good chance the camshaft is ok and I'll try and mic it to be sure. I've determined I will need new piston rings after all. 40 thou ring gap! There isn't really a ridge at the top of the bore but there kind of is at the bottom, which means maybe the cylinder is worn too. If I get a micrometer I'll check the bore more precisely. I might get 0.10 oversize rings and remove some material if I need to get the best ring gap. Luckily rings are still available and I can get them through Power Distributors for not too much. My main concern at this point is the valve guides. There is enough clearance in all 4 for the valve to rock back and forth slightly. It's not terrible, but not great. Video:
. My boss said it's probably alright, but that it's a slight gamble. Y'all let me know what you think.
Oh, and I've torn into the carburetor and It ain't pretty... hopefully, it'll come back around. There's a couple of opposed twins laying around the shop I can pull parts from if need be, too.
TylerFrankel1
>> The tops of the cam lobes have the toughest job of all. This is expressly why some engines require an API rated oil of SF/SG, which has the "zinc package". The zinc is an anti-wear compound that was added precisely for cam lobes. (Later on the zinc was removed by the EPA when it was found to have an adverse affect on catalytic converters... which lawn tractors obviously don't use.) So that's the story on cam lobe lubrication and "how & why" wear got there.
>> All valve trains will show some wear. Expecting zero wear would be unrealistic. So you are really trying to determine how much wear and can the engine still operate correctly.
To see if your cam lobes are adversely affected, take a micrometer and compare their heights... intake lobe to intake lobe. That is, measure the height from the base circle to the very top of the lobe. They should be with several thou of each other. Some manuals will give you the ideal factory-new height. You can also look at the lifter faces. They should be smooth with no ridges that can catch a finger nail. They may not be perfectly flat, but a little wear is to be expected. (I would NOT try and re-surface them, as that will only increase the valve lash.)
Another way to tell is to look at the assembled "valve lash" measurements. Inordinate differences between the same function valves will give you a good idea as well. You may even need to mix and match valves and lifters at assembly to achieve consistent valve lash clearances.
Hope this helps.
Much appreciated everyone! I'll take a closer look into it. I feel like there's a good chance the camshaft is ok and I'll try and mic it to be sure. I've determined I will need new piston rings after all. 40 thou ring gap! There isn't really a ridge at the top of the bore but there kind of is at the bottom, which means maybe the cylinder is worn too. If I get a micrometer I'll check the bore more precisely. I might get 0.10 oversize rings and remove some material if I need to get the best ring gap. Luckily rings are still available and I can get them through Power Distributors for not too much. My main concern at this point is the valve guides. There is enough clearance in all 4 for the valve to rock back and forth slightly. It's not terrible, but not great. Video:
Oh, and I've torn into the carburetor and It ain't pretty... hopefully, it'll come back around. There's a couple of opposed twins laying around the shop I can pull parts from if need be, too.
#7

TylerFrankel1
TylerFrankel1
I should also mention that this motor is just being rebuilt for recreational use, and maybe to replace an aging single-cylinder Intek on that Troy-Bilt I was working on last year. That thing has questionable pushrods:
. With that in mind, a slow oil burn is acceptable to me, I regularly check/add/change the oil in all my equipment. So long as I'm not adding a quart every 10 hours or seeing blue smoke constantly I'll be satisfied.
I also did a sort of experiment to check the valve guides: I set the valve in the guide and sprayed WD-40 on the top area of the guide, then waited to see how long it took for the WD-40 to gravity feed down the guide into the valve spring chamber. It took probably 15+ seconds and me moving the valve around a little bit for WD-40 to come out. Not very scientific but it gives me some hope.
I also did a sort of experiment to check the valve guides: I set the valve in the guide and sprayed WD-40 on the top area of the guide, then waited to see how long it took for the WD-40 to gravity feed down the guide into the valve spring chamber. It took probably 15+ seconds and me moving the valve around a little bit for WD-40 to come out. Not very scientific but it gives me some hope.
#8
B
Born2Mow
So the rule is that bores always wear in a conical shape; large at TDC and small at BDC, exactly because of piston ring expansion. This is not the only cylinder wear mode, but it is the main one that is always the first to present itself.
Obviously, you must gap your replacement rings based on measurements taken at the BOTTOM of the bore. Then, you can determine if the resulting gap at the TOP of the bore is still acceptable. When the difference between top and bottom ring gaps becomes too much, then you need to bore the cylinder to restore the conical shape back to a cylindrical shape.
Hope this helps.
B
Born2Mow
Bores wear at the TOP of the stroke because the rings are designed to allow the compression to force the rings outward. This allows the rings to make a much better compression chamber seal. Obviously, the compression decreases rapidly as the piston travels down the bore. So your largest bore diameter will always be about 1/4 inch below TDC. This is why you may have a "ridge".There isn't really a ridge at the top of the bore but there kind of is at the bottom, which means maybe the cylinder is worn too. If I get a micrometer I'll check the bore more precisely.
So the rule is that bores always wear in a conical shape; large at TDC and small at BDC, exactly because of piston ring expansion. This is not the only cylinder wear mode, but it is the main one that is always the first to present itself.
Obviously, you must gap your replacement rings based on measurements taken at the BOTTOM of the bore. Then, you can determine if the resulting gap at the TOP of the bore is still acceptable. When the difference between top and bottom ring gaps becomes too much, then you need to bore the cylinder to restore the conical shape back to a cylindrical shape.
Hope this helps.
#9

TylerFrankel1
TylerFrankel1
That does help, thank you! I didn’t know that. I’ll use a feeler gauge between the rings at the top/bottom to see how different it is. Since there wasn’t a notable ridge at the top I feel like that’s a good sign. If it needs to be bored I’ll quit on this because I already don’t feel great about the valve guides...Bores wear at the TOP of the stroke because the rings are designed to allow the compression to force the rings outward. This allows the rings to make a much better compression chamber seal. Obviously, the compression decreases rapidly as the piston travels down the bore. So your largest bore diameter will always be about 1/4 inch below TDC. This is why you may have a "ridge".
So the rule is that bores always wear in a conical shape; large at TDC and small at BDC, exactly because of piston ring expansion. This is not the only cylinder wear mode, but it is the main one that is always the first to present itself.
Obviously, you must gap your replacement rings based on measurements taken at the BOTTOM of the bore. Then, you can determine if the resulting gap at the TOP of the bore is still acceptable. When the difference between top and bottom ring gaps becomes too much, then you need to bore the cylinder to restore the conical shape back to a cylindrical shape.
Hope this helps.
#10
B
Born2Mow

Typically this is a big pit-fall for guys, especially guys on an internet forum. There are no shortage of "cheerleaders" encouraging you to spend (yours, not theirs) $2000 restoring a machine that has a CraigsList value of $200.
Just my 2 cents.
B
Born2Mow
For a first-time engine builder, the most important thing to keep in mind is that you are NOT building a Formula 1 engine. So what if the guides are a little loose ? OK it may burn a cup of oil between changes. Big deal; oil is VERY cheap. Compare the price of the oil burned versus the price of machine work and new parts to make it perfect. One year from now you'll feel really stupid having spent $800 on a complete valve job.... and then having only used the engine for 3 hours.That does help, thank you! I didn’t know that. I’ll use a feeler gauge between the rings at the top/bottom to see how different it is. Since there wasn’t a notable ridge at the top I feel like that’s a good sign. If it needs to be bored I’ll quit on this because I already don’t feel great about the valve guides...
Typically this is a big pit-fall for guys, especially guys on an internet forum. There are no shortage of "cheerleaders" encouraging you to spend (yours, not theirs) $2000 restoring a machine that has a CraigsList value of $200.
Just my 2 cents.
#11
W
Walt 2002
W
Walt 2002
Well cylinder ridge is caused because that is where the rings stop traveling up the cylinder. Measure the ring gap at the top of ring travel and at the bottom of ring travel. Rings do not travel to bottom of bore, only the piston skirt does. I almost always use .010" oversize rings hand fitting to .008" ring gap at bottom of ring travel. I do that, I do not recommend nor encourage anyone else to do it. Valve guides should be no problem for a Service Tech, easy and cheap to install, shop should have reamer, driver and finish ream.
Never saw a camshaft look like that and I have rebuilt a bunch of these engines. You may want to look at the cams in other engines you say are in shop junk. Check valve seats for tightness, especially the exhaust valve seats.
If there is no coil on engine now to look at, when you install coil, make sure it is right side up. Some are marked, others not. Install with wires heading towards back of engine then they double back under coil and out carb side of engine - common mistake. Also, make sure fuel pump hoses are connected properly, another common mistake. I see you have been pointed to a Service Manual which will be valuable. This engine should be economical to rebuild for your purpose, not figures advanced above.
Walt Conner
#12
W
Walt 2002
W
Walt 2002
Follow up, Yes, notch in piston towards flywheel. Important, I see you removed the rods from pistons, check manual for oil hole orientation to camshaft. You mentioned washers with the oil seals, I didn't see that but likely spacers for adjusting end play IF needed.
Walt Conner
Walt Conner
#13
B
Born2Mow
With all due respect, sir, this a correct but incomplete observation. There is no "cylinder ridge" at the lower end of ring travel... it's only at the top of the bore. And it's formed there because that's were combustion chamber pressure is Maximum.
So it's the force of the fuel combustion pushing the rings outward with tremendous force that causes the extreme wear (and thus the "cylinder ridge") at the top of the bore. It's not simply the presence of the rings, but presence of the rings PLUS immense combustion pressure.
B
Born2Mow
Walt -Well cylinder ridge is caused because that is where the rings stop traveling up the cylinder. Measure the ring gap at the top of ring travel and at the bottom of ring travel. Rings do not travel to bottom of bore, only the piston skirt does.
With all due respect, sir, this a correct but incomplete observation. There is no "cylinder ridge" at the lower end of ring travel... it's only at the top of the bore. And it's formed there because that's were combustion chamber pressure is Maximum.
So it's the force of the fuel combustion pushing the rings outward with tremendous force that causes the extreme wear (and thus the "cylinder ridge") at the top of the bore. It's not simply the presence of the rings, but presence of the rings PLUS immense combustion pressure.
#14
B
bertsmobile1
B
bertsmobile1
There are 2 things that get called ridges
One of them is a carbon build up from oil trapped between the upper ring & the top of the cylinder burning
The other is a groove , just below this which is the maximum ring travel.
You do get an end of wear step at the bottom of the bore but it is nowhere as pronounced as that at the top
Run an inside micrometer down the bore and you will find a tapper from the top to the end of ring travel at the bottom then a step anything from 0,002" to 0,0005"before the unworn section right at the bottom.
#15

TylerFrankel1
She fires right up and runs well after tuning. Needle/seat leaks but since it's a fuel pump, not gravity feed, it's not bad, and I'll put a shut-off inline instead of repairing it because I'm cheap. Now I'm working on piecing together the cooling shrouds that were missing from eBay listings. Having trouble finding a reasonably priced 691197 air shroud for the lower cylinder head. Once I do I'll get the rest put together and it should be about complete. I'm using 10W-30 synthetic at the moment but am considering changing it... I've run it a total of ~4 minutes across several starts (don't want to run long without cooling shrouds) and I realized that synthetic might be a bad idea for breaking in the rings. Anyway, here's a video of it running:
(Warning - it's loud - I still need to create an exhaust for it (another reason I don't run it for more than a minute at a time)
TylerFrankel1
Thanks for the advice! I took it. I went ahead and ordered the parts I needed and didn't worry about the valves. I got new rings, head gaskets, sump gaskets, PTO seals, etc etc. Finished cleaning block/parts... and rebuilt the motor. Found out my starter motor was too weak... bought a new aftermarket starter (and ignition coil). Cleaned carburetor thoroughly and put in a new pump diaphragm.For a first-time engine builder, the most important thing to keep in mind is that you are NOT building a Formula 1 engine. So what if the guides are a little loose ? OK it may burn a cup of oil between changes. Big deal; oil is VERY cheap. Compare the price of the oil burned versus the price of machine work and new parts to make it perfect. One year from now you'll feel really stupid having spent $800 on a complete valve job.... and then having only used the engine for 3 hours.
Typically this is a big pit-fall for guys, especially guys on an internet forum. There are no shortage of "cheerleaders" encouraging you to spend (yours, not theirs) $2000 restoring a machine that has a CraigsList value of $200.
Just my 2 cents.
She fires right up and runs well after tuning. Needle/seat leaks but since it's a fuel pump, not gravity feed, it's not bad, and I'll put a shut-off inline instead of repairing it because I'm cheap. Now I'm working on piecing together the cooling shrouds that were missing from eBay listings. Having trouble finding a reasonably priced 691197 air shroud for the lower cylinder head. Once I do I'll get the rest put together and it should be about complete. I'm using 10W-30 synthetic at the moment but am considering changing it... I've run it a total of ~4 minutes across several starts (don't want to run long without cooling shrouds) and I realized that synthetic might be a bad idea for breaking in the rings. Anyway, here's a video of it running:
(Warning - it's loud - I still need to create an exhaust for it (another reason I don't run it for more than a minute at a time)
#16

TylerFrankel1
TylerFrankel1
In regards to the other posts I've seen here, whatever ridges there may have been are not noticeably present anymore after honing. This motor was internally in pretty good shape, and I have no idea what that cam looked like that for. I think the brown was the result of some weird additive or oil used by the previous owner causing buildup on all the surfaces that were not wear surfaces, (and the non-lobe part of the cam doesn't really wear). That brown discoloration was on most all the parts... but like I said, it runs good.
I work at a reputable shop and we don't have valve reamers anymore. Unfortunately, the parts and labor cost for total engine rebuilds doesn't make economical sense for most customers anymore. If you were to really go through a full rebuild and replace valve guides, bore/hone cylinders, check the crank/piston pins with micrometers, replace rings, grind valves, etc. you'd be looking at well over 5 hours of labor plus parts... which costs more than a new engine or good used engine in most cases. Re-sealing a motor or replacing a crank is usually the most in depth a repair gets before motor replacement. I thought about this repair before committing to it and remembered what YouTuber Taryl Fixes All always says, "It ain't the space shuttle, it's a lawnmower." If my cylinders are slightly out of round or slightly conical, I'll burn a tiny bit of oil and since I'm a mechanic I check that all the time anyway. It'll run good enough. If I was rebuilding a 454 I might feel differently, but these motors are cheap and parts are too. Taking the motor on/off takes 20 minutes. And as of right now it's running great and doesn't smoke (Except briefly at startup because of that leaky needle & seat I mentioned).
Thanks for y'alls thoughts and feedback.
