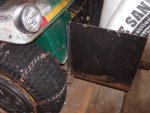
Chains & weights MTD "190-831" snowblower attachment weight box (MTD part 784-5147)

bruceha2000

Member
Joined
Apr 16, 2012
Threads
5
Messages
19
  • / MTD "190-831" snowblower attachment weight box (MTD part 784-5147)
OK, more pictures - whole rig:


Front:
P1130005.JPG


Front angle:
P1130009.JPG


Rear angle:
P1130008.JPG


Side:
P1130004.JPG


Side shot of the "ramps" coming out of the barn. Before I added these, the ball would catch on the floor of the barn on the way in (reversing) or out (forward). I can't get any closer to the barn if running parallel to it or the machine will slip sideways down what you can see isn't a particularly steep slope. Chickens in the background enjoying the January thaw.:
P1130006.JPG
 

metz12

Well-Known Member
Joined
Nov 24, 2012
Threads
49
Messages
892
  • / MTD "190-831" snowblower attachment weight box (MTD part 784-5147)
OK, more pictures - whole rig:


Front:
P1130005.JPG


Front angle:
P1130009.JPG


Rear angle:
P1130008.JPG


Side:
P1130004.JPG


Side shot of the "ramps" coming out of the barn. Before I added these, the ball would catch on the floor of the barn on the way in (reversing) or out (forward). I can't get any closer to the barn if running parallel to it or the machine will slip sideways down what you can see isn't a particularly steep slope. Chickens in the background enjoying the January thaw.:
P1130006.JPG

that is a sweet rig. i want a snowblower front end. do you have the deck for that too?
 

bruceha2000

Member
Joined
Apr 16, 2012
Threads
5
Messages
19
  • / MTD "190-831" snowblower attachment weight box (MTD part 784-5147)
that is a sweet rig. i want a snowblower front end. do you have the deck for that too?

Yep, 50"

All except the sand bags free from a friend at work. Of course "free" takes more immediate money and work than "new". But I've spent no more than a couple hundred dollars on parts (and a whole lot of hours) and I get to learn on a rusty old tractor rather than screwing up a new one :smile:

Check with Google, I'm pretty sure I ran across the same blower presumably new in the box for a few hundred $$. If true, it is a STEAL. Though, unless you live close to the seller, the shipping could be a killer. 350 pounds doesn't ship cheap.

Bruce
 

metz12

Well-Known Member
Joined
Nov 24, 2012
Threads
49
Messages
892
  • / MTD "190-831" snowblower attachment weight box (MTD part 784-5147)
Yep, 50"

All except the sand bags free from a friend at work. Of course "free" takes more immediate money and work than "new". But I've spent no more than a couple hundred dollars on parts (and a whole lot of hours) and I get to learn on a rusty old tractor rather than screwing up a new one :smile:

Check with Google, I'm pretty sure I ran across the same blower presumably new in the box for a few hundred $$. If true, it is a STEAL. Though, unless you live close to the seller, the shipping could be a killer. 350 pounds doesn't ship cheap.

Bruce

I got my craftsman for free too. i only spent around $30 on belts so far. it ran but i have to redo the belts for the deck. i also got my plow for free (spent a couple bucks on wood for the weight box and the plow mount) and my trailer. i made out pretty well.
 

bruceha2000

Member
Joined
Apr 16, 2012
Threads
5
Messages
19
  • / MTD "190-831" snowblower attachment weight box (MTD part 784-5147)
Good deals Metz! I'm not sure how you have managed to spend only $30 on belts, I think every one costs at least that much.

I replaced the transmission fan, it was missing a blade and had chunks out of most of the others. I replaced the plastic flat side idler pulley (with a metal one) on the deck after it blew apart while mowing. Also replaced the missing round rubber pad on the brake/clutch pedal. MUCH easier to push on that than the round metal.

I knew I needed the LONG belt for the blower. The prior owner said he went through those. So I took all the pulleys off and wire brushed then fine sanded the insides of them since there was some rust and I imagine that wears the belt pretty fast. I had to replace the 52" belt (from the PTO) because it shredded when really wet snow froze up behind the fan on the blower while I was clearing the chute. The PTO lever didn't want to engage after I cleared the chute so I stopped the tractor again and made sure there was nothing keeping the augers from turning, without knowing the fan could be a problem. I got the PTO to engage but before I could say "hmm, what is that burning smell?" the belt fried. I got a new belt then figured there had to be SOME reason the old one fried as all the pulleys under the tractor were turning. Cleared all the snow on the fan and any ice I could see, could NOT get the fan to turn even with the long belt off the fan pulley. It was like it had been welded on. In the end, I had to whack the edges of the fan blades with a hand sledge (which isn't easy since you have to reach through the augers to do it!) a goodly number of times, watching little flat chunks of ice drop out as it moved maybe 1/4". Once I finally had all the ice out, it turned easily. Live and Learn! And I did. The fan froze in the exact same manner again but this time I knew that if the PTO lever didn't want to engage, whack the fan blades!! :smile:

I'm wondering how many parts were already replaced on my tractor, maybe erroneously. For example, I find references to the lifting links, the right rear being non adjustable. Mine has 4 adjustable links. Then there is the shape. The pictures all make them look perfectly straight, with no different part number for the 46" deck vs the 50" deck I have (in fact, they show in the tractor diagrams, not the deck diagram) and the front links and left rear link are all the same part number. But my rear links are bent and the right rear so severely that it has chunks out if it where it can hit a pulley. I'm not sure it happens with the mower on, I never noticed until I was putting the blower on. You are supposed to use 2 long springs to pull the rear links forward, presumably out of the way as they are not used with the blower. I couldn't get that to work (maybe because of the bends) so I just took them off for the winter. So now I'm wondering if I am supposed to bang the rear links straight before I put them back on for mowing season.

With regard to raising my weight box a few inches, I'm thinking I can help support it structurally using the "ball hole" in the back of the tractor frame to help anchor the box. I have to do some measurements but maybe a piece of threaded rod through the hole connected with nuts on both sides of the frame, then connected somehow to the back of the box near the bottom and top. That should help (I hope) stabilize the box mounted on new "step up" angle iron supports that go into the blower frame in place of the straight ones. Won't have time for that for awhile though :frown: Would have been a good thing to do in the summer, had I known there would be a problem. I figured since the prior owner used it as it was, it was fine. Didn't think about him using it to blow his paved driveway and the sidewalk in front of his house. BIG difference between that and what I am dealing with.

Bruce
 

bruceha2000

Member
Joined
Apr 16, 2012
Threads
5
Messages
19
  • / MTD "190-831" snowblower attachment weight box (MTD part 784-5147)
Figured I would update with photos (bad as they are) of what I constructed to get the box up higher in case anyone else has a similar problem. I realize I forgot to take a "ground level side shot" for height comparison. I'll update if I get to that.

I took the ball off the plate welded on the bottom back of the box. I left the original box support "rails" as they were and bolted angle iron to the box such that I could put the pins through that and the blower frame where the box rails were originally connected. I was VERY scientific with the decision on how high to raise the box, all sorts of torque calculations and such.

OK, NOT :smile:

I raised it as high as I could, meaning until the original rails ran into the frame of the tractor. I think that was about 4", I forgot to measure. The box had a U shaped fitting of some sort with half inch holes in it mounted up high, facing forward. I have no idea what that was for but I took it off, rotated it 90 degrees and reattached it so one "ear" sits on the tractor frame over the hitch ball hole. It is mostly for added support though the clevis pin through it and the hitch ball hole do add some "anti tilt" factor. To pull the top of the box forward, I used a flat piece of stock with a hole drilled for the convenient (and purpose unknown) pin that comes out of the right side of the tractor just behind the axle. It already had a hole for a retaining pin. The other end is connected to the top of the angle iron on the right side of the box. My 25 year old 3/8" drill hung up when I was drilling the holes and fried just as I unlocked the trigger. New 1/2" drill coming for my birthday :thumbsup: As a result, it is currently held loosely by a too long and too small bolt. But it seems to be doing the job.

I am using only two 70# sand bags, per Metx12's suggestion to use a little less weight. It all seems to be working OK and I didn't get hung up when blowing the last time though I have to admit I wasn't pushing my luck trying to do the areas where I REALLY got hung up before and had to take the box off because I couldn't move at all with it stuck in the snow. Still, it was much better in the "problem but not TOO bad" areas.


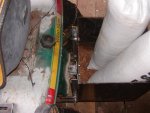
Side connection on the left
P3030048.jpg

"Overall" support picture
P3030049.jpg

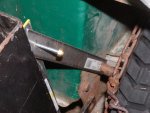
Angle brace.
P3030050.jpg

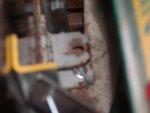
The U shaped thing. Amazing it is clear at all since I couldn't see it through the viewfinder with the lack of light down there.
P3030056.jpg

Bruce
 

metz12

Well-Known Member
Joined
Nov 24, 2012
Threads
49
Messages
892
  • / MTD "190-831" snowblower attachment weight box (MTD part 784-5147)
good job. i'm glad that you didnt get hung up in the parts that you did before. is it riding all right now or is it still weighing down the rear end? i bet about 50lbs in the box would do fine or even less since you have the wheel weights and the chains on your back tires. but whatever works works.
 

1566_Cowboy

Forum Newbie
Joined
Dec 5, 2014
Threads
0
Messages
1
  • / MTD "190-831" snowblower attachment weight box (MTD part 784-5147)
hi could you please post 1 picture of the front of your lawnmower right where the snow blower itself mounts to the frame of the lawn mower because i have same lawnmower only a vanguard twin 20 hp and i was going to buy a snow blower but the snowblower i was going to buy , the last fidget of the model number was different than yours, your snowblower model number is 190-831, and the one i wanted to buy is a 190-032, so i didn't know if it would fit on mine, everything looked pretty much the same though from what i could see.
 

bruceha2000

Member
Joined
Apr 16, 2012
Threads
5
Messages
19
  • / MTD "190-831" snowblower attachment weight box (MTD part 784-5147)
hi could you please post 1 picture of the front of your lawnmower right where the snow blower itself mounts to the frame of the lawn mower because i have same lawnmower only a vanguard twin 20 hp and i was going to buy a snow blower but the snowblower i was going to buy , the last fidget of the model number was different than yours, your snowblower model number is 190-831, and the one i wanted to buy is a 190-032, so i didn't know if it would fit on mine, everything looked pretty much the same though from what i could see.
Sorry, can't do it. I sold it a few weeks ago, replaced with a 54" Craftsman Garden Tractor in the spring and a "just received" 50" Agri-fab blower.

The blower on the old machine was permanently mounted to rails that ran the entire length of the tractor and bolted on in several places. Took a fair bit of finagling and lifting to get it bolted in then another decent effort to attach the "helper" springs up front. Not the sort of thing you want to do often. The weight box slid into the end of the rails, or did until I rigged the "higher position" setup.

I looked up the 032 and I think it is probably more like the Agri-fab I just got. There are mounting plates with shoulder bolts that you attach to the front frame (these can be permanent if you don't care about having the brush guard on in the summer) and the blower is EASY to put on. Pull the tractor up to it, tilt with the long handle and slide the slotted plates on the blower over the shoulder bolts. Two clevis pins and two hairclips hold it in place then you attach the belt to the clutch/idler assembly. The clutch/idler assembly is the only thing that has to come off to use the mower. That part is a WHOLE lot easier to put on/take off as well. The old one had 4 bolts and nuts. The new one has slotted plates that slide over shoulder bolts you install on the frame (they can be left on the tractor when you use the mower) and two special clevis pins with "pull ring" ends, secured with 2 hairclips. No more laying on my back getting it positioned and trying to hold up a fair amount of weight with one hand so I can put in the first 2 bolts. With the "modern design" once the "tractor frame parts" are attached, removing the blower requires only removing the PTO drive belt and pulling 4 hairclips, and 4 clevis pins. Because my blower is lifted by a winch, I also need to pull 2 electrical connections for the winch limit switches and a hairclip and washer where the winch cable attaches to the blower.
 
Top