Kohler CV15-41562 Oil Leak

cruzenmike

Well-Known Member
Joined
Feb 10, 2017
Threads
57
Messages
852
Hello all.

So, I am in the process of doing some fixing up on my new (to me) John Deere LT155 and I am trying to solve an oil leak that the engine is experiencing. When I pulled the engine out of the mower, I went ahead and replaced the oil drain valve and dipstick seal, and then checked and torqued down all of the oil pump and oil pan bolts. I did find an oil pan bolt that was just finger tight so I figured that to be my issue with having oil sitting on the frame around the base of the engine. From what I can tell, this mower has probably been leaking oil for quite a while as I spent a TON of time cleaning up the area around the engine and on the bottom side of the frame where oil, dirt and grass clippings had been stuck to the metal. In doing this cleaning I figured that once I got it back together I would see if there was still a leak.

Well, after about an hour of mowing, I opened the hood to find some oil on the frame near the back side of the engine. I cannot tell where the oil is coming from since the engine is quite clean and the oil is new. From what I can tell, oil is not coming from the crank seal or the valve cover.

I have ordered a tube of Loctite SI 5900 instant gasket which Kohler calls for when re-sealing the oil pan, as well as a new crank seal and oil pump cover o-ring since I will already have the bottom end off. Is there anything else that would or could cause this problem?

Thanks in advance.

Mike
 

ILENGINE

Lawn Pro
Joined
May 6, 2010
Threads
39
Messages
9,865
Once the RTV sealant breaks its bond on the parts is doesn't reseal.
 

cruzenmike

Well-Known Member
Joined
Feb 10, 2017
Threads
57
Messages
852
Once the RTV sealant breaks its bond on the parts is doesn't reseal.
So is safe to say that the RTV that was applied at the factory has subsequently failed and that cleaning and replacing of the sealant should resolve my issue?
 

StarTech

Lawn Royalty
Top Poster Of Month
Joined
Feb 19, 2020
Threads
75
Messages
10,111
Normally I prefer to use an UV dye to find the oil leaks. Oil has a habit of not appearing where the actual leak is.

You will need clean off all of the old RTV, clean the mating surfaces of all the oil residue, (optional apply a surface prep/accelerator, just makes sure the RTV adheres well) , assembly parts while torquing to finger tight, do not add oil at this time as the RTV need time to cure properly (I usually wait overnite) then torque to final spec, then don't to refill the oil. I usually put a tag on the engine as a reminder to add the oil.

EDIT: Don't forget to add oil before starting the engine.
 
Last edited:

cruzenmike

Well-Known Member
Joined
Feb 10, 2017
Threads
57
Messages
852
Normally I perfer to use an UV dye to find the oil leaks. Oil has a habit of not appearing where the actual leak is.

You will need clean off all of the old RTV, clean the mating surfaces of all the oil residue, (optional apply a surface prep/accelerator, just makes sure the RTV adheres well) , assembly parts while torquing to finger tight, do not add oil at this time as the RTV need time to cure properly (I usually wait overnite) then torque to final spec, then don't to refill the oil. I usually put a tag on the engine as a reminder to add the oil.
Thank you for the tips. I was going to do this when I had the engine out earlier this week, but I was hopefully optimistic that the one loose bolt was my problem and that torquing it, and the rest down would fix it. I guess that's what I get for not doing the work when I had the engine out. Now I have to tear the machine half down again. It's really not so bad as I found these rider type mowers pretty easy to disassemble.

I will report back once I get the job done. The sealant wont arrive until sometime this coming week so I will have it done by next weekend if I am lucky.
 

cruzenmike

Well-Known Member
Joined
Feb 10, 2017
Threads
57
Messages
852
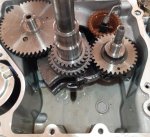
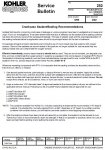
I just wanted to give an update on the oil leak. with the help of my thirteen-year-old daughter I pulled the motor out of the LT155 and started disassembling the bottom end. there was actually quite a bit of oil that was sitting underneath the engine even though it only ran for about an hour and a half. when I inspected the outside of the engine it appeared as if most of the oil was coming from the section of the gasket that is behind the starter on the back left side of the engine. when I took the oil pan off of the block it was surprising how little sealant there was between the two pieces. I have included a picture of the inside of the engine which I believe looks pretty good for being 22 years old. I am just waiting on the parts that I ordered including the loctite 5900 silicone gasket. Meanwhile I have reached out to Kohler for a printout of the service bulletin that the engine service manual references when replacing the gasket. I have not been able to find the service bulletin 252 on the internet anywhere so I'm hoping that Kohler can give it to me or possibly someone on the forum here has access to them and would not mind sending it my way. I will give an update once I am finished.

IMG_20200722_182304_01~2.jpg
 

StarTech

Lawn Royalty
Top Poster Of Month
Joined
Feb 19, 2020
Threads
75
Messages
10,111
sb-252.JPG
Now of course you refill after everything is cured.
 

cruzenmike

Well-Known Member
Joined
Feb 10, 2017
Threads
57
Messages
852
View attachment 53384
Now of course you refill after everything is cured.
Thank you so much. I just wanted to make sure that I do this job correctly. The last bottom end I reassembled (Briggs 24 ELS) used a paper gasket. The service manual for this engine makes reference to a point A and point B which it might get a double bead of sealant. The only issue is that the image in their manual isn't very clear. I have attached what their manual shows and from what I gather, the entire thing gets a single 1/16" bead and the area that is marked gets he double bead?

I think this A - B area is where my leak was happening; where the pan curves to accommodate the starter.

Screenshot_20200723-074538.png
 
Last edited:

StarTech

Lawn Royalty
Top Poster Of Month
Joined
Feb 19, 2020
Threads
75
Messages
10,111
See if this is any better image.
CV15 OIL pan Sealant.JPG
 

cruzenmike

Well-Known Member
Joined
Feb 10, 2017
Threads
57
Messages
852
See if this is any better image.
View attachment 53386
Oh my gosh, that is so much better. Now I can clearly see where this stuff is supposed to go!!

Would Lacquer Thinner for old sealant removal and Acetone for final cleaning be okay to use prior to applying the sealant? Is use of a brass brush absolutely necessary? The two pieces look quite smooth and are pretty clean.
 
Top