Garden

LawnBoy97

Well-Known Member
Joined
May 30, 2012
Threads
33
Messages
223
Man, our garden isn't doin too hot this year. We usually have a jungle of tomato plants, but not this year. Maybe next year I'll have to renovate the soil and try and get it going again. Your crop sure is looking great, though.
 

possum

Well-Known Member
Joined
Aug 5, 2011
Threads
7
Messages
856
I got behind on this thread. Last two years the gardens here were just terrible from the heat and dryness. No amount of city water would make up for it. But this year I see tomatoes big and lots of them on giant plants. Everything is doing better so far this year even the trees look some better. Glad the gardens are doing well for the most part.
 

exotion

Lawn Addict
Joined
Jun 24, 2012
Threads
66
Messages
3,444
I got behind on this thread. Last two years the gardens here were just terrible from the heat and dryness. No amount of city water would make up for it. But this year I see tomatoes big and lots of them on giant plants. Everything is doing better so far this year even the trees look some better. Glad the gardens are doing well for the most part.

I usually put about 1/2" of fresh dark garden soil from my local nursery plus my 50gal compost bin that utilizes grass clippings(herbicide and pesticide free) leaves and food scraps. We get a pretty good harvest however we only have a 30 sqft garden so getting new soil is easy
 
Joined
Jun 8, 2012
Threads
321
Messages
6,749
Man, our garden isn't doin too hot this year. We usually have a jungle of tomato plants, but not this year. Maybe next year I'll have to renovate the soil and try and get it going again. Your crop sure is looking great, though.

We have gotten so much rain this year so the garden is doing great. I'll post a picture of the whole thing when I get a chance.
 

djdicetn

Lawn Addict
Joined
Sep 3, 2012
Threads
12
Messages
2,193

lmf,
Nice garden for the area you planted!! So can you give me "instructions" on how you managed to attach those pictures, grouped and labeled so nicely??? You know the last time I tried to attach pictures of my ZTR light kits they were 'all over the map":0)
If I could post pics like you just did, I'd share some pictures of the raised garden boxes that I built an use for gardening.
 
Joined
Jun 8, 2012
Threads
321
Messages
6,749
lmf,
Nice garden for the area you planted!! So can you give me "instructions" on how you managed to attach those pictures, grouped and labeled so nicely??? You know the last time I tried to attach pictures of my ZTR light kits they were 'all over the map":0)
If I could post pics like you just did, I'd share some pictures of the raised garden boxes that I built an use for gardening.

I remember! :laughing:

Here are the steps:

  • Go to the "Manage Attachments" icon (paperclip) in the toolbar.
  • Add all the pictures you want; it really doesn't matter the order. Before you do that, it would be good to rename them different things so you know what each one is of.
  • Click upload, and wait till they all are uploaded.
  • X out of the attachments window, and get back to the page where you reply to a thread.
  • Now click the little arrow next to the paper clip. Select which one you want, in what order, and it will be in the reply. :thumbsup:
 

djdicetn

Lawn Addict
Joined
Sep 3, 2012
Threads
12
Messages
2,193
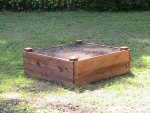
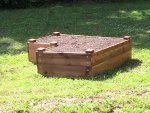
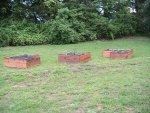
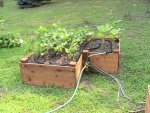
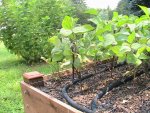
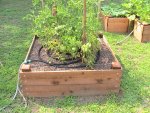
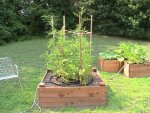
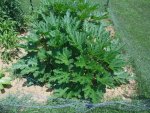
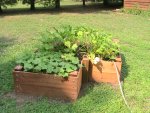
OK, lmf here goes....I used to have a 50' X 25' garden, but tilling and weeding became just too much trouble. So I found these Western Cedar Raised Garden Boxes on the Internet and they wanted almost $1,000 for the kit!! I said...no way, so because they were dumb enough to provide detailed pictures and instructions I just went to a local hardware store bought the 1 X 8 Western Cedar, some 4 x 4 posts and post caps, some lag screws and proceded to build my own for about $200 total in materials using their plans. I even air-stapled landscape fabric(weed preventive) across the bottom of the boxes before placing them and filling them with soil to further prevent weeds. Heck, the Garden Mix soil from the landscaping place cost me more than that to fill them up(around $300). Anyhow, I have found these raised beds to produce well and require very little weeding(and that's pretty easy when it's necessary). I even rigged up soaker hoses in each box, cut and connected garden hose to each one from a three-way hose splitter mounted to the box on the left(see the middle picture of it) and all I do when there's lack of rain is connect the garden hose to the splitter and turn it on for a couple of hours. Below are some pictures of them empty right after building them and then recent pictures of each of them after the plants are producing:
Boxes just after building and filling with soil: Empty_Left_Box.JPGEmpty_Middle_Box.JPGEmpty_Right_Box.JPG
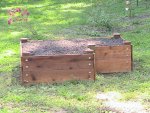
Right after planting: After_Planting.JPG

Left Box With Beans(Royalty Purple Pod) and Okra: Beans_Okra1.JPGBeans_Okra2.JPGBeans_Okra3.JPG
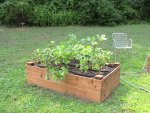
Middle Box With Tomatoes: Tomatoes1.JPGTomatoes2.JPG

Right Box With Cucumbers, Squash & Zucchini: Cukes_Squash_Zucchini.JPG
Let's see how well I followed your instructions.........not bad after following your directions!!! So, what do you guys think about my "city gardening"???
 
Joined
Jun 8, 2012
Threads
321
Messages
6,749
OK, lmf here goes....I used to have a 50' X 25' garden, but tilling and weeding became just too much trouble. So I found these Western Cedar Raised Garden Boxes on the Internet and they wanted almost $1,000 for the kit!! I said...no way, so because they were dumb enough to provide detailed pictures and instructions I just went to a local hardware store bought the 1 X 8 Western Cedar, some 4 x 4 posts and post caps, some lag screws and proceded to build my own for about $200 total in materials using their plans. I even air-stapled landscape fabric(weed preventive) across the bottom of the boxes before placing them and filling them with soil to further prevent weeds. Heck, the Garden Mix soil from the landscaping place cost me more than that to fill them up(around $300). Anyhow, I have found these raised beds to produce well and require very little weeding(and that's pretty easy when it's necessary). I even rigged up soaker hoses in each box, cut and connected garden hose to each one from a three-way hose splitter mounted to the box on the left(see the middle picture of it) and all I do when there's lack of rain is connect the garden hose to the splitter and turn it on for a couple of hours. Below are some pictures of them empty right after building them and then recent pictures of each of them after the plants are producing:

...

...

Let's see how well I followed your instructions.........not bad after following your directions!!! So, what do you guys think about my "city gardening"???

That looks really great! You did a good job building it, and it's a good idea how you have a soaker hose and a hose splitter. :thumbsup::thumbsup:
 
Top