CV740 ... metal shimmer in the oil, 1,500 hours

VRR.DYNDNS>BIZ

Well-Known Member
Joined
Jul 17, 2016
Threads
1
Messages
189
Put it this way
That short block is $ 800
A single con rod is $ 50
There are 2 oversizes available do you should be able to run that engine for the next 50 years
Bugger the top crank or cam journals and the engine is toast .
Pulling the sump off to check will cost nothing but a lower oil seal & sump gasket .

Only you know what sort of money you have availible
I am always one for finding out the problem first then working out what you are going to do
If for instance all that has happened is the seal was driven in too far then a new seal might be the fix or a new sump cover.
Kohler have their service manuals on line
However the last time I tried to download one I was blocked but I did get one from OPE .
So download your service manual, flip through it and see if you are comfortable with what is required.
Good advise here. I would add, only generally 2 metals , ie aluminum or steel, magnetic or not. Additionally, I do not think synthetic an ideal oil for these engines except maybe I might agree for recent 2-3 year production where fits and finishes are better for synthetic. The size of the metal specs indicate most likely from gear train or something recent rather than long term. Do you change the oil filter which should collect this stuff from circulation. That also makes the oil seal press depth a question effecting filtration/circulation.
 

bertsmobile1

Lawn Royalty
Joined
Nov 29, 2014
Threads
64
Messages
24,705
Oil flow to the big end is via the bottom bush and often via the space between the oil seal & the crank
The corner of the machines out area has an oil supply hole
If the seal is pressed in too ar you can block off this hole by about 2/3 thus drastically reducing the oil flow.
Some older engines has a step to seat the seal to but most now days the hole is the sam diameter all the way down..
Governors and automatic decompressors have a habit of falling apart and munching up things.
Right now the only cost for having a look is time , a gasket & a seal
The longer you take the worse it will get
Your mower your decision.
 

fmorelli

Member
Joined
Jul 1, 2018
Threads
4
Messages
22
Oil flow to the big end is via the bottom bush and often via the space between the oil seal & the crank
The corner of the machines out area has an oil supply hole
If the seal is pressed in too ar you can block off this hole by about 2/3 thus drastically reducing the oil flow.
Some older engines has a step to seat the seal to but most now days the hole is the sam diameter all the way down..
Governors and automatic decompressors have a habit of falling apart and munching up things.
Right now the only cost for having a look is time , a gasket & a seal
The longer you take the worse it will get
Your mower your decision.
Alright got the mower out and on the bench today. Pulled the pan. The oil seal is about 1/8" prior to the oil feed, so there is no obstruction. Off-hand I don't see anything obvious though I have not done more disassembly beyond pulling the crankshaft (looks fine).

Just for context again, when I had regasket the motor @ 1,400 hours, I did not remove the crank/rods/pistons. Hatch looked great in the cylinders. Oil at that time was clean and didn't indicate a need to do more. I simply leveled heads, seated valves with paste, and all new/updated gaskets everywhere. Runs well, burns some oil on start. It has 1,500 hours now (+100 hrs since regasket).

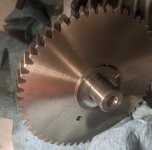
I can see little aluminum flake evidence on the camshaft wheel.

Nothing obvious to take pictures of and share. Any suggestions?
 

Scrubcadet10

Moderator
Staff member
Joined
Sep 24, 2017
Threads
250
Messages
6,441
I hope you cleaned the engine cleaner than Mr.Cleans cleanest room in his house, that valve grinding compound will get anywhere in that engine.
 

fmorelli

Member
Joined
Jul 1, 2018
Threads
4
Messages
22
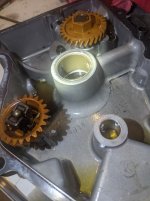
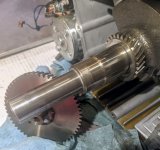
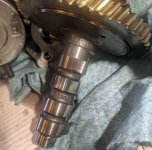
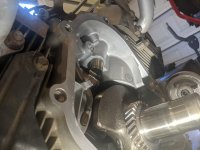
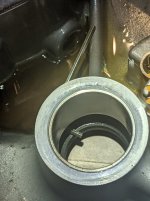
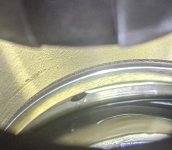
Adding some photos. Best as I can tell all these surfaces look just fine. Note I have a photo of the camshaft gear and you can see small aluminum glitter on it. Last two photos show the oiling hole is clear.

Anyone see any issues in these photos that I'm missing? Do I need to pull the heads and rods next? I don't know if I've got a rod bearing surface being eaten up.

pan.jpg

crankshaft.jpg

cam gear.jpg

camshaft.jpg

tappet.jpg

oiling hole1.jpg

oiling hole 2.jpg
 

350Rocket

Active Member
Joined
Jul 18, 2021
Threads
1
Messages
69
I'm not seeing anything bad. Sure looks clean. At least you got a lot of hours out of it for a modern small engine. Hard to say whether you should dig deeper or just cross your fingers that it keeps going for a while.
 

fmorelli

Member
Joined
Jul 1, 2018
Threads
4
Messages
22
I'm not seeing anything bad. Sure looks clean. At least you got a lot of hours out of it for a modern small engine. Hard to say whether you should dig deeper or just cross your fingers that it keeps going for a while.
Clean most likely due to Mobil 1 being used since new with <100 hour oil changes. My experience is that synthetic oil motors just look cleaner inside.
I'm wondering if the top side of the case/crankshaft can have a problem. Other than that, the only remaining place I think could be an issue is one of the rods at the large end?

That's why I've asked ... before I decide to take the whole motor apart. I feel like I'm chasing a ghost.
 

peteco

Member
Joined
Jun 12, 2014
Threads
3
Messages
45
I think it's aluminium ( from Photo 1 and 6) try a magnet test, may be when you reassemble a little dirt stay inside and do the job. Wash and clean it all and reassemble. No ghost, only mysteries
 

ARN Greencare

Member
Joined
Jan 11, 2019
Threads
0
Messages
15
Upper main bearing is usually first to go in these vertical engines.
 
Top