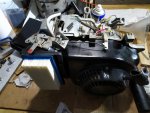
Can you help me to identify a generator motor ?

Mkala

Well-Known Member
Joined
Jan 5, 2019
Threads
5
Messages
140
Probably no help at this point but I had a Briggs vertical engine with some excess crank and cam end play, put it together with no sump gasket, sealed with it with regular blue RTV sealer. Worked fine for the last 10 years or so. Amazing stuff I think. I'd do some preassembly and see how it goes together with no gasket, if all is well I'd use sealer only if the gasket is an unobtainum part. Hammering a gasket might not be the best thing with aluminum parts though. I work in a power plant and we do this all the time on the iron and steel cases though. 3 AM and we need to get something together calls for whatever it takes.

Will try to check the endplay, but looks like it was good. I'm sure this engine has not so many hours, more "damaged" to stay a long time with old oil and fuel.
The problem to check it is the bearing is press-fit in the cranckase and the crankshaft is really tight on this bearing. Will see if heating bearing/cooling crankshaft provide me enough play to mount is with light tap, otherwyse I will only mount it once to avoid risk of destroying bearing.
 

Mkala

Well-Known Member
Joined
Jan 5, 2019
Threads
5
Messages
140
I continue the story :smile: I spend a few minutes on this old generator when I have time.

Submitted a form to have the gasket "on request" but the answer is "5 or 6 month" :laughing:
So I ordered gasket paper and will try my best to make a decent one !

I start to clean the old gasket and noticed the crankshaft can move in the bearing on the flywheel side... so now more worried why it can't in the bearing of PTO side ?
It's cold these days, engine is at a place where temperature is around 0°C. So I tried to heat hup a bit the crankcase cover to about 60°C... this does not solve the problem... was only able to put in 1-2 mm (the bearing is 15mm) and as the bearing make contact with crankshaft, it cool quicly and become quite stuck on.

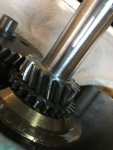
I was able to discuss with a mechanical engineer today, and he told me tolerance are really low: 4-5 microns for this particular assembly ! I asked if it is possible to send it down he say I can try... So I did it ! Started with 180 grit, do a motion to sand it around the shaft (push pull, from each side) and rotate the shaft... Final pass was done with 1600 !

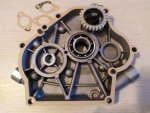
So now it fit... really tight ! Have to wiggle the cover and try to be really straight, and I am able to fit it and open it (slowly, but no hammer required !) So happy, and the finish is not bad :

IMG_1921.jpg

So it's a small step, but I big problem solve for this repair :)
 

Mkala

Well-Known Member
Joined
Jan 5, 2019
Threads
5
Messages
140
I continue my monologue :laughing:

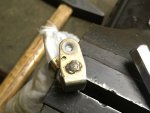
Was able to "crimp" the carburetor plate on his shaft again (was loose before), so no play anymore.

IMG_1925_resized.jpg


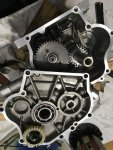
I should receive gasket paper soon, meanwhile I cleaned both surface so I'm ready when I have cut the new gasket :

IMG_1967_resized.jpg
 

Mkala

Well-Known Member
Joined
Jan 5, 2019
Threads
5
Messages
140
Back to this Mitsubishi clone engine after a while ! It's because I was waiting on the gasket cutting (and I was working on the Briggs 5HP anyway).

For the crankcase gasket I know I can cut it by hand or any small hammer (even if it's aluminum block should work), but it's not fun or at least geek :laughing:
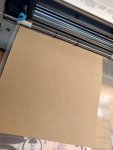
So I searched gasket cutting machine - but of course it's not at all in the budget of DIY for one or two gasket a year... But I remembered a "girl tool" that is used to cut paper for scrapbooking : the Cameo Silhouette cutting machine ! I know someone that as one so I started to take the impression of the crankcase cover, scanned it, and with some computer magic (with some help) was able to have the gasket drawing !

After you import it into the Cameo software and it recognize outline, so you can cut it ! Very neat result :cool:
IMG_20190315_170111_resized.jpg IMG_20190316_181623_resized.jpg IMG_20190316_181645_resized.jpg
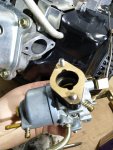
Really happy of the result ! Even if it's not really worth the time invested for such an old engine, when I do things I like to do it the best I (possibly) can - and I learned some interesting things in the process. Done some intake gasket in the same time, as you can see.

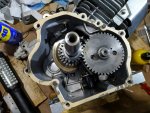
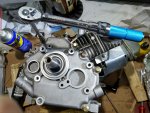
Time to close the cover, torque it to specs (20Nm) with my useful new little torque wrench and fill the crankcase with 0.7l of oil ! After a night, it's oil tight - except near the drain plug that I forgot to tight :laughing: :rolleyes:
So looks ok, have to run the engine for a little while to be 100% sure the seal is perfect.

Next is installation of the carburetor, governor, springs, choke lever, air box and new air filter.
Tested for spark and it's still ok (have to order a new NGK plug to replace the old fouled Torch), I will bolt the engine to a piece of wood and connect it temporarily to a fuel tank. THis way I can test it and adjust it more easily, before reassemble the alternator and than back the frame.

IMG_20190316_202047_resized.jpg IMG_20190316_202834_resized.jpg IMG_20190316_204709_resized.jpg IMG_20190316_215410_resized.jpg
 

Mkala

Well-Known Member
Joined
Jan 5, 2019
Threads
5
Messages
140
Hello,

A little follow up. Not a lot of hours on the engine, but works fine, gasket is fine, no leaks. Frame was painted (not by me, credits to the current owner :) ) and I had to change the flimsy fuel line I put... now I bought the right braided line SAE standard fuel compatible !

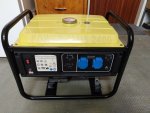
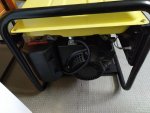
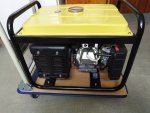
I add full "Genset" pictures to close this topic :
IMG_20200528_145116_resized.jpg IMG_20200528_145127_resized.jpg IMG_20200528_145355_resized.jpg
 
Top