You are using an out of date browser. It may not display this or other websites correctly.
You should upgrade or use an alternative browser.
You should upgrade or use an alternative browser.
Export thread
Can you help me to identify a generator motor ?
#1

Mkala

Mkala
Hello everyone,
First I'm new here, I try to read basics thing but if I do something wrong let me know. I used forum a lot when I was younger, but not so many since...
If this place is strictly reserved to mower let me know I remove my thread...
I like working on small engines, manly doing maintenance on my stuff or repairing older stuff (or helping others).
Main goal is turning wrenches, as Mustie1 says on videos because I like doing this in my free time.
This week I picked up a used not working generator for few bucks. It has the generator capacitor that fail (easy fix) and generous oil leak, crankcase gasket seem the cause (and a few other not interesting issues for now )
)
But my main problem is : I can't identify the engine ! Can someone help me ?
What I now (almost nothing) :
2100-2400w Generator (so I expect 5-6hp engine ?)
Obviously an inclined OHV design
It's not a GX clone (carburetor bolts are at same level)
Only makings I see on case are : "*04040035*" .Not sure of start and end symbol, numbers I am.
Huazhong carburetor (no other markings)
Torch F6RTC spark plug. So if it's the original one some kind of chinese engine I imagine ?
I post some pictures with some measurements. Let me know if you want any other picture, any measurement.
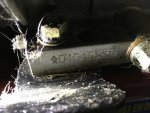
Case marking
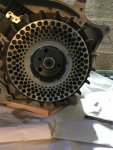
Cast flywheel (plastic fan on Honda and clones usually) and strange starting cup (no holes, but indents)
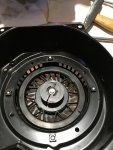
4 screw rewind (3 on most engines)
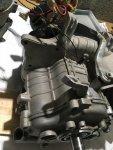
Some reinforcements in block ?
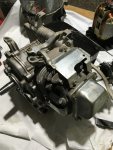
Strange governor arm and governor fixation. It dows not pinch governor shaft, but it hold with two nuts (top and bottom)
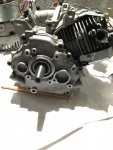
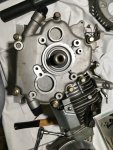
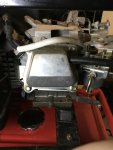
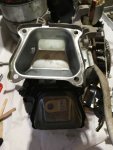
Strange two piece assembly for rocker cover. Was not able to remove the other part to see the rocker, don't want to break more gasket before identifying the engine.
Was not able to remove crankcase cover, it's holding on motor shaft (don't know what to do ?)
Any help and advices greatly appreciated ! If something is not clear let me know english is not my language.
Thanks !
First I'm new here, I try to read basics thing but if I do something wrong let me know. I used forum a lot when I was younger, but not so many since...
If this place is strictly reserved to mower let me know I remove my thread...
I like working on small engines, manly doing maintenance on my stuff or repairing older stuff (or helping others).
Main goal is turning wrenches, as Mustie1 says on videos
This week I picked up a used not working generator for few bucks. It has the generator capacitor that fail (easy fix) and generous oil leak, crankcase gasket seem the cause (and a few other not interesting issues for now
But my main problem is : I can't identify the engine ! Can someone help me ?
What I now (almost nothing) :
2100-2400w Generator (so I expect 5-6hp engine ?)
Obviously an inclined OHV design
It's not a GX clone (carburetor bolts are at same level)
Only makings I see on case are : "*04040035*" .Not sure of start and end symbol, numbers I am.
Huazhong carburetor (no other markings)
Torch F6RTC spark plug. So if it's the original one some kind of chinese engine I imagine ?
I post some pictures with some measurements. Let me know if you want any other picture, any measurement.

Case marking

Cast flywheel (plastic fan on Honda and clones usually) and strange starting cup (no holes, but indents)

4 screw rewind (3 on most engines)

Some reinforcements in block ?

Strange governor arm and governor fixation. It dows not pinch governor shaft, but it hold with two nuts (top and bottom)


Strange two piece assembly for rocker cover. Was not able to remove the other part to see the rocker, don't want to break more gasket before identifying the engine.
Was not able to remove crankcase cover, it's holding on motor shaft (don't know what to do ?)
Any help and advices greatly appreciated ! If something is not clear let me know english is not my language.
Thanks !
Attachments
#2

ILENGINE
ILENGINE
Most likely a lifon, rato, or loncin engine. Most of those chinese engines have their parts diagrams tied to the piece of equipment that the are attached to. Usually little to no support or parts availability. Some honda parts may or may not fit, so Yamaha parts may or may not fit. Some Suzuki parts may or may not fit. And the breather in the picture is a two piece cover. the other cover should be held on by another gasket.
And welcome to the forum, where we discuss anything with a small engine or sometimes a not so small engine.
And welcome to the forum, where we discuss anything with a small engine or sometimes a not so small engine.
#3
A
(Account Closed)
A
(Account Closed)
The carb is Chinese made.
If the only main issue is a side cover oil leak, I'd remove the side cover CAREFULLY.
Clean real well and apply a light coat of sealer on both sides of the gasket and re-assemble...
If you have all the side cover bolts removed, alignment pins can be about the only thing holding the cover on.
Gently tapping at the cover in the "off" direction should do it..
I suspect that engine (as noted, likely Chinese), was a very good engine with the steel flywheel, and other parts built heavier than engines nowadays.
Plz post back how it goes...
#4

Mkala
Mkala
ILENGINE, thanks for your kind welcome and fast reply ! Nice, I should be happy on this forum :biggrin:
Thanks for the make and help provided. Already searched a lot whit lifan, but they look like "pure" Honda GX clone and mine not.
Just tried now with Loncin or Rato (now I know a new brand ) but no luck. I already worked with an EM168 and it was easy to find parts, not this time...
For the breather exactly, first come the cover a removed, than a gasket, than the "internal part" with check valve, than a gasket and the head. But the gasket stick very well, and for now if I am not able to have a gasket set I dont want to destroy them all.
SRTsFZ6, thanks for your help too !
Yes it is an option, only problem is this cover is stuck on the crankshaft. I was able to remove it for one or two millimeter, but now it move with the crankshaft (until the flywheel stop it on the other side).
I think there is a bearing and it is stuck ? How can I remove it without destroying the bearing, the seal and of course the cover ? The bearing should stay in the cover, not on the crankshaft ? Never had this issue, usually the pin are sticking as you say (but I only opened a few engines...)
Thanks for the make and help provided. Already searched a lot whit lifan, but they look like "pure" Honda GX clone and mine not.
Just tried now with Loncin or Rato (now I know a new brand
For the breather exactly, first come the cover a removed, than a gasket, than the "internal part" with check valve, than a gasket and the head. But the gasket stick very well, and for now if I am not able to have a gasket set I dont want to destroy them all.
SRTsFZ6, thanks for your help too !
Yes it is an option, only problem is this cover is stuck on the crankshaft. I was able to remove it for one or two millimeter, but now it move with the crankshaft (until the flywheel stop it on the other side).
I think there is a bearing and it is stuck ? How can I remove it without destroying the bearing, the seal and of course the cover ? The bearing should stay in the cover, not on the crankshaft ? Never had this issue, usually the pin are sticking as you say (but I only opened a few engines...)
#5
B
bertsmobile1
B
bertsmobile1
I see Honda Honda Honda.
However no name Honda on it
SO it is a Chonda ( Chinese Honda copy )
Honda have sued ( and won ) a lot of Chinese companies thus it is not uncommon to find a knock off engine to be a mixture of different model Honda parts.
If there is no name anywhere then it is a made to customer specification knock off engine & replacement parts wil require some Sherlock Homes type sluthing.
No knock off engines come with any servie information other than what is in the handbook.
#6
A
(Account Closed)
A
(Account Closed)
That engine very likely does NOT have a separate roller/needle bearing in the cover for the crankshaft.
Push the cover back in and make sure ALL rust / corrosion is off the crankshaft. It just takes a knats hair to stop that cover from coming off..
Some penetrating oil in the alignment pins, down into the crank and side cover and gentle tapping from all sides to the cover should get things moving. Back and forth, back and forth, definitly do NOT force it hard, it'll give..
Just a side note, roller crank bearings (etc), can be attached to the cover, can be attached (pressed on) to the crank. Just depends on the manufacturer. In any event/style, the case should come off with or W/O the bearing (if equipped)
#7

Boudreaux In Eunice La.
Boudreaux In Eunice La.
All those gaskets can be hand made with some gasket matrial and a ball peen hammer ..... I just made 2 not long ago for a Greyhound engine which is a pre Predator engine...... The 2 I made were the sump gaskets like you want to change........
#8

Mkala
Mkala
Thanks all for help and advices so quickly !
The good new is I was able to open the crankcase cover ! :smile:
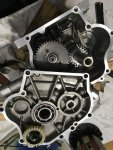
The "not so good" new is that was with unconventional method... as you can see below I had to use the 2mm play I had on the shaft to put some wood spacers between cover and case, gradually increasing thickness and hammer a bolt at the end of crankshaft. This is not good for the bearing but this is what it is... the crankshaft is tight on the bearing : no micrometer but measured 25mm for... a 6205 bearing. And the shaft is really clean, used oil and spray.
So next step will be to find a method to assemble it again ? Think I will put cover in oven at 80-100°Celsius (can't go too hot because of governor gear)
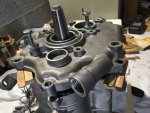
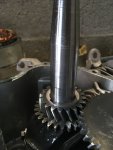
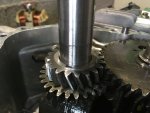
And for the gasket have to clean all very good, after I think to use a sealant like permatex. If someone has a good brand/type as advice let me know.
For model identification, this is a 25mm tapered shaft, has a JLD piston (will try to determine bore and stroke without removing the head) and has an uncommon low oil sensor with wire going under the flywheel. All Chonda I have seen has it on the side, like GX serie. I have a very rare engine I should say :frown:
Carburetor look like Yamaha MZ175, and clone style Sumec. But crankcase like nothing I seen (3 bolt on the cylinder region)
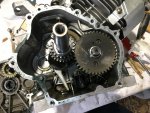
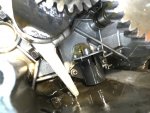
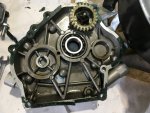
The good new is I was able to open the crankcase cover ! :smile:
The "not so good" new is that was with unconventional method... as you can see below I had to use the 2mm play I had on the shaft to put some wood spacers between cover and case, gradually increasing thickness and hammer a bolt at the end of crankshaft. This is not good for the bearing but this is what it is... the crankshaft is tight on the bearing : no micrometer but measured 25mm for... a 6205 bearing. And the shaft is really clean, used oil and spray.
So next step will be to find a method to assemble it again ? Think I will put cover in oven at 80-100°Celsius (can't go too hot because of governor gear)


And for the gasket have to clean all very good, after I think to use a sealant like permatex. If someone has a good brand/type as advice let me know.
For model identification, this is a 25mm tapered shaft, has a JLD piston (will try to determine bore and stroke without removing the head) and has an uncommon low oil sensor with wire going under the flywheel. All Chonda I have seen has it on the side, like GX serie. I have a very rare engine I should say :frown:
Carburetor look like Yamaha MZ175, and clone style Sumec. But crankcase like nothing I seen (3 bolt on the cylinder region)


#9

Boudreaux In Eunice La.
Boudreaux In Eunice La.
I really don't use permatex or silicone on the sump cover....... Just the gasket will do fine..... On some I do use a very micro thin Ultra black just to hold the gasket in place real good....
#10
A
(Account Closed)
A
(Account Closed)
Well that appears to be a pretty HD engine.
Also, when ready to re-assemble, put the crankshaft (engine) in the freezer for awhile. That'll shrink down the crank a bit and make assembly easier. (I had some parts, same issue as yours, but I left one part out in the hot Florida sun ((warmed it good)), and with the freezer, easily popped together. W/O doing that, it wouldn't go back together W/O hammering.)
That side cover gasket is toast. As noted, break out the gasket paper.
#11

Mkala
My idea was in place of the gasket, see below
The problem is I can't find a gasket, so only two solutions : make my own with paper gasket material or use sealant only, without gasket - as it is now done with sump covers in automotive industry.
But I don't have much experience on sealant in place of gasket. I know it's working on cars, I don't know if in small engine aluminum block it will be great. I think both of you can tell me what should be good to do ? :smile:
SRTsFZ6, yes this engine does not look bad at all ! Bearing on both sides, low oil shutdown (that is working), full cast flywheel, lot of screws for the sump cover, looks well built. Just complicated to identify and find spares, unlike for example 168F where you can find all you need.
The bottom of the bore looks nice for what I can see, will try to look better
Mkala
I really don't use permatex or silicone on the sump cover....... Just the gasket will do fine..... On some I do use a very micro thin Ultra black just to hold the gasket in place real good....
My idea was in place of the gasket, see below
Well that appears to be a pretty HD engine.
Also, when ready to re-assemble, put the crankshaft (engine) in the freezer for awhile. That'll shrink down the crank a bit and make assembly easier. (I had some parts, same issue as yours, but I left one part out in the hot Florida sun ((warmed it good)), and with the freezer, easily popped together. W/O doing that, it wouldn't go back together W/O hammering.)
That side cover gasket is toast. As noted, break out the gasket paper.
The problem is I can't find a gasket, so only two solutions : make my own with paper gasket material or use sealant only, without gasket - as it is now done with sump covers in automotive industry.
But I don't have much experience on sealant in place of gasket. I know it's working on cars, I don't know if in small engine aluminum block it will be great. I think both of you can tell me what should be good to do ? :smile:
SRTsFZ6, yes this engine does not look bad at all !
The bottom of the bore looks nice for what I can see, will try to look better
#12

ILENGINE
ILENGINE
The gasket on side covers and sumps is used to set the end play in the crankshaft, and if too tight can cause other issues. So it is advisable to replace a gasket with a gasket for places that have end play.
#13

Boudreaux In Eunice La.
Boudreaux In Eunice La.
All those gaskets can be hand made with some gasket material and a ball peen hammer ..... I just made 2 not long ago for a Greyhound engine which is a pre Predator engine......
#14
A
(Account Closed)
A
(Account Closed)
Plus 1 to both posts ^^^^.
That gasket does shimming.
If it NEVER had a gasket, case sealer (I use Yamabond #4) would be fine for metal on metal.
Take your time trimming, cut out the center. Once you have some outside holes punched and bolted, it's usually pretty easy to go around the perimeter with a small ball peen hammer, tapping the gasket material up against the outside edge of the block.
Leaves a nice outline or tap till the gasket separates in the form you need it to be...
#15

Boudreaux In Eunice La.
We work on outboards also, actually the main biz is outboards...... We use Honda Bond to put the engines back together.....
Boudreaux In Eunice La.
Plus 1 to both posts ^^^^.
That gasket does shimming.
If it NEVER had a gasket, case sealer (I use Yamabond #4) would be fine for metal on metal.
Take your time trimming, cut out the center. Once you have some outside holes punched and bolted, it's usually pretty easy to go around the perimeter with a small ball peen hammer, tapping the gasket material up against the outside edge of the block.
Leaves a nice outline or tap till the gasket separates in the form you need it to be...
We work on outboards also, actually the main biz is outboards...... We use Honda Bond to put the engines back together.....
#16
A
(Account Closed)
I work on about everything. Yesterday did a valve check AND adjustment (shim and bucket) on my Yamaha FZ6. 14 valves were in spec, the last two exhaust valves were tight by .001". Had to use my Yamabond on the side cam chain cover.
Also recently used the Yamabond on the crankcase halfs of an Echo chain saw that had a "crankshaft stuffer" come loose and lock up the engine...
The Honda and Yamaha stuff are likely very close to the same..
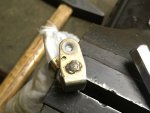
The last two pic's are of the Echo CS 355 chain saw, the first two are of my Yamaha FZ6, (in-line 4, two OHVs, 4 valves per cylinder, water cooled). I used the Yamabond on both. Just have to work fairly quick re-assembling.
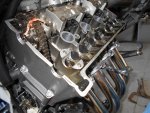
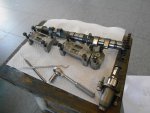
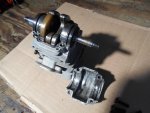
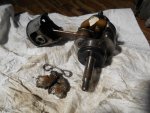
Ok, back to the original thread, sorry for the de-rail..
A
(Account Closed)
We work on outboards also, actually the main biz is outboards...... We use Honda Bond to put the engines back together.....
I work on about everything. Yesterday did a valve check AND adjustment (shim and bucket) on my Yamaha FZ6. 14 valves were in spec, the last two exhaust valves were tight by .001". Had to use my Yamabond on the side cam chain cover.
Also recently used the Yamabond on the crankcase halfs of an Echo chain saw that had a "crankshaft stuffer" come loose and lock up the engine...
The Honda and Yamaha stuff are likely very close to the same..
The last two pic's are of the Echo CS 355 chain saw, the first two are of my Yamaha FZ6, (in-line 4, two OHVs, 4 valves per cylinder, water cooled). I used the Yamabond on both. Just have to work fairly quick re-assembling.


Ok, back to the original thread, sorry for the de-rail..
#17
P
Pumper54
That 4th picture is ugly.
Tom
P
Pumper54
I work on about everything. Yesterday did a valve check AND adjustment (shim and bucket) on my Yamaha FZ6. 14 valves were in spec, the last two exhaust valves were tight by .001". Had to use my Yamabond on the side cam chain cover.
Also recently used the Yamabond on the crankcase halfs of an Echo chain saw that had a "crankshaft stuffer" come loose and lock up the engine...
The Honda and Yamaha stuff are likely very close to the same..
The last two pic's are of the Echo CS 355 chain saw, the first two are of my Yamaha FZ6, (in-line 4, two OHVs, 4 valves per cylinder, water cooled). I used the Yamabond on both. Just have to work fairly quick re-assembling.
View attachment 42236View attachment 42237View attachment 42238View attachment 42239
Ok, back to the original thread, sorry for the de-rail..
That 4th picture is ugly.
Tom
#18

Mkala
Mkala
Ha yes did not think to endplay.. so yes definitively a gasket ! So I will order some material and make one 
Thanks for advice. Yes already seen on video how to do it with ball hammer (from Roadking - they do for old engines)
I was able to measure precisely the bore, it's 68mm. I measured stroke from spark plus hole and from piston skirt - and result is 50mm
So bore 68mm x 50mm stroke it's a 181cc engine ! It looks like its a clone of a Mitsubishi GM181 (or GM180 or GM182) - was not able to be 100% sure.
But definitely not an Honda or Clonda / Chonda, they are 160cc (stroke 45) or 200cc (stroke 54).
Now I have to work on carburetor, throttle was stuck full open when I got it (fortunately petcock was broken so I hope nobody run it full throttle).
And the connecting part has some play with the shaft, will try to crimp this together again.
Thanks again for help and advices :smile:
#19

tom3
tom3
Probably no help at this point but I had a Briggs vertical engine with some excess crank and cam end play, put it together with no sump gasket, sealed with it with regular blue RTV sealer. Worked fine for the last 10 years or so. Amazing stuff I think. I'd do some preassembly and see how it goes together with no gasket, if all is well I'd use sealer only if the gasket is an unobtainum part. Hammering a gasket might not be the best thing with aluminum parts though. I work in a power plant and we do this all the time on the iron and steel cases though. 3 AM and we need to get something together calls for whatever it takes.
#20
A
(Account Closed)
That Echo was destined for the "parts pile" as it was almost completely locked up with all those parts in the bottom end jacking up the crank.
That plastic/metal, is a "crankshaft stuffer", to lower volume in the crankcase for better performance.
I ended up removing the other (fearing it will let loose) and re-assembled.. Runs like a scalded dog!!
My customer has several CS 355's chain saws and you can't tell the difference running them. A short video on that machine all done, assembled and back into service:
https://www.flickr.com/photos/147134237@N06/45591828684/
A
(Account Closed)
That 4th picture is ugly.
Tom
That Echo was destined for the "parts pile" as it was almost completely locked up with all those parts in the bottom end jacking up the crank.
That plastic/metal, is a "crankshaft stuffer", to lower volume in the crankcase for better performance.
I ended up removing the other (fearing it will let loose) and re-assembled.. Runs like a scalded dog!!
My customer has several CS 355's chain saws and you can't tell the difference running them. A short video on that machine all done, assembled and back into service:
https://www.flickr.com/photos/147134237@N06/45591828684/
#21

Mkala
Will try to check the endplay, but looks like it was good. I'm sure this engine has not so many hours, more "damaged" to stay a long time with old oil and fuel.
The problem to check it is the bearing is press-fit in the cranckase and the crankshaft is really tight on this bearing. Will see if heating bearing/cooling crankshaft provide me enough play to mount is with light tap, otherwyse I will only mount it once to avoid risk of destroying bearing.
Mkala
Probably no help at this point but I had a Briggs vertical engine with some excess crank and cam end play, put it together with no sump gasket, sealed with it with regular blue RTV sealer. Worked fine for the last 10 years or so. Amazing stuff I think. I'd do some preassembly and see how it goes together with no gasket, if all is well I'd use sealer only if the gasket is an unobtainum part. Hammering a gasket might not be the best thing with aluminum parts though. I work in a power plant and we do this all the time on the iron and steel cases though. 3 AM and we need to get something together calls for whatever it takes.
Will try to check the endplay, but looks like it was good. I'm sure this engine has not so many hours, more "damaged" to stay a long time with old oil and fuel.
The problem to check it is the bearing is press-fit in the cranckase and the crankshaft is really tight on this bearing. Will see if heating bearing/cooling crankshaft provide me enough play to mount is with light tap, otherwyse I will only mount it once to avoid risk of destroying bearing.
#22

Mkala
Mkala
I continue the story :smile: I spend a few minutes on this old generator when I have time.
Submitted a form to have the gasket "on request" but the answer is "5 or 6 month" :laughing:
So I ordered gasket paper and will try my best to make a decent one !
I start to clean the old gasket and noticed the crankshaft can move in the bearing on the flywheel side... so now more worried why it can't in the bearing of PTO side ?
It's cold these days, engine is at a place where temperature is around 0°C. So I tried to heat hup a bit the crankcase cover to about 60°C... this does not solve the problem... was only able to put in 1-2 mm (the bearing is 15mm) and as the bearing make contact with crankshaft, it cool quicly and become quite stuck on.
I was able to discuss with a mechanical engineer today, and he told me tolerance are really low: 4-5 microns for this particular assembly ! I asked if it is possible to send it down he say I can try... So I did it ! Started with 180 grit, do a motion to sand it around the shaft (push pull, from each side) and rotate the shaft... Final pass was done with 1600 !
So now it fit... really tight ! Have to wiggle the cover and try to be really straight, and I am able to fit it and open it (slowly, but no hammer required !) So happy, and the finish is not bad :
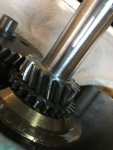
So it's a small step, but I big problem solve for this repair
Submitted a form to have the gasket "on request" but the answer is "5 or 6 month" :laughing:
So I ordered gasket paper and will try my best to make a decent one !
I start to clean the old gasket and noticed the crankshaft can move in the bearing on the flywheel side... so now more worried why it can't in the bearing of PTO side ?
It's cold these days, engine is at a place where temperature is around 0°C. So I tried to heat hup a bit the crankcase cover to about 60°C... this does not solve the problem... was only able to put in 1-2 mm (the bearing is 15mm) and as the bearing make contact with crankshaft, it cool quicly and become quite stuck on.
I was able to discuss with a mechanical engineer today, and he told me tolerance are really low: 4-5 microns for this particular assembly ! I asked if it is possible to send it down he say I can try... So I did it ! Started with 180 grit, do a motion to sand it around the shaft (push pull, from each side) and rotate the shaft... Final pass was done with 1600 !
So now it fit... really tight ! Have to wiggle the cover and try to be really straight, and I am able to fit it and open it (slowly, but no hammer required !) So happy, and the finish is not bad :

So it's a small step, but I big problem solve for this repair
#24

Mkala
Mkala
Back to this Mitsubishi clone engine after a while ! It's because I was waiting on the gasket cutting (and I was working on the Briggs 5HP anyway).
For the crankcase gasket I know I can cut it by hand or any small hammer (even if it's aluminum block should work), but it's not fun or at least geek :laughing:
So I searched gasket cutting machine - but of course it's not at all in the budget of DIY for one or two gasket a year... But I remembered a "girl tool" that is used to cut paper for scrapbooking : the Cameo Silhouette cutting machine ! I know someone that as one so I started to take the impression of the crankcase cover, scanned it, and with some computer magic (with some help) was able to have the gasket drawing !
After you import it into the Cameo software and it recognize outline, so you can cut it ! Very neat result
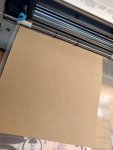
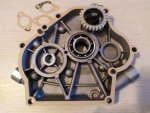
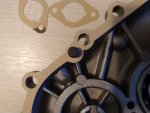
Really happy of the result ! Even if it's not really worth the time invested for such an old engine, when I do things I like to do it the best I (possibly) can - and I learned some interesting things in the process. Done some intake gasket in the same time, as you can see.
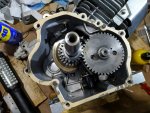
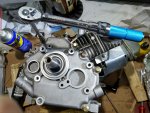
Time to close the cover, torque it to specs (20Nm) with my useful new little torque wrench and fill the crankcase with 0.7l of oil ! After a night, it's oil tight - except near the drain plug that I forgot to tight :laughing:
So looks ok, have to run the engine for a little while to be 100% sure the seal is perfect.
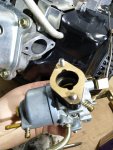
Next is installation of the carburetor, governor, springs, choke lever, air box and new air filter.
Tested for spark and it's still ok (have to order a new NGK plug to replace the old fouled Torch), I will bolt the engine to a piece of wood and connect it temporarily to a fuel tank. THis way I can test it and adjust it more easily, before reassemble the alternator and than back the frame.
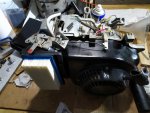
For the crankcase gasket I know I can cut it by hand or any small hammer (even if it's aluminum block should work), but it's not fun or at least geek :laughing:
So I searched gasket cutting machine - but of course it's not at all in the budget of DIY for one or two gasket a year... But I remembered a "girl tool" that is used to cut paper for scrapbooking : the Cameo Silhouette cutting machine ! I know someone that as one so I started to take the impression of the crankcase cover, scanned it, and with some computer magic (with some help) was able to have the gasket drawing !
After you import it into the Cameo software and it recognize outline, so you can cut it ! Very neat result


Really happy of the result ! Even if it's not really worth the time invested for such an old engine, when I do things I like to do it the best I (possibly) can - and I learned some interesting things in the process. Done some intake gasket in the same time, as you can see.
Time to close the cover, torque it to specs (20Nm) with my useful new little torque wrench and fill the crankcase with 0.7l of oil ! After a night, it's oil tight - except near the drain plug that I forgot to tight :laughing:
So looks ok, have to run the engine for a little while to be 100% sure the seal is perfect.
Next is installation of the carburetor, governor, springs, choke lever, air box and new air filter.
Tested for spark and it's still ok (have to order a new NGK plug to replace the old fouled Torch), I will bolt the engine to a piece of wood and connect it temporarily to a fuel tank. THis way I can test it and adjust it more easily, before reassemble the alternator and than back the frame.


#25

Mkala
Mkala
Hello,
A little follow up. Not a lot of hours on the engine, but works fine, gasket is fine, no leaks. Frame was painted (not by me, credits to the current owner ) and I had to change the flimsy fuel line I put... now I bought the right braided line SAE standard fuel compatible !
I add full "Genset" pictures to close this topic :
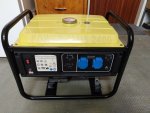
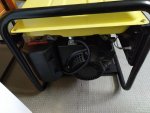
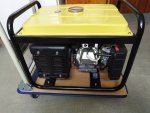
A little follow up. Not a lot of hours on the engine, but works fine, gasket is fine, no leaks. Frame was painted (not by me, credits to the current owner
I add full "Genset" pictures to close this topic :


