You are using an out of date browser. It may not display this or other websites correctly.
You should upgrade or use an alternative browser.
You should upgrade or use an alternative browser.
Export thread
Picked up a used BR 430 - wont start.
#1
F
FredBacher

F
FredBacher
I knew it wasn't working when I got it and figured I could give repairing it a shot.
Here is where I am at.
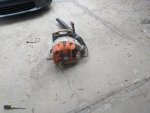
There it is, exciting right?
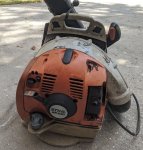
So far I have taken apart the carb, cleaned it, got a Zama spec re-haul kit and replaced the diaphragms and screen, I also swapped out the fuel filter, primer bulb, and fuel line going from bulb to carb as it was cracked and gave it all new fuel.
So as of now the primer bulb is working, I see it sucking up the fuel, the spark plug us working, and that's it. I pull the handle and get nothing. I tried adjusting the L and H screws back to what I read was default, which is all the way in then 1 and 1/4 turn out, and nothing.
Everything seems clean and in working order but we aren't getting started. I close the choke and have tested it by pulling the trigger and I see the lever snap to the open position.
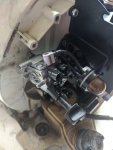
What do you all recommend I look at now? The starter cable pulls fine, it kind of gives the expected shake you would hear when you pull something. Outside of replacing the whole carb with an after market anything I can do now? There isn't like an obvious shut off switch or something I am missing, right? The adjustment screws were loose when I got it so no idea what's been happening there.
Here is where I am at.

There it is, exciting right?

So far I have taken apart the carb, cleaned it, got a Zama spec re-haul kit and replaced the diaphragms and screen, I also swapped out the fuel filter, primer bulb, and fuel line going from bulb to carb as it was cracked and gave it all new fuel.
So as of now the primer bulb is working, I see it sucking up the fuel, the spark plug us working, and that's it. I pull the handle and get nothing. I tried adjusting the L and H screws back to what I read was default, which is all the way in then 1 and 1/4 turn out, and nothing.
Everything seems clean and in working order but we aren't getting started. I close the choke and have tested it by pulling the trigger and I see the lever snap to the open position.

What do you all recommend I look at now? The starter cable pulls fine, it kind of gives the expected shake you would hear when you pull something. Outside of replacing the whole carb with an after market anything I can do now? There isn't like an obvious shut off switch or something I am missing, right? The adjustment screws were loose when I got it so no idea what's been happening there.
Attachments
#2

StarTech
StarTech
So you was able to find the RB-161 kit.
FIrst you need to check the spark arrester in the muffler as they tend to clog up. Second either induce fuel into cylinder to see if it will even hit or do a compression test.
FIrst you need to check the spark arrester in the muffler as they tend to clog up. Second either induce fuel into cylinder to see if it will even hit or do a compression test.
#3
F
FredBacher
F
FredBacher
Is there a way (or should I even) clean the spark arrester or just cut it off like some of the YouTube pepople do?
For the kit I bought a Stens one: https://www.amazon.com/gp/product/B01I731BY0/ref=ppx_yo_dt_b_asin_title_o02_s00?ie=UTF8&psc=1
One thing I noticed was the replacement plastic piece here:
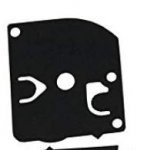
Was not black like that but a clear plastic. Like it wasn't dyed. It was the official Stens kit though sold through Amazon.
For the kit I bought a Stens one: https://www.amazon.com/gp/product/B01I731BY0/ref=ppx_yo_dt_b_asin_title_o02_s00?ie=UTF8&psc=1
One thing I noticed was the replacement plastic piece here:

Was not black like that but a clear plastic. Like it wasn't dyed. It was the official Stens kit though sold through Amazon.
#4

StarTech
StarTech
The spark arresters are cleaned using a propane torch and heated to burn off the carbon and oils.
#5

PTmowerMech
PTmowerMech
After pulling on it several times, remove the plug to see if it's wet.
If the plug isn't wet, then you'll know it's a carb issue.
If the plug is dry, you might squirt some carb spray through the carb just to see if it'll hit. Be sure to check the plug for wetness before using the carb spray.
If it won't hit, remove the plug again to check the compression. Even if you have to use your thumb over the plug hole.
Is it sparking at the right time. Could be a sheared flywheel key as well as the spark arrester that Star mentioned.
#6
B
bertsmobile1
B
bertsmobile1
With things like blowers the firs thing I do is a pressure test on the crankcase.
They seem to eat crankshaft seals.
If that is good then it is a spark tester on the plug & some carb cleaner down the plug hole
IF it don't go bang then it is going to be an expensive repair.
Got a crate full of dead BR's and all of them have worn out cylinders requiring a new crank case which is about 1/2 the price of a new blower.
Blowers tend to get a lot of use so wear out a lot sooner than trimers or chainsaws.
And back pack blowers tend to be the worst.
Pump diaphragms are made from different materials to suit different applications.
A full kit generally has 3 or 4 of them because the logistical costs on the kits is greater than the manufacturing costs.
The clear diaphragms are for a different carb.
Having said that, even with the wrong diaphragm the carb should still work but might run out of fuel when running WFO for extended periods.
#7
F
FredBacher
F
FredBacher
I will try the compression test tomorrow... how does that work? I don't think I have ever done a compression test tomorrow. I'll make that a first effort.
Second I will check the spark plug. So by wet you mean the spark plug should have some gas on it as if it was trying to ignite it type of thing?
By "going bang" --- ???
Second I will check the spark plug. So by wet you mean the spark plug should have some gas on it as if it was trying to ignite it type of thing?
By "going bang" --- ???
#8
F
FredBacher
So then the one they sent is wrong? The picture shows a black one.
F
FredBacher
The clear diaphragms are for a different carb.
So then the one they sent is wrong? The picture shows a black one.
#9

StarTech
StarTech
What Bert mean by Bang is will the engine try to run on the induced fuel mix.
A wet plug can mean few things like no spark, below minimum compression (usually you will need at least 100 psi for a 2 cycle try to run), have a clogged spark arrester, or clogged muffler (not allowing the engine to breathe).
Compression test requires a compression tester gauge for small engines; not the same as automotive engine most times.
The pressure test Bert mentions is a pressure/vac test of the crankcase as it is part the fuel system. Normally this is .5 bar pressure and .5 bar vacuum.
#10
B
bertsmobile1
Oregon make a limited number of them in the USA and of course Walbro & Zama make some kits in the USA
But most of them come either as a kit from China or the individual parts come from China & are assembled into the packets in the USA usually in a dissabled people work shop who would not know on diaphragm from another.
There are different diaphragm materials and different thickness of materials so they are colour coded in China so you can easily see the difference because the thickness differences is measured in micron so too expensive to measure individual diaphragms . The actual film is made in Japan & also in China so I doubt that any one would be making substitute film in a different colour as there is no money in it .
Because of new EU disclosure laws Stihl ( who own Zama ) no longer list what a kit contains on their web site .
'They have also removed most of the parts break downs so people like me can not work out which bits go with what carbs, in an effort to force you to go to a Stihl Dealer
Husqvarna only list the carburettor complete and use carbs from one of the trade only suppliers so there are no service parts available for them at all .
Now back to your specific problem.
eReplacement parts have a nice set of videos on general diagnosing small two stroke engines , worth watching.
Their parts are a reasonable retail price as well and they do know so can generally send you the right bits .
B
bertsmobile1
Yes they sent the wrong kit or the kit was missing bits.So then the one they sent is wrong? The picture shows a black one.
Oregon make a limited number of them in the USA and of course Walbro & Zama make some kits in the USA
But most of them come either as a kit from China or the individual parts come from China & are assembled into the packets in the USA usually in a dissabled people work shop who would not know on diaphragm from another.
There are different diaphragm materials and different thickness of materials so they are colour coded in China so you can easily see the difference because the thickness differences is measured in micron so too expensive to measure individual diaphragms . The actual film is made in Japan & also in China so I doubt that any one would be making substitute film in a different colour as there is no money in it .
Because of new EU disclosure laws Stihl ( who own Zama ) no longer list what a kit contains on their web site .
'They have also removed most of the parts break downs so people like me can not work out which bits go with what carbs, in an effort to force you to go to a Stihl Dealer
Husqvarna only list the carburettor complete and use carbs from one of the trade only suppliers so there are no service parts available for them at all .
Now back to your specific problem.
eReplacement parts have a nice set of videos on general diagnosing small two stroke engines , worth watching.
Their parts are a reasonable retail price as well and they do know so can generally send you the right bits .
#11

Fish
Fish
Is the primer/purge bulb hooked up correctly?
If you need the mechanic's manual, I can send you it through g-mail.
If you need the mechanic's manual, I can send you it through g-mail.
#12

StarTech
StarTech
I actually got a copy of a Stihl catalog from 2015 that listed the Zama kits RB numbers. But as Stihl is trying and do most times force independent shops to buy the kits from the dealers when the dealer is even willing to order them but most they only want to sell a whole carburetor. I most of my kits out Hong Kong from one of two suppliers. Besides the dealer here charges 20.11 for the RB161 kit and my source charged me 1.45 for the same kit. When I was able to get the kits from the Zama distributor the last kits were 6.52.
The BR430 here uses the RB161 per that catalog which is the same as the RB100 but Stihl has the complete carburetor kit listed as 7010 871 0222. Even these Stihl kit PNs is not list in the IPLs even though they are listed in the yearly technical reference guide. Currently I have the 2019 version.
As for the Mylar color they come in clear, blue, and black. What matters most is the shape and holes location.
Personally I think it comes down that Stihl doesn't want to stock the kits anymore nor do the dealers. It is also to note Stihl has scrub the Zama website of the carburetor IPLs that are used only on Stihl products too.
#13
B
Born2Mow
B
Born2Mow
The hard part about 2-stroke diagnosis is that bottom-end compression is just as important as top-end compression, but much harder to measure. Modern 2-strokes often have rubber seals on the main bearings, and when these go dry there is a loss of bottom-end compression that can prevent fuel intake.If it won't hit, remove the plug again to check the compression. Even if you have to use your thumb over the plug hole.
#14
F
FredBacher
F
FredBacher
Okay gents, here is where we are as of this morning. I can now confirm it is running, the throttle works, and its blowing a whole lot of air. The issue now though is that it will only do this when both the air filter compartment and the black bit that covers the carb are fully removed. I took the advice to add a little gas directly into the carb/spark to get it running. Nothing was happening so I ended up taking it off down to the carb to make sure the choke switch was working, it was. Gas added directly into carb, left it all apart, got it going. Was excited.
We have two videos to watch, both with sound if you click the audio icon in the link on the top right of the movie:
Link to video: Click here to get to the first video
Video 1: This shows it running and pulling the throttle. Air blasting the leaves all the way down the driveway with ease. During this time I also picked it up and walked around a bit pulling the throttle. Worked well enough. Didn't test for too long but it ran for several minutes and never turned itself off.
Link to video: Click here to get to the second video
Video 2: This shows adding back on the black cover and you can hear it start to struggle. If you pull the throttle while this is on it completely dies.
Blower will not start at all if both the black cover and orange air filter compartment are added. Remove all of it, like I have above, the blower will most likely start if pulling the starter cable and also trying to throttle up at the same time.
Edit: Had to fix the video links.
#15

PTmowerMech
Any sort of air restrictions changes the air/fuel mixture. Put everything back on and re-adjust. Adding an air filter, changes the amount of air that is going through the carb. Therefore you need to change the amount of fuel also.
That video does show a drastic drop in RPM's, in what shouldn't be much of a loss of air. When you install that cover, are you certain it's not accidentally closing the choke a little?
PTmowerMech
Okay gents, here is where we are as of this morning. I can now confirm it is running, the throttle works, and its blowing a whole lot of air. The issue now though is that it will only do this when both the air filter compartment and the black bit that covers the carb are fully removed. I took the advice to add a little gas directly into the carb/spark to get it running. Nothing was happening so I ended up taking it off down to the carb to make sure the choke switch was working, it was. Gas added directly into carb, left it all apart, got it going. Was excited.
We have two videos to watch, both with sound if you click the audio icon in the link on the top right of the movie:
Link to video: Click here to get to the first video
Video 1: This shows it running and pulling the throttle. Air blasting the leaves all the way down the driveway with ease. During this time I also picked it up and walked around a bit pulling the throttle. Worked well enough. Didn't test for too long but it ran for several minutes and never turned itself off.
Link to video: Click here to get to the second video
Video 2: This shows adding back on the black cover and you can hear it start to struggle. If you pull the throttle while this is on it completely dies.
Blower will not start at all if both the black cover and orange air filter compartment are added. Remove all of it, like I have above, the blower will most likely start if pulling the starter cable and also trying to throttle up at the same time.
Edit: Had to fix the video links.
Any sort of air restrictions changes the air/fuel mixture. Put everything back on and re-adjust. Adding an air filter, changes the amount of air that is going through the carb. Therefore you need to change the amount of fuel also.
That video does show a drastic drop in RPM's, in what shouldn't be much of a loss of air. When you install that cover, are you certain it's not accidentally closing the choke a little?
#16
F
FredBacher
F
FredBacher
Please see this third video I went out and just took. It's a little messy as I was doing it all with one hand but once I have it all in place wait until the end and it all shuts down.
Click here for a link to the video
I also checked the black cover as you suggested, as far as I can tell it's perfectly aligned and not closing the choke at all when in place. It slide into a little slot in there and doesn't look to impact how the choke is sitting.
When you say readjust, what am I adjusting? The L and H screws?
When even just the black cover is in place it wont start at all. The screws have been adjusted all over the place it seems and I can't find out how to get them in any position to get it to even turn over when the covers are in place. Right now it's starting with only a pull or two each time.
#17

Fish
Fish
Did you check and make sure your primer bulb lines are on correctly? Did you check the exhaust for blockage?
#19
F
FredBacher
Sorry I am new at all of this still. What do you mean by this one? Isn't the intake the carb itself? What is blowback?
For the exhaust, I looked in there, on the big muffler over on the opposite side where all the exhaust gas shoots out, right? Doesn't look blocked or anything I guess.
As for primer bulb, short tube goes to carb, other tube goes into the engine or someplace. Not sure as I didn't follow it. Bulb looks like it's working as it fills with gas when running and when I push it prior to running I can hear stuff being sucked up into the carb.
F
FredBacher
With it running with the covers off, see if you get some blowback from the intake.
Sorry I am new at all of this still. What do you mean by this one? Isn't the intake the carb itself? What is blowback?
For the exhaust, I looked in there, on the big muffler over on the opposite side where all the exhaust gas shoots out, right? Doesn't look blocked or anything I guess.
As for primer bulb, short tube goes to carb, other tube goes into the engine or someplace. Not sure as I didn't follow it. Bulb looks like it's working as it fills with gas when running and when I push it prior to running I can hear stuff being sucked up into the carb.
#20

Fish
Fish
The bulb can easily be hooked up backwards, It pulls gas through the carb, and then sends it to the tank.
#21

Fish
Fish
A plugged up exhaust can send things backward, as the combusted material has no where to go. Might just remove the muffler and start it for a few seconds, see how it runs.
#22

PTmowerMech
A clogged muffler is unlikely. The screen is usually the first thing to get stopped up. There should be a couple of screws and a plate that fits over the exhaust hole. Being old like it is, it's possible that someone has removed it. You probably won't be able to see the screen without taking the plate off. They're sometimes tough to see if they're clogged.
I'm not sure about your model, but you may have a screw in type "tail pipe." Where it's got what looks like a nut around the mufflers hole. Either way, there should be a screen in there.
Personally I don't think that's your problem. But I'm not a guru like some of these other gents. Either way, it's something that needs to looked at. And it's a 2 minute check. Easy peasy, Japaneasy.
If the screen is clogged, you can use some brake clean or carb clean spray on it and wire brush it lightly. THE best way is how StarTech explained. Heat it with a torch til it's glowing red. Then hold it under the faucet and cool it off quickly. If it's real bad, it might take a couple of tries.
PTmowerMech
Sorry I am new at all of this still. What do you mean by this one? Isn't the intake the carb itself? What is blowback?
For the exhaust, I looked in there, on the big muffler over on the opposite side where all the exhaust gas shoots out, right? Doesn't look blocked or anything I guess.
As for primer bulb, short tube goes to carb, other tube goes into the engine or someplace. Not sure as I didn't follow it. Bulb looks like it's working as it fills with gas when running and when I push it prior to running I can hear stuff being sucked up into the carb.
A clogged muffler is unlikely. The screen is usually the first thing to get stopped up. There should be a couple of screws and a plate that fits over the exhaust hole. Being old like it is, it's possible that someone has removed it. You probably won't be able to see the screen without taking the plate off. They're sometimes tough to see if they're clogged.
I'm not sure about your model, but you may have a screw in type "tail pipe." Where it's got what looks like a nut around the mufflers hole. Either way, there should be a screen in there.
Personally I don't think that's your problem. But I'm not a guru like some of these other gents. Either way, it's something that needs to looked at. And it's a 2 minute check. Easy peasy, Japaneasy.
If the screen is clogged, you can use some brake clean or carb clean spray on it and wire brush it lightly. THE best way is how StarTech explained. Heat it with a torch til it's glowing red. Then hold it under the faucet and cool it off quickly. If it's real bad, it might take a couple of tries.
#23

Fish
Fish
Also, if you have the carb off again, look through the intake and look at the condition of the piston for damage.
#25

Hammermechanicman
Hammermechanicman
If you assemble the air filter assy to the blower but leave the air filter out will it start and run?
#26
F
FredBacher
F
FredBacher
Okay I will take that apart next and check the screen. Would that have an impact to what is going on? I went out and started it up a few more times. Without the air filter and the black cover it's firing right up and blasting away, the internals must be okay as the engine is doing its thing and the air is so strong its blowing leaves across the street. Once that cover goes on like in the last video, dead, and it wont start.
I have no tried that yet.. do you also mean to leave the black inside plastic part off as well? The black cover kills it once tightened down, I will try putting just the orange cover on next without the inside pieces and also leave the air filter off.
If you assemble the air filter assy to the blower but leave the air filter out will it start and run?
I have no tried that yet.. do you also mean to leave the black inside plastic part off as well? The black cover kills it once tightened down, I will try putting just the orange cover on next without the inside pieces and also leave the air filter off.
#27

PTmowerMech
PTmowerMech
Is there something pinched somewhere around the carburetor? Because just putting the cover and the air filter on it should have almost no affect.
#28

Fish
Fish
A partially plugged up exhaust forces the combustion gases back through the intake, and putting the cover over the intake restricts the flow even more, as it is barely running with the air filter off.Two little screws and the tube/screen comes off/out, free and easy thing to check. Also could be carboned over at the exhaust port, but the screen is quite easy to check.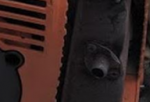

#29

StarTech
StarTech
It was mention about checking the piston and cylinder condition. I have found on 2 cycles that it is easier and better if the condition is checked through the exhaust port since the exhaust side is usually the side that get most of the damage from straight gassing and hard carbon deposits. Looking through intake side is usually a lot harder too.
Since the muffler is fully exposed this should be easy. But I would recommend that after the blower is working correctly to replace the shroud as it is a serious safety issue. Major burns can happen.
Since the muffler is fully exposed this should be easy. But I would recommend that after the blower is working correctly to replace the shroud as it is a serious safety issue. Major burns can happen.
#30

Fish
Fish
If one gets blowback through the intake, one usually finds piston damage on the intake side from dirt ingestion. From the looks of the overall condition of the blower, I would recommend removing the muffler first and viewing the piston there for damage before spending any time or money.
I am not familiar with this model, this intake block looks interesting. I am not sure if that is some form of reed valve on the inside, and if that is bad, could also be the problem. Hopefully someone familiar with this particular model will chime in.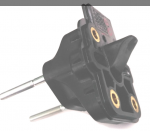
I am not familiar with this model, this intake block looks interesting. I am not sure if that is some form of reed valve on the inside, and if that is bad, could also be the problem. Hopefully someone familiar with this particular model will chime in.

#32
F
FredBacher
F
FredBacher
I took the exhaust thing off. The gasket crumbled in my hands
and there was no sign of a screen anywhere. No blockages in there though.
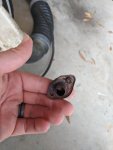
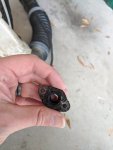
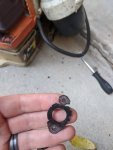
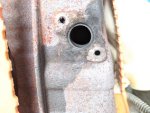
I ran it a few more times, the carb is leaking. I noticed the air filter area was wet after running.
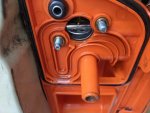
Took everything off again and saw it is leaking out of the bottom of the carb.
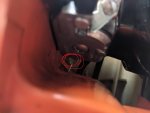
That circled bit is where the fuel kept dripping out.
So, lets talk replacement carbs, I tried and seem to have failed in rebuilding it. I've tried replacing the innards and now I am left with it leaking on me. To see if I can just get this thing going can anyone recommend a replacement I can throw on there to see if it will start and run with the covers on? I'll keep this one handy if so. I know this thing starts right up, I know the air blows, just something I cannot fix with the skills I have is causing the carb to have issues.
and there was no sign of a screen anywhere. No blockages in there though.


I ran it a few more times, the carb is leaking. I noticed the air filter area was wet after running.

Took everything off again and saw it is leaking out of the bottom of the carb.

That circled bit is where the fuel kept dripping out.
So, lets talk replacement carbs, I tried and seem to have failed in rebuilding it. I've tried replacing the innards and now I am left with it leaking on me. To see if I can just get this thing going can anyone recommend a replacement I can throw on there to see if it will start and run with the covers on? I'll keep this one handy if so. I know this thing starts right up, I know the air blows, just something I cannot fix with the skills I have is causing the carb to have issues.
#33

PTmowerMech
My guess is it's coming from the needle. Meaning the metering level isn't correct. Or the needle or seat is bad.
PTmowerMech
I took the exhaust thing off. The gasket crumbled in my hands
and there was no sign of a screen anywhere. No blockages in there though.
View attachment 55408
View attachment 55409
View attachment 55411
View attachment 55412
I ran it a few more times, the carb is leaking. I noticed the air filter area was wet after running.
View attachment 55413
Took everything off again and saw it is leaking out of the bottom of the carb.
View attachment 55414
That circled bit is where the fuel kept dripping out.
So, lets talk replacement carbs, I tried and seem to have failed in rebuilding it. I've tried replacing the innards and now I am left with it leaking on me. To see if I can just get this thing going can anyone recommend a replacement I can throw on there to see if it will start and run with the covers on? I'll keep this one handy if so. I know this thing starts right up, I know the air blows, just something I cannot fix with the skills I have is causing the carb to have issues.
My guess is it's coming from the needle. Meaning the metering level isn't correct. Or the needle or seat is bad.
#35
F
FredBacher
F
FredBacher
I will take it apart again this weekend and check the order and the pieces inside that part of the carb.
On the other topic, anyone have any recommendations on a replacement carb itself to throw in there and see what happens?
On the other topic, anyone have any recommendations on a replacement carb itself to throw in there and see what happens?
#36

Fish
Fish
Well, if you have the carb off, take a peek at the piston skirt, as a condition like I have described will force the air/fuel mixture back out of the intake.
#38
T
Telesis
T
Telesis
Fred, as StarTech mentioned, the order of the gaskets and diaphragms is important because they are different on either side of the carb. You can see that on the parts breakdown pic above. In the pic, note that the metering diaphragm gasket(13) goes against the carb body first, then the metering diaphragm(14). However, in the lower half of the pic, the pump diaphragm(16) goes against the carb body first, and then the pump diaphragm gasket(15).
fwiw, good luck!
fwiw, good luck!
#39
F
FredBacher
F
FredBacher
Part 16 is the one in my replacement kit that came clear instead of black plastic... and thats the side things are leaking from...
Anyone ever try a knock off carb instead of a full $150 one?
Anyone ever try a knock off carb instead of a full $150 one?
#40

PTmowerMech
I've used to those clear plastic pieces before. And can't remember any problems with them. All they really are is like a check valve. The allow fuel in, and keep it from going back. At least that's my understanding.
Unless I've missed something along this discussion, the blower runs fine as long as the air isn't restricted, correct? It idles fine. Sounds like it blows pretty hard.
Did you peak inside the ports to see if their was any cylinder scoring?
Is there any build up of oily dirt coming from behind the flywheel?
PTmowerMech
Part 16 is the one in my replacement kit that came clear instead of black plastic... and thats the side things are leaking from...
Anyone ever try a knock off carb instead of a full $150 one?
I've used to those clear plastic pieces before. And can't remember any problems with them. All they really are is like a check valve. The allow fuel in, and keep it from going back. At least that's my understanding.
Unless I've missed something along this discussion, the blower runs fine as long as the air isn't restricted, correct? It idles fine. Sounds like it blows pretty hard.
Did you peak inside the ports to see if their was any cylinder scoring?
Is there any build up of oily dirt coming from behind the flywheel?
#41
F
FredBacher
Yes, 100%. Starts up after a pull or two, will idle all you want, and the air will blow when the trigger is pulled. You can even walk around with the blower blowing things and you'd think it was fine. As soon as anything goes over the air intake though, it dies.
Ports? Which ports should I be looking at? Like on the carb itself?
I didnt see any dirt from the flywheel or anything behind it. Flywheel is the part the starter cable hooks up to, right, with the magnetic metal round arms that spin when you pull?
F
FredBacher
Unless I've missed something along this discussion, the blower runs fine as long as the air isn't restricted, correct? It idles fine. Sounds like it blows pretty hard.
Yes, 100%. Starts up after a pull or two, will idle all you want, and the air will blow when the trigger is pulled. You can even walk around with the blower blowing things and you'd think it was fine. As soon as anything goes over the air intake though, it dies.
Did you peak inside the ports to see if their was any cylinder scoring?
Is there any build up of oily dirt coming from behind the flywheel?
Ports? Which ports should I be looking at? Like on the carb itself?
I didnt see any dirt from the flywheel or anything behind it. Flywheel is the part the starter cable hooks up to, right, with the magnetic metal round arms that spin when you pull?
#42

StarTech
StarTech
Okay let's see if we can get your head out of the fog...
The ports are on the cylinder. They are how the fuel mix gets into the cylinder and how the burnt fuel gets out. Looking at the IPL it looks like the intake manifold (part between the carburetor and cylinder) has to removed to so can look through the port to look at the piston. It is much easier to remove the muffler and look through the exhaust port at the piston. But as the intake could be damaged and not viewable from the exhaust side; although, the intake side cylinder wall can be seen through the exhaust port.
Basically what is being asked is for you to look inside the cylinder for the condition of the piston and cylinder. (PNC)
#43

PTmowerMech
When you take the carb off, the big hole that goes straight to the piston. Same as when you remove the muffler. Through those ports, you can see the piston go up and down when you spin the flywheel. With the piston all the way down, you can see the cylinder walls. As the piston is going up and down, you can see the condition of the piston.
From the muffler side looking in, if there's any scoring on the cylinder, you might just leave the blower as is and just use the heck out of it. Once a cylinder starts scarring, there's no hope for it, unless you can hone it out and maybe put a set of rings in it.
PTmowerMech
Yes, 100%. Starts up after a pull or two, will idle all you want, and the air will blow when the trigger is pulled. You can even walk around with the blower blowing things and you'd think it was fine. As soon as anything goes over the air intake though, it dies.
Ports? Which ports should I be looking at? Like on the carb itself?
I didnt see any dirt from the flywheel or anything behind it. Flywheel is the part the starter cable hooks up to, right, with the magnetic metal round arms that spin when you pull?
When you take the carb off, the big hole that goes straight to the piston. Same as when you remove the muffler. Through those ports, you can see the piston go up and down when you spin the flywheel. With the piston all the way down, you can see the cylinder walls. As the piston is going up and down, you can see the condition of the piston.
From the muffler side looking in, if there's any scoring on the cylinder, you might just leave the blower as is and just use the heck out of it. Once a cylinder starts scarring, there's no hope for it, unless you can hone it out and maybe put a set of rings in it.
#44
F
FredBacher
F
FredBacher
Okay folks, been gone for a bit and here is the update. I tried my best to check the carb some more, opened it up, looked at the gaskets, screens, etc. Would not stop leaking. Also found the fuel filter line cracked. Threw in the towel and got a replacement carb and filter kit, after market as I wasn't going to spend $100 on a Sthil for a blower I don't even know works. Primer bulb also replaced as mentioned earlier and one of the fuel lines replaced. Fuel tank has been completely cleaned out and refilled to the top with ethanol free gas mixed with the Sthil brand oil mixture.
This is what I bought: https://www.ebay.com/itm/For-Stihl-...-0606-C1Q-S220C-C1Q-S209C-Blower/324313839822
Fits in fine, everything works as you would expect with the choke and throttle snapping it open.
Where we are at now:
Engine starts
Engine revs up with choke half way open
Engine idles with choke open
Engine dies when throttle is pulled
I have put back on the air filter and cover. I have not tried any of this with the filter off.
Since everyone likes the video here is what is happening:
Sounds pretty good, right? I think once it's warmed up and idling it is pretty decent. Starts so easily I could pull the cord sitting down in front of it and it fires right up and idles great. I futzed around with the L and idle speed screws to get it sounding good. You'd think this was a great blower.
Unfortunately, as you can hear in the video, the throttle kills it almost immediately. I was out there for an hour trying to adjust the H screw and I am getting no where. From completely screwed in to what feels like so far out the screw will fall out. Same result. I am out of ideas.
#46
F
FredBacher
F
FredBacher
As an update I have replaced the spark plug and gapped the new one to be .5mm as per the manual.
At one point while idling I had it so far backed out I thought the screws would fall out. For every adjustment to the L I went and tried a lot of settings with the H. Maybe I am doing something wrong but same result every time, pull trigger, dead.
Should I be going about this another way? I got the L adjusted to where it will idle nicely without mucking about with the H. Adjust the idle speed up so it would really be running the way I would think it should sound. Tried every setting of H from all the way in to almost all the way out. Pull trigger, dead.
I am getting sad. We're so close to having it running but something is stopping it from being a successful recovery project.
For this, I think I have, I have backed everything out all over the place. I sat there again this morning with a screw driver on the H and L at times adjusting in and out. II would squeeze handle just a tiny bit, hear it die, turn it 1/8th, pull trigger a little bit, hear it die, let go and turn 1/8th again.You need to back out the low speed screw out some.
At one point while idling I had it so far backed out I thought the screws would fall out. For every adjustment to the L I went and tried a lot of settings with the H. Maybe I am doing something wrong but same result every time, pull trigger, dead.
Should I be going about this another way? I got the L adjusted to where it will idle nicely without mucking about with the H. Adjust the idle speed up so it would really be running the way I would think it should sound. Tried every setting of H from all the way in to almost all the way out. Pull trigger, dead.
I am getting sad. We're so close to having it running but something is stopping it from being a successful recovery project.
#47
B
bertsmobile1
B
bertsmobile1
The trick to this is to be able to tell the different sounds of an engine quitting rich & one that quits lean.
What most do not understand is the engine at idles runs 95% on the idle jet & 5% on the high jet ,
This progressively reverses till at WFO you are 95% on the H jet & 5% on the L jet.
Thus they both work together , it is not the ON / OFF situation that most expect .
As you throttle up , around 1/4 throttle you get to the 50:50 point and if both are not right the engine will either flood out or stall all together.
So the very first thing to do is to slide the carb off the studs, turn it sideways, screw IN the L needle fully then blow air through the carb.
If the H needle is working properly you should get a strong mist of fuel out the engine end of the carb.
As you turn down the air flow ( reduce the pressure ) the volume of fuel mist should reduce.
If you can not do this the H circuit is blocked or otherwise faulty.
Cube carbs are tricky because you can get them to run perfect at WFO and perfect at idle but when they got to the 50:50 point the engine stalls because the 2 jets are not working together
The other thing I see regularly is needles in the wrong holes.
This usually wrecks the carb
The H needle is the shorter and generally has a much thicker taper
The L needle is the longer and has a much finner tapered section.
#48
S
slomo
S
slomo
1. 0.5mm plug gap sounds small. Hope this is the OEM recommendation.
2. I don't see much smoke when it's running. You said you put Stihl oil in. How much oil did you dump into the gas?
3. To me it seems like a flaky carb. Sometimes saving money on a Chinese carb is not saving money. Put a real OEM Stihl carb on it. I bet your issue will be solved.
4. You said you didn't want to put a lot of money in it until you hear it run. I've seen several videos of it running.
5. Chinese carb kits, well , do I need to elaborate? Some Chinese carbs and kits are fine. Then some are junk. To me it's like gambling.
6. I'll fess up and tell on myself. Is there any chance you are operating the choke lever the wrong way? Yup I'm guilty...... LOL
7. Does it have a strong spark? Get a spark tester and see. Or ground the plug on the block and check it that way. Make a video of your spark test.
8. Muffler seems wide open. Look elsewhere.
9. How about a vacuum leak at the carb? Most guys over torque those tiny bolts that secure the carb and warp that black block slash manifold deal.
10. Order new exhaust gaskets to replace the one that crumbled.
11. Strip it down to verify intake and exhaust ports IN the block are clear. Might need to decarbon that little fella'.
Summation, over 90% of the time on used OPE, the carb is the issue. You need air, spark, fuel and compression. Stick with these basics.
slomo.
#49

Fish
Fish
Again, I'll ask.
Is the primer/purge bulb hooked up correctly?
It can be hooked up backwards.
Is the primer/purge bulb hooked up correctly?
It can be hooked up backwards.
#51
F
FredBacher
The machine now starts up super easy, one of two pulls max, it's great. No matter what I do though, throttle kills it. For giggles I also took off the fuel filter (desperation) to see if maybe that was causing the engine to be starved of fuel. Same issue. I am going to put things back together and check into the carb again, the post above yours has the air test, I'll guess I will do that now, turn L all the way in and see if anything comes out the H.
I wonder if someone will buy this for $100 and I'll cut my losses.. I will try the next few suggestions today and see what happens.
It's just that the trigger kills it so quickly, it doesn't even try to rev up, there isn't even an attempt. Pulling it just shuts it off immediately. $100 for a Sthil carb still scares me as I wont be able to get my money back on that if it doesn't work. I have used a lot of knock off carbs before and have had issues, rough idling, never really perfection, but at least enough to get the various mowers and edgers and stuff running to the point where they were functional. Having this be this bad is something new.
F
FredBacher
1. 0.5mm plug gap sounds small. Hope this is the OEM recommendation. - Yup, this is right out of the Sthil manual.
2. I don't see much smoke when it's running. You said you put Stihl oil in. How much oil did you dump into the gas? - 1 gallon of ethanol free fresh gas to 1 little bottle of sthil mixture.
4. You said you didn't want to put a lot of money in it until you hear it run. I've seen several videos of it running. - $100 on a carb for this old machine is a quarter of a price of a new machine. I could try putting the original back on if I can figure out how to stop it from leaking.
6. I'll fess up and tell on myself. Is there any chance you are operating the choke lever the wrong way? Yup I'm guilty...... LOL - I sure hope not. Looked right when I had the air filter cover off.
7. Does it have a strong spark? Get a spark tester and see. Or ground the plug on the block and check it that way. Make a video of your spark test. - I have a Harbor Freight spark tester that lights up but its not a very bright test kit, whenever I use it on lawnmowers and such it needs to be done in the dark, this one lights it up as well. I don't know if my camera will pick up the video in a dark garage.
8. Muffler seems wide open. Look elsewhere. - This morning I decided to have one more go at it, took off the entire muffler to see if it would run without it. It does, same issue though. Despite being loud enough to wake up the entire neighborhood when I was running it with no muffler same exact thing happened, so thats not the problem.
9. How about a vacuum leak at the carb? Most guys over torque those tiny bolts that secure the carb and warp that black block slash manifold deal. - The two tiny screws that hold the carb on?
10. Order new exhaust gaskets to replace the one that crumbled. - Can it run with no exhaust gasket at all?
11. Strip it down to verify intake and exhaust ports IN the block are clear. Might need to decarbon that little fella'. - So you're talking about taking off everything leading into the engine block and checking the other side?
The machine now starts up super easy, one of two pulls max, it's great. No matter what I do though, throttle kills it. For giggles I also took off the fuel filter (desperation) to see if maybe that was causing the engine to be starved of fuel. Same issue. I am going to put things back together and check into the carb again, the post above yours has the air test, I'll guess I will do that now, turn L all the way in and see if anything comes out the H.
I wonder if someone will buy this for $100 and I'll cut my losses.. I will try the next few suggestions today and see what happens.
It's just that the trigger kills it so quickly, it doesn't even try to rev up, there isn't even an attempt. Pulling it just shuts it off immediately. $100 for a Sthil carb still scares me as I wont be able to get my money back on that if it doesn't work. I have used a lot of knock off carbs before and have had issues, rough idling, never really perfection, but at least enough to get the various mowers and edgers and stuff running to the point where they were functional. Having this be this bad is something new.
#52
F
FredBacher
It's hooked up like this.

That part I don't know how to get to. How do I see the piston?
F
FredBacher
Again, I'll ask.
Is the primer/purge bulb hooked up correctly?
It can be hooked up backwards.
It's hooked up like this.

And, did you ever look at the piston on the intake or exhaust side?
That part I don't know how to get to. How do I see the piston?
#54

Fish
Fish
To see the piston, one takes off the muffler and the intake, or on most, the piston skirt can be seen by just looking into the intake with the carb removed.
#55
F
FredBacher
Purge bulb! I learned something new from that. I had no idea.
Okay, so with that, then yes, I have the purge bulb hooked up correctly. Short side (In) connected to the carb, the long side (out) connected to the line going to the fuel tank.
I went and found the piston now too while the muffler was off. Here is a video for you. There is no easy to see scoring or scratches, it looks very smooth, goes up and easy, and appears to be coated with a proper amount of oil to keep it moving very smoothly.
Click here: Link to the video
F
FredBacher
This looks like a decent video.
Purge bulb! I learned something new from that. I had no idea.
Okay, so with that, then yes, I have the purge bulb hooked up correctly. Short side (In) connected to the carb, the long side (out) connected to the line going to the fuel tank.
I went and found the piston now too while the muffler was off. Here is a video for you. There is no easy to see scoring or scratches, it looks very smooth, goes up and easy, and appears to be coated with a proper amount of oil to keep it moving very smoothly.
Click here: Link to the video
#56

Fish
Fish
Hard to see the other side, from what I can see, it looks a tad rough, like some dirt ingestion. Look at the other side to see the piston.
#57
F
FredBacher
F
FredBacher
Haven't been around for a while but have a potentially exciting update.
While out there putzing around with it as always, I went back to the original carb after taking it apart and screwing it back together again, a large shock was felt, hand was on top of the spark plug rubber boot. Opened it up and didn't see any frayed wires but added a few inches of electrical tape to the connection point where the wire reaches the rubber.
It started.
Pulled the trigger.
It blew full force.
Was able to walk around with it for a while blowing things around.
Eventually it died.
Still, progress? I got it going a few more times, eventually it now dies after blowing for a while but this is a huge change from before of when any attempt to touch the throttle kills it instantly.
Thoughts?
#58
B
Born2Mow
B
Born2Mow
Regular-grade pump grade Ethanol fuel will gum up a carb and block passageways during even short storage. If you can consistently get the engine to run, then simply adding a fuel system cleaner in with fresh fuel will sometimes clear the last remaining issues. I use StarTron myself, but others here have their favorite cleaners/fuel conditioners.
Put in a half tank of gas-and-cleaner, take it to an out of the way location so you don't have to listen to it, and simply allow it to run out of fuel. That's going to cost you about $2 and take nearly zero effort. What have you got to loose ?
Put in a half tank of gas-and-cleaner, take it to an out of the way location so you don't have to listen to it, and simply allow it to run out of fuel. That's going to cost you about $2 and take nearly zero effort. What have you got to loose ?
#59
F
FredBacher
F
FredBacher
I only am using ethanol free after cleaning the carb and using the new one. It's sold everywhere in Florida, its very convenient.
Adding the cleaner to what I have in there now might flush out other parts of the system?
Adding the cleaner to what I have in there now might flush out other parts of the system?
#60
B
Born2Mow
B
Born2Mow
Then the interior of the carb is clean, but the tank, lines and filters will also be coated and similarly clogged. You can either clean or replace. Replace means getting the parts, then a lot of labor to remove covers, cut lines to the correct length, and fish filters into the tank.... which you may ultimately need to do.
On a customer job where you need to guarantee all the work, then go everything new. But on a personal job, I start with the simplest way first.
On a customer job where you need to guarantee all the work, then go everything new. But on a personal job, I start with the simplest way first.
#61
F
FredBacher
F
FredBacher
What do you think the electrical tape did or messing around with the wire hooked up to the spark?
We've been working on this thing for weeks now with no luck up until this point.
We've been working on this thing for weeks now with no luck up until this point.
#63

Fish
Fish
I would say that the piston looks worse.
But it is hard to tell without looking at it. The video makes it hard to tell.
But it is hard to tell without looking at it. The video makes it hard to tell.
#65

StarTech
StarTech
That engine has scoring on the intake side of the cylinder which is caused by running to the unit without an air filter and dirt has inhaled. I am surprised that it even tries to run.
#66
S
slomo
I would de-carbon that cylinder. Might have to soak it and scrub later. Carb cleaner works pretty good. Make sure your allow any liquid/carbon/dirt to drain out of the cylinder while cleaning/spraying carb cleaner. Seafoam and B-12 are good too. Might soak with WD-40 (mainly a solvent) and scrub away. Clean is clean. Think hospital clean.
slomo
S
slomo
Your spark was arcing where it didn't belong, at the plug gap. You can take a simple 12 volt test light and check for spark leakage. Ground the tester to the cooling fins on the block. Then probe around the plug wire, coil and plug. If you see a spark jump onto the tester probe, you have spark leakage. Again going where it doesn't belong. Start the engine and probe around.What do you think the electrical tape did or messing around with the wire hooked up to the spark?
We've been working on this thing for weeks now with no luck up until this point.
I would de-carbon that cylinder. Might have to soak it and scrub later. Carb cleaner works pretty good. Make sure your allow any liquid/carbon/dirt to drain out of the cylinder while cleaning/spraying carb cleaner. Seafoam and B-12 are good too. Might soak with WD-40 (mainly a solvent) and scrub away. Clean is clean. Think hospital clean.
slomo
#67

PTmowerMech
I've never heard of spark leakage before.
PTmowerMech
Your spark was arcing where it didn't belong, at the plug gap. You can take a simple 12 volt test light and check for spark leakage. Ground the tester to the cooling fins on the block. Then probe around the plug wire, coil and plug. If you see a spark jump onto the tester probe, you have spark leakage. Again going where it doesn't belong. Start the engine and probe around.
I would de-carbon that cylinder. Might have to soak it and scrub later. Carb cleaner works pretty good. Make sure your allow any liquid/carbon/dirt to drain out of the cylinder while cleaning/spraying carb cleaner. Seafoam and B-12 are good too. Might soak with WD-40 (mainly a solvent) and scrub away. Clean is clean. Think hospital clean.
slomo
I've never heard of spark leakage before.
#68

StarTech
StarTech
You must be youngin then. When I worked on the family cars back in the 70's and 80's it wasnt uncommon to raise the hood at night and see bad plug wires arcing all over the place.I've never heard of spark leakage before.
#69

Hammermechanicman
Rubber is pliable because of the oily compounds in it. When those dissapate out of the rubber it becomes stiff and brittle and looses much of its dielectric strength and prone to arc leakage. Rubber boots do the same.
Hammermechanicman
It was not uncommon for cars from the 60s and early 70s to run rough on humid summer days and open the hood at night and watch the light show when the plug wires needed replaced. Old time mechanics would use a spray bottle of water and wet down the plug wires at idle and if it started missing it needed new plug wires. Modern automotive plug wires are far superior to the old stuff.You must be youngin then. When I worked on the family cars back in the 70's and 80's it wasnt uncommon to raise the hood at night and see bad plug wires arcing all over the place.
Rubber is pliable because of the oily compounds in it. When those dissapate out of the rubber it becomes stiff and brittle and looses much of its dielectric strength and prone to arc leakage. Rubber boots do the same.
#70

PTmowerMech
Yeah, was born in 70. My first pick up at 16, was a 65 Ford. I changed plugs and wires pretty often in my late teens, because I didn't know any better.
But from the 55, 65, 68, 69, 71, 75, 82, 84, 88 & 95 Ford's I've ever owned, I've never seen sparks coming from the plugs (installed) or the wires.
PTmowerMech
You must be youngin then. When I worked on the family cars back in the 70's and 80's it wasnt uncommon to raise the hood at night and see bad plug wires arcing all over the place.
Yeah, was born in 70. My first pick up at 16, was a 65 Ford. I changed plugs and wires pretty often in my late teens, because I didn't know any better.
But from the 55, 65, 68, 69, 71, 75, 82, 84, 88 & 95 Ford's I've ever owned, I've never seen sparks coming from the plugs (installed) or the wires.
#72
B
bertsmobile1
B
bertsmobile1
Depends upon the engine & the type of plug lead
The worst are the graphite leads because the graphite dust gets shaken by engine vibrations till you get sections where there is none
Solid copper wires tend to only leak at the boots particularly if the engine is old and has a bit of oil fume deposited on everything
Spiral wound leads never fail which is why high end vehicles use them plus a lot of F1 engines.
The fun is when they hold tight at idle then arc every where at high revs
#73

Fish
It "Depends"...........
Fish
Leaking starts to be a problem when you hit 50 years old or so.I've never heard of spark leakage before.
It "Depends"...........

