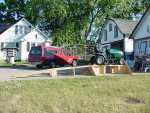
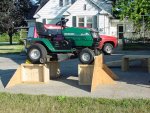
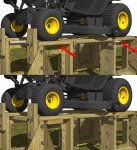
Been designing a stand to make working on my riding mower easier, and thought I would post it here and see what you think. Comments, criticisms and suggestions are more than welcome. I have thick skin, so don’t hold back.


I have a 2007 MTD 13AN771H729 46 inch, and, while I generally like it a lot, doing maintenance on it can be a real pain. Removing the deck on this thing is anything but straight forward, and I’m a long way from being a spring chicken (whatever that means) and getting down on the ground (and back up) can be very difficult. So I’m going to build this to get the mower up where I can work on it at a comfortable level. I had built a similar stand many years ago, but let’s just say I didn’t really plan that one very well. More on that later. Keep in mind that this is designed for my particular situation. I live in an old farmhouse, and it has a small barn and workshop with a large concrete slab in front of them. While I do use a grass texture in some of the photos, that is just to give it a base (and I’m too lazy to develop a decent concrete texture). It would not be suitable for use on the ground. The slab is large enough that I can leave it up all summer without it being in the way, so I will assemble it in the Spring and disassemble and store it when the mowing season is over. I could maybe/sort of use it in the barn, but it would be tight, to the point that actually working on the mower would be too much of a pain (the barn, like the other buildings, including the house, was designed by children and built by fools).

The center sections can be easily removed to facilitate working underneath the mower, and for removal and installation of the deck. Ramps can also be quickly removed to make working around the mower easier.

I have an old garden wagon, from which I have removed everything on top and attached a slab of ¾” plywood. I’ve been using it to haul things around, and I will just attach the “box” (with piano hinges inside to let it fold flat for storage) with wing nuts on lag bolts. The top will have lips to set it on the box.

I don’t want the actual stand to be in constant contact with the concrete so I will use “sacrificial” wooden blocks, separated by a number of washers on the lag bolts. Easy to replace and I will just make an extra set or two when I make them. I will just use lag bolts to lift the “outriggers” away from the concrete. This is the same setup that I used on the original stand and it worked well.

I am also considering the use of some type of hard rubber blocks, but I’m moving away from that for now due to some concerns about it’s suitability.

While the original had wooden ramps, I’ve decided to go with aluminum for this one. There are any number of them available online, but I have narrowed it down to a select few. Reading the reviews it’s not too surprising that the main problem with this type of ramp is the area where the two sections join/fold. That is obviously the weak point, so I plan to add a support of some type (possibly a swing-down support)to take care of that. The design of that support and how the ramps will connect with the stand will have to wait until I have decided which ramps to order.

An exploded view, probably more confusing than informative. The majority of the cuts are simple straight cuts, and the few exceptions aren’t anything that difficult. I actually bought all the treated lumber maybe six or seven years ago (after visiting stores all over the area to make sure I got the best I could find) and have had them stored so that they dried without warping. So they are more than ready for a suitable protective finish to be applied to each piece before it is assembled. I have done a lot of research on protecting treated lumber, and am aware that whenever you make a cut you are exposing untreated lumber. There are products specifically designed to take care of that. I actually photographed some of my lumber and used the photos to make the wood textures seen in the model. I also found a good supplier for all of the stainless steel hardware needed, and it’s been waiting and ready to go also.

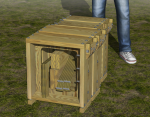
The whole thing can be quickly broken down for storage, taking up very little space, just by removing a number of wing nuts (gonna buy a wing nut attachment for a drill to simplify this, just haven’t decided on which one yet. Might just make my own)
(The guy is just a 3D figure I found online. I did not model him, just modified him a bit and scaled to 6 foot height to add a scale reference.)
Anyhow, I am having some difficulty in figuring out how to correctly configure this post, and whenever I select "Preview Post" it does provide the preview, but the actual post that I am previewing simply goes away, and I have to start from scratch. So I'm just gonna hit "Submit" and see how it goes before I post the rest of the photos and whatnot.


I have a 2007 MTD 13AN771H729 46 inch, and, while I generally like it a lot, doing maintenance on it can be a real pain. Removing the deck on this thing is anything but straight forward, and I’m a long way from being a spring chicken (whatever that means) and getting down on the ground (and back up) can be very difficult. So I’m going to build this to get the mower up where I can work on it at a comfortable level. I had built a similar stand many years ago, but let’s just say I didn’t really plan that one very well. More on that later. Keep in mind that this is designed for my particular situation. I live in an old farmhouse, and it has a small barn and workshop with a large concrete slab in front of them. While I do use a grass texture in some of the photos, that is just to give it a base (and I’m too lazy to develop a decent concrete texture). It would not be suitable for use on the ground. The slab is large enough that I can leave it up all summer without it being in the way, so I will assemble it in the Spring and disassemble and store it when the mowing season is over. I could maybe/sort of use it in the barn, but it would be tight, to the point that actually working on the mower would be too much of a pain (the barn, like the other buildings, including the house, was designed by children and built by fools).

The center sections can be easily removed to facilitate working underneath the mower, and for removal and installation of the deck. Ramps can also be quickly removed to make working around the mower easier.

I have an old garden wagon, from which I have removed everything on top and attached a slab of ¾” plywood. I’ve been using it to haul things around, and I will just attach the “box” (with piano hinges inside to let it fold flat for storage) with wing nuts on lag bolts. The top will have lips to set it on the box.

I don’t want the actual stand to be in constant contact with the concrete so I will use “sacrificial” wooden blocks, separated by a number of washers on the lag bolts. Easy to replace and I will just make an extra set or two when I make them. I will just use lag bolts to lift the “outriggers” away from the concrete. This is the same setup that I used on the original stand and it worked well.

I am also considering the use of some type of hard rubber blocks, but I’m moving away from that for now due to some concerns about it’s suitability.

While the original had wooden ramps, I’ve decided to go with aluminum for this one. There are any number of them available online, but I have narrowed it down to a select few. Reading the reviews it’s not too surprising that the main problem with this type of ramp is the area where the two sections join/fold. That is obviously the weak point, so I plan to add a support of some type (possibly a swing-down support)to take care of that. The design of that support and how the ramps will connect with the stand will have to wait until I have decided which ramps to order.

An exploded view, probably more confusing than informative. The majority of the cuts are simple straight cuts, and the few exceptions aren’t anything that difficult. I actually bought all the treated lumber maybe six or seven years ago (after visiting stores all over the area to make sure I got the best I could find) and have had them stored so that they dried without warping. So they are more than ready for a suitable protective finish to be applied to each piece before it is assembled. I have done a lot of research on protecting treated lumber, and am aware that whenever you make a cut you are exposing untreated lumber. There are products specifically designed to take care of that. I actually photographed some of my lumber and used the photos to make the wood textures seen in the model. I also found a good supplier for all of the stainless steel hardware needed, and it’s been waiting and ready to go also.


The whole thing can be quickly broken down for storage, taking up very little space, just by removing a number of wing nuts (gonna buy a wing nut attachment for a drill to simplify this, just haven’t decided on which one yet. Might just make my own)
(The guy is just a 3D figure I found online. I did not model him, just modified him a bit and scaled to 6 foot height to add a scale reference.)
Anyhow, I am having some difficulty in figuring out how to correctly configure this post, and whenever I select "Preview Post" it does provide the preview, but the actual post that I am previewing simply goes away, and I have to start from scratch. So I'm just gonna hit "Submit" and see how it goes before I post the rest of the photos and whatnot.

