You are using an out of date browser. It may not display this or other websites correctly.
You should upgrade or use an alternative browser.
You should upgrade or use an alternative browser.
Export thread
Craftsman GT 5000 Wiring
#1
S
Spikeit
S
Spikeit
Does anyone have, or can direct me to where I can get a wiring schematic for a GT 5000 model #917.27636? The Sears site shows one in the owners manual doesn't list the wire colors. The Kohler engine gave up so I put a twin Briggs in it's place and have some wiring to figure out. It'll crank/run, lights work but the PTO won't engage whereas it did before and the fuse is good. And, I can't find a terminal on the ign switch that will ground out the motor to shut it off. I've ohm'd and ohm'd with no luck, hence the need for a schematic. I've found some schematics online but the wire colors don't match up to this mower, besides a few other differences.
Thanks!
Thanks!
#2
I
Isaac22
I
Isaac22
Here I found this for the gt5000 maybe this will help you http://i210.photobucket.com/albums/bb268/MOWNIE/Examplewiring.jpg
#3
B
bertsmobile1
B
bertsmobile1
Your mower is a Husqvana in drag and should have the same wiring as a YTH 2648 ( 4 wire seat switch ) if not then a GTH 2245 ( 1 or 2 wire seat switch)
Both of these parts books have the complete wiring diagrams in them and are downloadable for free.
The earth wire is not on the plug but a single wire that hooks up to the G ( Ground ) terminal on the back of the ignition switch.
The back of the PTO switch should have 3 rows of contacts.
The rows with 3 terminals are all ground connections to activate the various safety switches.
The row with only 2 is power in & power out to the PTO.
#4
S
Spikeit
Sorry for my delay but regardless I appreciate your reply and the schematic! Looks like just what I've needed so now I can get this beast finished and cutting grass again. :thumbsup:
S
Spikeit
Here I found this for the gt5000 maybe this will help you http://i210.photobucket.com/albums/bb268/MOWNIE/Examplewiring.jpg
Sorry for my delay but regardless I appreciate your reply and the schematic! Looks like just what I've needed so now I can get this beast finished and cutting grass again. :thumbsup:
#5
S
Spikeit
Man, this is some helpful info! This, combined with the schematic from another response should to the trick and I greatly appreciate the help. A Husqvana in drag? :laughing: That right there's funny, I don't care who you are! By the way, the "drag queen" has the 4 wire seat switch; YTH2648. And thx too for including model #'s and mfg 'cause I wondered who built this thing. Husqvana; I would've never guessed.
S
Spikeit
Your mower is a Husqvana in drag and should have the same wiring as a YTH 2648 ( 4 wire seat switch ) if not then a GTH 2245 ( 1 or 2 wire seat switch)
Both of these parts books have the complete wiring diagrams in them and are downloadable for free.
The earth wire is not on the plug but a single wire that hooks up to the G ( Ground ) terminal on the back of the ignition switch.
The back of the PTO switch should have 3 rows of contacts.
The rows with 3 terminals are all ground connections to activate the various safety switches.
The row with only 2 is power in & power out to the PTO.
Man, this is some helpful info! This, combined with the schematic from another response should to the trick and I greatly appreciate the help. A Husqvana in drag? :laughing: That right there's funny, I don't care who you are! By the way, the "drag queen" has the 4 wire seat switch; YTH2648. And thx too for including model #'s and mfg 'cause I wondered who built this thing. Husqvana; I would've never guessed.
#6
S
Spikeit
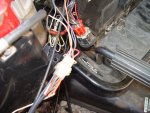
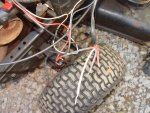
Well, I've been down for several days and just now got back on this project. I found the YTH-2648 is close but not exact. Reading further explains why not. To the drivers left side of the motor the wires in that section of harness are; red, white, orange, purple. I don't have the printed schematic in front of me right now but I do remember there is NO purple wire listed, unless I've overlooked it. Any idea where it goes? And this mower does have the 4-wire seat switch. One pic shows the left side (ing. switch hanging loose) and the other pic is of the drivers rt side.
S
Spikeit
Your mower is a Husqvana in drag and should have the same wiring as a YTH 2648 ( 4 wire seat switch ) if not then a GTH 2245 ( 1 or 2 wire seat switch)
Both of these parts books have the complete wiring diagrams in them and are downloadable for free.
The earth wire is not on the plug but a single wire that hooks up to the G ( Ground ) terminal on the back of the ignition switch.
The back of the PTO switch should have 3 rows of contacts.
The rows with 3 terminals are all ground connections to activate the various safety switches.
The row with only 2 is power in & power out to the PTO.
Well, I've been down for several days and just now got back on this project. I found the YTH-2648 is close but not exact. Reading further explains why not. To the drivers left side of the motor the wires in that section of harness are; red, white, orange, purple. I don't have the printed schematic in front of me right now but I do remember there is NO purple wire listed, unless I've overlooked it. Any idea where it goes? And this mower does have the 4-wire seat switch. One pic shows the left side (ing. switch hanging loose) and the other pic is of the drivers rt side.


#7
B
bertsmobile1
B
bertsmobile1
Purple is used by Kohler for the alternator feed to the battery ( usually goes to the A1 or A2 on the ignition switch).
If yiu pull the plug off the ignition switch most are stamped with letters corresponding to the connection chart in the bottom of the diagrams.
The only thing to get absolutely right are the ignition kill wires so I strongly sugges you disconnect the ignition coil kill wire from the coil and double check you never get voltage on the wire.
It should be either open circuit ( on ) or ground ( off ).
#8
S
Spikeit
Man, if your not a mower repairman you should be. I've been working on them for several years now on the side. This one has stumped me but it's the first one I've converted from Kohler to Briggs. Reason I did so is because I had the the Briggs sitting and the Kohler, while the cylinders are great, smoked a lot as int eh end gap was way past the high side of acceptable. The oddity was the cylinders have NO ring wear at the top. I priced replacement rings @ $35 or so for each cylinder plus seals and gaskets plus shipping. Why spend all that when I have a good Briggs? In hindsight I should've because I've had that much in headache's trying to get this figured out. I've had it running but when I engage the PTO it shuts off. And, without the PTO being on, when I turn it off it keeps running. It grounds via a white wire from the coil (remember, this is an old L head) but can't find which one on the switch grounds when it's turned off. I've used an ohm meter and still haven't found the right position/wire. On the flip side, when the Kohler was on it the PTO worked no problem so it's in the wiring EVEN THOUGH I haven't touched that segment of the wiring. I know it's basic thus SHOULD be simple but still, it's worn me out. Maybe I'm just over thinking it. Dunno. Thanks again greatly for your knowledge and assist.
S
Spikeit
Purple is used by Kohler for the alternator feed to the battery ( usually goes to the A1 or A2 on the ignition switch).
If yiu pull the plug off the ignition switch most are stamped with letters corresponding to the connection chart in the bottom of the diagrams.
The only thing to get absolutely right are the ignition kill wires so I strongly sugges you disconnect the ignition coil kill wire from the coil and double check you never get voltage on the wire.
It should be either open circuit ( on ) or ground ( off ).
Man, if your not a mower repairman you should be. I've been working on them for several years now on the side. This one has stumped me but it's the first one I've converted from Kohler to Briggs. Reason I did so is because I had the the Briggs sitting and the Kohler, while the cylinders are great, smoked a lot as int eh end gap was way past the high side of acceptable. The oddity was the cylinders have NO ring wear at the top. I priced replacement rings @ $35 or so for each cylinder plus seals and gaskets plus shipping. Why spend all that when I have a good Briggs? In hindsight I should've because I've had that much in headache's trying to get this figured out. I've had it running but when I engage the PTO it shuts off. And, without the PTO being on, when I turn it off it keeps running. It grounds via a white wire from the coil (remember, this is an old L head) but can't find which one on the switch grounds when it's turned off. I've used an ohm meter and still haven't found the right position/wire. On the flip side, when the Kohler was on it the PTO worked no problem so it's in the wiring EVEN THOUGH I haven't touched that segment of the wiring. I know it's basic thus SHOULD be simple but still, it's worn me out. Maybe I'm just over thinking it. Dunno. Thanks again greatly for your knowledge and assist.
#9
B
bertsmobile1
B
bertsmobile1
Take the plug off the ignition switch .
On the back should be tiny letters
M= magneto kill wire
G= Ground
these two wires should join when the switch is off
On the back should be tiny letters
M= magneto kill wire
G= Ground
these two wires should join when the switch is off
#10
S
Spikeit
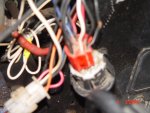
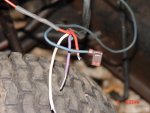
Hey Berts. Yes, I'm still dealing with this junk when time allows. I can't find it but in one reply you said this ignition switch has one stand alone white wire. Mine doesn't. Hopefully the attachments get through and clear enough to see.
S
Spikeit
Take the plug off the ignition switch .
On the back should be tiny letters
M= magneto kill wire
G= Ground
these two wires should join when the switch is off
Hey Berts. Yes, I'm still dealing with this junk when time allows. I can't find it but in one reply you said this ignition switch has one stand alone white wire. Mine doesn't. Hopefully the attachments get through and clear enough to see.


#11
B
bertsmobile1
Hope your wrenching is better than your photography :laughing:
Take the red plug off the ignition switch and in good strong light you will see tiny letters on the back.
These will correspond with the little chart at the bottom of those circuit diagrams.
Take a photo of the back of the switch & the front of the red plug.
Put your camera on a stand of some sort & focus it.
If you are using your phone, straddle a step ladder over the mower and lean your hands on one of the steps to steady them while you focus & shoot.
AS for the other two photos, zoom out a bit because I need to know where those wires go. A plug is a plug is a plug.
B
bertsmobile1
Hey Berts. Yes, I'm still dealing with this junk when time allows. I can't find it but in one reply you said this ignition switch has one stand alone white wire. Mine doesn't. Hopefully the attachments get through and clear enough to see.
Hope your wrenching is better than your photography :laughing:
Take the red plug off the ignition switch and in good strong light you will see tiny letters on the back.
These will correspond with the little chart at the bottom of those circuit diagrams.
Take a photo of the back of the switch & the front of the red plug.
Put your camera on a stand of some sort & focus it.
If you are using your phone, straddle a step ladder over the mower and lean your hands on one of the steps to steady them while you focus & shoot.
AS for the other two photos, zoom out a bit because I need to know where those wires go. A plug is a plug is a plug.
#12
S
Spikeit
Ah, found the problem. Somehow I hit a button and took it off auto focus but thx for the photo lesson just the same. Believe me, I'm a much better wrencher! I'll get better pics.
S
Spikeit
Hope your wrenching is better than your photography :laughing:
Take the red plug off the ignition switch and in good strong light you will see tiny letters on the back.
These will correspond with the little chart at the bottom of those circuit diagrams.
Take a photo of the back of the switch & the front of the red plug.
Put your camera on a stand of some sort & focus it.
If you are using your phone, straddle a step ladder over the mower and lean your hands on one of the steps to steady them while you focus & shoot.
AS for the other two photos, zoom out a bit because I need to know where those wires go. A plug is a plug is a plug.
Ah, found the problem. Somehow I hit a button and took it off auto focus but thx for the photo lesson just the same.
#13
B
bertsmobile1
B
bertsmobile1
I worked for some of the worlds best ? stills photographers when we had the courier business so I picked up a trick or two when working on site.
Knowing how to take professional grade photos on site allowed me to make a profit writing articles for a few technical publications .
The dearest part of writing a manual is the studio time to take the photos so most don't have any where near enough to be of use to the layperson.
Professionals don't need photos cause they all speak the same language but then you have limited your target audience down to a never profitable level.
It is amazing what you can do freehand but holding the camera ? a foot away from you to see the image view in the back will almost never yield a print quality picture.
Even with auto focus and shake reduction.
#14
S
Spikeit
Here's another part lacking in the equation; I wasn't wearing glasses and never gave them a thought. That means the one clear pic was a fluke AND I glanced at but didn't give a hard look after taking each one, nor when uploading/downloading. When I say look, again, wasn't wearing glasses so I figured while they were a little fuzzy, they were ok. I went with it and that's what you got. Hey, look at the pics again using glasses OR get stronger ones; maybe they'll be clearer. :laughing: Thankfully, I only need them to read. Well, that, and taking
pics.
S
Spikeit
I worked for some of the worlds best ? stills photographers when we had the courier business so I picked up a trick or two when working on site.
Knowing how to take professional grade photos on site allowed me to make a profit writing articles for a few technical publications .
The dearest part of writing a manual is the studio time to take the photos so most don't have any where near enough to be of use to the layperson.
Professionals don't need photos cause they all speak the same language but then you have limited your target audience down to a never profitable level.
It is amazing what you can do freehand but holding the camera ? a foot away from you to see the image view in the back will almost never yield a print quality picture.
Even with auto focus and shake reduction.
Here's another part lacking in the equation; I wasn't wearing glasses and never gave them a thought. That means the one clear pic was a fluke AND I glanced at but didn't give a hard look after taking each one, nor when uploading/downloading. When I say look, again, wasn't wearing glasses so I figured while they were a little fuzzy, they were ok. I went with it and that's what you got. Hey, look at the pics again using glasses OR get stronger ones; maybe they'll be clearer. :laughing: Thankfully, I only need them to read. Well, that, and taking
pics.
#15
B
bertsmobile1
B
bertsmobile1
As you get older the eyeballs and in particular the cornea get harder & flatter so your distance vision gets better and your close vision gets worse.
I have 2 pairs of general use bifocals and 5 pairs of specific purpose glasses .
Drove the optomistrist crazy but he finally wrote me out perscriptions for
Very Close
Reading
Short intermediate
Long intermediate
distance
Then I bumped around the workshop for a week with a 40" rule in my hand to work out the distance I like to work from things and how good a focus I need at particular lengths.
Prior to doing this I had at least a dozen magnifing glasses all over he shop + a magnifier/lamp at the grinding wheels, chain maker, chain grinder, press, lathes, mills & welding bench.
What I spent in glasses I will save in electricity.
Should have done this years ago but it sort of sneeks up on you.
#16
S
Spikeit
LOL! That's funny on one hand, sad on the other. Sad in that we've aged to this point but eyesight issues could've happened at younger age and things could easily be worse. I keep cheaters in both garages, bathroom (the library,) my end table and in my truck. I'm kinda like the alcoholic who stashes bottles everywhere. Ahhhh yes, it's all part of the "Golden Years." I remember growing up listening to older folks talk about that and I couldn't wait. Well, I made it and imo, so far, it SUCKS. I'll admit it does increase the number of new friends you get to make ie: doctors, nurses, tech's and so forth AND you get to contribute $$$ to the coffers of drug companies due to the increase in med's your put on which in turn helps the economy. Words I've grown to live by come from the old DuPont motto, "Better Living Through Chemistry." I don't know that's it living, but it'll do I suppose. Seven pills in the morning, seven at night. The 25th I'll have my gall bladder removed because the three doctors don't know what else to do. Seriously, in this day/age they don't know. There are no more tests they can do. I get bile in my throat, pain in the pit of my stomach, nausea, and it's been going on for eleven months. Eight different tests show everything is good, even the GB but reading online, every symptom I have points to that. This is one reason it's taken me so long on the mower. I've good days, I've bad days, with the bad being more frequent. Golden Years. Ha!
S
Spikeit
As you get older the eyeballs and in particular the cornea get harder & flatter so your distance vision gets better and your close vision gets worse.
I have 2 pairs of general use bifocals and 5 pairs of specific purpose glasses .
Drove the optomistrist crazy but he finally wrote me out perscriptions for
Very Close
Reading
Short intermediate
Long intermediate
distance
Then I bumped around the workshop for a week with a 40" rule in my hand to work out the distance I like to work from things and how good a focus I need at particular lengths.
Prior to doing this I had at least a dozen magnifing glasses all over he shop + a magnifier/lamp at the grinding wheels, chain maker, chain grinder, press, lathes, mills & welding bench.
What I spent in glasses I will save in electricity.
Should have done this years ago but it sort of sneeks up on you.
LOL! That's funny on one hand, sad on the other. Sad in that we've aged to this point but eyesight issues could've happened at younger age and things could easily be worse. I keep cheaters in both garages, bathroom (the library,) my end table and in my truck. I'm kinda like the alcoholic who stashes bottles everywhere. Ahhhh yes, it's all part of the "Golden Years." I remember growing up listening to older folks talk about that and I couldn't wait. Well, I made it and imo, so far, it SUCKS. I'll admit it does increase the number of new friends you get to make ie: doctors, nurses, tech's and so forth AND you get to contribute $$$ to the coffers of drug companies due to the increase in med's your put on which in turn helps the economy. Words I've grown to live by come from the old DuPont motto, "Better Living Through Chemistry." I don't know that's it living, but it'll do I suppose. Seven pills in the morning, seven at night. The 25th I'll have my gall bladder removed because the three doctors don't know what else to do. Seriously, in this day/age they don't know. There are no more tests they can do. I get bile in my throat, pain in the pit of my stomach, nausea, and it's been going on for eleven months. Eight different tests show everything is good, even the GB but reading online, every symptom I have points to that. This is one reason it's taken me so long on the mower. I've good days, I've bad days, with the bad being more frequent. Golden Years. Ha!
#17
B
bertsmobile1
B
bertsmobile1
Just a heads up. I am off to do some motorcycling latter this week so I do hope some one else will pop in to look over your shoulder.
#18
S
Spikeit
Rode dirt bikes in the mid/late 70's. At work one night my left leg started hurting and progressively got worse. When I got off I went to a doctor who said I had a blood clot in it. I was going too fast and zig zag between trees when I finally hit one and the knee took a blow causing the clot. That was the last time I went riding which I had grown tired of anyway. Ok, my camera is older, a 5 meg with a 10x Zeiss lens. Tonight I took 5 pics of the rear of the switch and only one turned out clear but was so far back that you can't read the letters on it. I know about the letters and schematic; this was just a test to see. Good luck riding and I'll wait til you return to resume this. :thumbsup:
S
Spikeit
Just a heads up. I am off to do some motorcycling latter this week so I do hope some one else will pop in to look over your shoulder.
Rode dirt bikes in the mid/late 70's. At work one night my left leg started hurting and progressively got worse. When I got off I went to a doctor who said I had a blood clot in it. I was going too fast and zig zag between trees when I finally hit one and the knee took a blow causing the clot. That was the last time I went riding which I had grown tired of anyway. Ok, my camera is older, a 5 meg with a 10x Zeiss lens. Tonight I took 5 pics of the rear of the switch and only one turned out clear but was so far back that you can't read the letters on it. I know about the letters and schematic; this was just a test to see. Good luck riding and I'll wait til you return to resume this. :thumbsup:
