You are using an out of date browser. It may not display this or other websites correctly.
You should upgrade or use an alternative browser.
You should upgrade or use an alternative browser.
Export thread
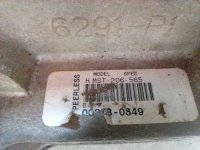
About gear box Peerles-HMST-206-565
#1
B
Bange
B
Bange
I always try to anticipate some problems ...
I am seeing information and videos about the gearbox (mine works well), it is bathed in thick oil, but has no drain or opening for changes.
It seems to have a sturdy construction and a long life forecast, but not infinite ...
Is there any guidance for changing the oil?
At what age?
I am seeing information and videos about the gearbox (mine works well), it is bathed in thick oil, but has no drain or opening for changes.
It seems to have a sturdy construction and a long life forecast, but not infinite ...
Is there any guidance for changing the oil?
At what age?
#2
R
Rivets
R
Rivets
The “thick oil” you are seeing is actually Bentinite grease, which is a clay based grease used in many on the Peerless models. If you decide that you “MUST” change the lubricant in you tranny, be ready for a sticky, dirty job. Do not attempt this unless you have above average mechanical skills and a minimum time frame of one week. I know this time frame sounds odd, but if you decide to open the tranny, it will take 1 day to open unit, disassemble and clean all parts. Bentinite grease will get into everything. Then you should inspect the shift keys, bearings/bushings, gears as seals to see about replacing as needed. Most shops don’t have in stock, so will need to order. After you receive the needed parts, plus a tube of grease, most of the time It takes me about three hours to assemble it properly, I triple check everything, don’t want to open it a second time. I’ve done this many times in the last 50 years and really don’t mind doing it, but it dos take time and patience.
#3
B
Bange

B
Bange
Strange you talk about grease ... I saw this video and the lubricant is thick oil ...
Looking on the net, a few minutes ago I found a Tecomseh material (the site refused to attach it, as it is very large), where I have my Peerless MST series, and in fact the lubricant is oil ... and there is also a plug for supervision and exchange of oil ... but nothing says about changing the period and this is my question.
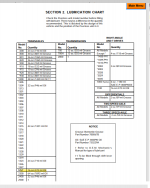
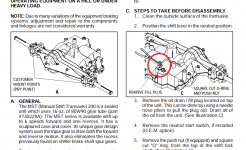
Mechanical execution is no problem ... I have a lot of tools, but not a compressed air one ...
Looking on the net, a few minutes ago I found a Tecomseh material (the site refused to attach it, as it is very large), where I have my Peerless MST series, and in fact the lubricant is oil ... and there is also a plug for supervision and exchange of oil ... but nothing says about changing the period and this is my question.


Mechanical execution is no problem ... I have a lot of tools, but not a compressed air one ...
Attachments
#4
B
bertsmobile1
B
bertsmobile1
The reason why there is no provision for changing the lubricant is because it is not designed to be replaced.
The actual consistency of the lubricant is very important for the proper operation of the transmission as holes for the lubricant to circulate around gears & bushes are sized for the lubricant used .
Unless you have identified a problem, like leaks from a seal, leave them alone.
Providied you do not shift whie moving which damages the keys and gears that box will do 10,000 hours , about 5 times of the life of the engine .
#5
B
Bange
B
Bange
I totally agree, but he is an 11-year-old cutter, I am the third or fourth owner, he doesn't have an hour meter and I don't know under what conditions he has been kept (see my post on engine noise).
As the gearbox is working well, my intention is just to change the oil and make sure it is clean and at the correct level.
Just like buying a used car, it is normal to change all fluids, inspect brakes, shock absorbers, headlights ... then just follow the preventive maintenance chart ...
I was satisfied and calmer when I discovered that there is a way to drain, inspect or change the oil, because until then I only saw information that I was only opening to change.
#6
R
Rivets
R
Rivets
Are you sure you have an MST tranny and not an 800 or 900 series tranny? What is the number on the ID tag on the tranny? Yes, you are correct that an MST tranny uses 80W90 gear lube, but the 800 and 900 series units use Bentinite. You say you have an MST unit, but the video your watch is not an MST if it has Bentinite in it. The ID tag will tell us which you have. Your analogy of buying a used car vs a used tractor is only half correct. We are talking about a multi $1000 unit vs a multi $100 unit. Having torn down and repaired both types of mower trannies I can tell you there is no reason to open up a unit unless I’m over 80% sure that there is something wrong inside. If you do open it up, I’m will to bet big money that you will have to replace the seals or it will leak after reassembled. If the tranny is working well I strongly recommend not doing anything with it, but it is your call. Only my opinion which many techs on this site say ain’t worth a dime. If you do open it up there is a good procedure manual available.
#7
B
bertsmobile1
B
bertsmobile1
Double of what Rivers says
These units are tough and EXPENSIVE which is one reason why they are not used much.
They will outlast everything on the mower by a long way and require next to no work.
If you do open it up, you should replace all of the bushes & seals , check the shift keys for cracking, I replace them as a matter of course, less than $ 20 but $ 100 in time to do it again.
Very dirty job.
I mechanically remove as much as possible with a pallet knife , kitchen spatchler & finally kerrosene towels
The a soak in kerro for a day or so followed by a high pressure water jet wash.
Internals like gears get a solvent soak, pressure wash then ultrasound using kerro as the solution
Similarly to working on a hydro, clean parts need to be kept in closed bags till you are ready to assemble.
Do this on a damp towel and keep another damp towel handy to cover over the job if you ave to walk away.
Make sure all shafts that get seals on them are polished shinny before assembly .
#10
B
Bange
B
Bange
Well, I could only see the brake today ...
The removal of the disc had to be somewhat aggressive due to rust, now it goes in and out manually. I don't know the thickness of the inserts, but the internal one shows a degree of wear ... does anyone know how to inform?
If they are still reasonable, can I put a plate of the same size to make the tablet higher?
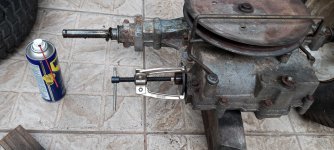
Right-hand insert is always internal
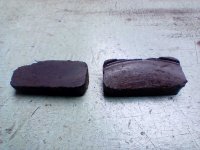
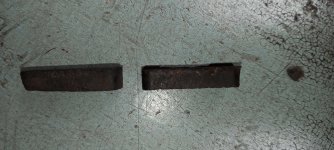
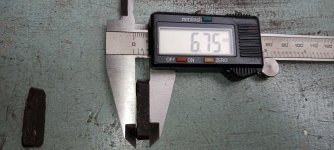
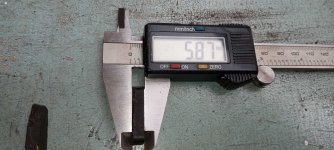
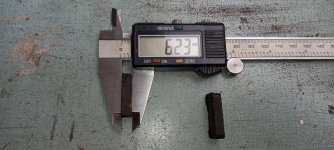
Can I consider the largest measurement to be the thickness of a new one?
The removal of the disc had to be somewhat aggressive due to rust, now it goes in and out manually. I don't know the thickness of the inserts, but the internal one shows a degree of wear ... does anyone know how to inform?
If they are still reasonable, can I put a plate of the same size to make the tablet higher?

Right-hand insert is always internal


Can I consider the largest measurement to be the thickness of a new one?
#11
R
Rivets
R
Rivets
Just went out and measured the thickness of a nearly new set of pads. Thickness is .380”. Tecumseh part number 799021A, cost about $8.00. Hope you still have the thin shim which rides against the two pins to keep the pad from breaking.
#12
B
Bange
B
Bange
Yes, I kept it carefully ...
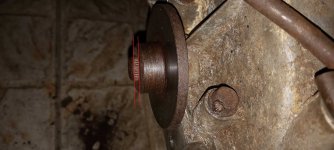
So, by this measure, the high part of the disc faces the tip of the shaft ... in mine there is a difference of approximately 3mm, coinciding with your information.
New tablet
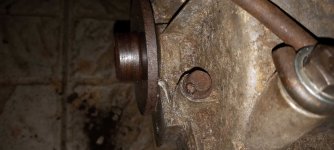
used tablet
Where I live I have two problems buying parts.
1 - Find the part. (Few suppliers)
2 - High price. (imported material)
Sometimes it is cheaper to make the piece. Thanks for your information...
Another question ... is there a rule for the angle of the brake pedal to activate the brake? ... after activating the clutch?
So, by this measure, the high part of the disc faces the tip of the shaft ... in mine there is a difference of approximately 3mm, coinciding with your information.
New tablet

used tablet

Where I live I have two problems buying parts.
1 - Find the part. (Few suppliers)
2 - High price. (imported material)
Sometimes it is cheaper to make the piece. Thanks for your information...
Another question ... is there a rule for the angle of the brake pedal to activate the brake? ... after activating the clutch?
#13
B
bertsmobile1
B
bertsmobile1
Replace them.
There should have been shims behind both
If so the thicker on goes behind the moving pad .
There should have been shims behind both
If so the thicker on goes behind the moving pad .
#14
B
bertsmobile1
B
bertsmobile1
You adjust the brake by the middle nut which moved the lever in or out.
Done on the mower so the brake comes on just as the drive belts gets loose enough to slip.
Note, this is a sudden death brake it is either on or off as it locks the layshaft which locks the diff so the wheels can only turn is opposite directions
Done on the mower so the brake comes on just as the drive belts gets loose enough to slip.
Note, this is a sudden death brake it is either on or off as it locks the layshaft which locks the diff so the wheels can only turn is opposite directions
#16
B
Bange
B
Bange
As for the oil change, I sent an email to Peerless about the possibility of drilling (without opening) the same point that appears in their own manual ... they still haven't answered me and I don't even know if they will ...
What do you think? My problem would be limited to just buying or making the plug (Nylon or rubber?)
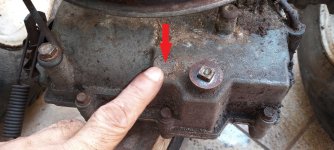
What do you think? My problem would be limited to just buying or making the plug (Nylon or rubber?)

#17
B
Bange
See how difficult things are here ...
I just received the quote for brake pads from the only existing supplier.
BRL326.00, which is equivalent to USD62.69 in a simple and direct conversion.
In this difference (USD 8 to USD62) are fees and profit from the supplier, of course, but it is very expensive for a simple piece.
USD 8.00 is equivalent to BRL 41.62 ... if you add 100% tax (which is not true) it would go to BRL 83.20 ... if you add more 100% of the seller's profit it goes to BRL 164.40. .. which is already expensive, but it would be acceptable ... but BRL326.00 is much more than absurd!
This is the reason for homemade solutions ...
B
Bange
Rivets,Just went out and measured the thickness of a nearly new set of pads. Thickness is .380”. Tecumseh part number 799021A, cost about $8.00. Hope you still have the thin shim which rides against the two pins to keep the pad from breaking.
See how difficult things are here ...
I just received the quote for brake pads from the only existing supplier.
BRL326.00, which is equivalent to USD62.69 in a simple and direct conversion.
In this difference (USD 8 to USD62) are fees and profit from the supplier, of course, but it is very expensive for a simple piece.
USD 8.00 is equivalent to BRL 41.62 ... if you add 100% tax (which is not true) it would go to BRL 83.20 ... if you add more 100% of the seller's profit it goes to BRL 164.40. .. which is already expensive, but it would be acceptable ... but BRL326.00 is much more than absurd!
This is the reason for homemade solutions ...
#18
R
Rivets
R
Rivets
I understand. This might help you out. I’ve seen guys who cannot get pads go to the big semi repair shops and get a piece of brake pad. They would them cut their own pads and in a pinch this seems to work.
#20
B
Bange
B
Bange
With a few hours of searching and working, I managed to make the tablets exactly ... but ...
Either the inserts do not have the same thickness (internal / external) or there is some difference in my system, because the external support does not touch the transmission box, there is still approximately 4mm missing.
But now I know how to specify the maximum size, because with the pads in place and the brake fully retracted, the support has to touch the gearbox housing ... just adjust it ...
The way was this and in the morning I will have brand new home-made pads at zero cost ...
I don't know if hardness will make any difference when braking, but then just take another one and redo it, as the technology is already assimilated.
Used car pad
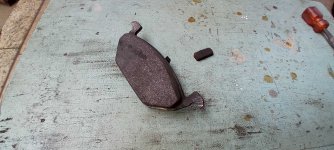
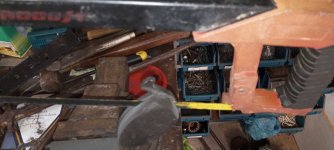
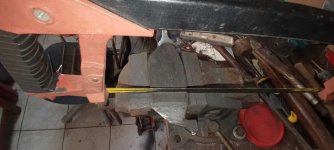
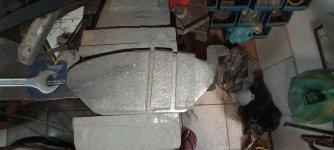
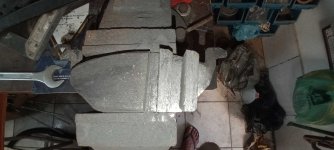
After grinding and sanding ...
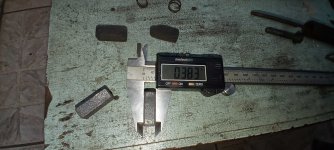
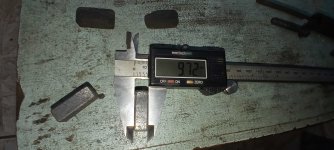
The diference...
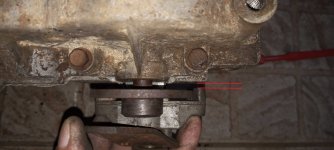
Either the inserts do not have the same thickness (internal / external) or there is some difference in my system, because the external support does not touch the transmission box, there is still approximately 4mm missing.
But now I know how to specify the maximum size, because with the pads in place and the brake fully retracted, the support has to touch the gearbox housing ... just adjust it ...
The way was this and in the morning I will have brand new home-made pads at zero cost ...
I don't know if hardness will make any difference when braking, but then just take another one and redo it, as the technology is already assimilated.
Used car pad


After grinding and sanding ...


The diference...

#21
B
Bange
B
Bange
Good news!!!
1 - Carlisle answered me which tube is ideal for my tire ... Carlisle 320410 Tube 18 X 6.50 / 8.50 / 9.50-8, confirming what was said by the Lefort team ... excellent!
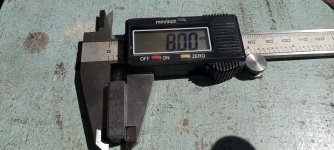
2 - After sanding, experimenting, sanding, experimenting ... I reached a maximum thickness value, to fix the support with the pads in place, without braking. The thickness was 8mm (0.315 ") ... it shows! This on my system, which has some differences in relation to the manufacturer's manual, which may be some adaptation or solution on the part of the importer.
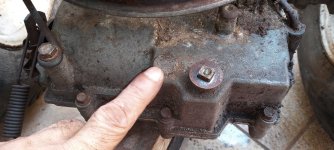
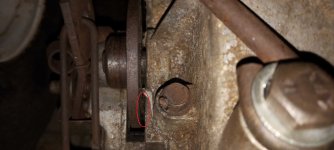
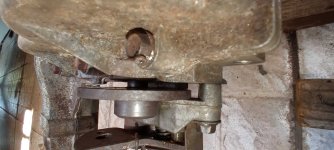
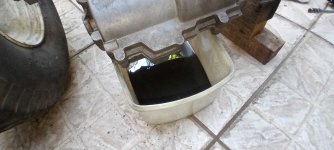
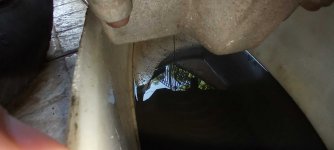
3 - I removed the screw, spring and ball assembly and turned the box upside down and ... oil came out !!! As the passage is very narrow and the oil thick, it is coming out very slowly, but I believe it will be possible to measure the quantity and replace this old and very dark oil. But the ideal would be the proper place for the oil to come out in good volume, bringing eventual dirt, filings, etc ...
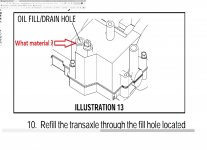
Now, even if Peerless doesn’t answer me (which I think is quite right), I can drill in the appropriate place, but I need you to tell me what material the cover is made of, as it is certain that it will be an absurd value and I can do it one...


#22
B
Bange
B
Bange
Although I managed to drain the oil through the hole in the ball, drilling the box could be an option, but the amount of oil that came out, after 2 days with various inclinations, was half of what it should be (like in a car, standing up) 5% must be normal), indicating that:
1 - or leaked (although with no apparent traces)
2 - or was it poorly maintained (?)
3 - or has already been assembled at the factory with a small quantity (difficult, but possible)
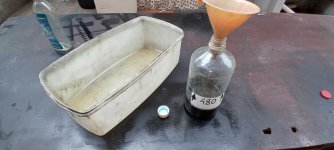
Now I'm going to drill and wash the interior with kerosene (dissolving and loosening the thick parts and filings), and put the right amount of oil.


#23
B
Bange
B
Bange
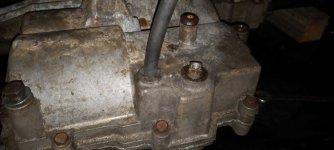
Well, as I said before, I drilled the hole and put 1 liter of kerosene ... I swung in several positions until I was tired ... something like sand (!?!) came out, small pieces of joint and very fine iron filings of used gearboxes.
Even when swinging and rotating the axles with kerosene, no part leaked, ensuring a good seal.
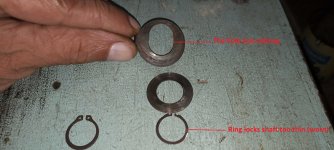
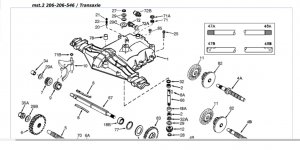
I put the amount of 500ml of SAE 90 oil (here we don't need the 80W90), and now I wait since last Thursday, Murray representative's quote for flat washers (29) and lock washer (29C), which I found worn on the input shaft. .. the ring hangs (27) I bought in a parallel store.
With these worn out components, the gear goes wrong in the differential and starts a characteristic noise ... without these parts I cannot finish the gearbox.


#24
B
Bange
B
Bange
Well, the solution for the washers ended up being national, since neither the official seller returned my request for a quote (made within 1 week) and I will also not import via Amazon or e-Bay.
I found the washers in the exact diameters, with a small difference in thickness ... at (29) with 0.5mm and at (29C) with 1mm, as will be 1 x (29C) + 2 x (29) they add up to 2.1mm ... the new ones will give 2.0mm, the difference of 0.1mm in total is not important.
These washers are manufactured for the starter and brake of some Mercedes vehicle and are even cheaper than there in the USA.
The (29) package of 20 units at USD 4.08 and the (29C) package of 10 units at USD 1.72 - simple conversion) ... now it is waiting for the arrival (+ - 20 days ... must deliver to foot ?).
In the meantime, I would like some discussion of a modification to this gearbox, which I have seen in some videos ... some call it up grade, others call it lock (with or without weld).
Examples:
This modification has a specific purpose (competition type), which?
Do you have any advantage for use only as a lawn mower?
Does it cause any problems (strength, wear out more, heat up) for the gearbox?
It is noticed that it improves traction in sandy terrains, with mud and even snow, but in these cases there is no grass.
What do the experts think about it?
#26
B
bertsmobile1
B
bertsmobile1
Some of us have lives you know
Anzac day here yesterday.
Diffs consume power
Racers want every ft lb at the back wheel not heating the gearbox oil.
Add to that they want both wheels driving all the time for better traction except when they are sliding around a corner.
On a mower you get better traction because a wheel with no down force can not just sit there spinning while you go nowhere because the other wheel will also be driving.
Down side
because both wheels drive all the time you either have to do 3 point turns or very wide turns .
Trying to do tight turns will just keep going forward till the tyre rolls off the rim.
All of my mowers have direct drive ( no diff )
#28
B
Bange
B
Bange
bertsmobile1
kkkk ... me too ...
Anzac Day is an Australian celebration ... do you live in Australia or in an Australian community?
Lawn mowers is a completely new subject for me and here there are no groups for discussion and to know more is to make less mistakes.
As I thought, this modification does not make sense only for those who mow the lawn.
Rivets
It was not really a direct question of a defect, it was more of a topic for discussion and I believe that the bertsmobile1 has cleared up well. But tell us what you think about such a change in the gearbox.
#29
R
Rivets
R
Rivets
I doubt that the changes would be worth anything to anybody but you. Time and cost would not be valid unless you have a very specific need.
#30
B
Bange
B
Bange
I also think that any change is based on external needs, but there are hobbyists, people who have to do something unprecedented or very difficult ... a self challenge.
There are also those who do it for the sake of exhibitionism ... I think that's where the crazy contests start.
I saw videos of people who, in addition to making the modification, add a second box, imitating a 4x4 vehicle.
There are also those who do it for the sake of exhibitionism ... I think that's where the crazy contests start.
I saw videos of people who, in addition to making the modification, add a second box, imitating a 4x4 vehicle.
#31
B
Bange
B
Bange
Hey, guys...
The washers arrived ahead of schedule ...
Although the lock washer is not a very hard steel, it should last a long time and I now have several.
Due to the thicknesses it was not possible to place the 3 (1 lock and 2 spacing, according to the drawing), the lock must spend first and adjust, then I will put the second spacing ... maybe in 2 years ... the fact is that it was kept with a minimum spacing and without the noise of gears with incorrect fitting.
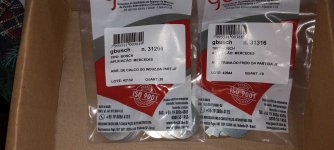
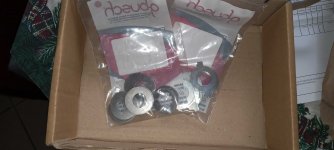
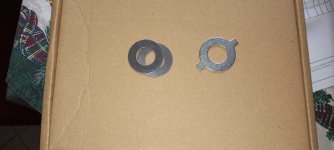
There should have been 2 spacer washers, but it was only 1.
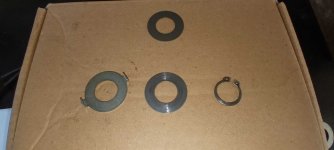
As it will have friction, a little grease goes well ...
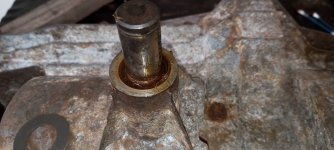
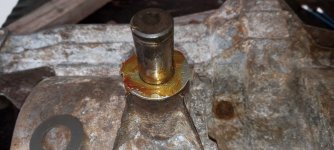
Now virtually zero clearance and no strange noise.
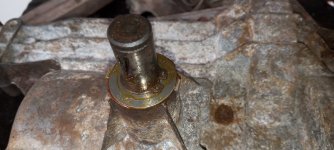
One less problem.
The washers arrived ahead of schedule ...
Although the lock washer is not a very hard steel, it should last a long time and I now have several.
Due to the thicknesses it was not possible to place the 3 (1 lock and 2 spacing, according to the drawing), the lock must spend first and adjust, then I will put the second spacing ... maybe in 2 years ... the fact is that it was kept with a minimum spacing and without the noise of gears with incorrect fitting.


There should have been 2 spacer washers, but it was only 1.

As it will have friction, a little grease goes well ...


Now virtually zero clearance and no strange noise.

One less problem.

