Video Series - How to Sharpen Mower Blades

With all respect, I must offer some corrections. I use a bench grinder but the principle is the same. The direction of the grind should be towards the sail of the blade and not the direction shown in this video. Also the bottom side should never be touched. The sparks should always fly towards the sail or lift of the blade. This will avoid any burrs on the bottom, so no need to clean up. Balancing is very important to preserve bearings in the engine. Other than that, everything is right on and a very good video.
 
Its amazing how everybody is different.

I would never use a bench grinder as don't have the same control as an angle grinder.
I always grind on the bottom so that my customers can tell that something has been done on the machine when they tip it over (as nine out of 10 customers do check).
Also you want to grind at the same angle as the blade wing as it makes flow easier for collecting.
Also the new way for mulch is instead of a blade that has a low point then an angle and then a high point, they are flat and the cutting edge is ground all the way along to just about the middle of the blade.
 
I use a bench grinder and try my best to keep the factory pitch. And the wing is up with sparks going away from the wing. But will try with blade flipped over so don't have to hit the bottom side to clean up

Sent from my iPhone using LMF
 
I sense that I might have been misunderstood. We all have our own ways to achieve the same goals. I just happened to have my camera here at the shop today, so I will do a pictorial. Also, I will look into my files and see if I can find my Toro service school hard copy on "sharpening" I have an employee here that sharpens blades a minimum of 4 hours a day 5 days a week. Thats all he does. I go through one 8 inch ruby grind stone a month. It took almost 2 weeks to train him to sharpen correctly for a "long lasting" sharp hollow ground cut.
I'll post pics later
 
Last edited:
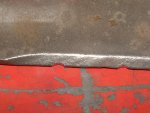
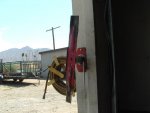
OK the first pic is a dull blade with (self inflicted) nicks.

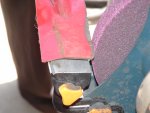
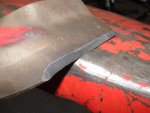
The second pic is removing the nicks to have a uniform foundation in which to grind a 45 degree angle. Notice the grind is "square" to the bottom of the blade.

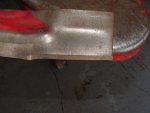
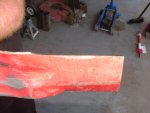
The 3rd and 4th pic is a view of this square grind

Edit:
Hmm, the pics show a different order on the post than when I uploaded, but you'll figure it out.

continued
 

Attachments

  • BLADE-1.JPG
    BLADE-1.JPG
    119.3 KB · Views: 67
  • BLADE-2.JPG
    BLADE-2.JPG
    118.9 KB · Views: 64
  • BLADE-3.JPG
    BLADE-3.JPG
    117.8 KB · Views: 63
  • BLADE-4.JPG
    BLADE-4.JPG
    119.5 KB · Views: 62
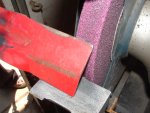
This 1rst pic is grinding the 45 degree pitch to the blade. Grind with pressure until you see the sparks start to go over the blade, then lighten up

The 2nd pic is the finished blade. As I look at this pic on the computer, it is deceiving because the blade wasn't laying flat when the image was captured, but it "is" 45 degrees.

The 3rd pic is something I cant do without. It not only balances the blade but checks for it being straight too. There are inexpensive ones on the market too. A blade that is even slightly out of balance causes even slight vibrations. This puts stress on engine brgs and or spindle brgs
 

Attachments

  • BLADE-7.JPG
    BLADE-7.JPG
    118.9 KB · Views: 60
  • BLADE-6.JPG
    BLADE-6.JPG
    116.7 KB · Views: 49
  • BLADE-5.JPG
    BLADE-5.JPG
    119 KB · Views: 50
Last edited:
Something I might add, is that a quality cut, (something that is required by my clients) does much more than just look good. When you have "poorly" cut turf with split ends, it actually promotes disease and yellowing.
 
Whoever that was that sent me an E-mail message,, forgive me but I deleted it and forgot (oldtimers disease) to reply, but thank you for your kind words.
 
Back
Top