logistiker
Member
- Joined
- May 2, 2012
- Threads
- 5
- Messages
- 26
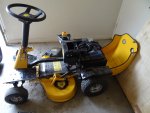
The oem seat that comes with the Rechargemower G2 is horribly uncomfortable to ride around for a long period of time, so I decided to upgrade the seat to a low profile suspension one to get a smoother ride.
Parts list:
-Concentric International High-Back Seat w/ Integrated Suspension (without armrest) 36010BK
-Concentric International Universal Slot Bar Set 94500BK
-Waterproof 2 Pin Electrical Wire Connector Plug
-Seat Switch / John Deere Am131968 (SPST NO -- Single Pole Single Throw Normally Open)
-Twist lock or diamond shaped safety switch housing
-6 electrical crimp connectors
-Wire
-Plastic protector for the wire
-Washers
-Wood screws
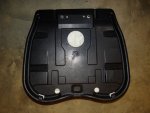
1. Disconnect the seat safety switch wire, remove the seat rod and pin and remove the old seat.
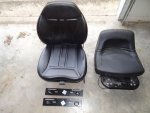
2. Stand around contemplating how this is going to go together. Look how much more comfortable the new seat will be!
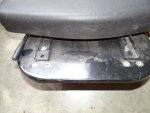
3. Slide the seat back all the way and unbolt the old seat from the bottom plate since the bottom plate is still needed to install the new seat. The old seat safety switch uses some kind of flat copper plate pad and is incompatible with the new seat, so just leave it on the old seat.
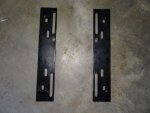
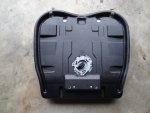
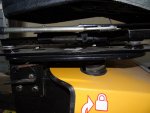
4. Drill holes in the universal plates so two of the bolt holes will match up with the bottom plate from the Rechargemower. Note in the close up picture of the install, the holes you drill will line up to the back bolts on the Rechargemower G2 seat plate. Then bolt the universal plates to the new seat with the feet of the universal plates up. If the length of the bolts are too long so that the bolt does not fit within the enclosed area underneath the foot, then use washers as a shim so the bolt fits and does not touch the Rechargemower G2 seat plate. Then bolt the whole thing to the seat plate of the Rechargemower.
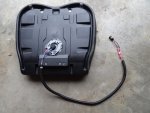
5. Remove the seat cushion from the frame of the new seat.
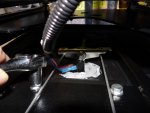
6. Install the seat safety switch. I used a twist lock switch but that didn't fit right and I just screwed it in with some wood screws. In retrospect, I should have gotten the diamond shaped one instead and just screwed it in instead of trying to get a twist lock to fit right.
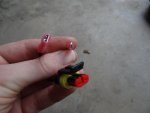
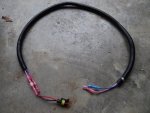
7. Install a female and a male crimp connect on each end of the 2 pin waterproof connector. The added benefit of this is if your seat switch doesn't work, malfunctions or you need to do some testing, you could simply unhook it and hook the two wires together on this connector to bypass the seat switch shutoff.
8. Install two female crimp connectors to one end of the new seat wire and a male and female to the other end of the seat wire.
9. Attach the waterproof connector to the seat wire.
10. Attach the wire to the shutoff switch.
11. Bolt the seat cushion back on to the seat frame and install the new seat just like the old seat with the rod and pin.
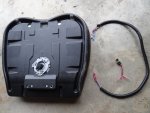
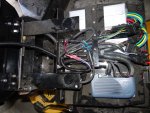
12. Thread the wire through where the other wires thread and hook up the connector.
13. Job complete! Test out the new seat. It's much more comfortable!
14. Closeup of the install.
Parts list:
-Concentric International High-Back Seat w/ Integrated Suspension (without armrest) 36010BK
-Concentric International Universal Slot Bar Set 94500BK
-Waterproof 2 Pin Electrical Wire Connector Plug
-Seat Switch / John Deere Am131968 (SPST NO -- Single Pole Single Throw Normally Open)
-Twist lock or diamond shaped safety switch housing
-6 electrical crimp connectors
-Wire
-Plastic protector for the wire
-Washers
-Wood screws
1. Disconnect the seat safety switch wire, remove the seat rod and pin and remove the old seat.
2. Stand around contemplating how this is going to go together. Look how much more comfortable the new seat will be!
3. Slide the seat back all the way and unbolt the old seat from the bottom plate since the bottom plate is still needed to install the new seat. The old seat safety switch uses some kind of flat copper plate pad and is incompatible with the new seat, so just leave it on the old seat.
4. Drill holes in the universal plates so two of the bolt holes will match up with the bottom plate from the Rechargemower. Note in the close up picture of the install, the holes you drill will line up to the back bolts on the Rechargemower G2 seat plate. Then bolt the universal plates to the new seat with the feet of the universal plates up. If the length of the bolts are too long so that the bolt does not fit within the enclosed area underneath the foot, then use washers as a shim so the bolt fits and does not touch the Rechargemower G2 seat plate. Then bolt the whole thing to the seat plate of the Rechargemower.
5. Remove the seat cushion from the frame of the new seat.
6. Install the seat safety switch. I used a twist lock switch but that didn't fit right and I just screwed it in with some wood screws. In retrospect, I should have gotten the diamond shaped one instead and just screwed it in instead of trying to get a twist lock to fit right.
7. Install a female and a male crimp connect on each end of the 2 pin waterproof connector. The added benefit of this is if your seat switch doesn't work, malfunctions or you need to do some testing, you could simply unhook it and hook the two wires together on this connector to bypass the seat switch shutoff.
8. Install two female crimp connectors to one end of the new seat wire and a male and female to the other end of the seat wire.
9. Attach the waterproof connector to the seat wire.
10. Attach the wire to the shutoff switch.
11. Bolt the seat cushion back on to the seat frame and install the new seat just like the old seat with the rod and pin.
12. Thread the wire through where the other wires thread and hook up the connector.
13. Job complete! Test out the new seat. It's much more comfortable!
14. Closeup of the install.
Attachments
-
 01remove_old_seat_with_platform.jpg238.2 KB · Views: 16
 -
 02new_seat_with_adapters_and_old_seat_side_by_side.jpg243.3 KB · Views: 13
 -
 03adjust_old_seat_backwards_to_expose_bolts_and_remove_seat_from_platform.jpg331.4 KB · Views: 8
 -
 04drill_holes_in_universal_brackets_with_foot_parts_on_floor.jpg203.9 KB · Views: 4
 -
 05remove_new_seat_cushion_to_install_safety_shutoff.jpg253.7 KB · Views: 5
 -
 06install_safety_shutoff_spst_no_switch_with_wood_screws.jpg280.6 KB · Views: 4
 -
 07install_female_and_male_crimp_connectors_to_spare_two_pin_waterproof_plug_and_wire.jpg132.4 KB · Views: 5
 -
 08install_crimp_connects_on_spare_wire_and_wire_plastic_protection.jpg272.2 KB · Views: 3
 -
 09attach_waterproof_connect_to_one_end_of_the_wire.jpg317.3 KB · Views: 4
 -
 10attach_wire_to_spst_no_switch_on_seat_cushion.jpg264.7 KB · Views: 5
 -
 11reinstall_seat_cushion.jpg193.8 KB · Views: 3
 -
 12thread_seat_wire_through_holes_and_attch_to_female_two_pin_waterproof_connector_for_seat_shuto.jpg342.5 KB · Views: 12
 -
 13new_seat_installed.jpg257.8 KB · Views: 27
 -
 14closeup_of_installation.jpg214 KB · Views: 7