You are using an out of date browser. It may not display this or other websites correctly.
You should upgrade or use an alternative browser.
You should upgrade or use an alternative browser.
Export thread
Honda Commercial HRA216-SXA revival, lots of pics
#1
F
freeloader700
F
freeloader700
Hey All,
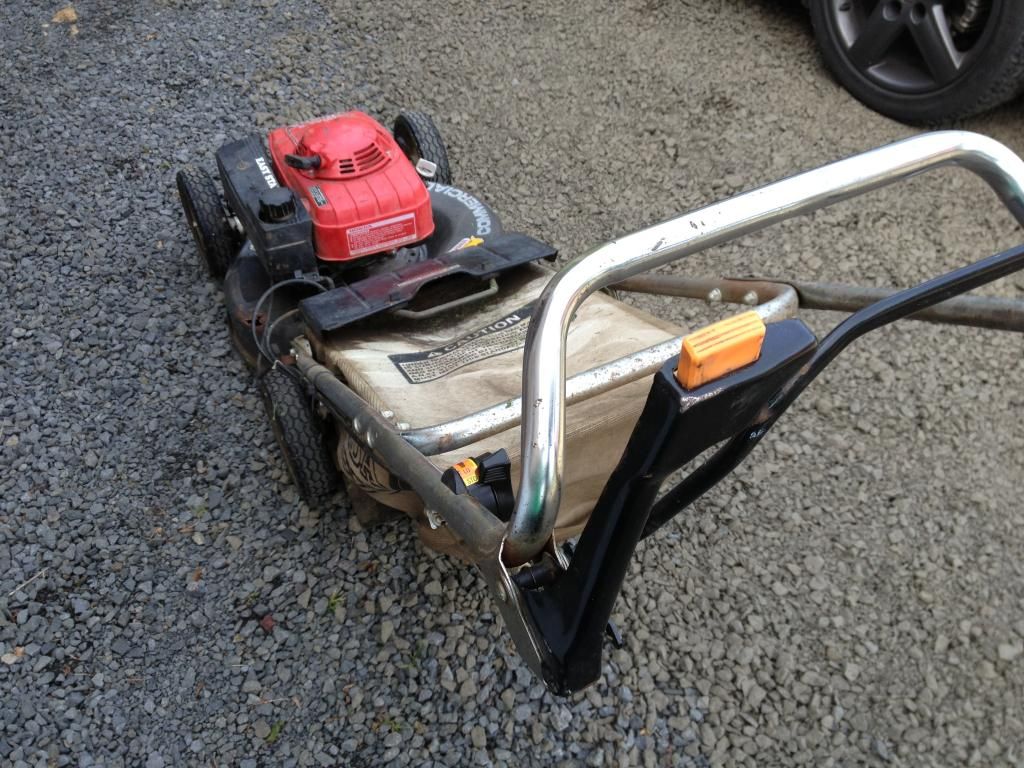
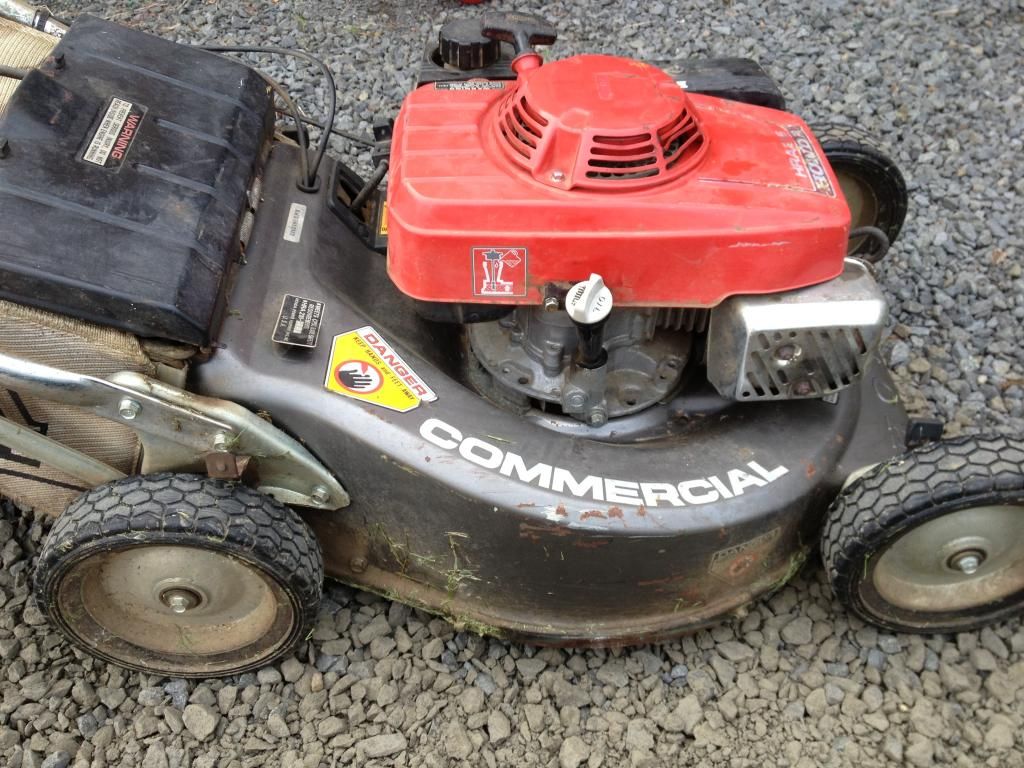
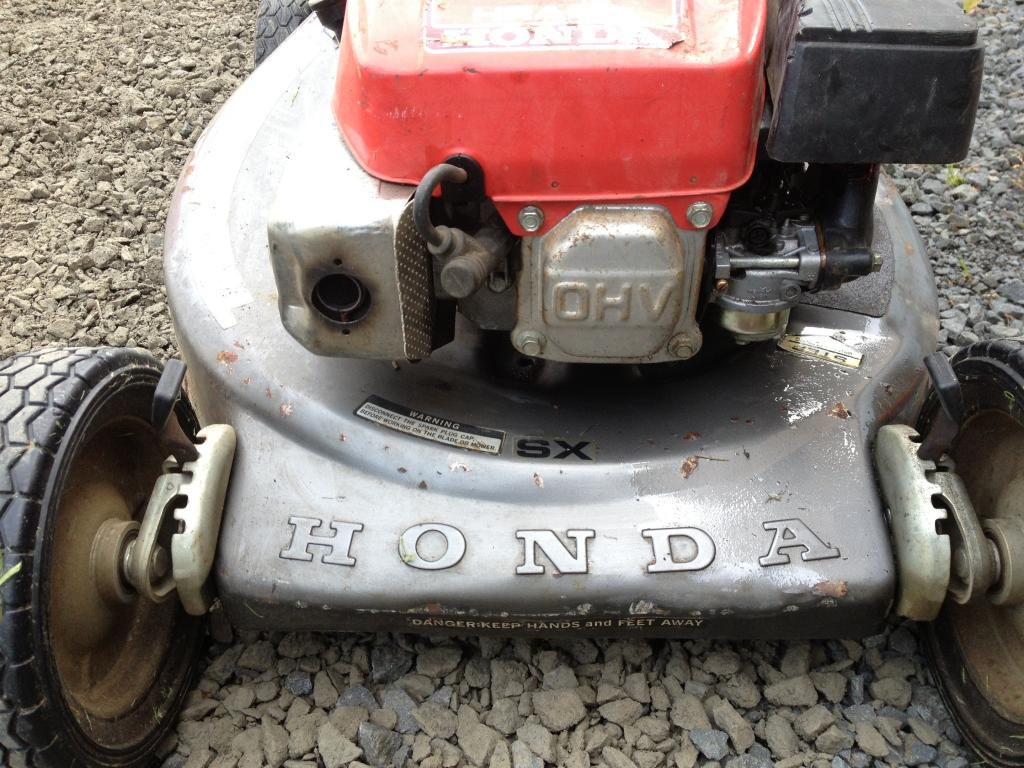
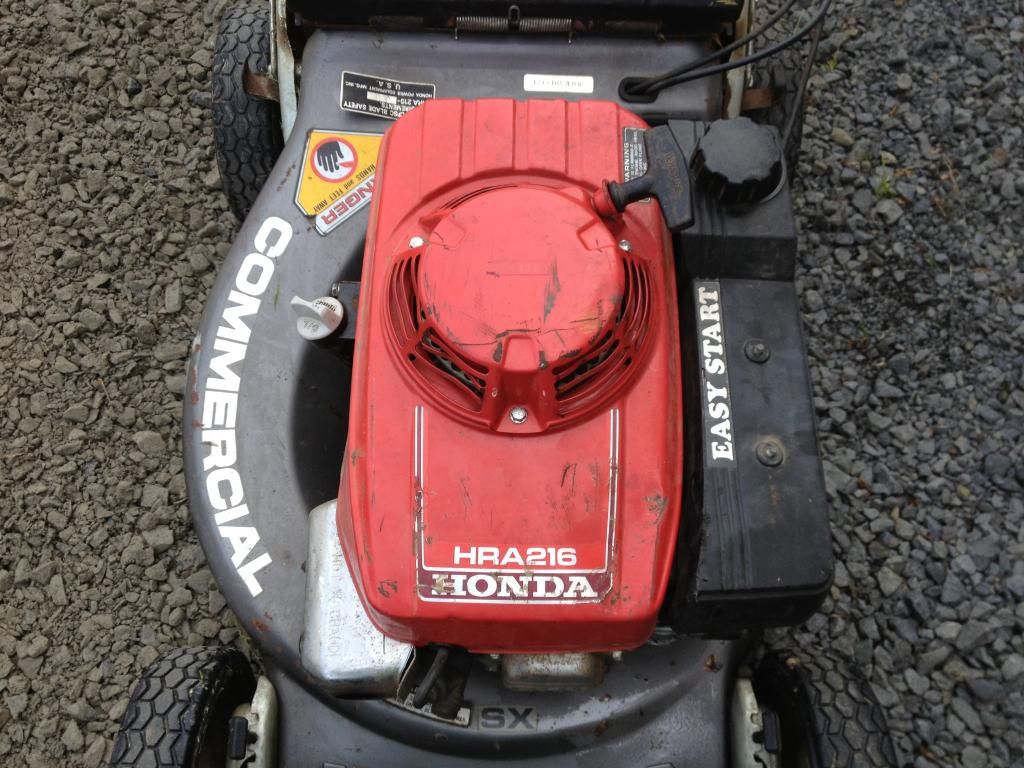
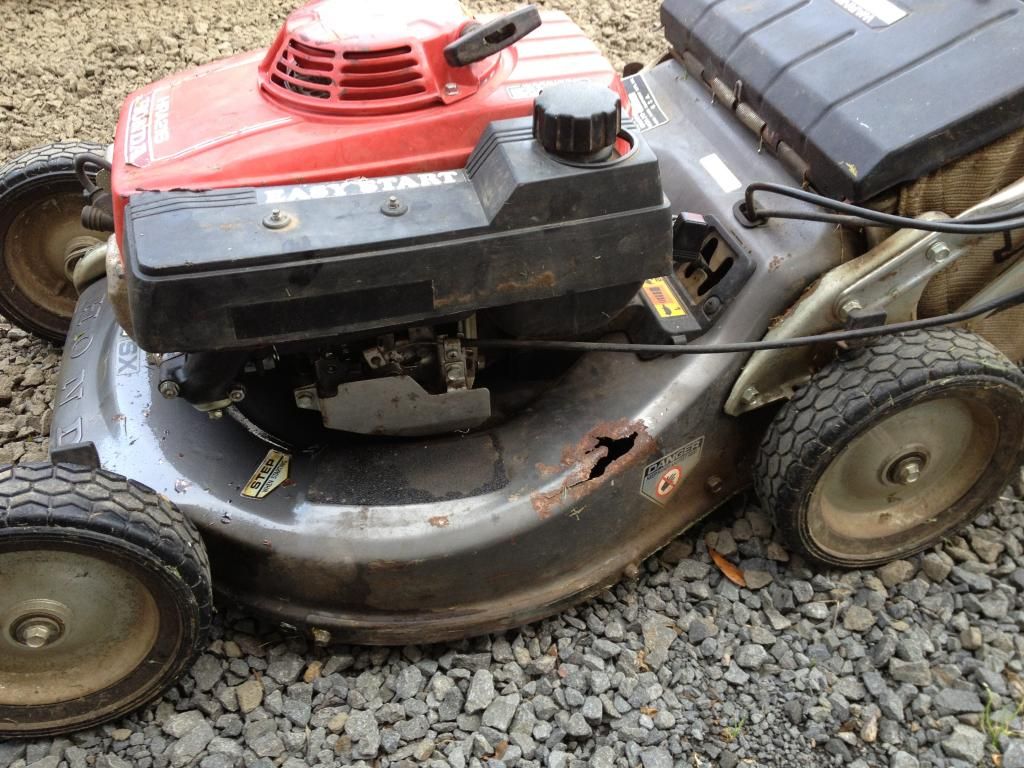
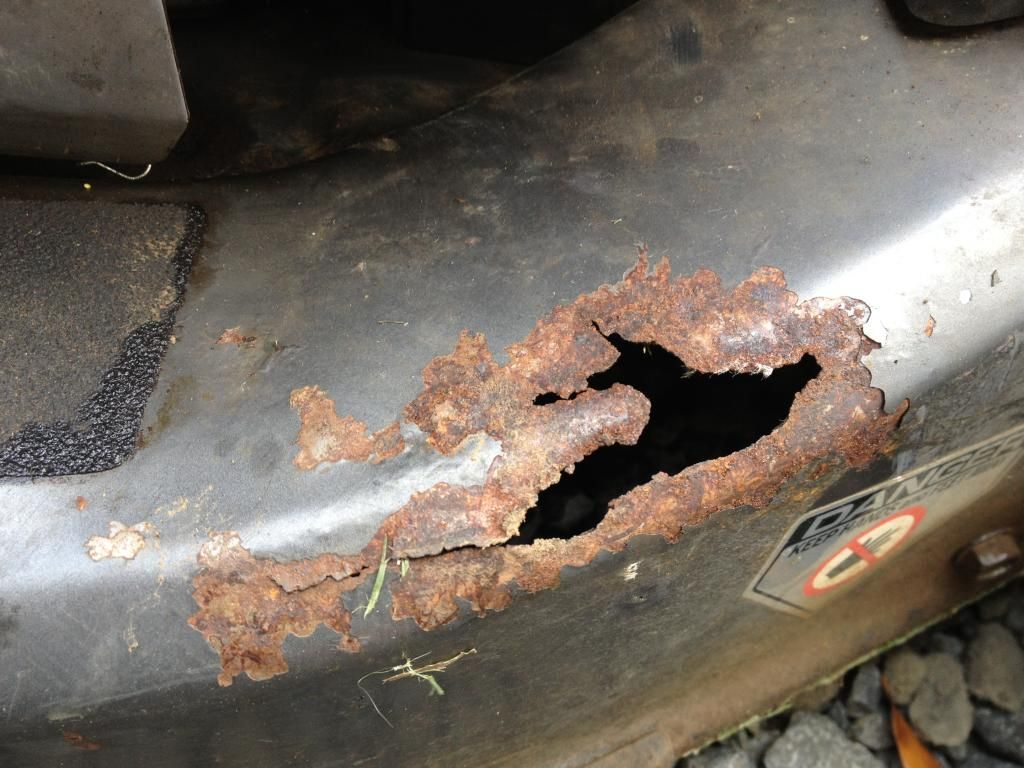
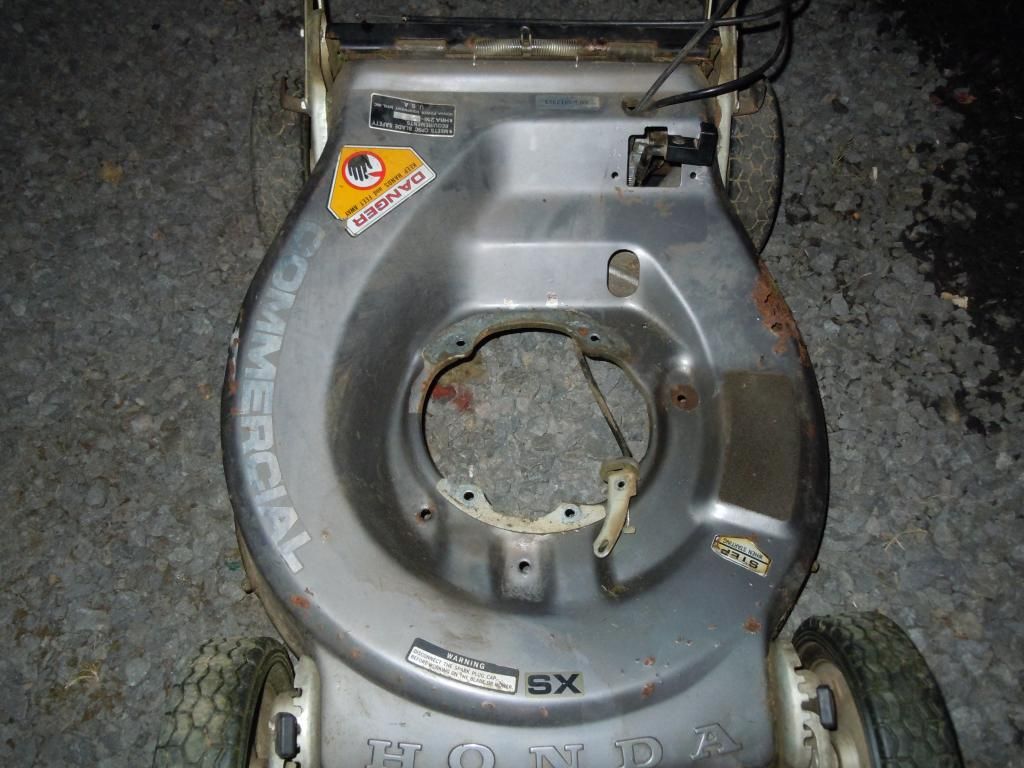
New to this forum. I have two Honda mowers. One is a Honda Harmony that I picked up last fall. Had some deck rot issues (more on that in a different thread) and picked this one up last week. Its a 1988 HRA216-SXA that was purchased in '92. I bought it from the original owner who used it for home use. He was asking $200 for it and we settled on $100
Pros
- Decent shape
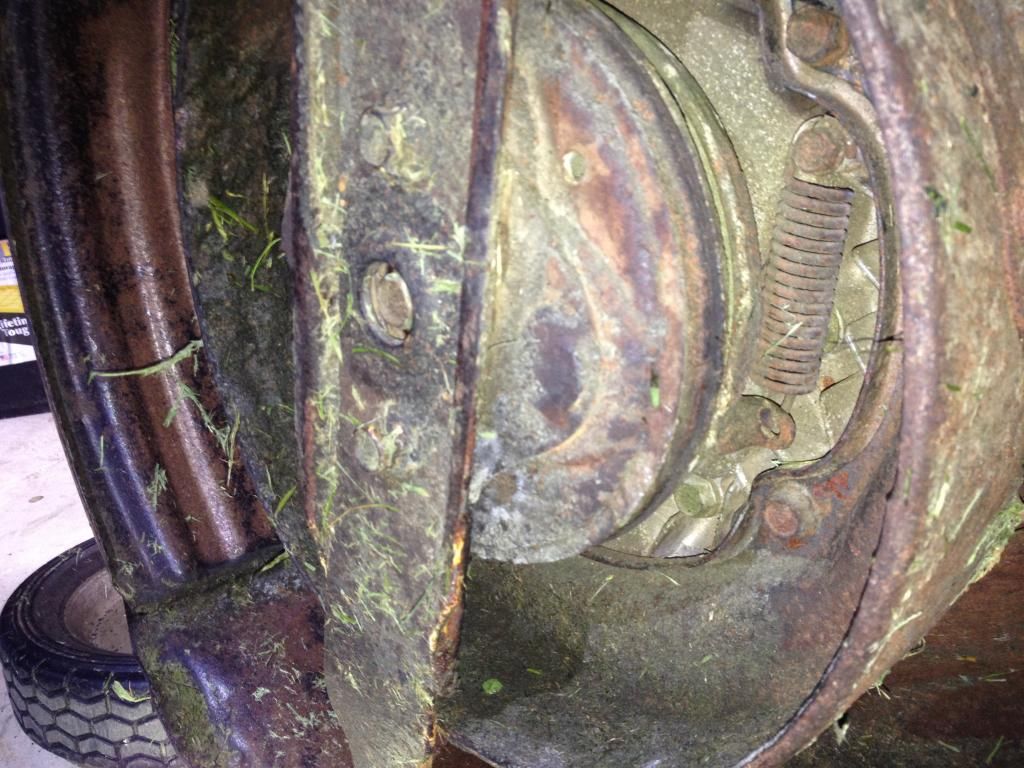
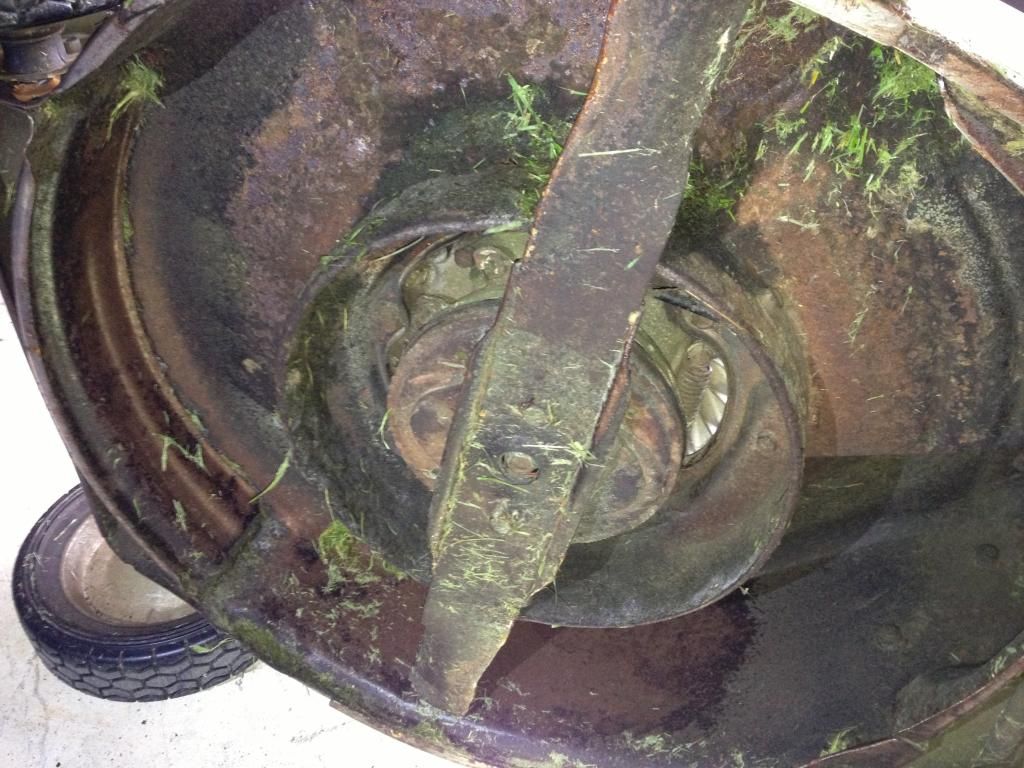
-Minor surface rust
-Low cost
-Cold starts first 1/4 pull
Cons
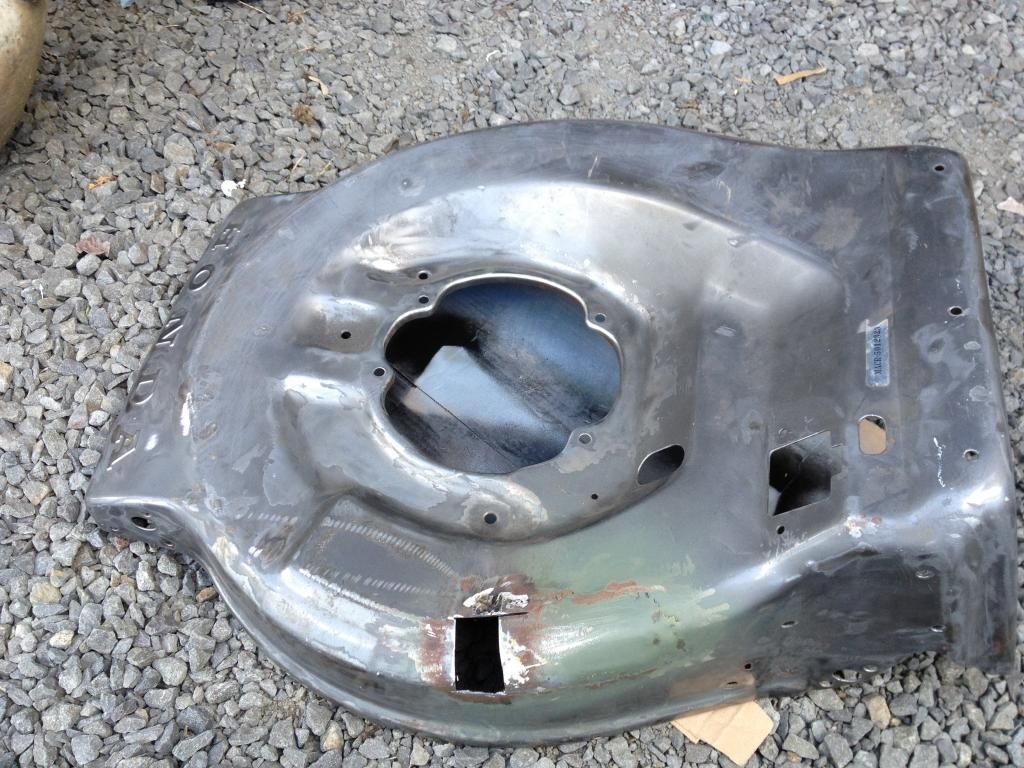
-Hole in the top of the deck
-Loud vibration @ certain RPMs (CHECK THE VIDEO OUT)
-Leaky carburetor (CHECK THE VIDEO OUT)
-Little/No oil when I looked at it
So the plan is to get this thing running smooth without leaks, attend to the rust and patch the hole in the deck. I am going to use this thread as sort of a journal/timeline for my project. I appreciate any feedback/suggestions any of you may have.
Did I get a decent deal?
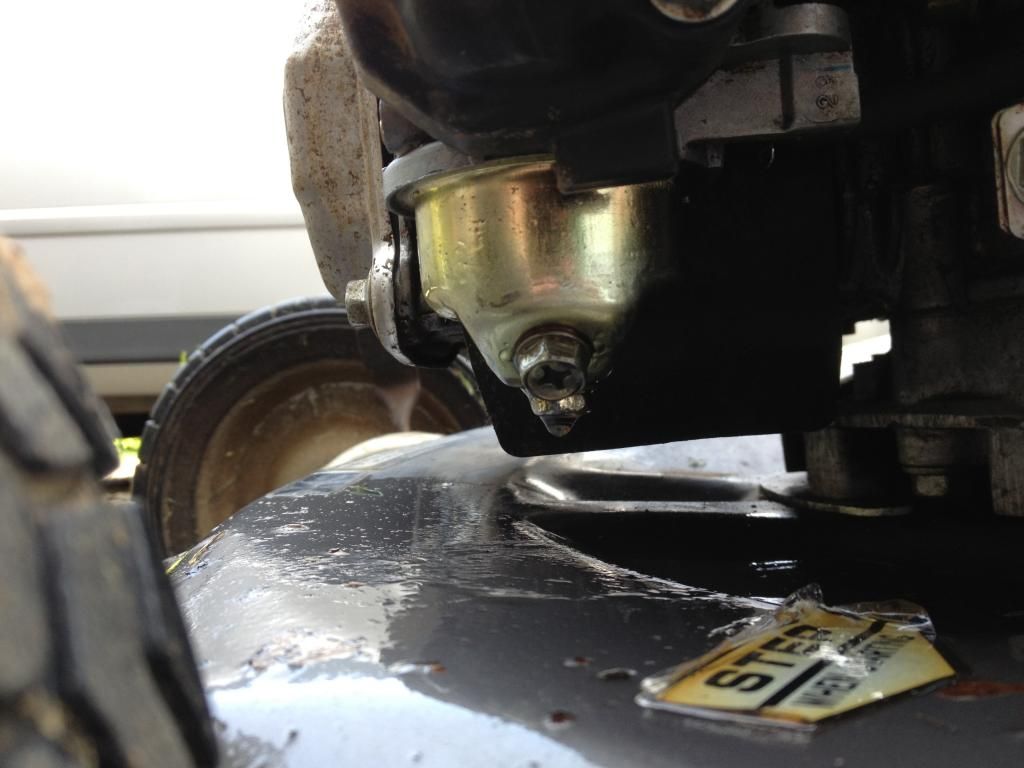


#2

robert@honda
robert@honda
The engine is a beaut; GXV160-series, very rugged, commercial grade. Shaft drive trans (I believe), and love them vintage chrome handlebars. As you might expect, some parts are No Longer Available, and those that are may be a bit pricy.
If you'll PM me with the full serial numbers (sticker on the mower deck, MXXX-1234567) I might be able to pull up some history for both mowers...
Honda has paper shop manuals for both on eBay and Amazon. Many dealers have parts catalogs online too.
Keep us posted on the resto.
If you'll PM me with the full serial numbers (sticker on the mower deck, MXXX-1234567) I might be able to pull up some history for both mowers...
Honda has paper shop manuals for both on eBay and Amazon. Many dealers have parts catalogs online too.
Keep us posted on the resto.
#3
F
freeloader700
F
freeloader700
Rugged is right. This thing is an absolute beast. It is actually a challenge to control with the transmission on high and full throttle. I just sent you a PM with the details.
Here is the other thread with the Harmony...I think it might be toast...
CLICKY CLICKY
Here is the other thread with the Harmony...I think it might be toast...
CLICKY CLICKY
#5
F
freeloader700
F
freeloader700
Yeah I was a little nervous at first but it doesn't look too bad. From what I was able to see it is just surface. A really good cleaning and sanding/wire brush should take care of it. I am hoping to tear into it this week and get the deck welded up. The take apart the carb and get it all cleaned up.
edit
Any tips for getting the light surface rust off of the chrome handles without harming the chrome itself?
edit
Any tips for getting the light surface rust off of the chrome handles without harming the chrome itself?
#6

robert@honda
A Brillo pad (steel wool) with some spray rust penetrant and a gentle buffing will make 'em shine like new. I use the Hondalube product:

Part Number 08732-RP000, about $6
robert@honda
Any tips for getting the light surface rust off of the chrome handles without harming the chrome itself?
A Brillo pad (steel wool) with some spray rust penetrant and a gentle buffing will make 'em shine like new. I use the Hondalube product:

Part Number 08732-RP000, about $6
#7
F
freeloader700
F
freeloader700
So tonight I got to working on it
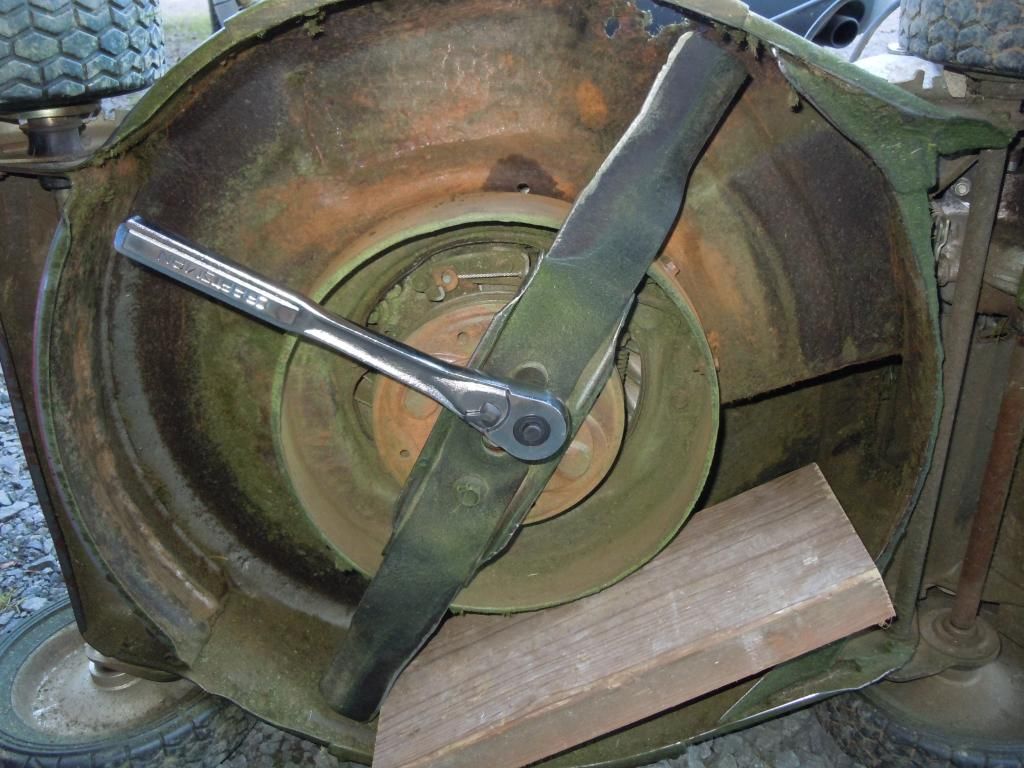
First, 2 x 14mm bolts to remove the blade. Use a block of wood to prevent it from spinning
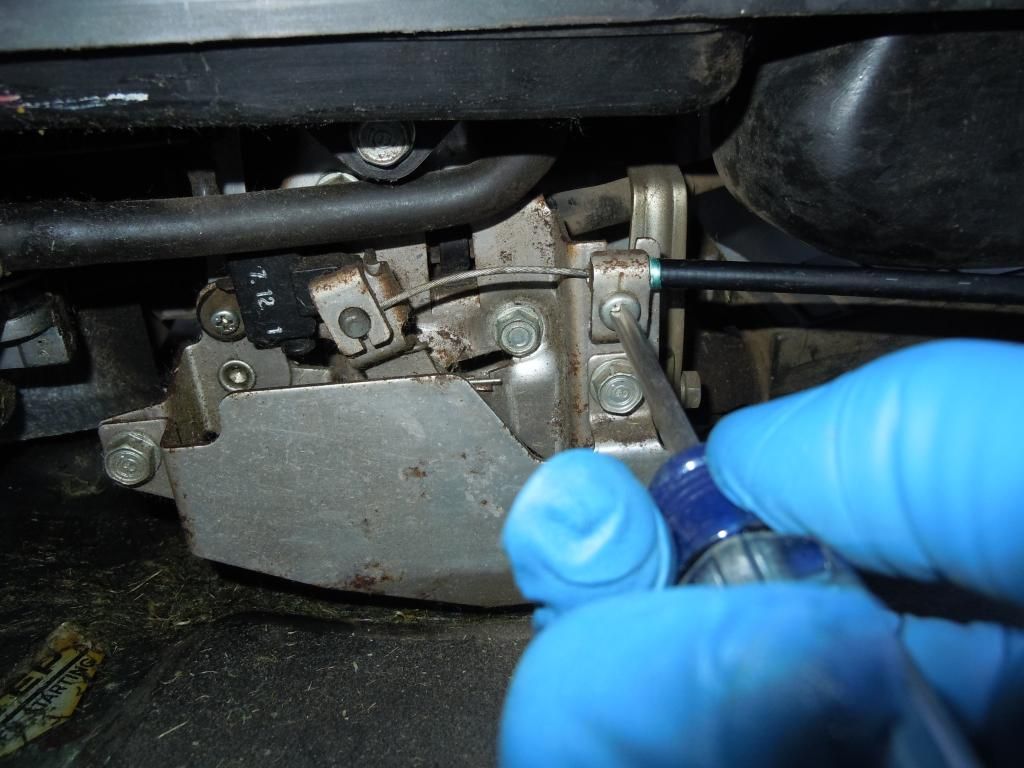
Next use a philips screwdriver to remove the throttle cabel linkage. Its a good idea to mark the position on the cable where it was was clamped. I used a green marker
Next remove 2 x 10mm bolts securing the throttle cable linkage bracket in place. It may not be necessary however I found that it made it easier to remove.
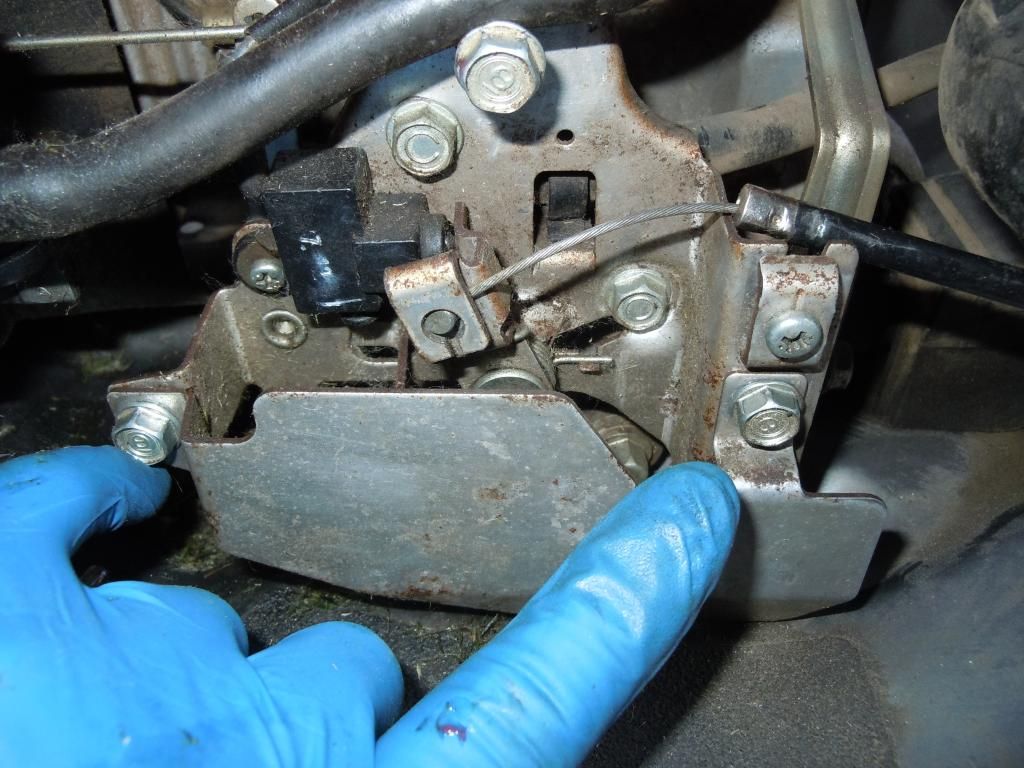
Align the cable in the the slot and pull the whole cable end towards you. Should you have difficulty removing it, apply pressure on the backside with a hook of some sort
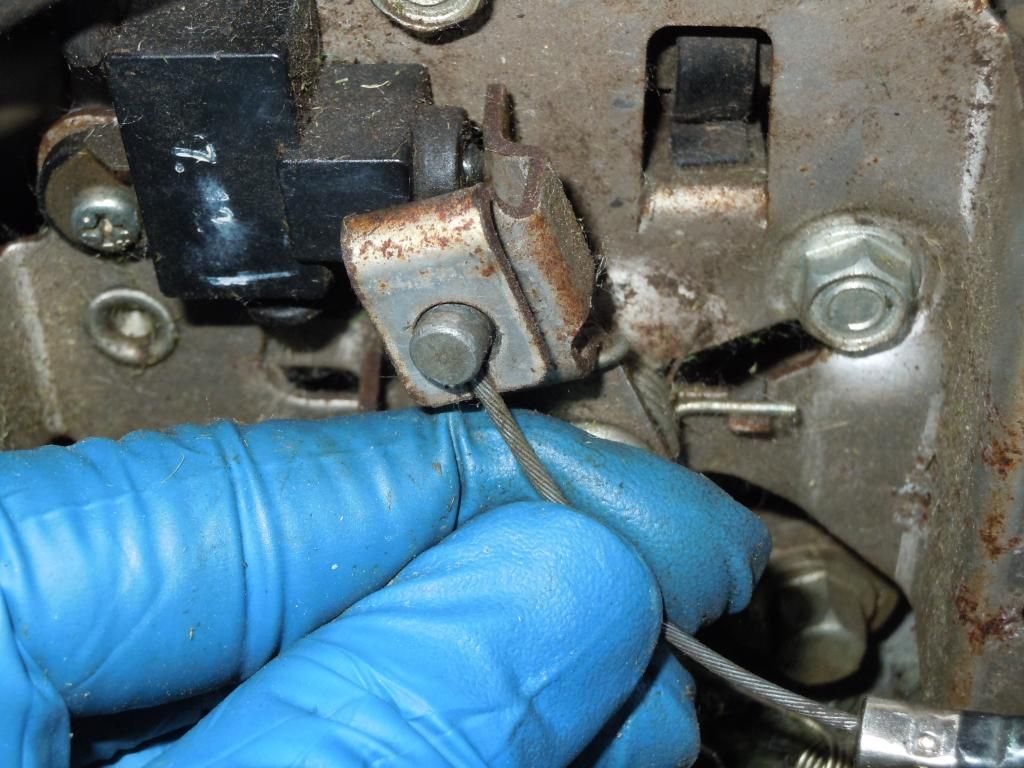
Next up is the transmission cable cover, 4 x 10mm bolts
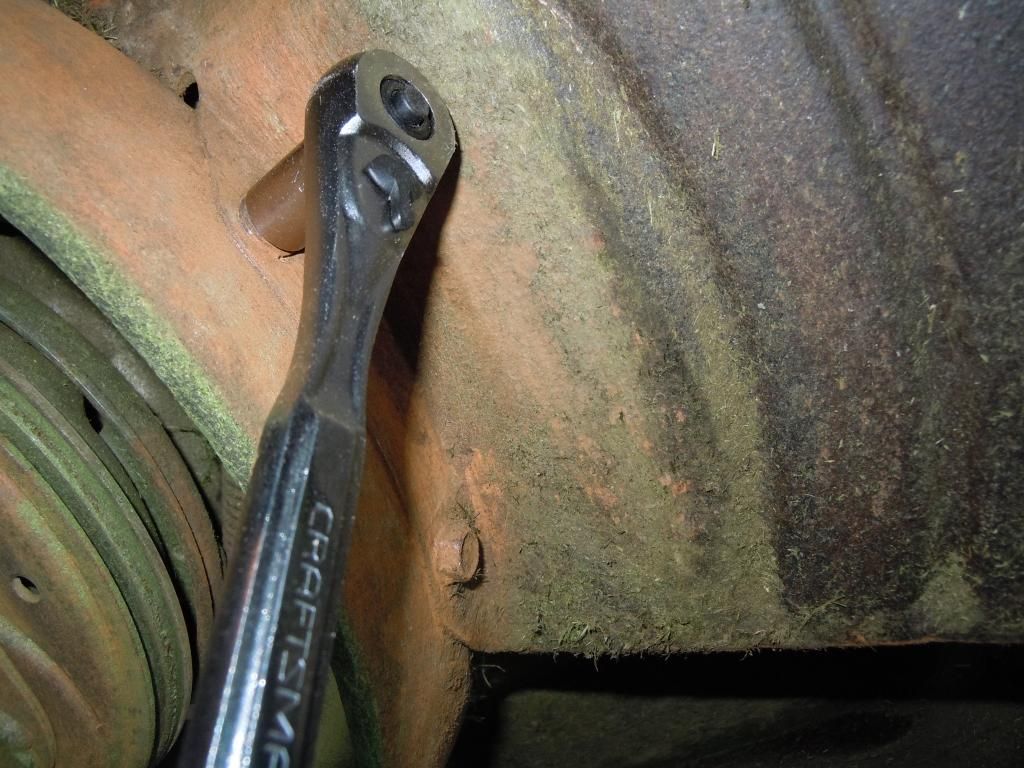
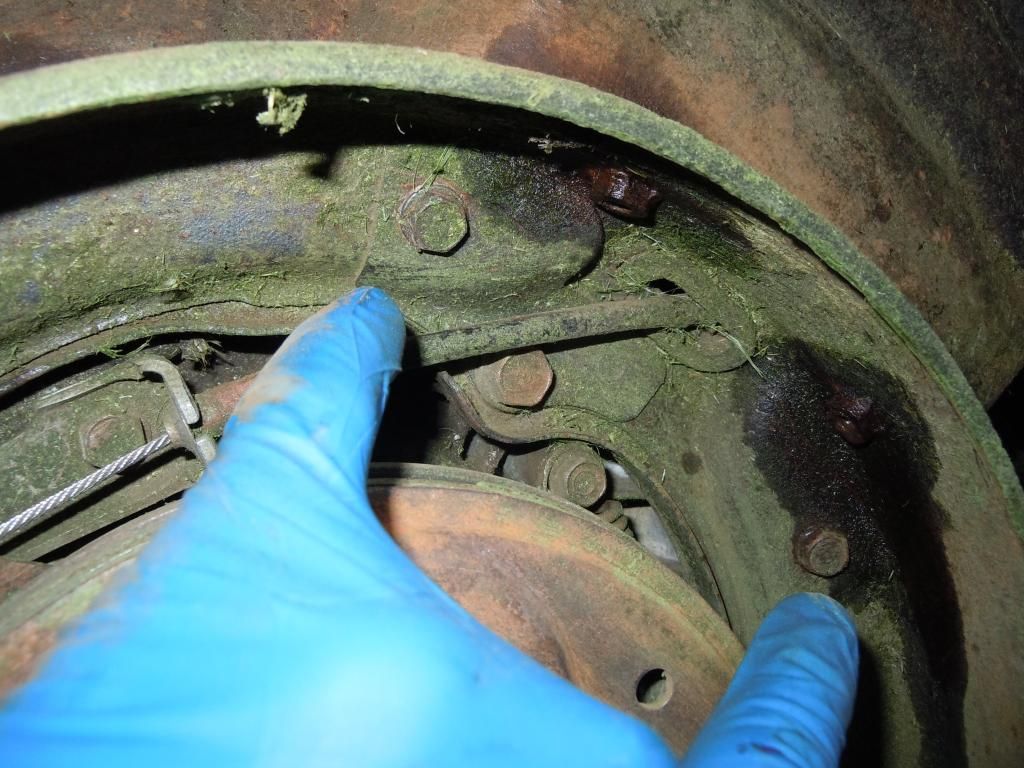
Then proceed to remove the clutch cable bracket. 2 x 10mm bolts
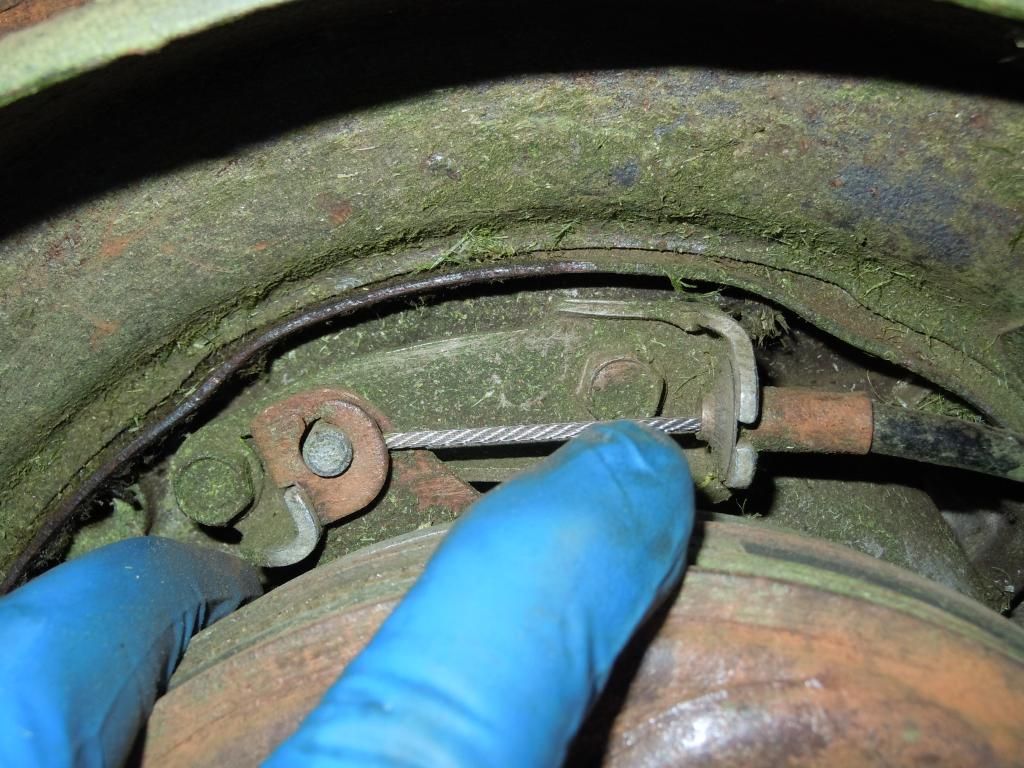
Once the bolts are removed you can slide the bracket out to the side. To remove the cable use the same method as for the throttle cable. For this one I needed to use my hooked aull.
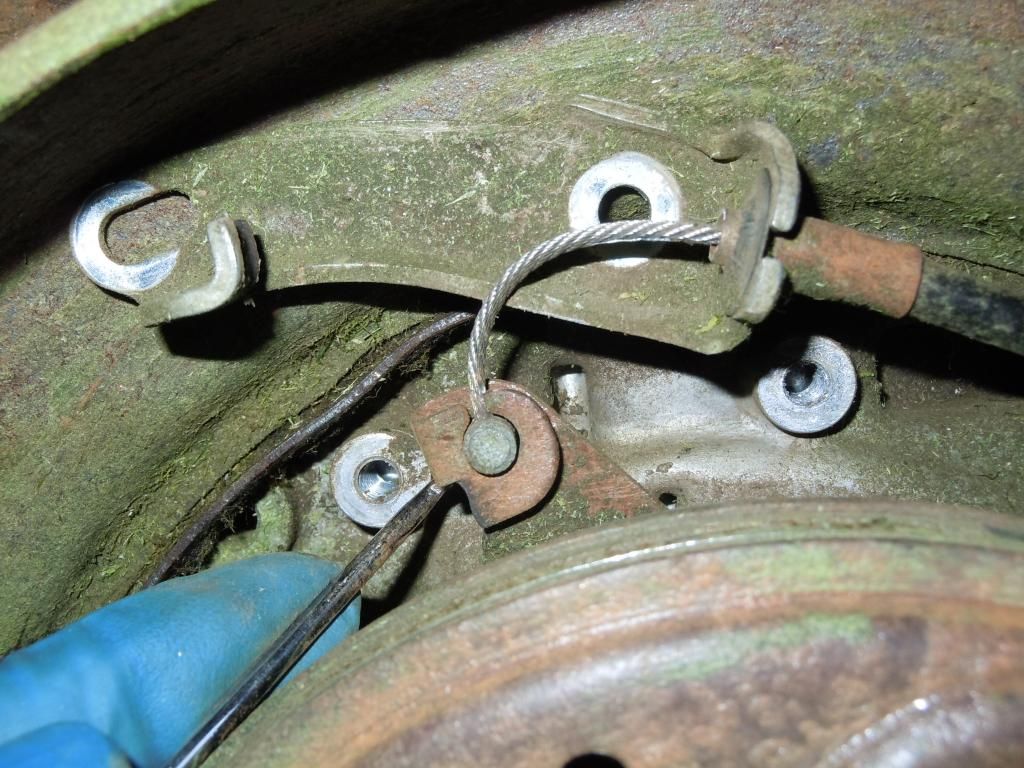
Now to unbolt the motor from the deck, 4 x 12mm bolts. Carefully remove the last two bolts. I had the mower tilted just barely enough for me to get my hand underneath the finish removing the bolts. This will prevent the motor from sliding abruptly/snapping bolts/bending bolt/metal
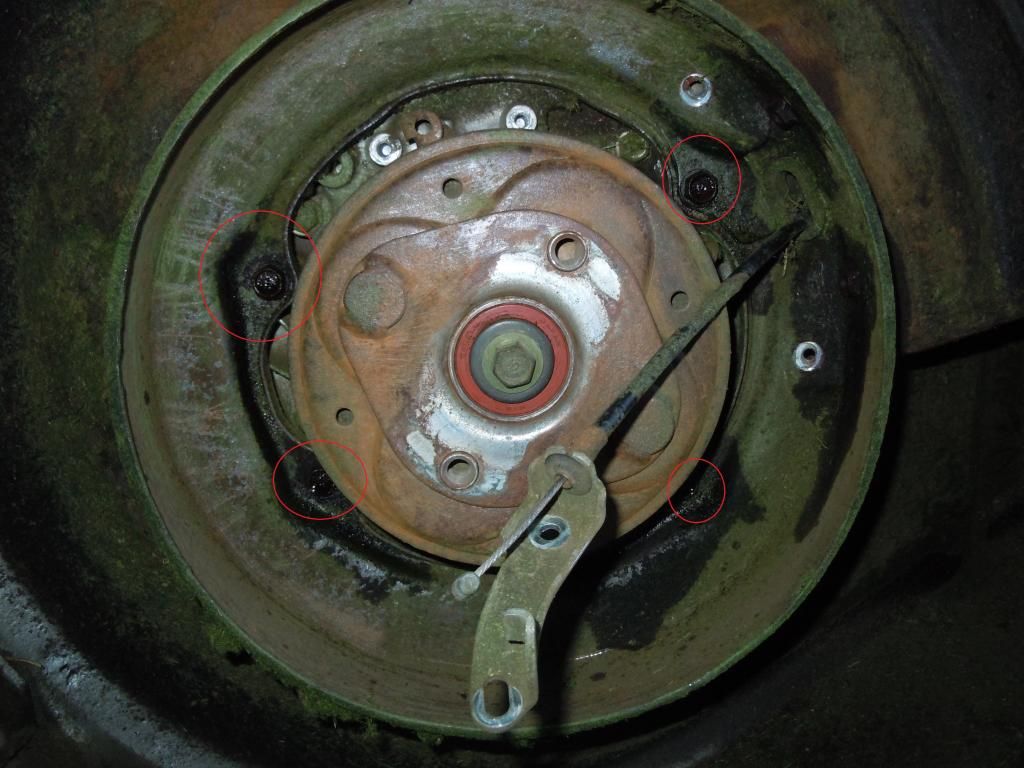
Once the motor is off, it is time to remove the clutch cable from the center ring (not sure on what the name of the part is), I pushed the rubber grommet back and then wiggled the bracket out of the hole.
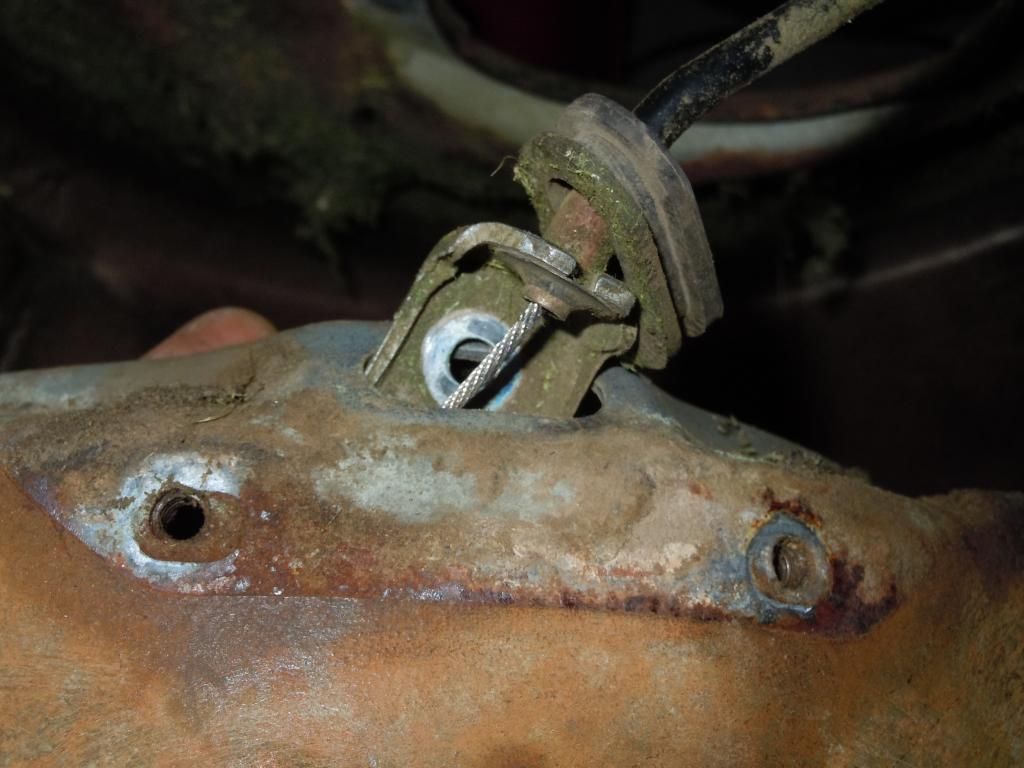
All off! (minus the stuck transmission cover...more on that later)
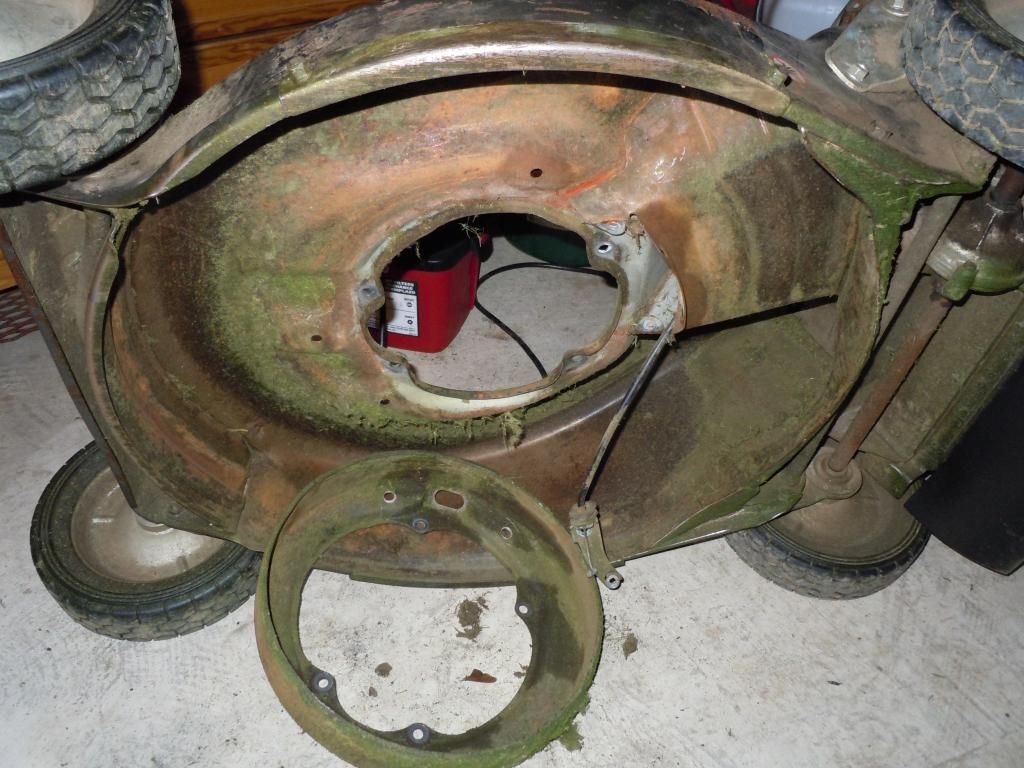
Calling it a night, hopefully to continue tomorrow
First, 2 x 14mm bolts to remove the blade. Use a block of wood to prevent it from spinning

Next use a philips screwdriver to remove the throttle cabel linkage. Its a good idea to mark the position on the cable where it was was clamped. I used a green marker

Next remove 2 x 10mm bolts securing the throttle cable linkage bracket in place. It may not be necessary however I found that it made it easier to remove.

Align the cable in the the slot and pull the whole cable end towards you. Should you have difficulty removing it, apply pressure on the backside with a hook of some sort

Next up is the transmission cable cover, 4 x 10mm bolts


Then proceed to remove the clutch cable bracket. 2 x 10mm bolts

Once the bolts are removed you can slide the bracket out to the side. To remove the cable use the same method as for the throttle cable. For this one I needed to use my hooked aull.

Now to unbolt the motor from the deck, 4 x 12mm bolts. Carefully remove the last two bolts. I had the mower tilted just barely enough for me to get my hand underneath the finish removing the bolts. This will prevent the motor from sliding abruptly/snapping bolts/bending bolt/metal

Once the motor is off, it is time to remove the clutch cable from the center ring (not sure on what the name of the part is), I pushed the rubber grommet back and then wiggled the bracket out of the hole.

All off! (minus the stuck transmission cover...more on that later)

Calling it a night, hopefully to continue tomorrow

#8

OutdoorEnvy
OutdoorEnvy
Neat project man! This will be a fun one to follow. Restoring quality equipment and tools is always fun :thumbsup:
#9
F
freeloader700
F
freeloader700
Thanks man, I am enjoying it so far. I am trying to figure out what I am going to do about paint for the top of the deck. I was thinking a similar grey/silver Duplicolor engine or wheel paint. I know some people think it is blasphemy to paint other than the factory colors, any suggestions on what color to get?
#10

OutdoorEnvy
OutdoorEnvy
It's your mower so whatever you want.
I do like the grey colors or a darker charcoal grey would probably be cool. Then again I like lawnboys too so a green Honda might be the coolest thing ever
I do like the grey colors or a darker charcoal grey would probably be cool. Then again I like lawnboys too so a green Honda might be the coolest thing ever
#11
F
freeloader700
F
freeloader700
A green Honda would be interesting...I will take a look at the colors and see if something other than the charcoal catches my attention
#12
F
freeloader700
F
freeloader700
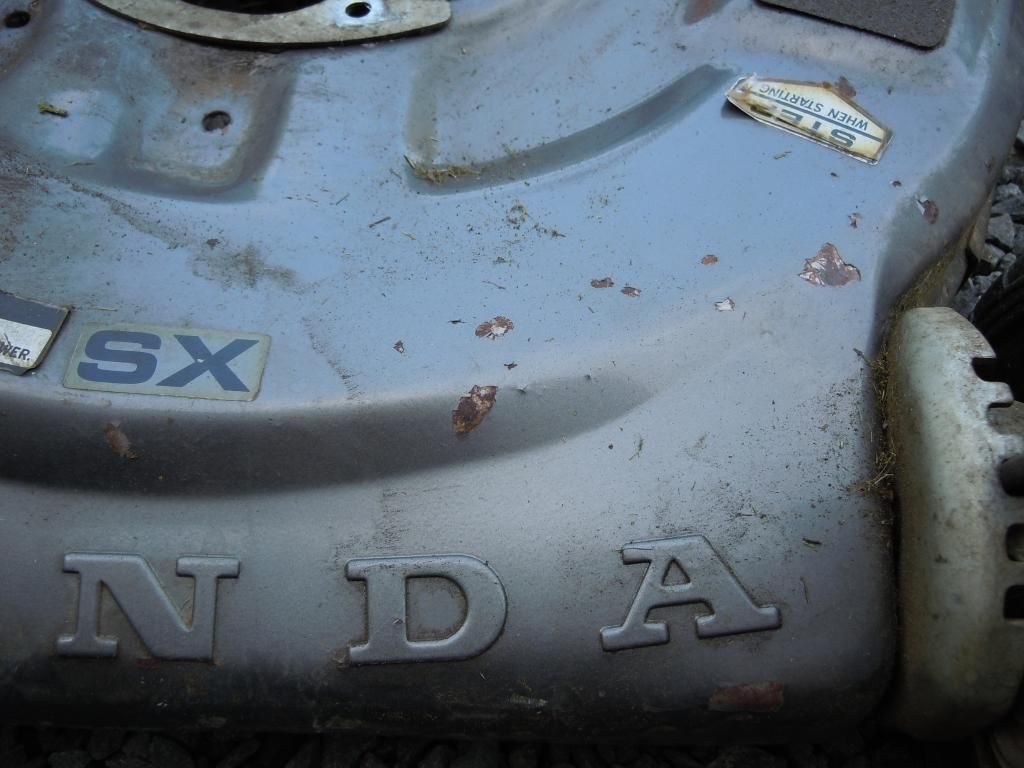
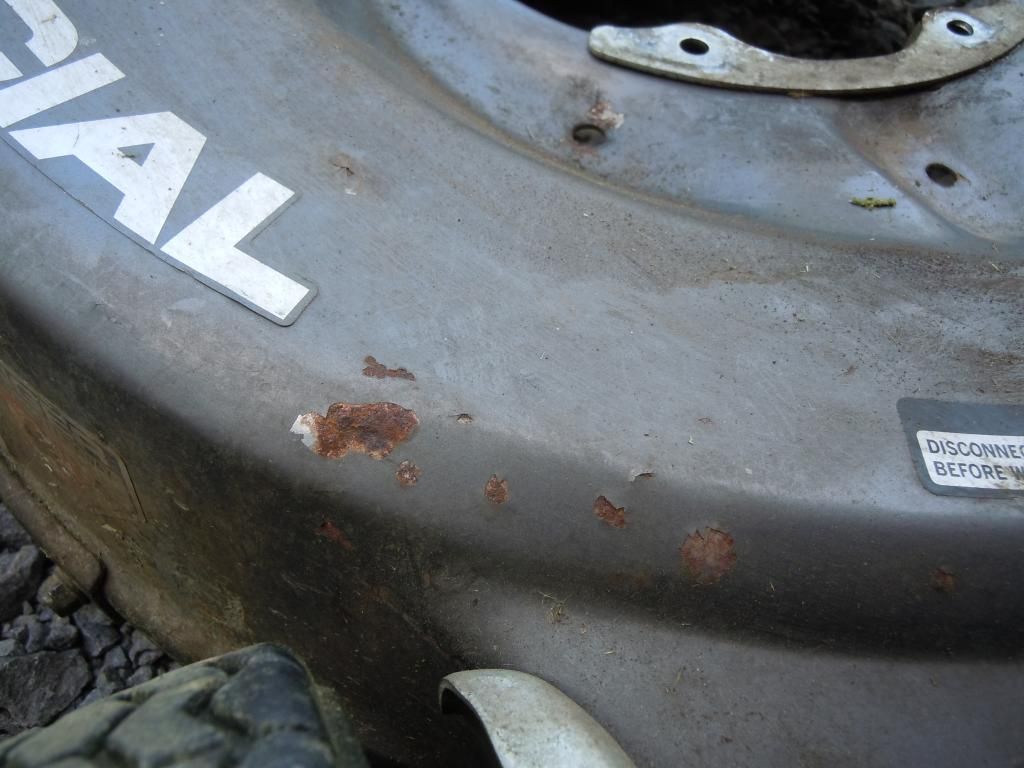
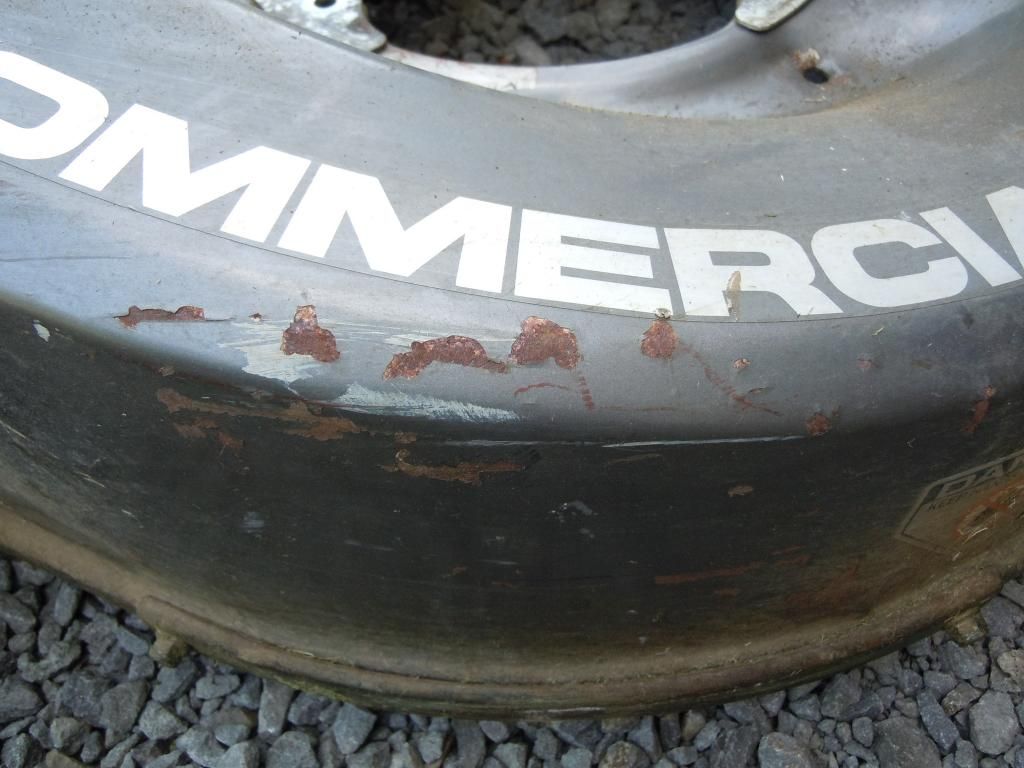
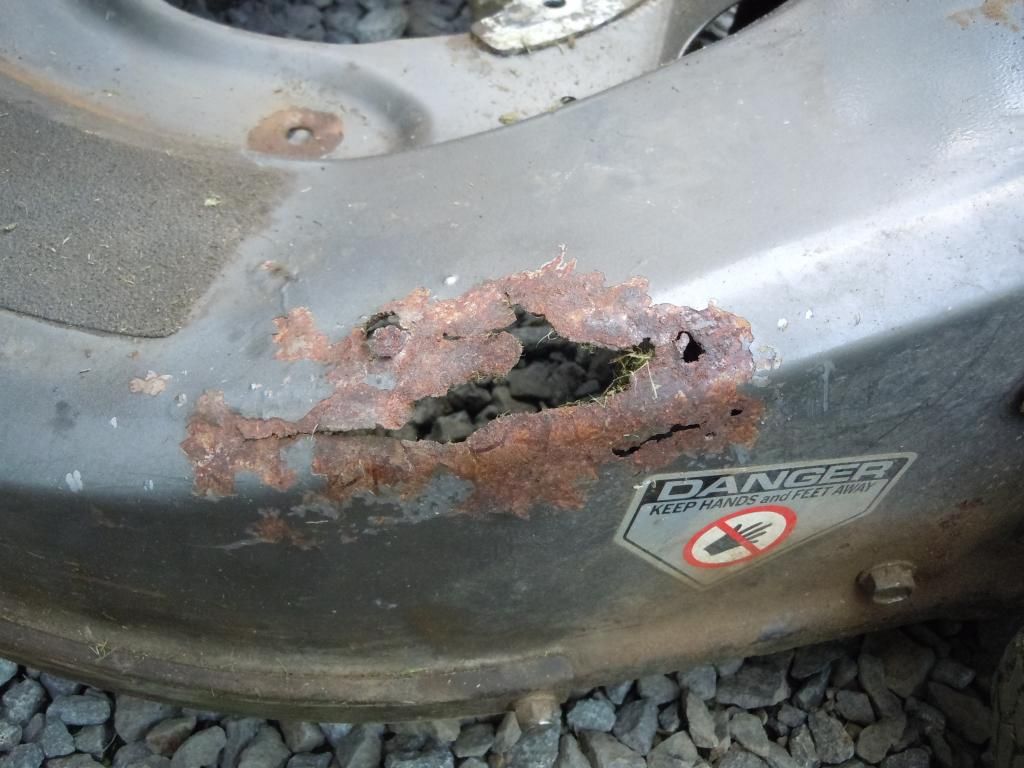
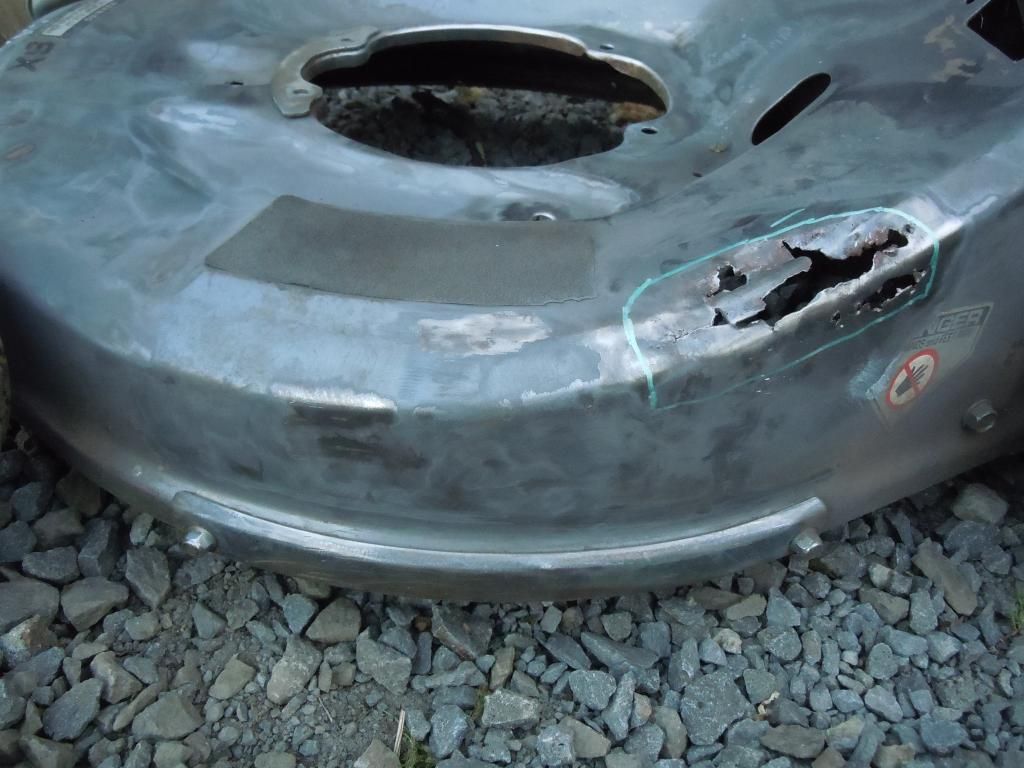
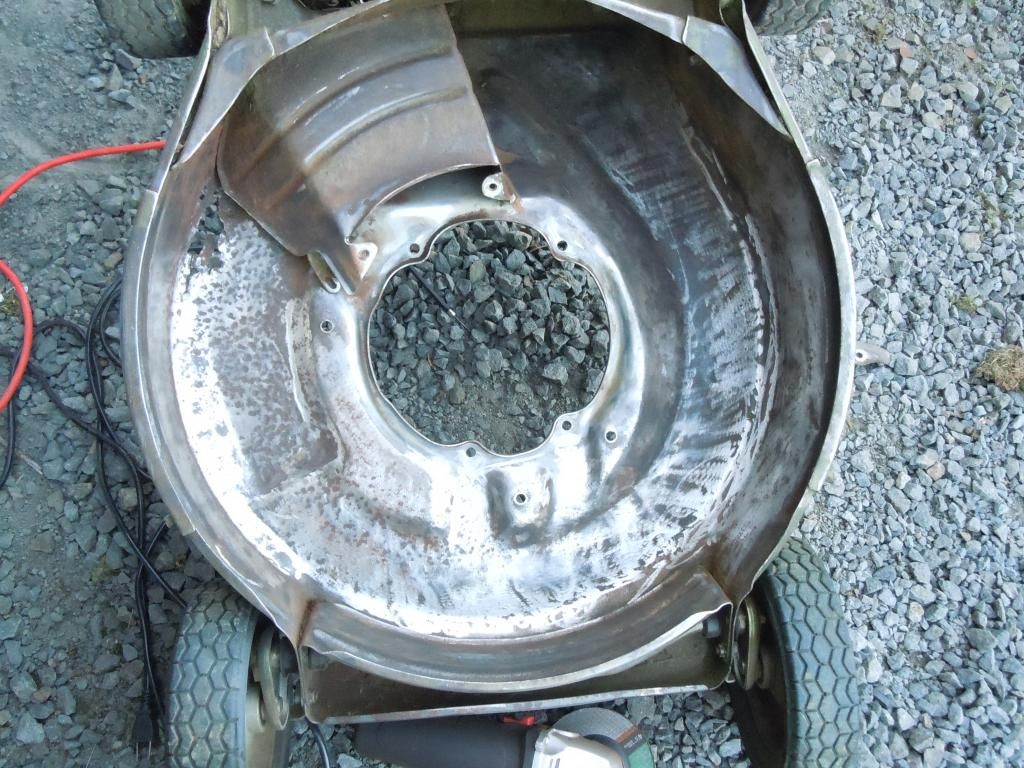
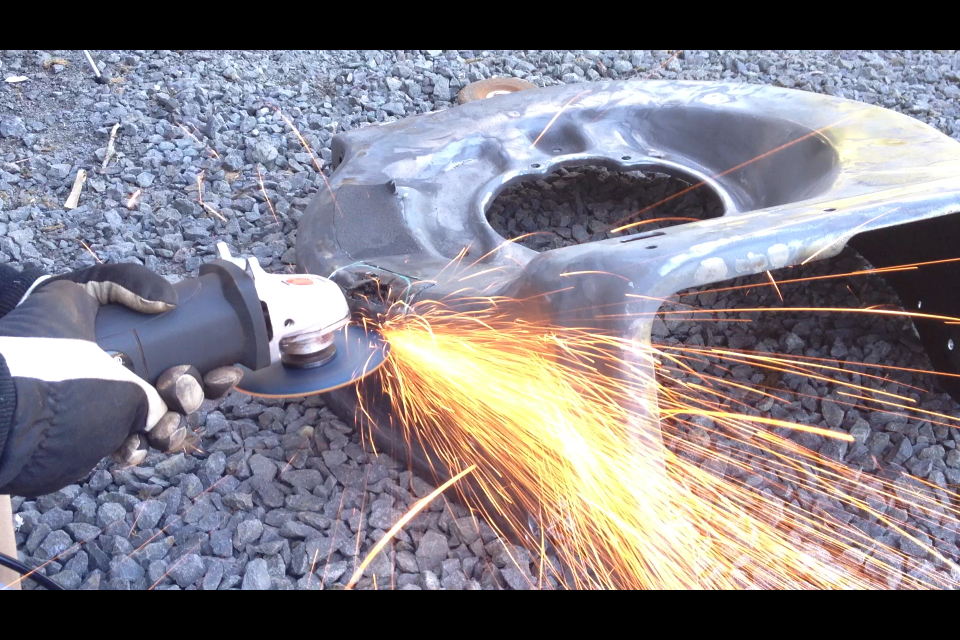
Alright did a bit yesterday, actually a little over an hours worth. Here are some before pictures of the rust spots on the topside that I will be cleaning up with a grinder using a combo of a grinding disk & wire wheel.
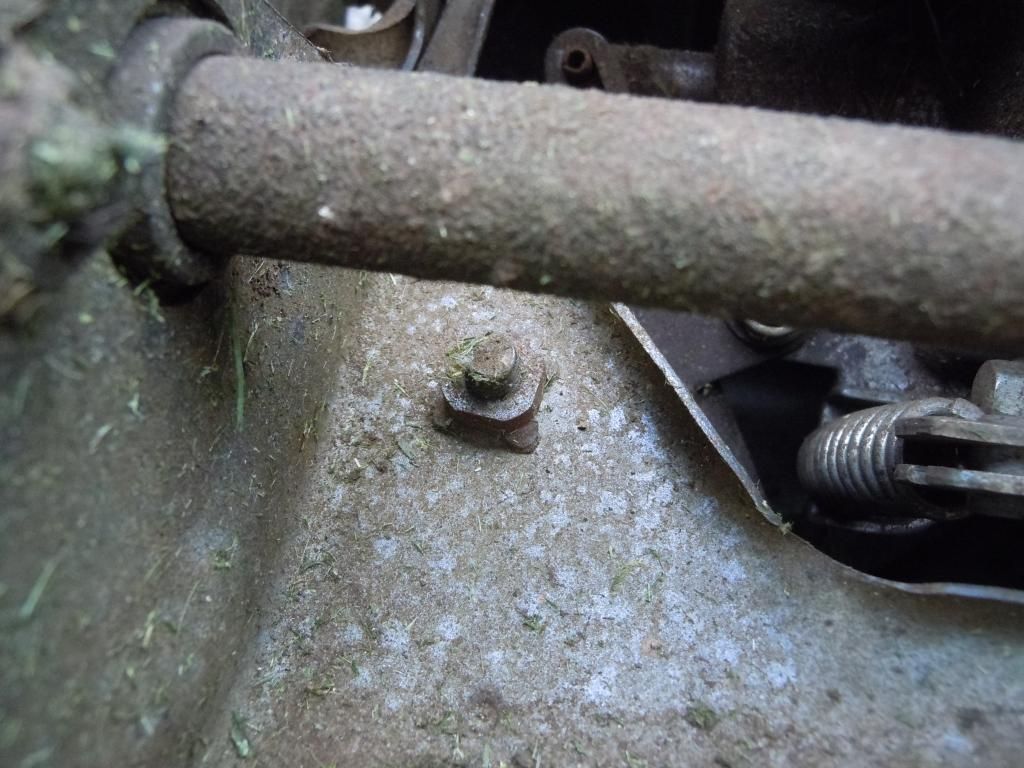
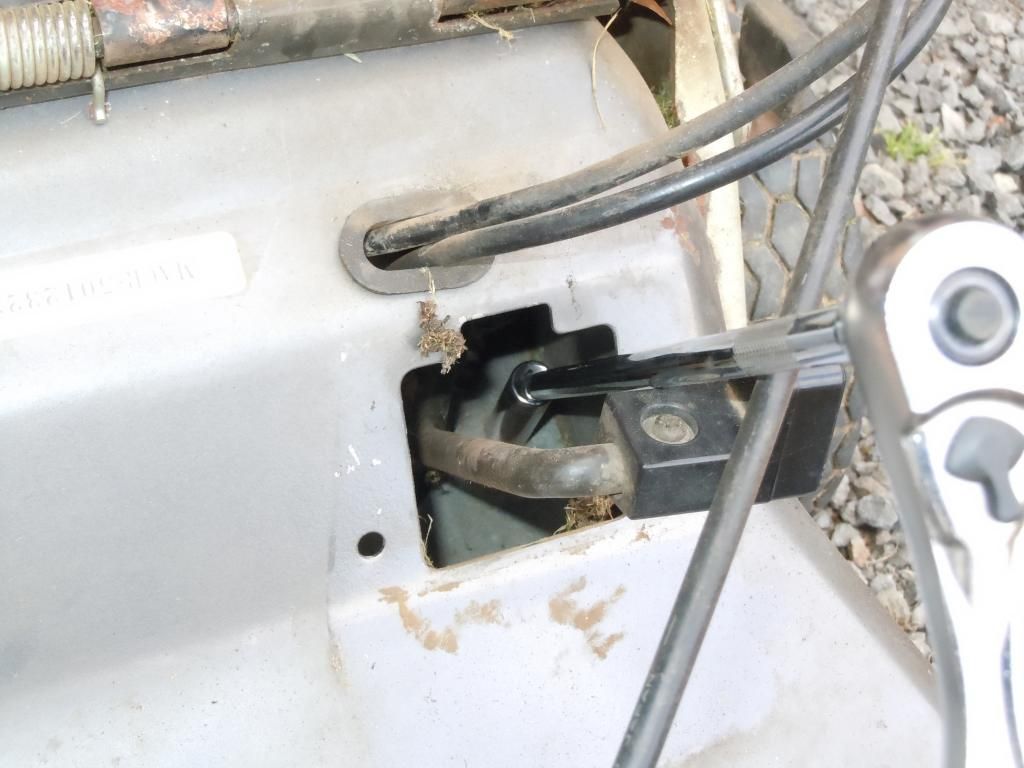
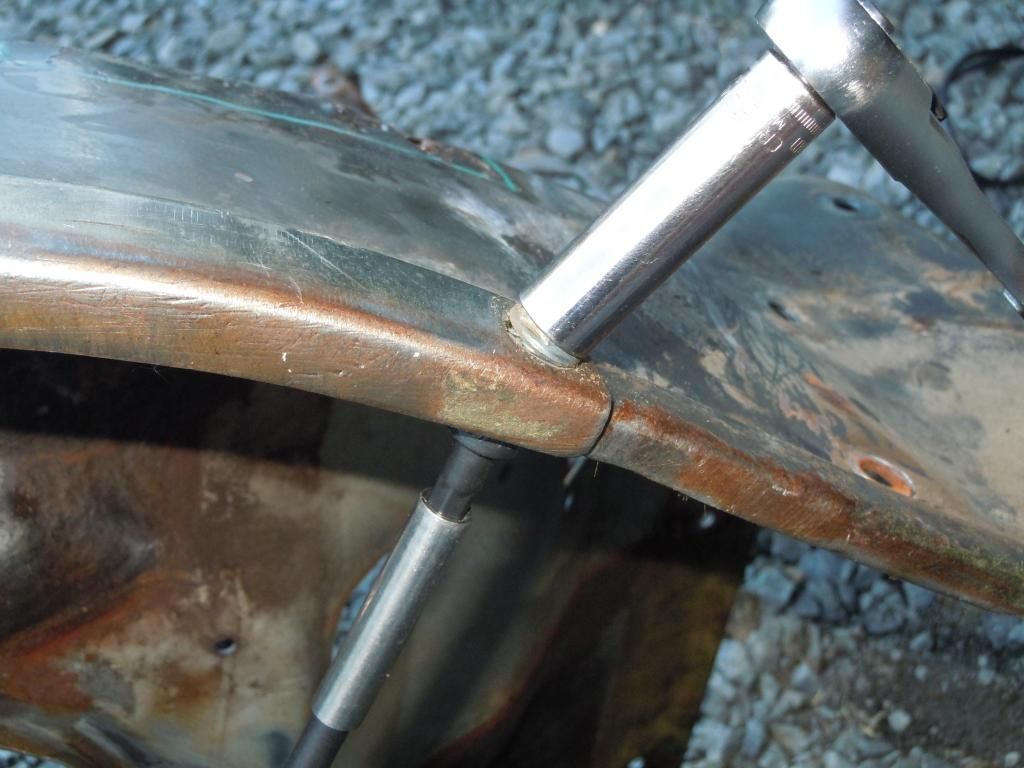
I found this other 10mm bolt holding the clutch cable cover. This shot is right under the rear axle. To get it out, I used a 10mm deep socket with a long swivel extension, from above through the gear lever hole.
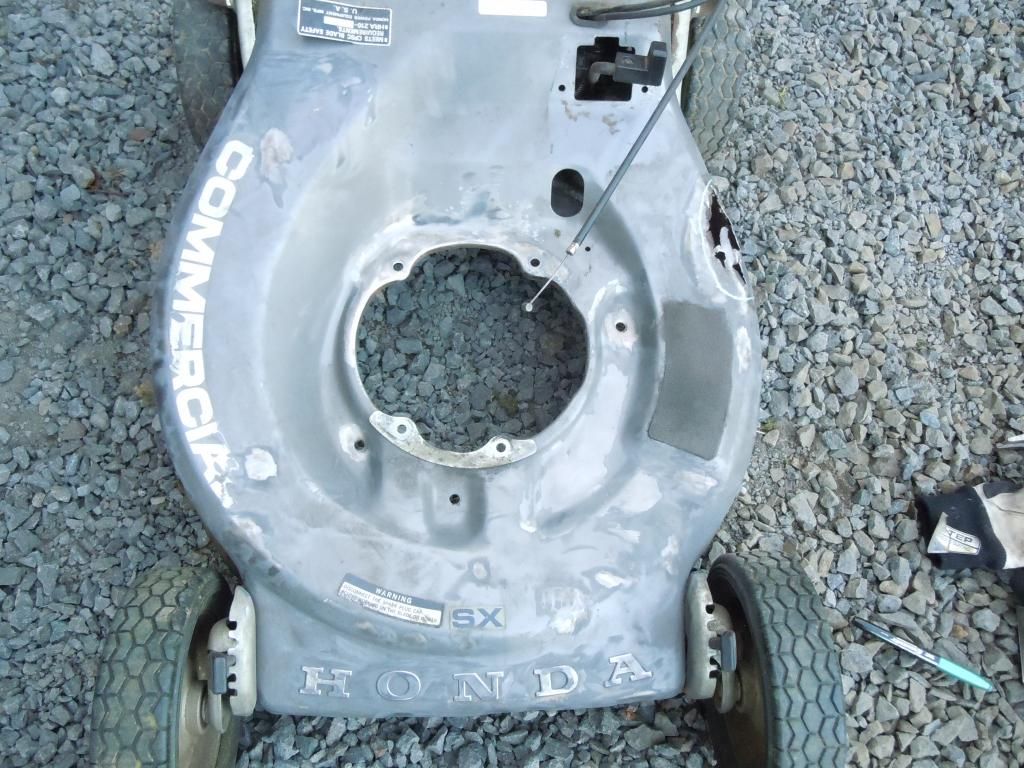
All cleaned up now, I think this will be good enough for some good adhesion of the self-etching primer.
I marked out the area I am planning on cutting out
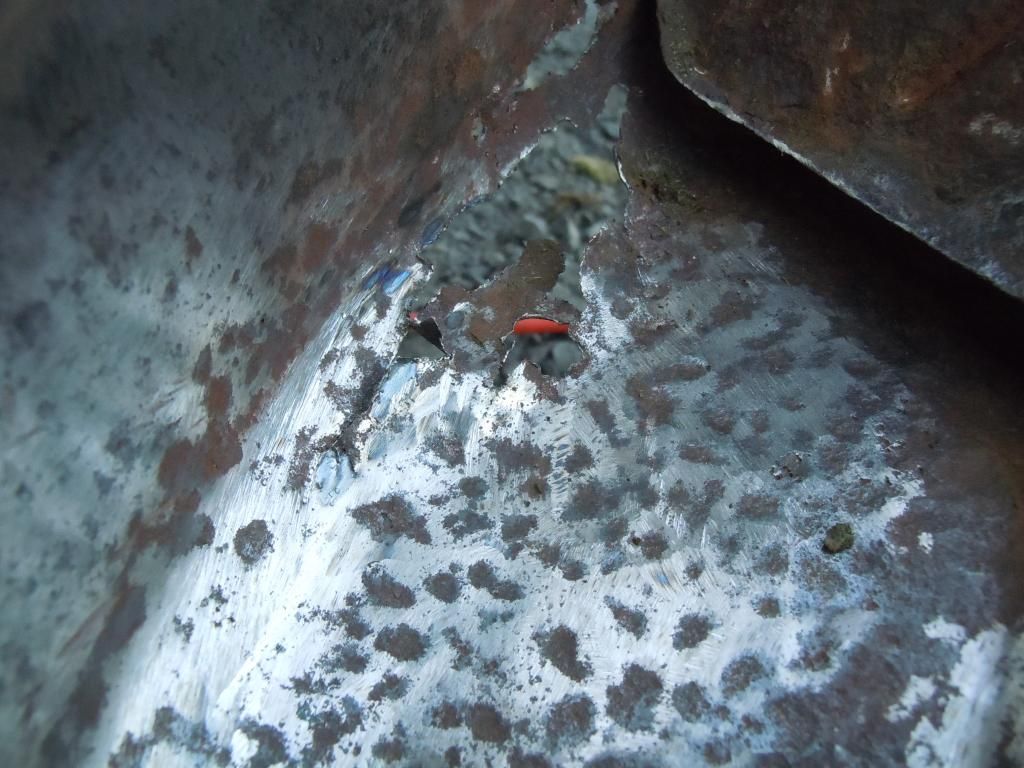
Its a little pitted but not too bad
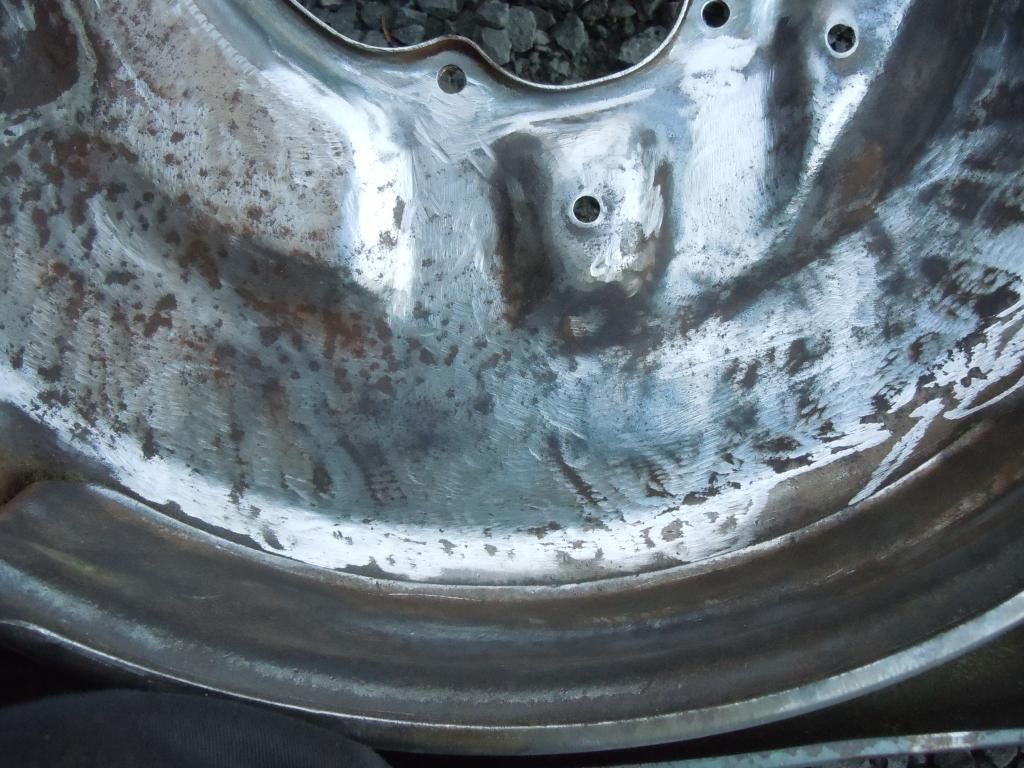
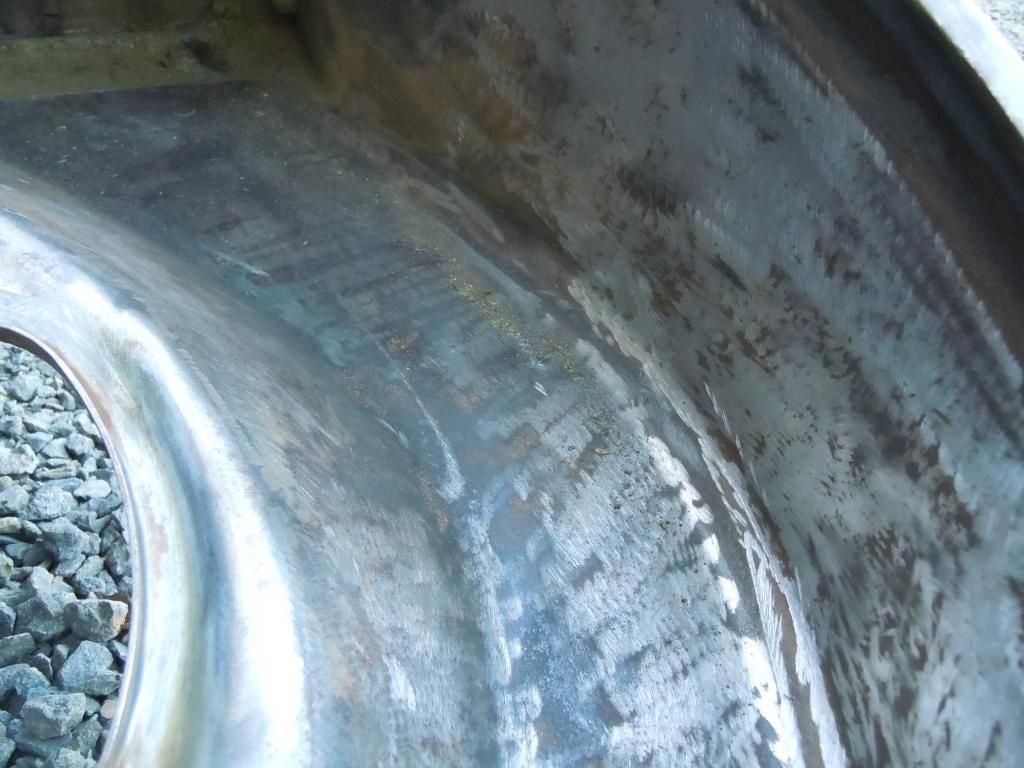
As you can see, I still have not been able to get the clutch cable cover off even after removing that other bolt. What am I not seeing on how to remove it...is it just rusted and not able to move much or is there another sneaky bolt?


I found this other 10mm bolt holding the clutch cable cover. This shot is right under the rear axle. To get it out, I used a 10mm deep socket with a long swivel extension, from above through the gear lever hole.


All cleaned up now, I think this will be good enough for some good adhesion of the self-etching primer.

I marked out the area I am planning on cutting out


Its a little pitted but not too bad


As you can see, I still have not been able to get the clutch cable cover off even after removing that other bolt. What am I not seeing on how to remove it...is it just rusted and not able to move much or is there another sneaky bolt?
#14
F
freeloader700
F
freeloader700
First I have to say, with something this old use some PB Blaster or Liquid Wrench, You will need it. I found out the hard way
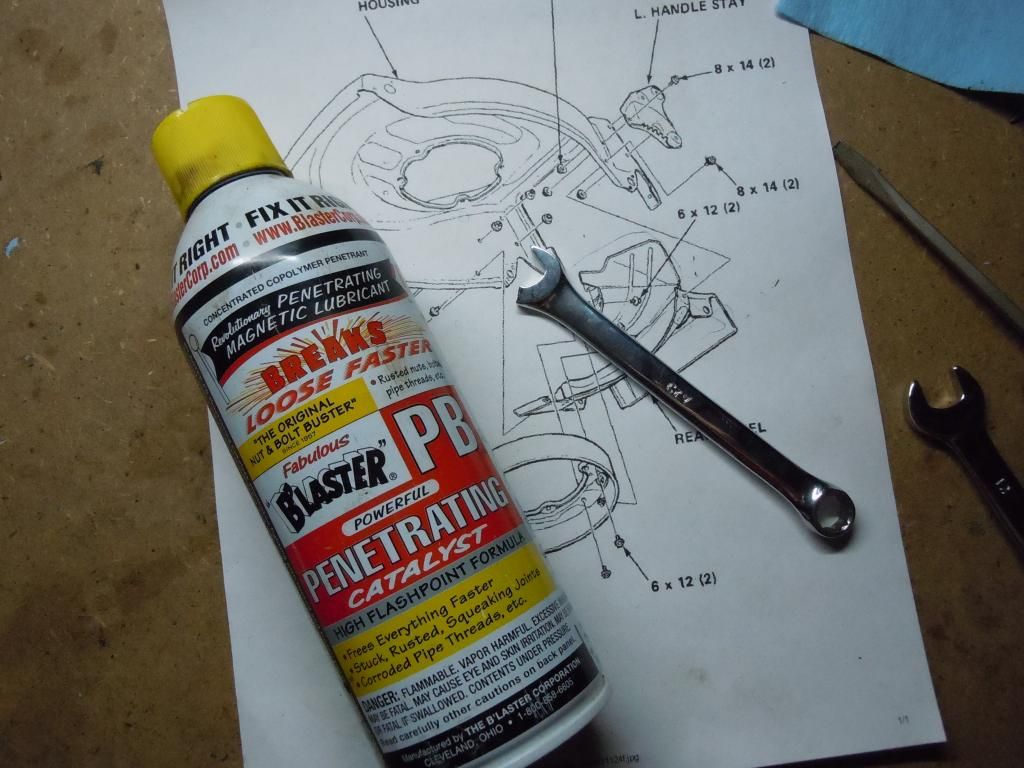
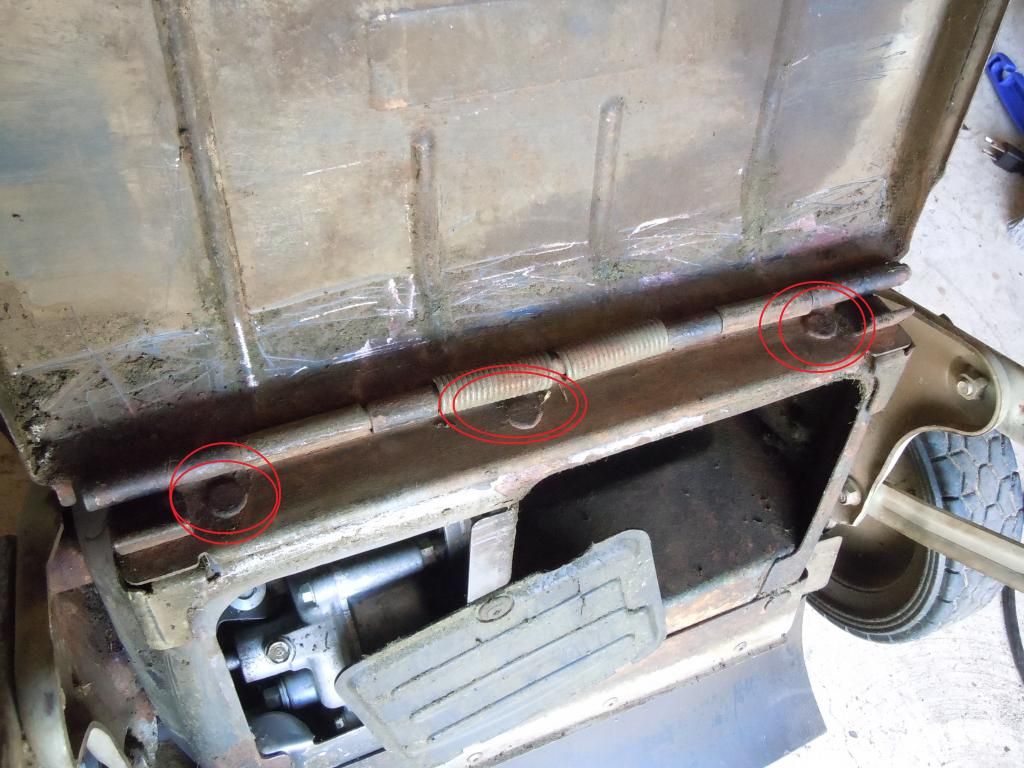
Alright, first up for tonight, removing the bag catch flap (not sure what it is technically called). There are 3 x 10mm nuts to remove, The threaded studs are circled in red
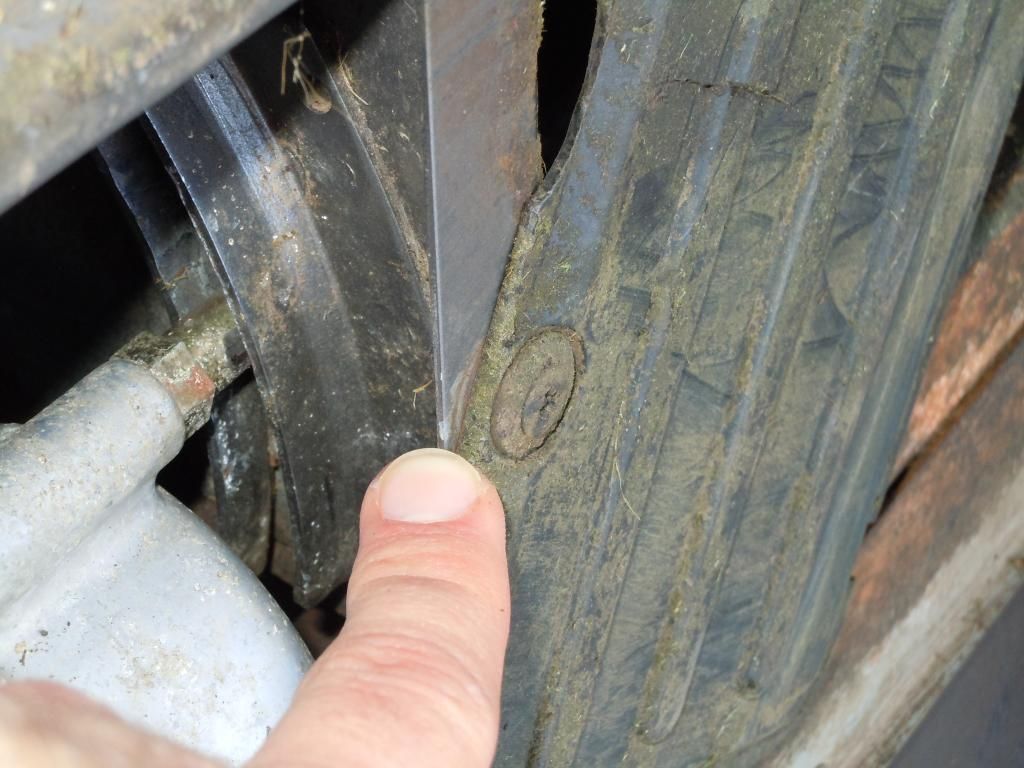
Then the plastic transmission cover,. 1 phllips scew
2 x 10mm bolt holding part of the guard to the deck next to the axle
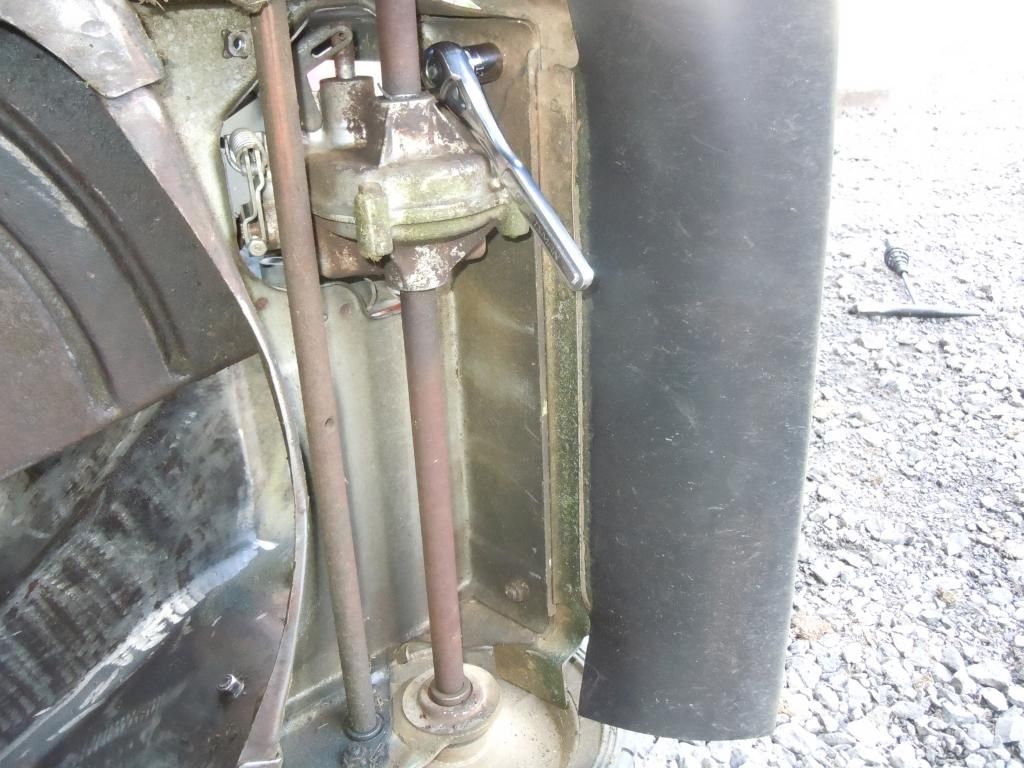
Now, lets remove the drive cable from the transmission so we can remove the handlebars. There are 2 x 10mm thin nuts holding it into place. You can loosen one of them and slide it out of the bracket
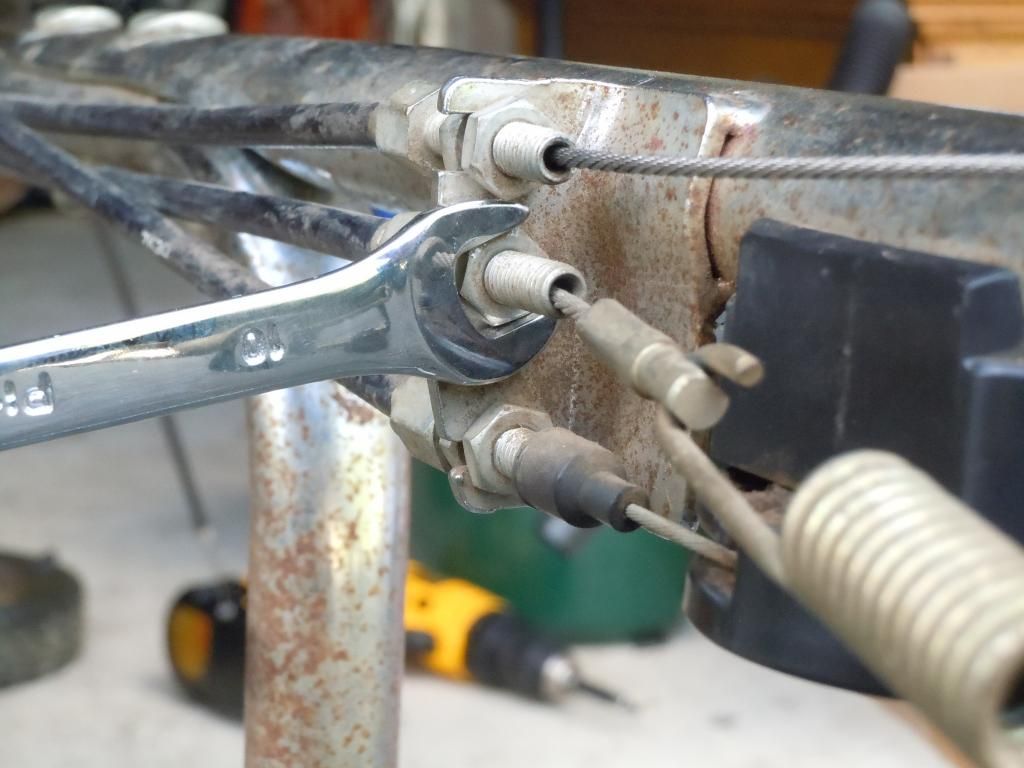
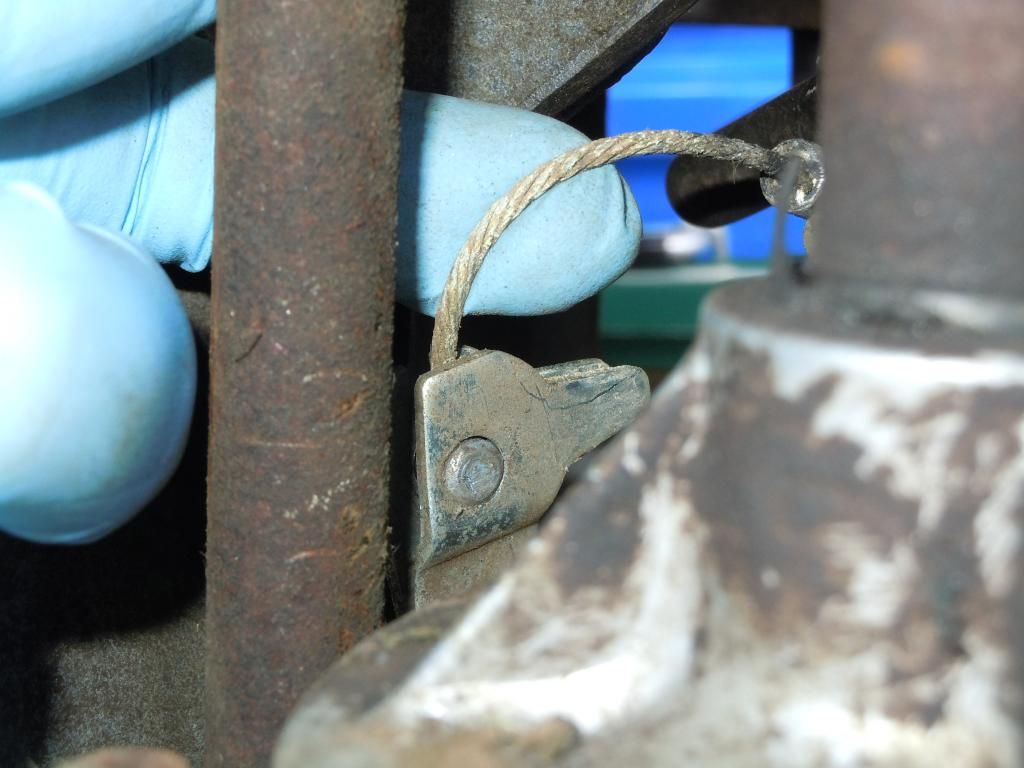
To remove the cable from the transmission, first pull the cable upward to release it from its catch. I accessed it through the hole after removing the plastic cover
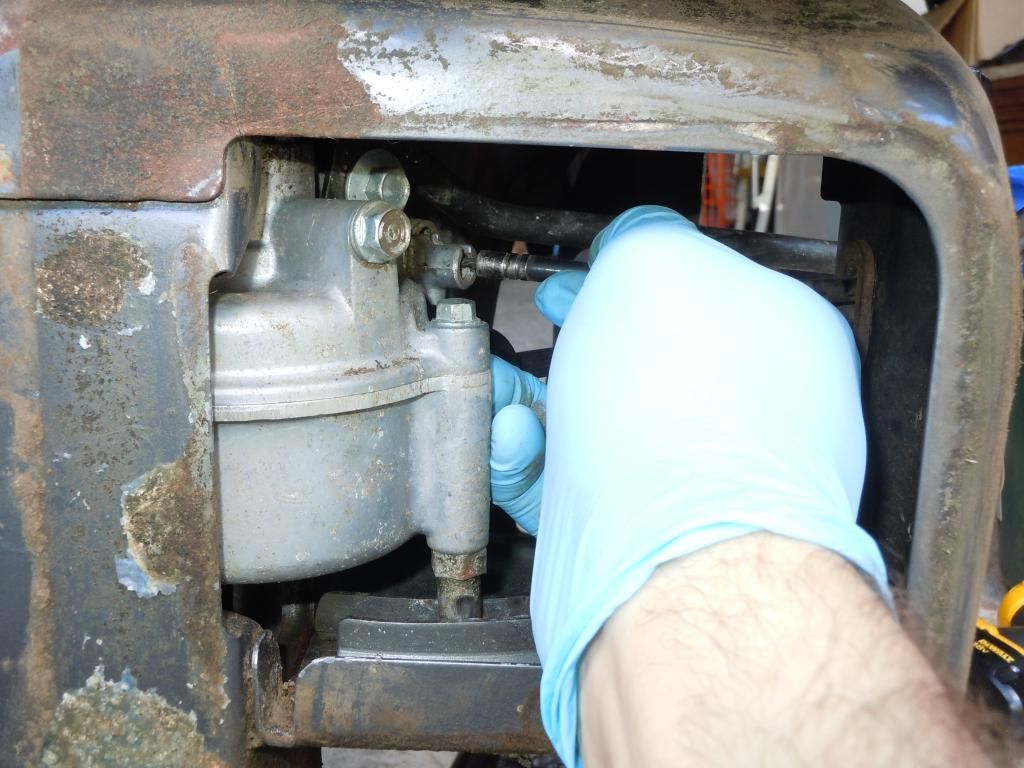
Then proceed from the bottom of the mower to access the drive cable spring, I used a hook, First pull the far side towards you to free it from its seat, Then slide the spring up the cable,
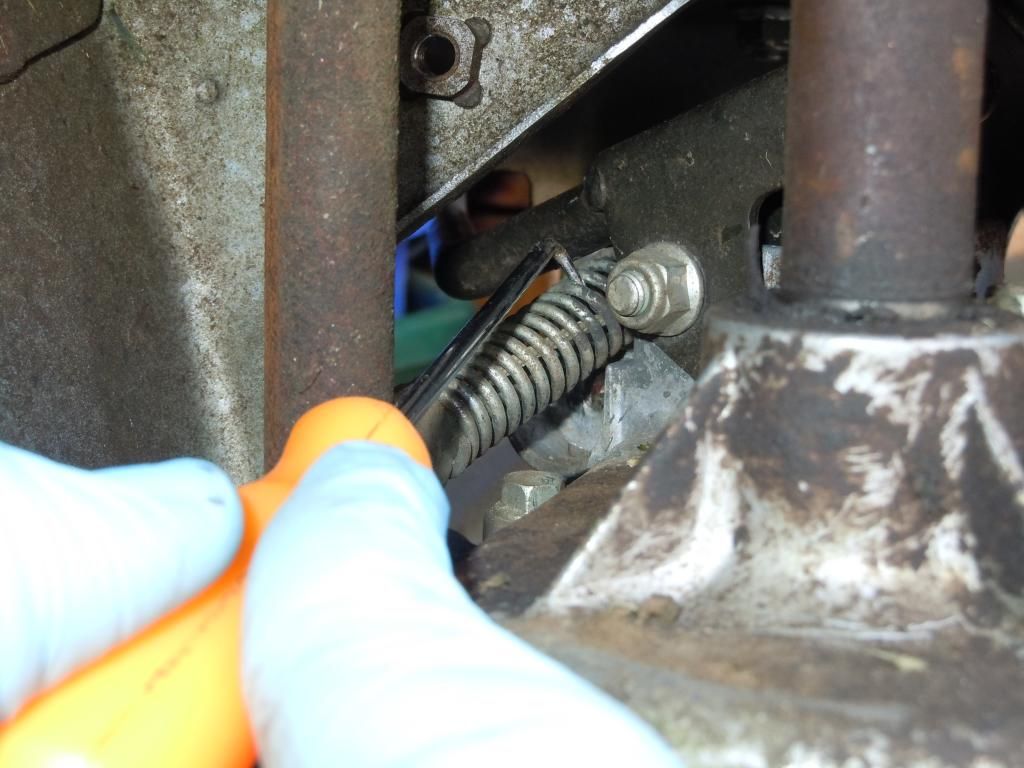
Now you can slide the cable through
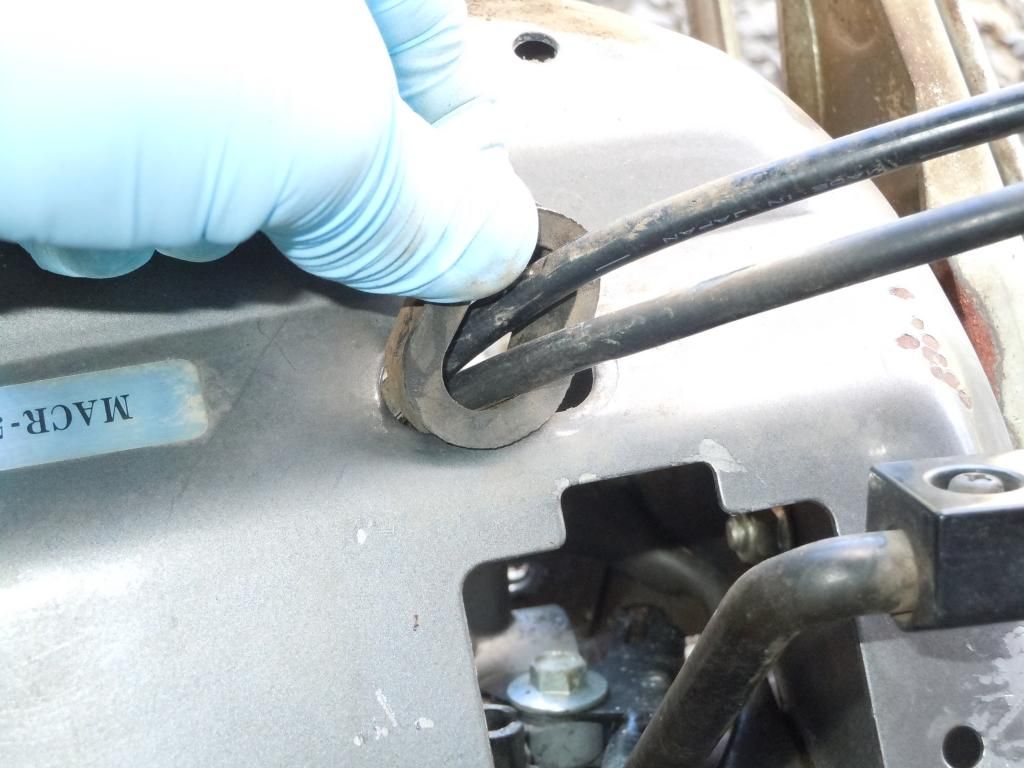
Its not time to feed the clutch and drive cables through the deck, Simply push the rubber grommet up from underneath, The clutch cable will take a little bit of maneuvering to get it
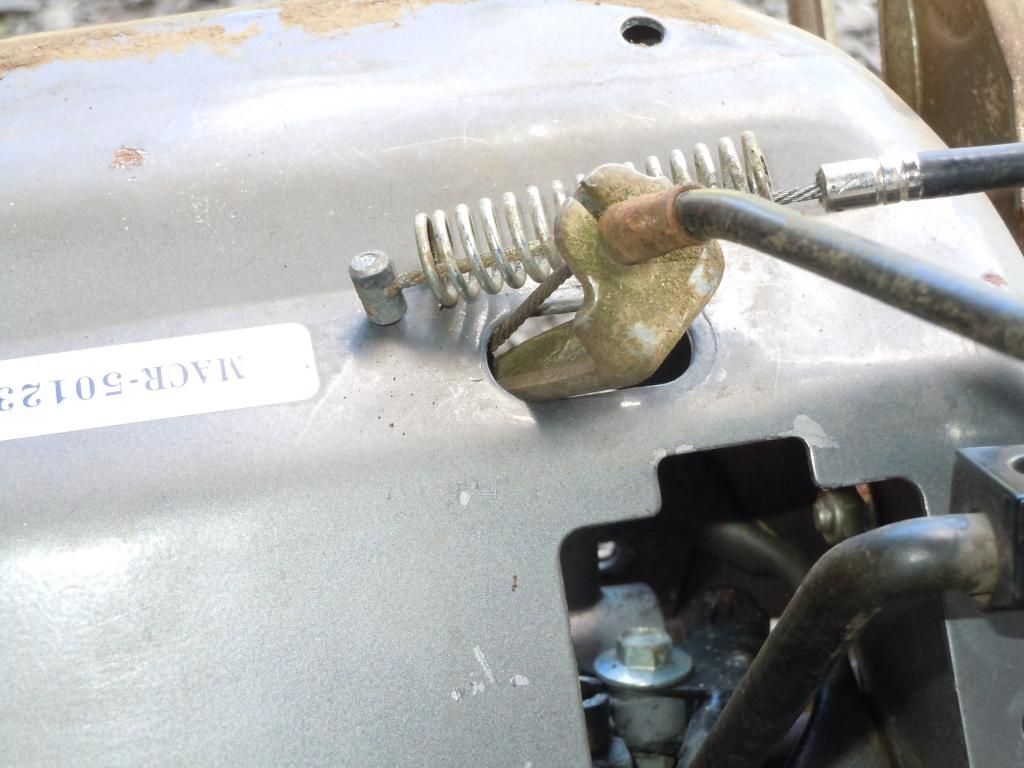
Now lets work on the handlebars. 2 x 12mm bolts on the outside and 1 x 12mm nut on the inside for the support bracketm per side.
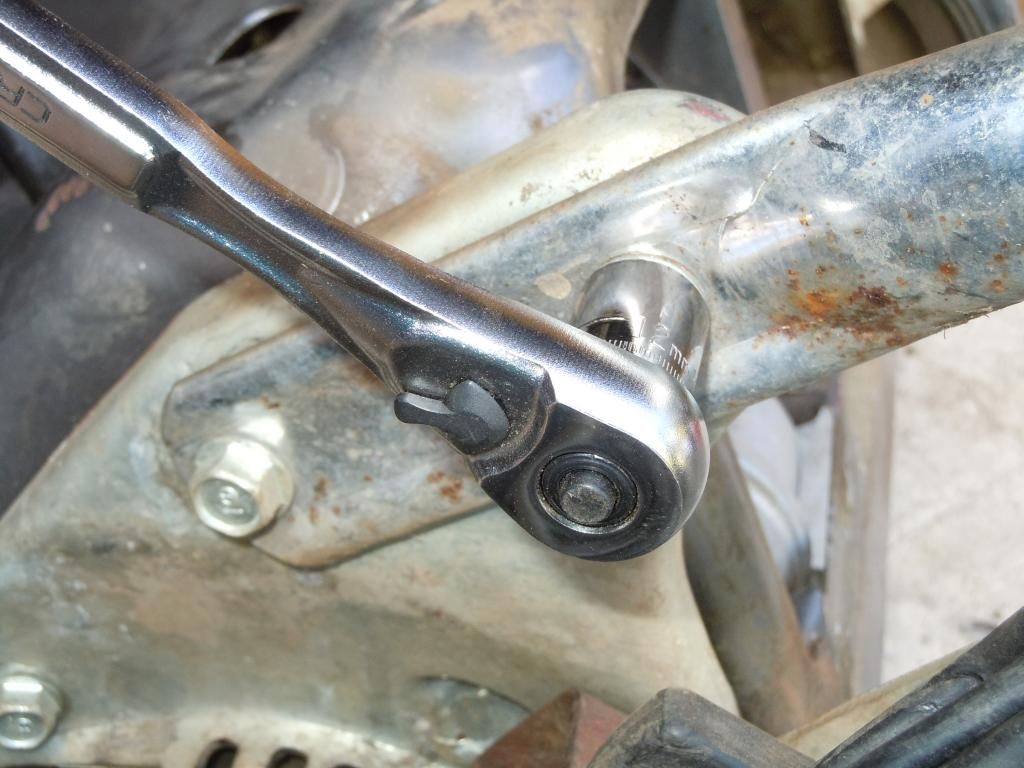
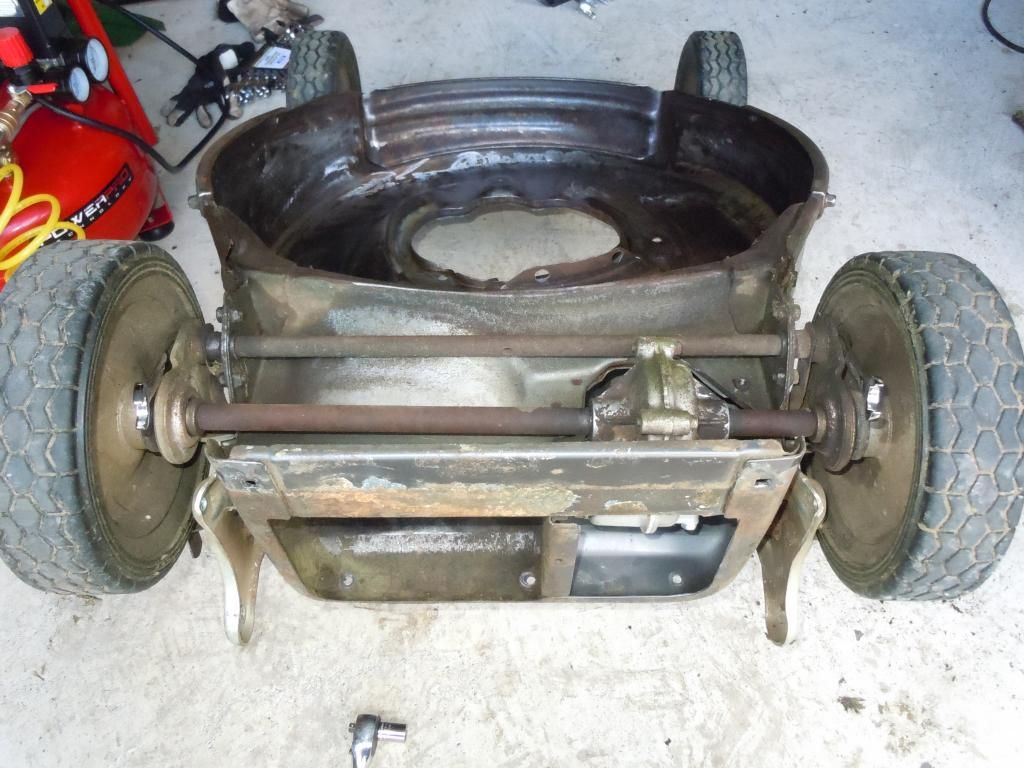
Handles off, time to get the suspension off.
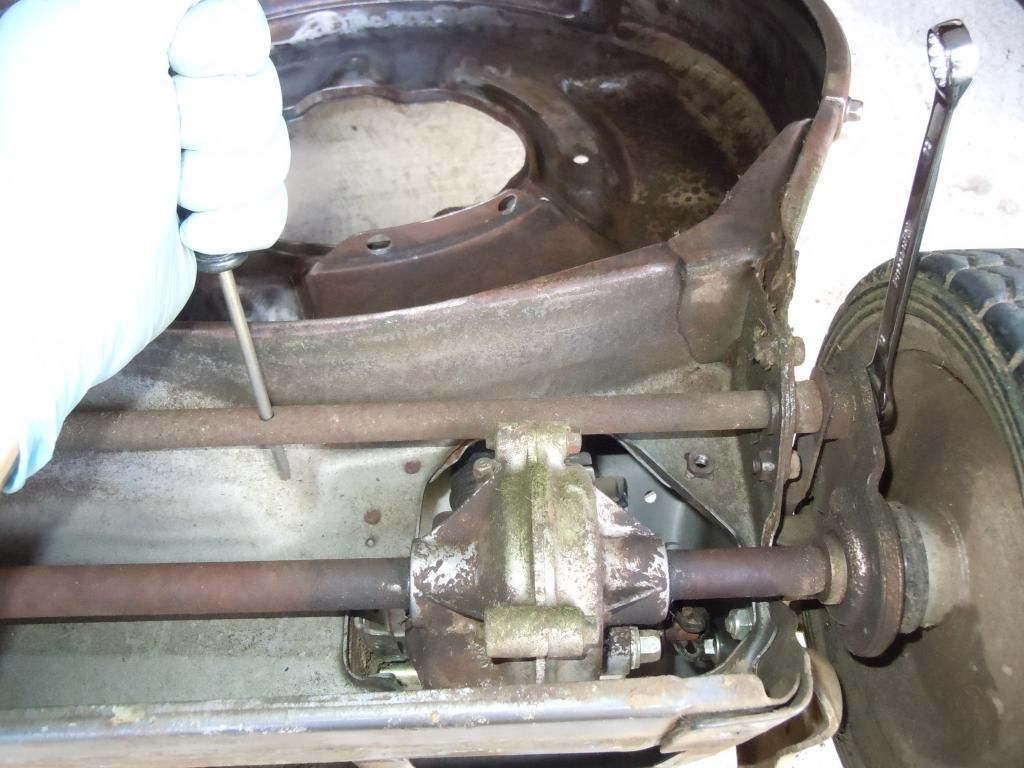
1 x 12mm bolt per side for the sway bar, I used a screw driver through the center hole of the bar to keep it from spinning
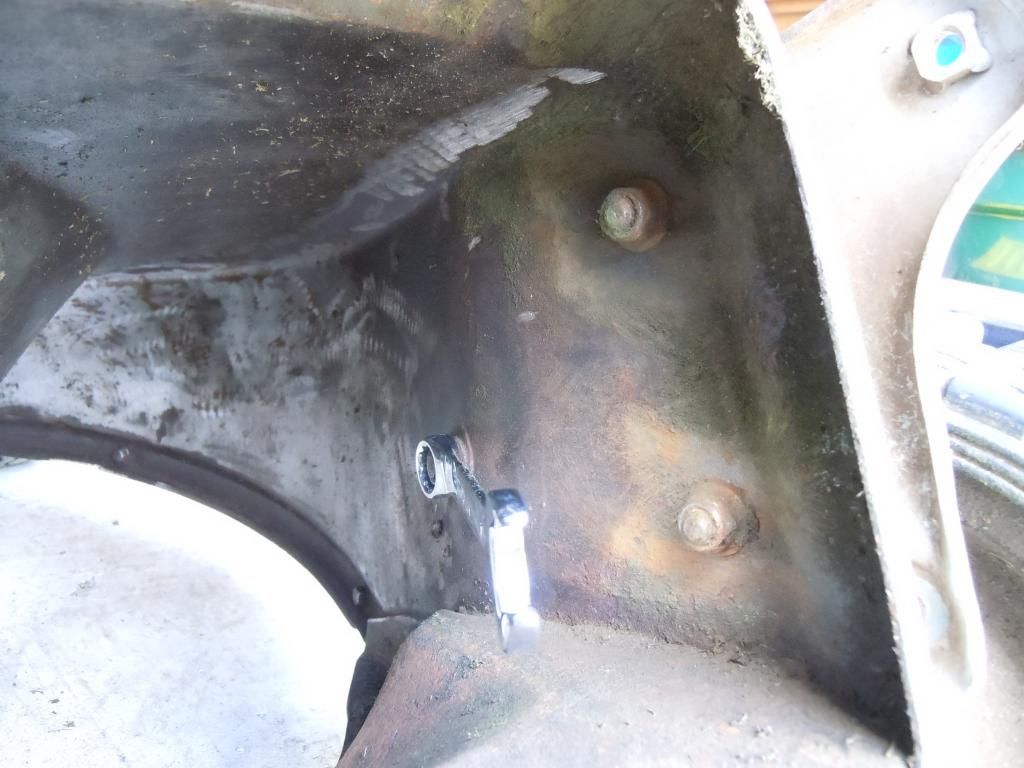
Next, remove the handle brackets. 3 x 12mm on the inside. 2 nuts and 1 bolt, per side. USE PB BLASTER
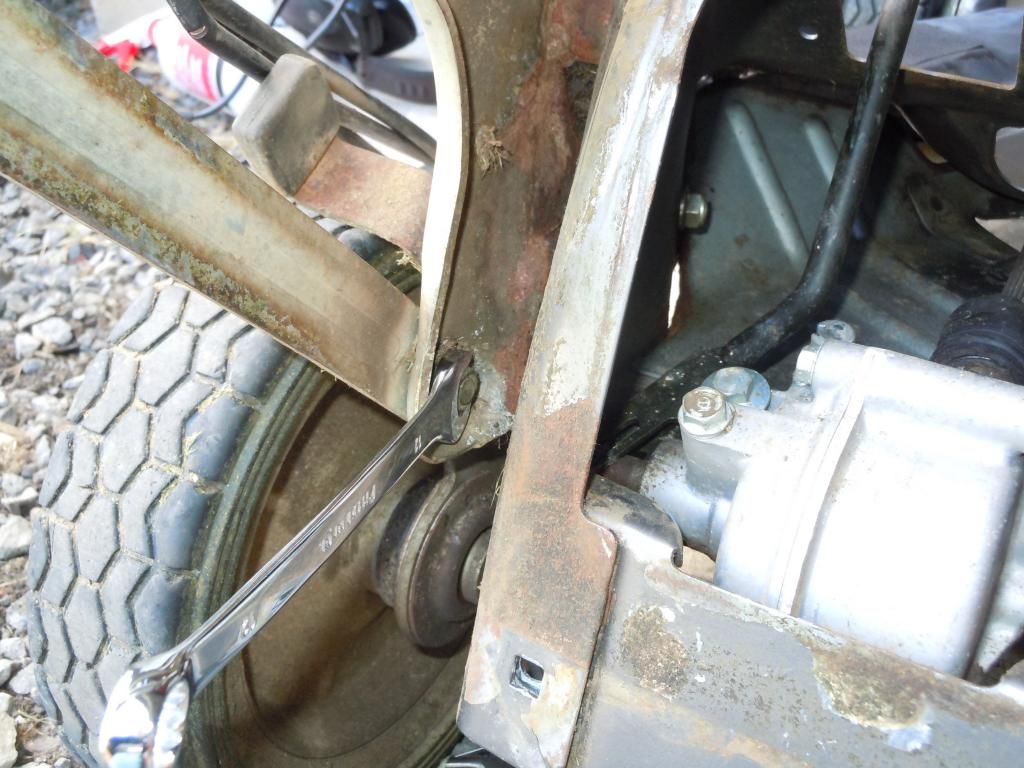
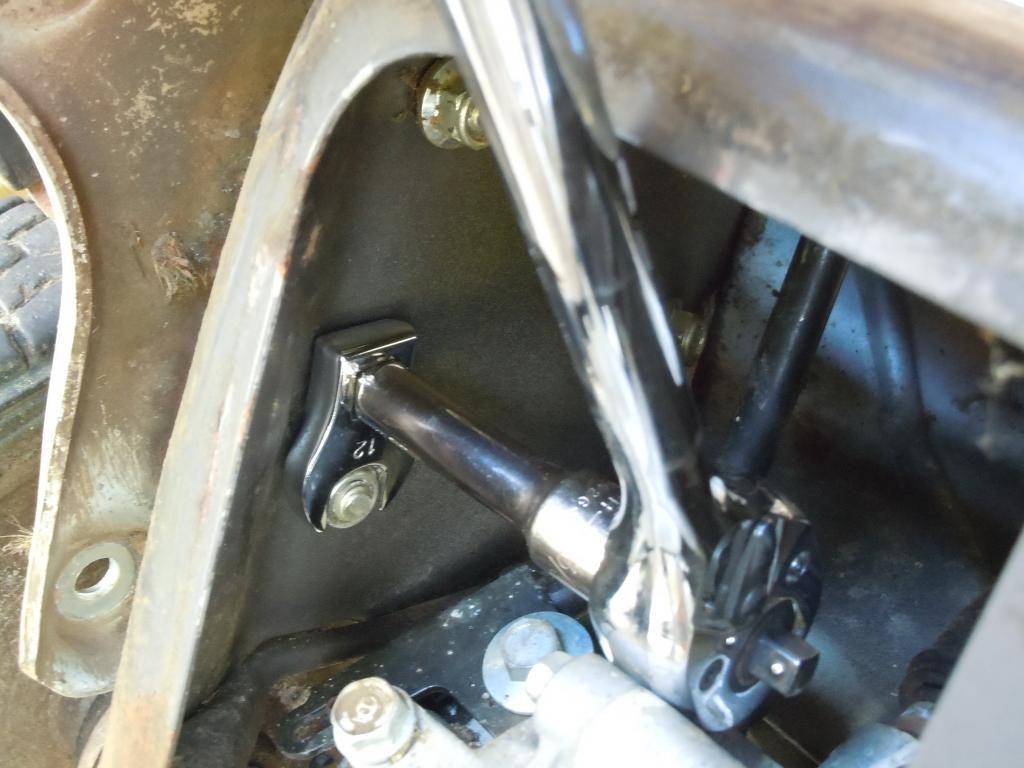
I found the a crows foot 12mm was a life saver on the transmission side for this one
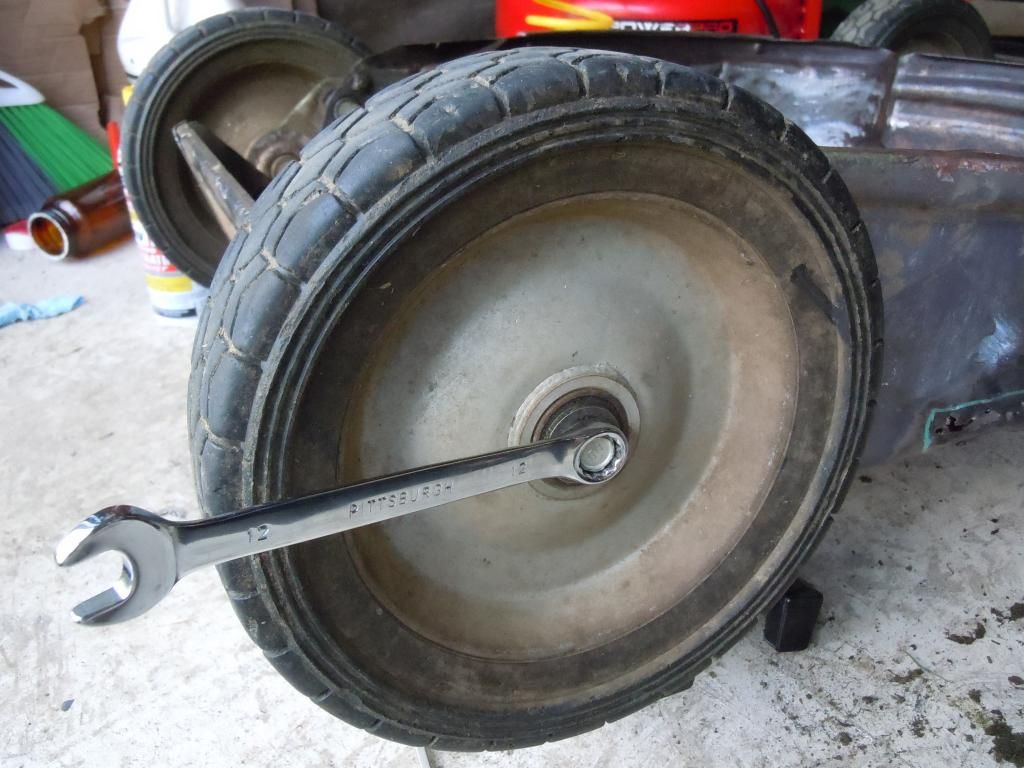
Rear tires,,,one side you will be able to get it fairly easy without the axle spinning too much. I will show you how I was able to get the other side off after this one was. 1 x 12mm bolt with a large washer
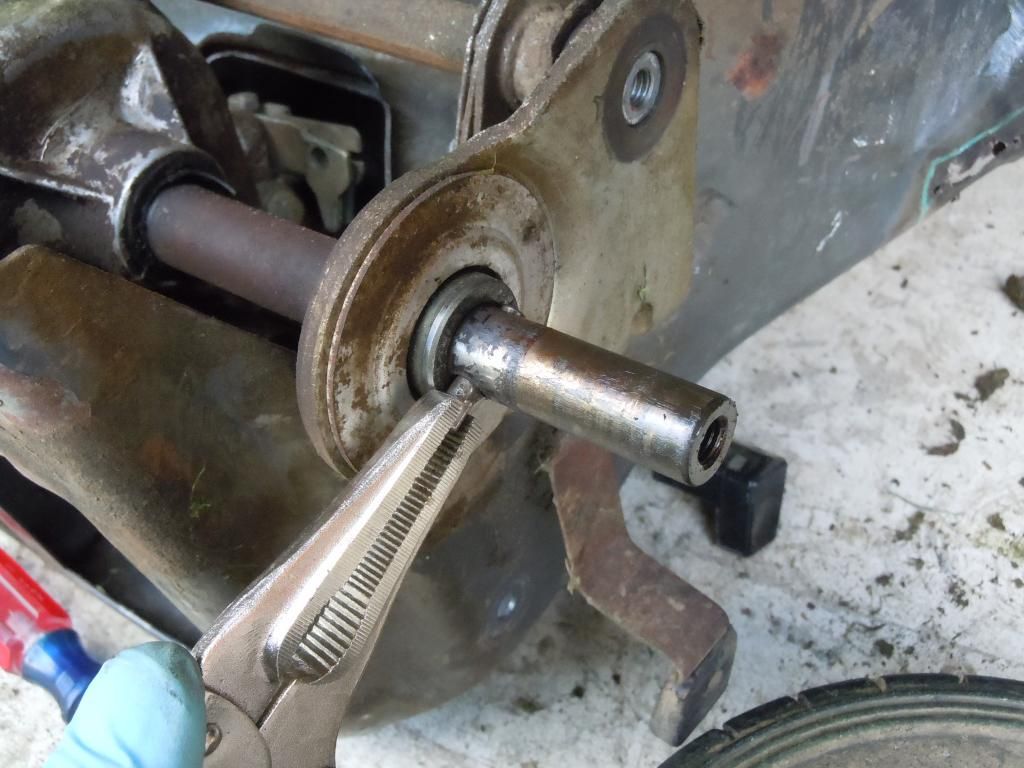
Once the wheel is off, pull this pin out. I had to tap it a little with a hammer to get it loose.
I had to tap the hub off as well
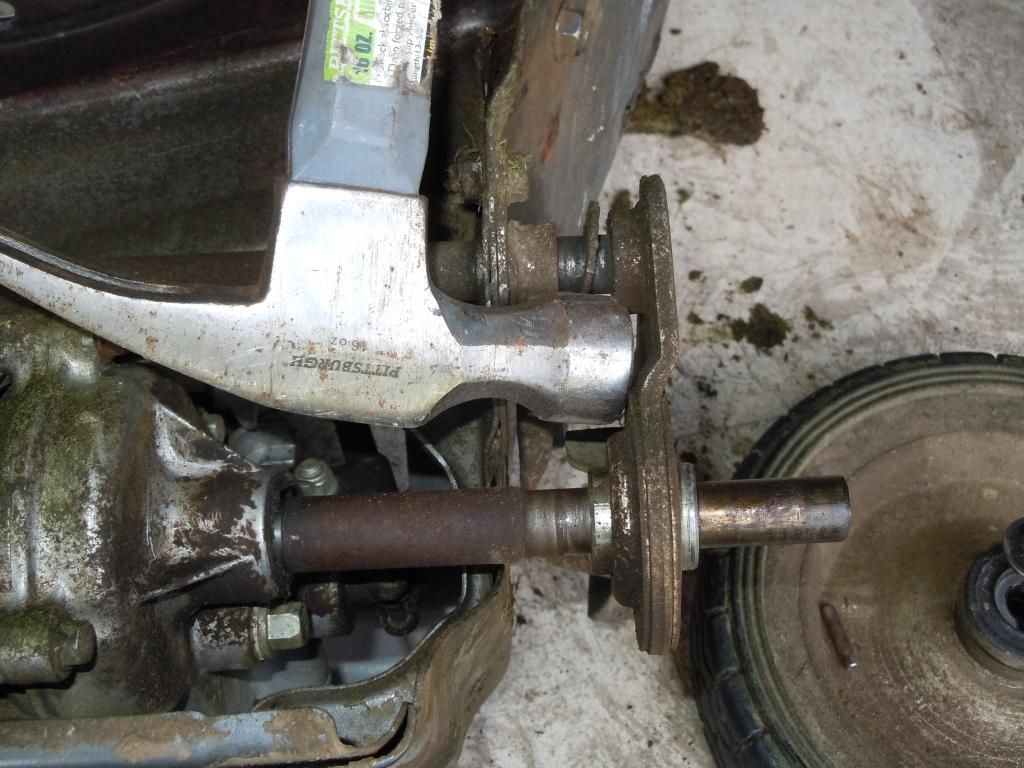
When you slide it off there will be a thick washer on each side.
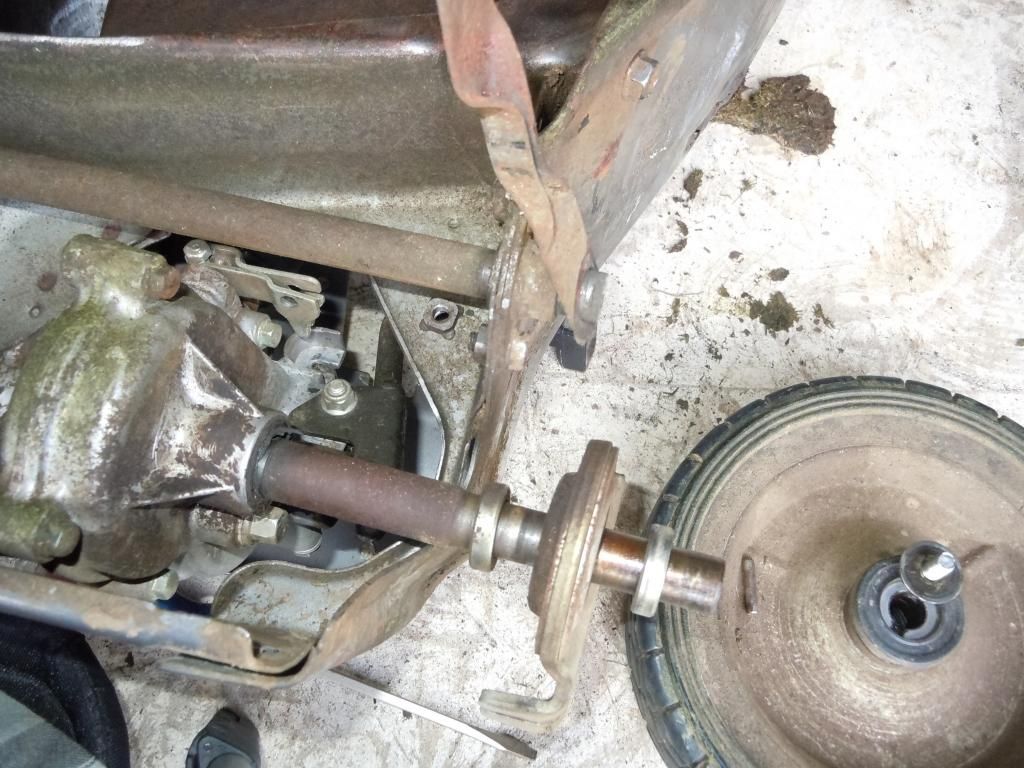
Next is the sway bar flange, 2 x 10mm bolts
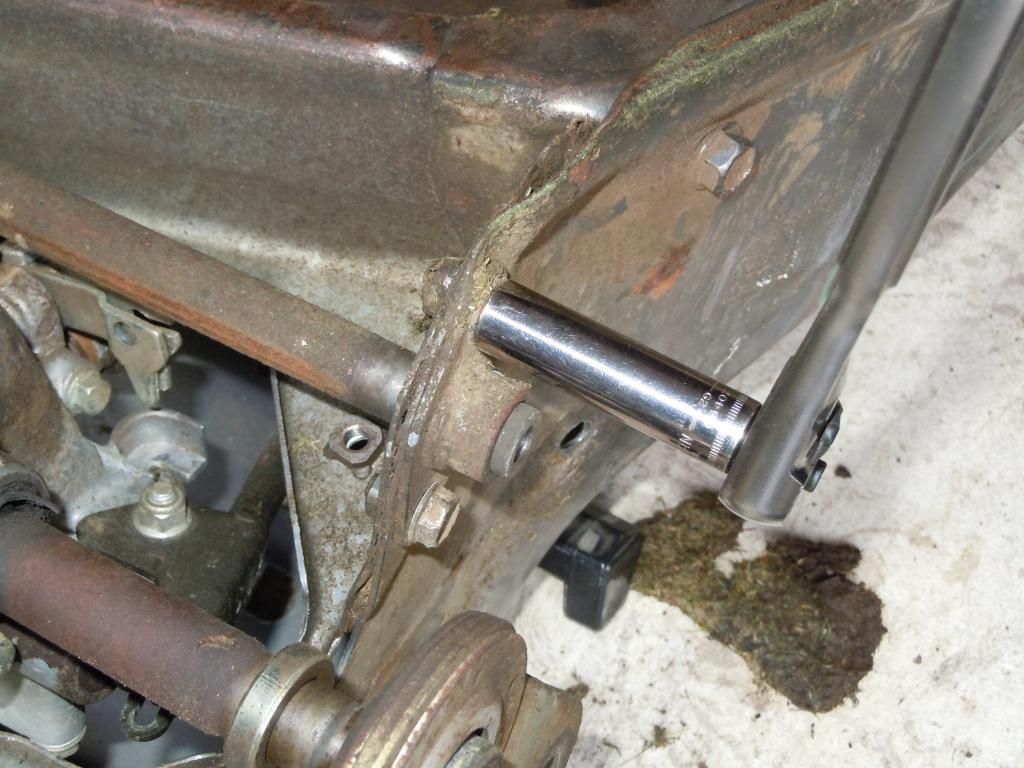
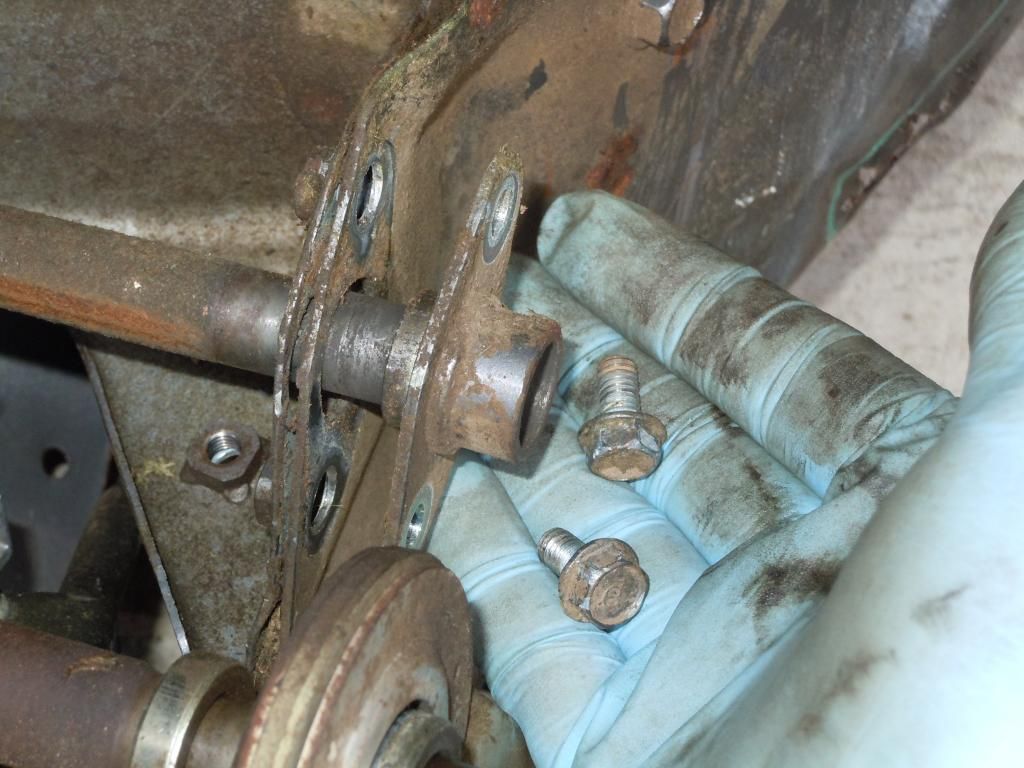
Then work on the other wheel. The pin you removed from the side with the wheel already off is a great spot to put a screw driver to keep the axle from spinning. Proceed to remove the other wheel and sway bar flange. After that you can work on getting the assembly out.
Transmission gear lever has 1 phillips screw. Once that is removed, you will be able to slide the axle/sway bar assembly to the side and wiggle it out
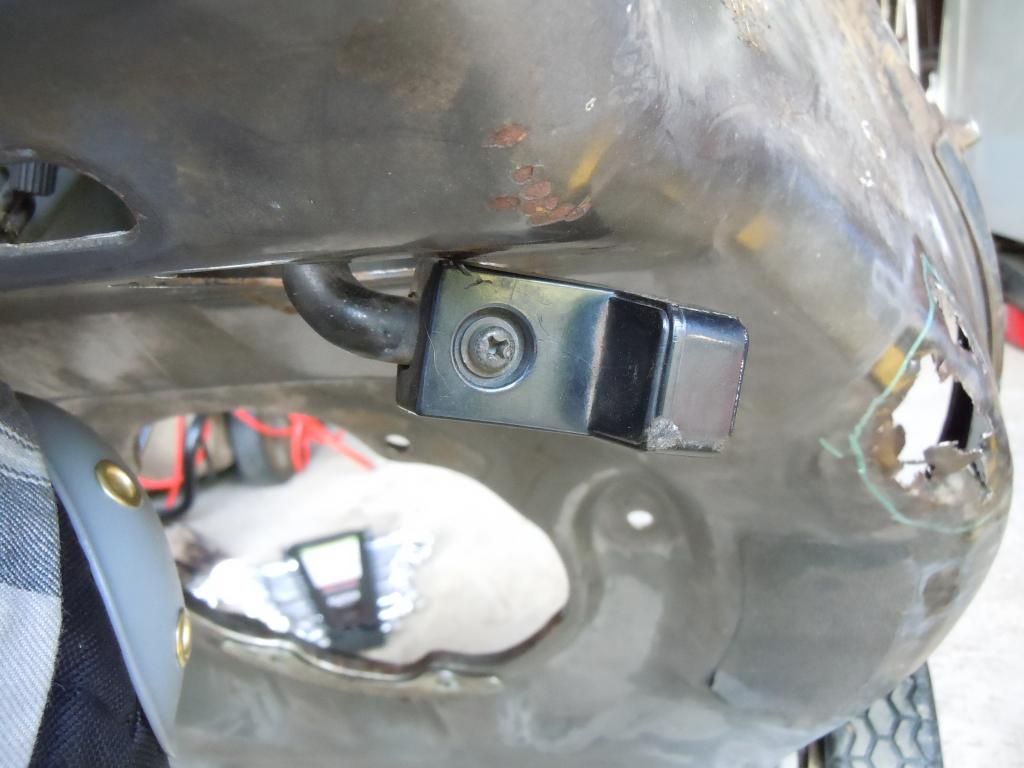
The rear guard (I didn't realize it was so big!) can be removed after you take the remaining two 12mm bolts out. One on each side. USE PB BASTER!!
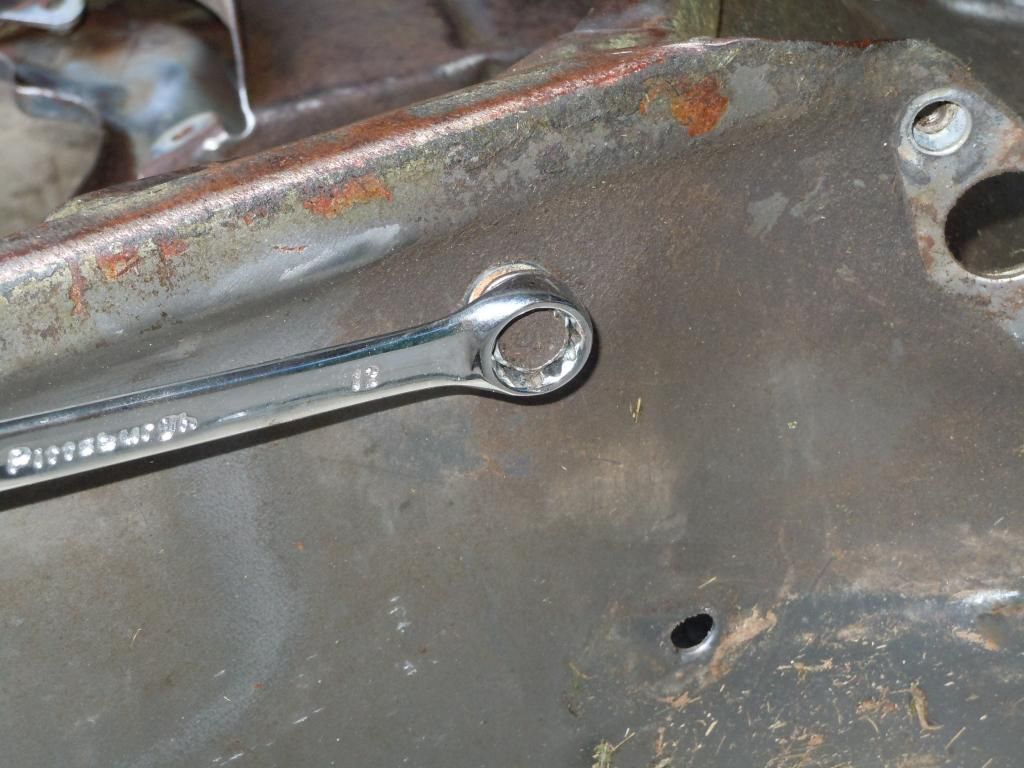
Wiggle the assemble out
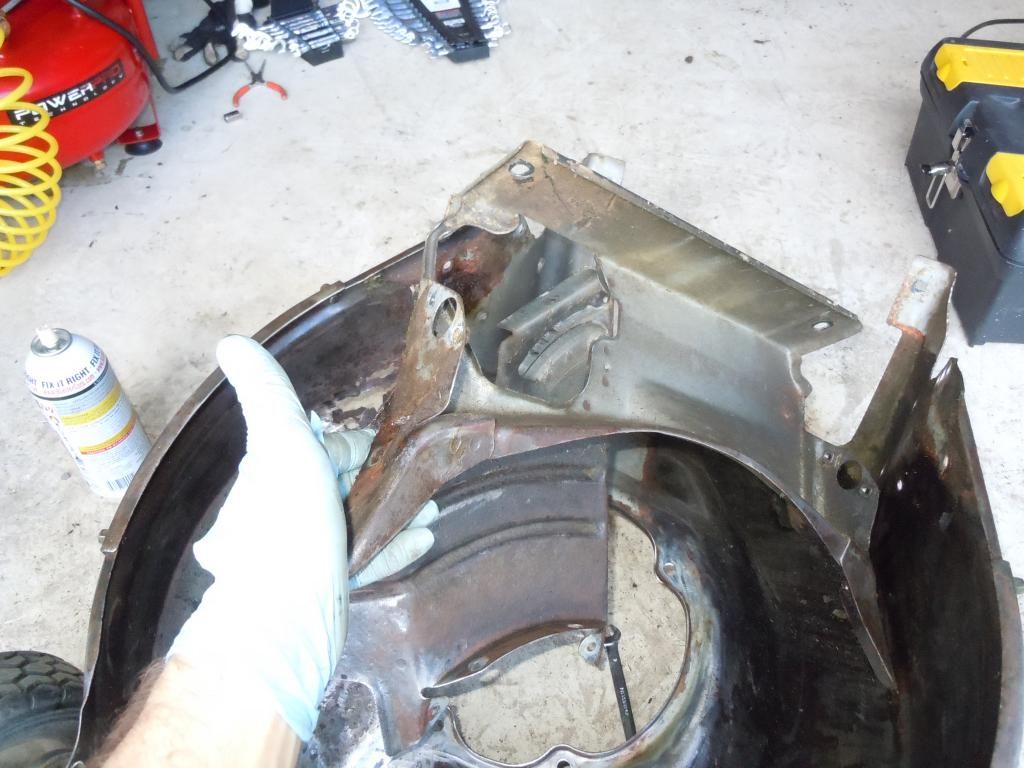

Alright, first up for tonight, removing the bag catch flap (not sure what it is technically called). There are 3 x 10mm nuts to remove, The threaded studs are circled in red

Then the plastic transmission cover,. 1 phllips scew

2 x 10mm bolt holding part of the guard to the deck next to the axle

Now, lets remove the drive cable from the transmission so we can remove the handlebars. There are 2 x 10mm thin nuts holding it into place. You can loosen one of them and slide it out of the bracket

To remove the cable from the transmission, first pull the cable upward to release it from its catch. I accessed it through the hole after removing the plastic cover

Then proceed from the bottom of the mower to access the drive cable spring, I used a hook, First pull the far side towards you to free it from its seat, Then slide the spring up the cable,

Now you can slide the cable through

Its not time to feed the clutch and drive cables through the deck, Simply push the rubber grommet up from underneath, The clutch cable will take a little bit of maneuvering to get it


Now lets work on the handlebars. 2 x 12mm bolts on the outside and 1 x 12mm nut on the inside for the support bracketm per side.


Handles off, time to get the suspension off.

1 x 12mm bolt per side for the sway bar, I used a screw driver through the center hole of the bar to keep it from spinning

Next, remove the handle brackets. 3 x 12mm on the inside. 2 nuts and 1 bolt, per side. USE PB BLASTER

I found the a crows foot 12mm was a life saver on the transmission side for this one

Rear tires,,,one side you will be able to get it fairly easy without the axle spinning too much. I will show you how I was able to get the other side off after this one was. 1 x 12mm bolt with a large washer

Once the wheel is off, pull this pin out. I had to tap it a little with a hammer to get it loose.

I had to tap the hub off as well

When you slide it off there will be a thick washer on each side.

Next is the sway bar flange, 2 x 10mm bolts


Then work on the other wheel. The pin you removed from the side with the wheel already off is a great spot to put a screw driver to keep the axle from spinning. Proceed to remove the other wheel and sway bar flange. After that you can work on getting the assembly out.
Transmission gear lever has 1 phillips screw. Once that is removed, you will be able to slide the axle/sway bar assembly to the side and wiggle it out

The rear guard (I didn't realize it was so big!) can be removed after you take the remaining two 12mm bolts out. One on each side. USE PB BASTER!!

Wiggle the assemble out

#15
F
freeloader700
F
freeloader700
Front wheels, 12mm bolt and large washer like the rears
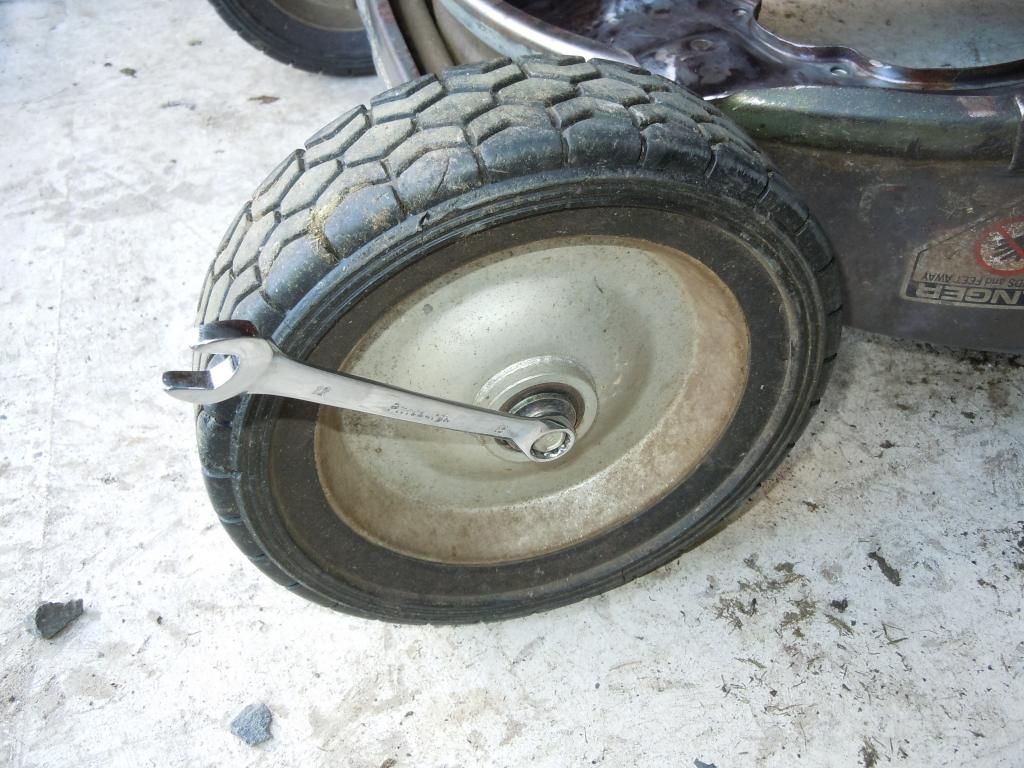
Slide the wheel off. You'll need to remove the front sway bar . Slide the rubber boot to the side
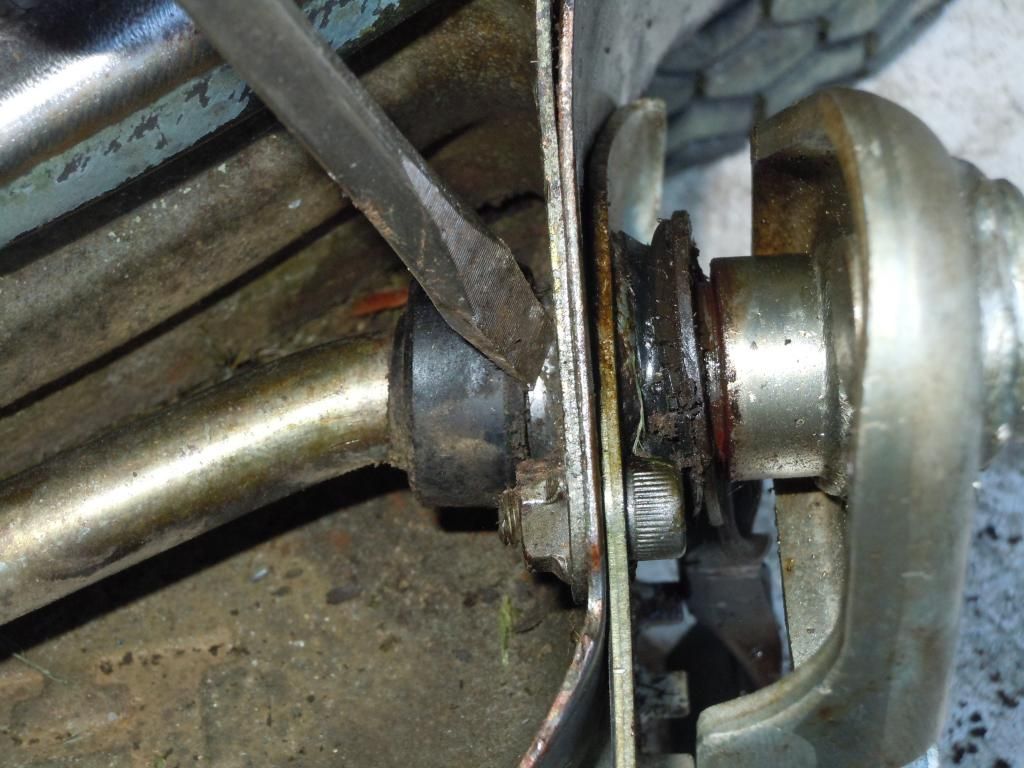
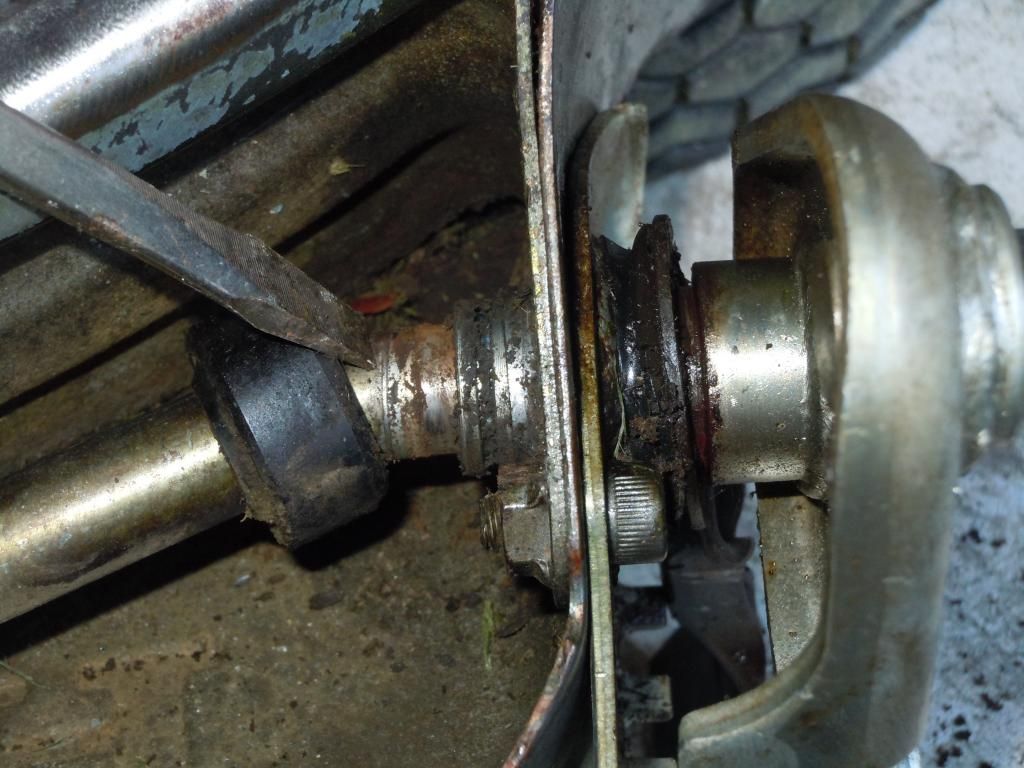
Do the same with the other side
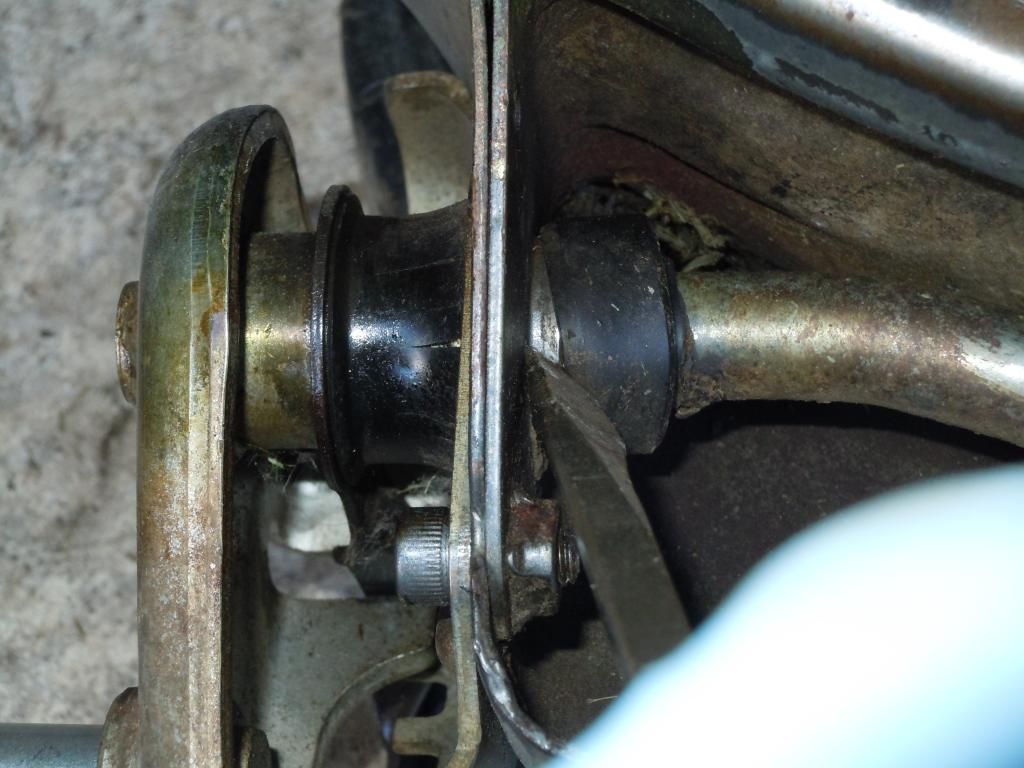
Once you do that, you have to slide it all out from one side as the sway bar has one end welded.
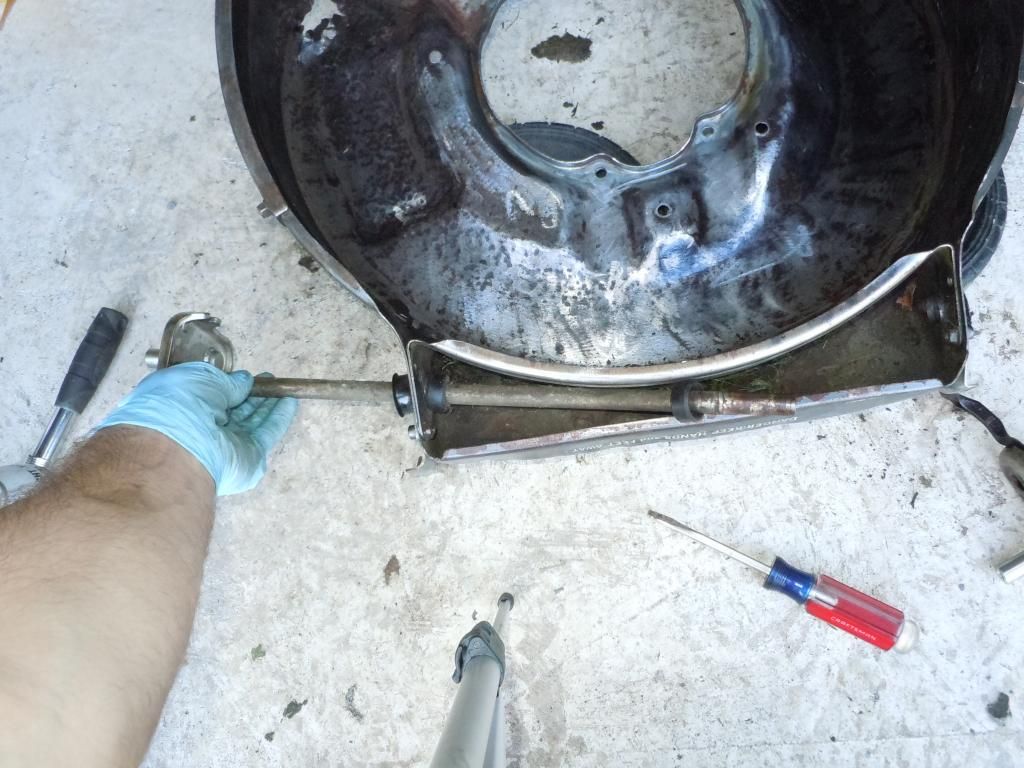
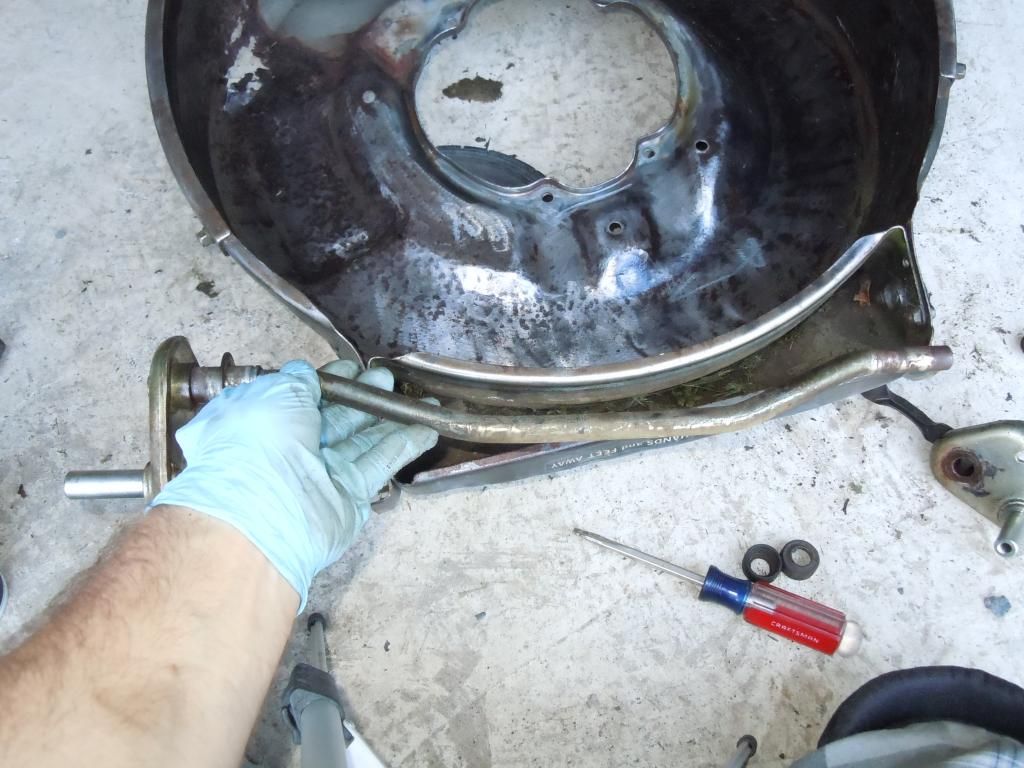
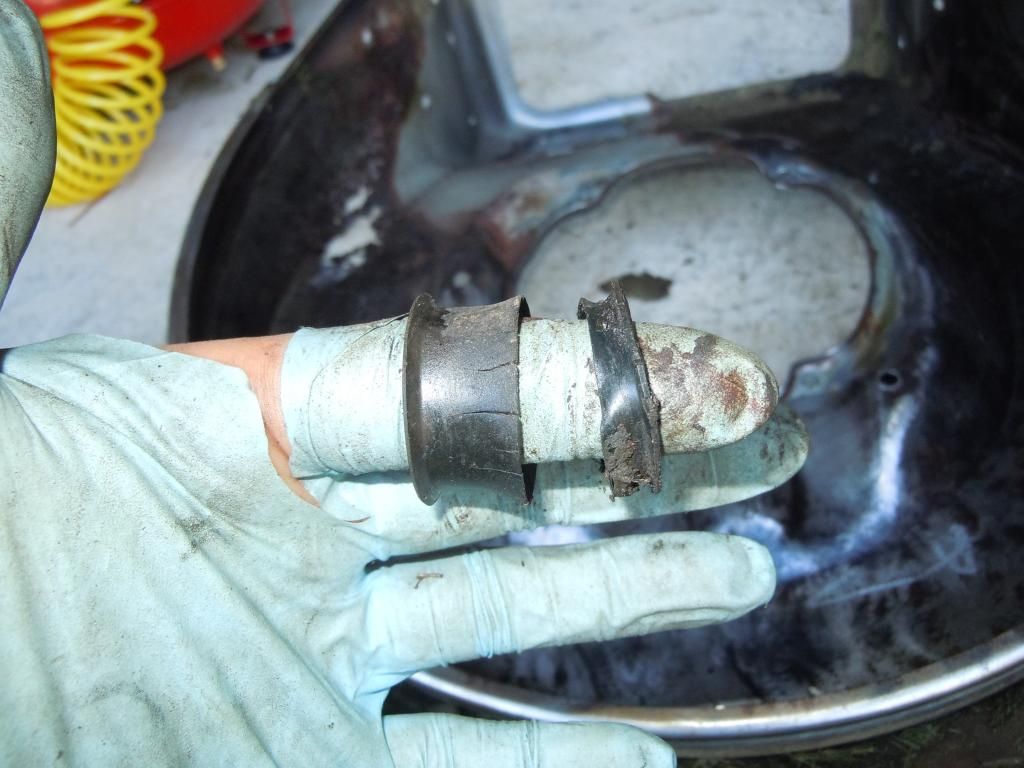
These boots are shot. Not sure where to get them or even what their PN is. Might have to reuse them or find a generic replacement
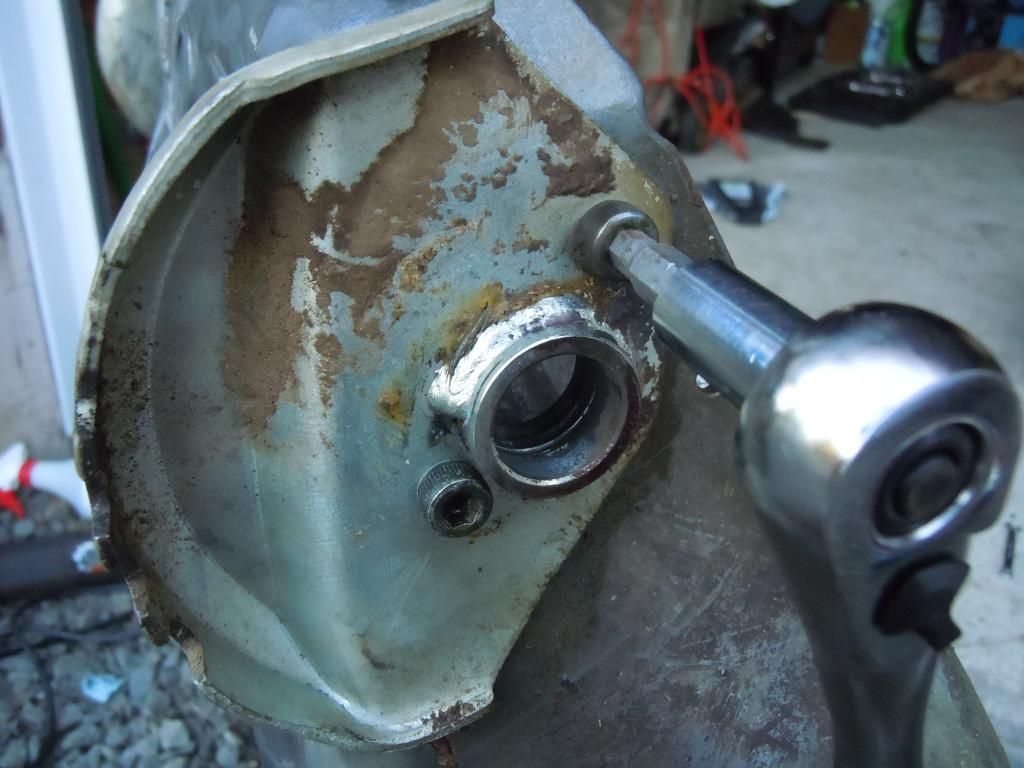
4 x 5mm allen key, two per side for the height adjustment plate
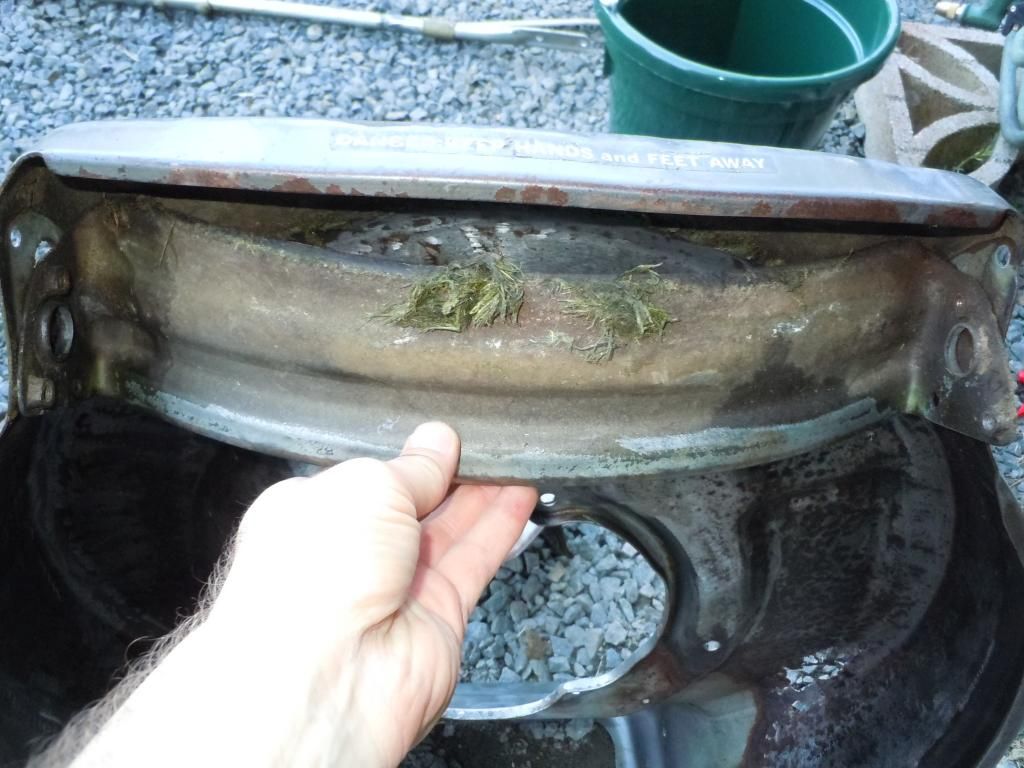
You can now remove the front guard
Last but not least... 2 x 10mm nut per side for this guard/guide.
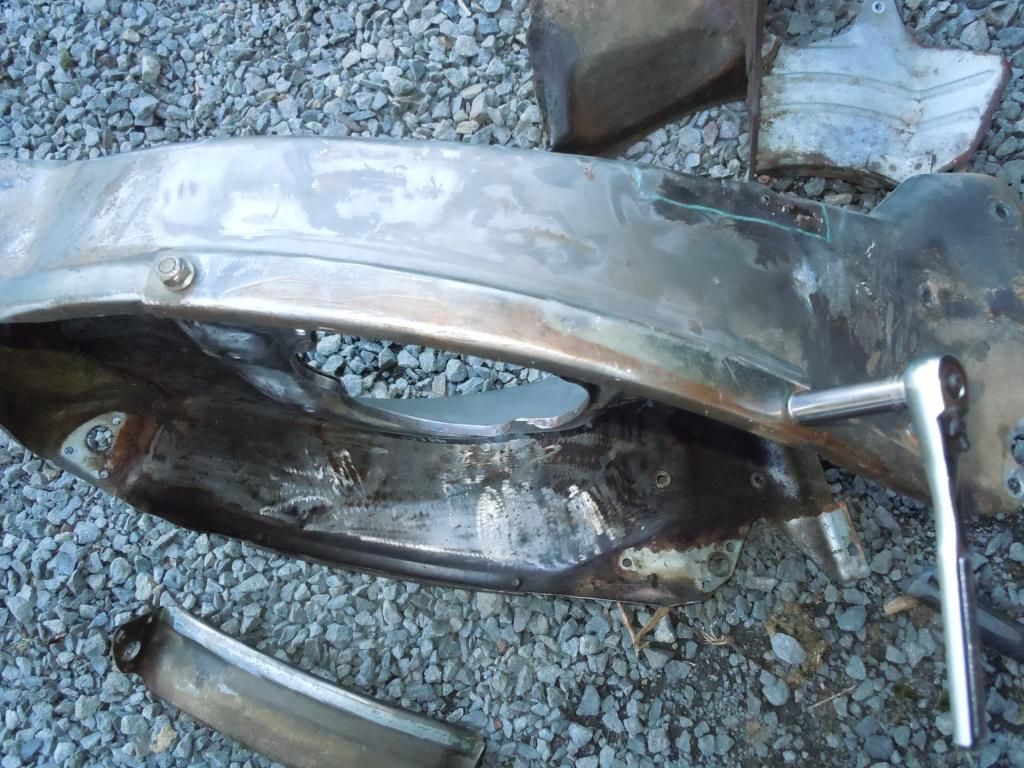
You will also need to use a 5/16" socket to hold the bolt from spinning with the nut
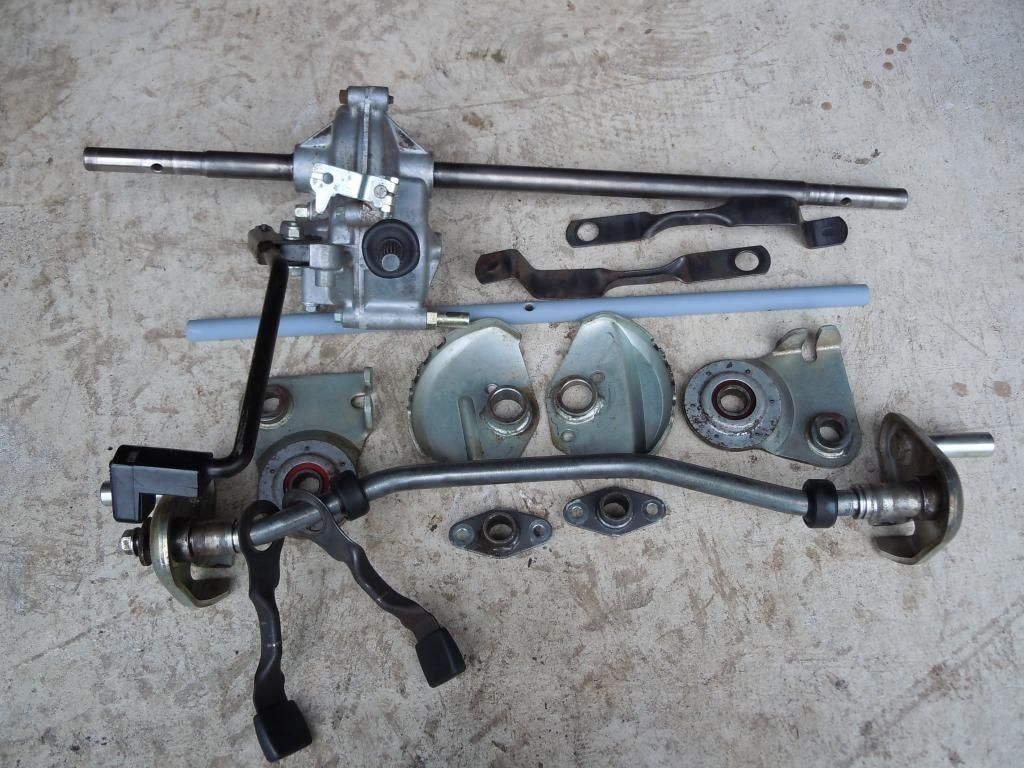
Its all apart now!! Took more time than I thought it would. Now I can safely cut out and weld the hole in the deck. I am making some progress!:smile:

Slide the wheel off. You'll need to remove the front sway bar . Slide the rubber boot to the side


Do the same with the other side

Once you do that, you have to slide it all out from one side as the sway bar has one end welded.


These boots are shot. Not sure where to get them or even what their PN is. Might have to reuse them or find a generic replacement

4 x 5mm allen key, two per side for the height adjustment plate

You can now remove the front guard

Last but not least... 2 x 10mm nut per side for this guard/guide.

You will also need to use a 5/16" socket to hold the bolt from spinning with the nut

Its all apart now!! Took more time than I thought it would. Now I can safely cut out and weld the hole in the deck. I am making some progress!:smile:
#17

OutdoorEnvy
OutdoorEnvy
It's a lot of work just to look through the pics, haha! Nice work. It's coming a long good. Thanks for the update
#18
F
freeloader700
F
freeloader700
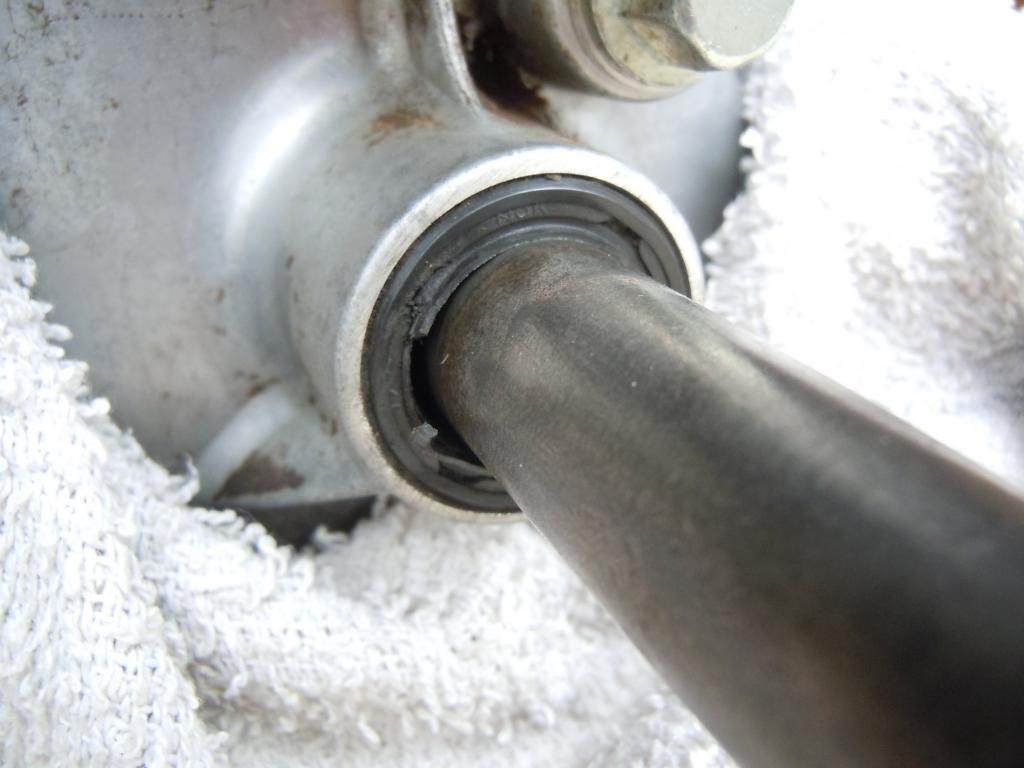
Over the weekend I put a bit of work into the project. All the axles/bars have the surface rust removed and are prepped for some paint. (Center bar has some primer on it) As I was cleaning up the transmission I noticed the axle has some movement and a slightly torn dust seal. Is there a bearing inside the transmission or a bushing that holds it straight? How difficult is the job to fix it? Check the video to see the movement
Torn seal on the short side of the axle
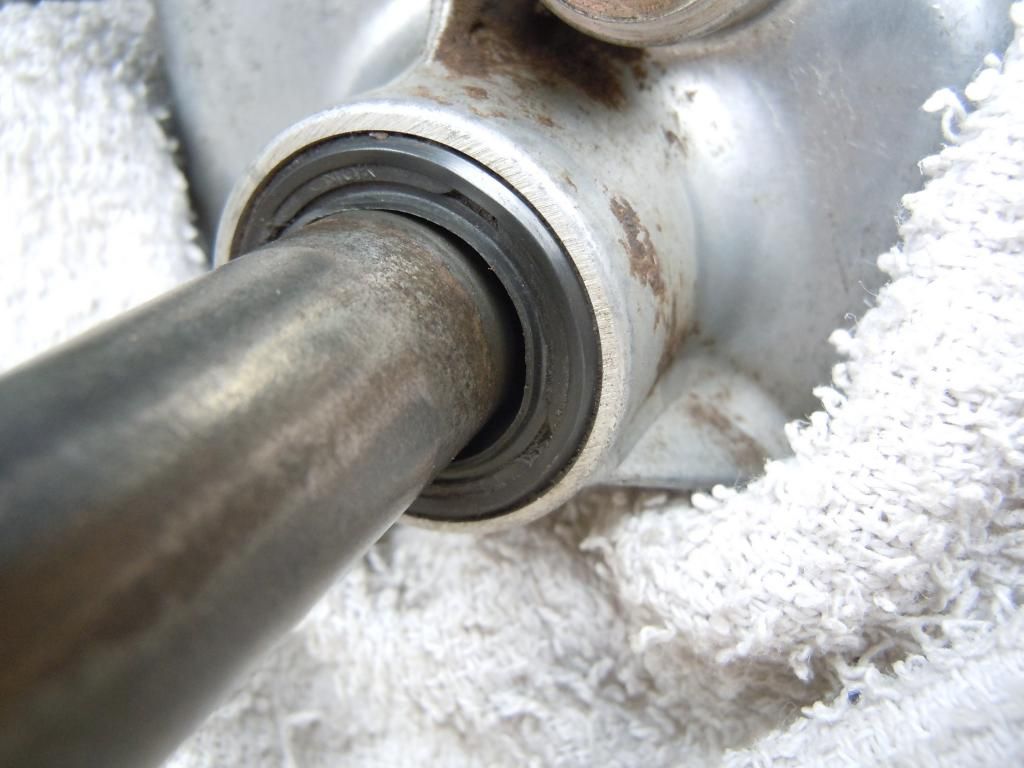

Torn seal on the short side of the axle


#19

robert@honda
robert@honda
Here's a parts & MSRP list / illustration of the trans....appears all parts are still available except the knob...
Attachments
#20
F
freeloader700
F
freeloader700
So I would need 2 x 21521-VB5-801? It is not a bearing, rather a bushing?
and 2 x 91205-VB5-801 oil seals?
and 2 x 91205-VB5-801 oil seals?
#21

robert@honda
Description says it is a bushing...shop manual does not provide a spec or service limit, but video seems to verify worn bushings, but I can't say for 100% certainty.
Probably, as they are likely the original seals. There are many other seals on the input and axle shaft, and if it was me, and I was rebuilding the trans., I'd put in all new ones for sure, to head off any possible leaks in the future.
You should get a shop manual if digging into the trans. It's not complex, but can save a lot of frustration, especially when you are doing a full-on restore/overall on a machine like this. Honda sells paper copies online direct ($35, free shipping)
Amazon: Honda-HRA216-HRC215-HRC216-Service Manual
eBay: Honda-HRA216-HRC215-HRC216-Service Manual
robert@honda
So I would need 2 x 21521-VB5-801? It is not a bearing, rather a bushing?
Description says it is a bushing...shop manual does not provide a spec or service limit, but video seems to verify worn bushings, but I can't say for 100% certainty.
and 2 x 91205-VB5-801 oil seals?
Probably, as they are likely the original seals. There are many other seals on the input and axle shaft, and if it was me, and I was rebuilding the trans., I'd put in all new ones for sure, to head off any possible leaks in the future.
You should get a shop manual if digging into the trans. It's not complex, but can save a lot of frustration, especially when you are doing a full-on restore/overall on a machine like this. Honda sells paper copies online direct ($35, free shipping)
Amazon: Honda-HRA216-HRC215-HRC216-Service Manual
eBay: Honda-HRA216-HRC215-HRC216-Service Manual
#22
F
freeloader700
F
freeloader700
I picked up a shop manual from eBay and it should be here tomorrow. I ordered it yesterday morning directly from Honda via eBay and I had a tracking # within 10 mins. I am very impressed at the speed of the processing. Once I get it I will start taking apart the transmission case and see whats going on in there. Is it normally grease or gear oil in these things? I have seen some of the newer Hondas using grease.
#23

robert@honda
The HRA216SXA transmission is filled with SAE 90 hypoid gear oil, available at any auto parts store. Completely drained, it holds a maximum of 130cc (0.14 quart).
robert@honda
I picked up a shop manual from eBay and it should be here tomorrow. I ordered it yesterday morning directly from Honda via eBay and I had a tracking # within 10 mins. I am very impressed at the speed of the processing. Once I get it I will start taking apart the transmission case and see whats going on in there. Is it normally grease or gear oil in these things? I have seen some of the newer Hondas using grease.
The HRA216SXA transmission is filled with SAE 90 hypoid gear oil, available at any auto parts store. Completely drained, it holds a maximum of 130cc (0.14 quart).
#24
F
freeloader700
F
freeloader700
Thanks Robert.
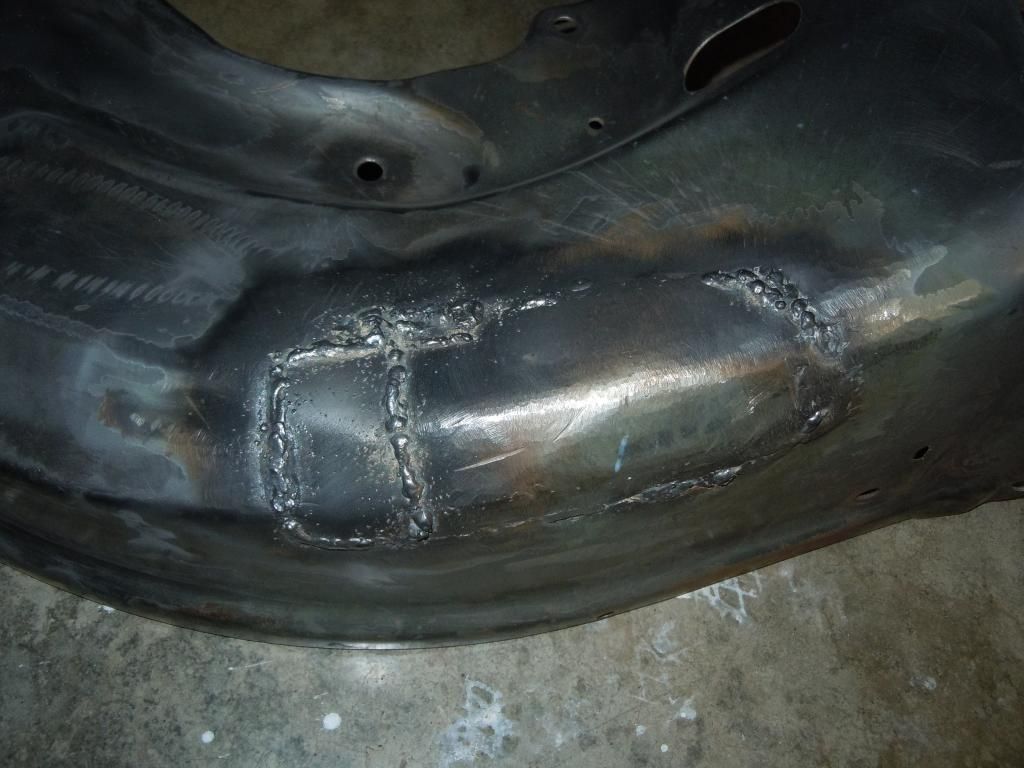
I will try to get some pics of the progress I made off and on the last couple of days. The deck it just about done welded/filled. Had some issues with burning through when I was welding. Just need to used the grinder and smooth out some of the welds then it will be ready for paint
I will try to get some pics of the progress I made off and on the last couple of days. The deck it just about done welded/filled. Had some issues with burning through when I was welding. Just need to used the grinder and smooth out some of the welds then it will be ready for paint
#25
F
freeloader700
F
freeloader700
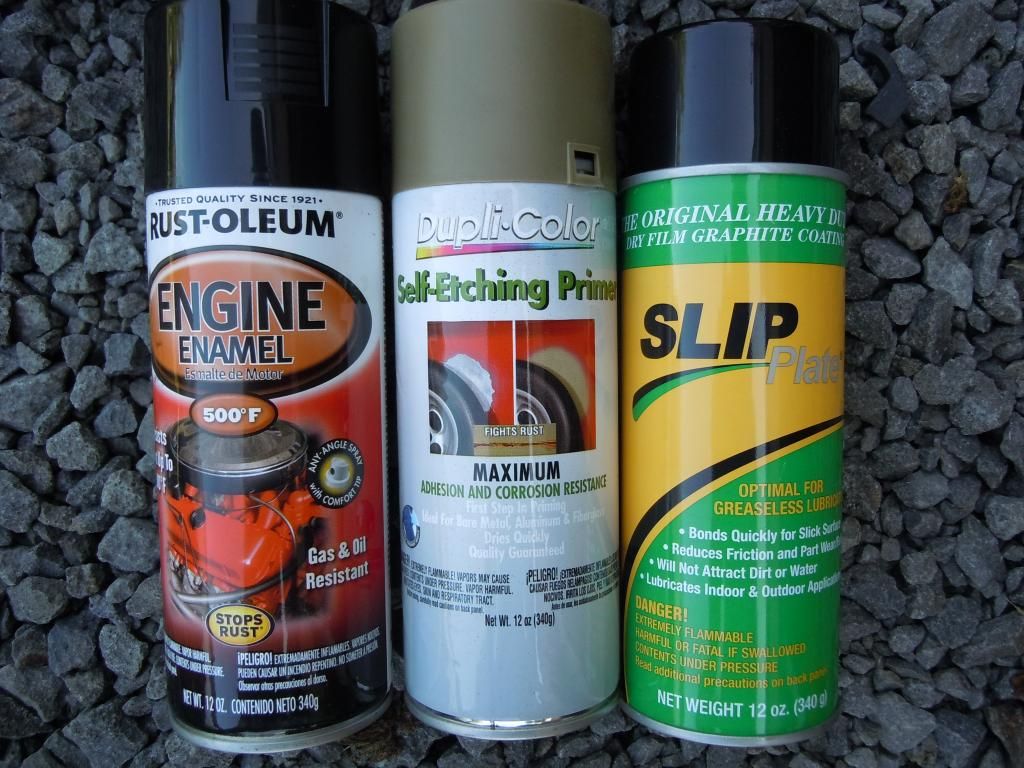
Here is the next round of pictures. I have various parts ready for paint. Here is what I am using. The slip plate wasn't actually used yet.
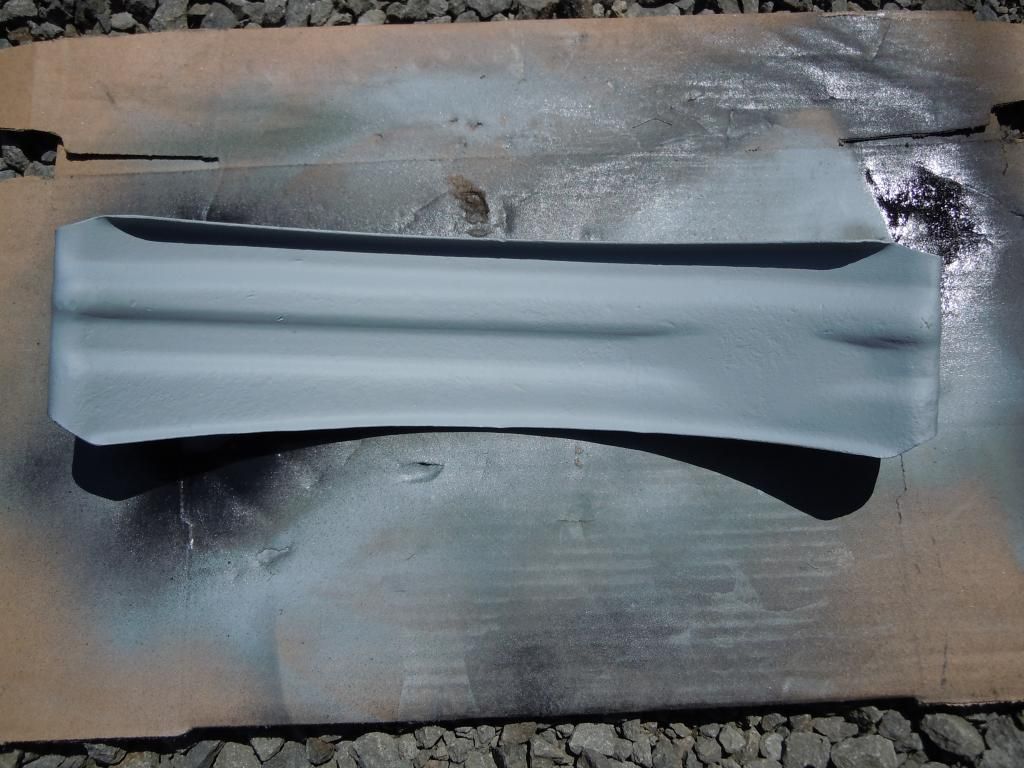
Primed with self-etching then sandable primer
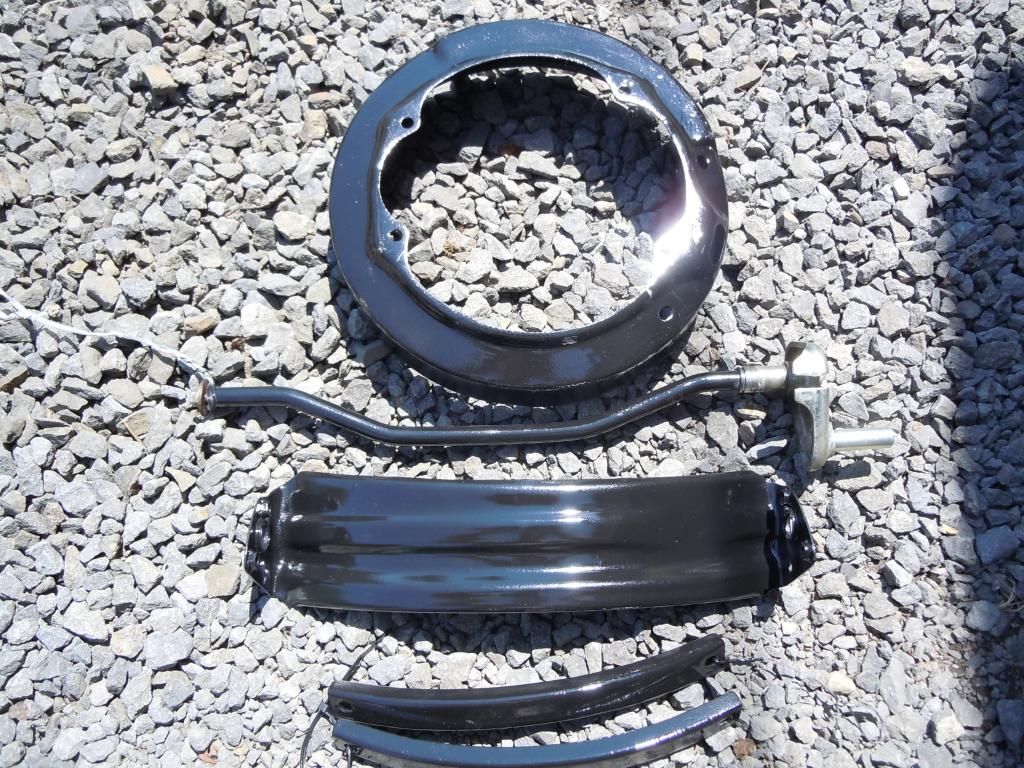
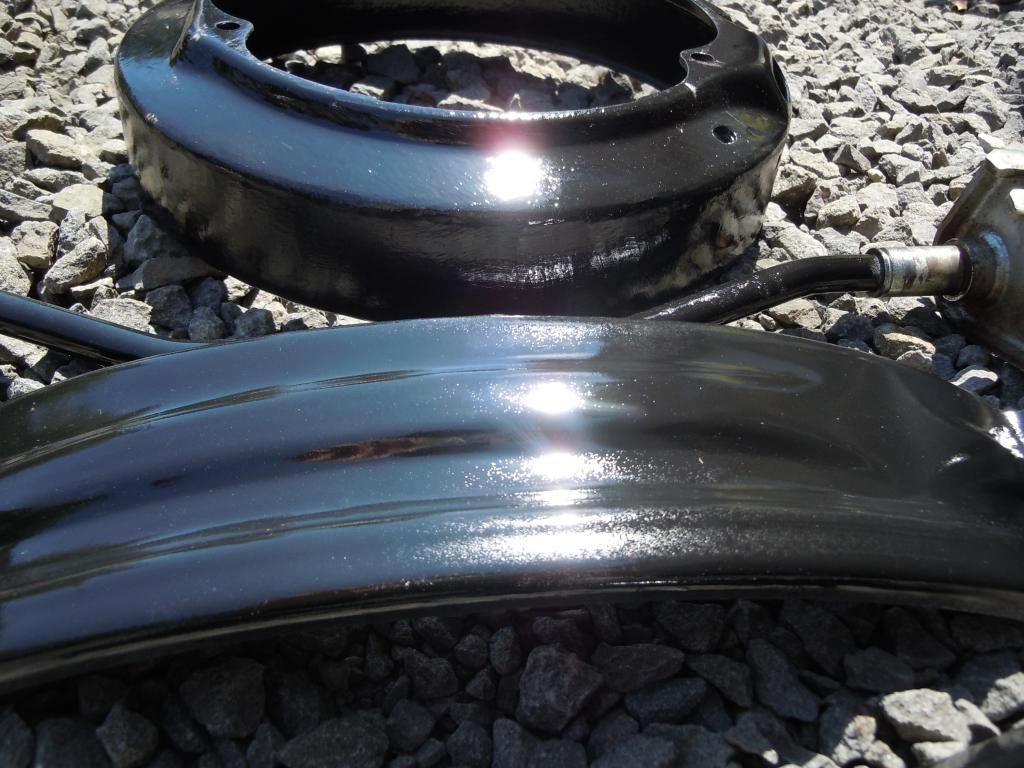
Black engine paint
Cutting out the rusted hole. Welded it up and then had some issues
Ended up needing to cut out a bit more since I was burning though and it was a bit thin. I cut out the left side a bit more.
Welded in the new small piece
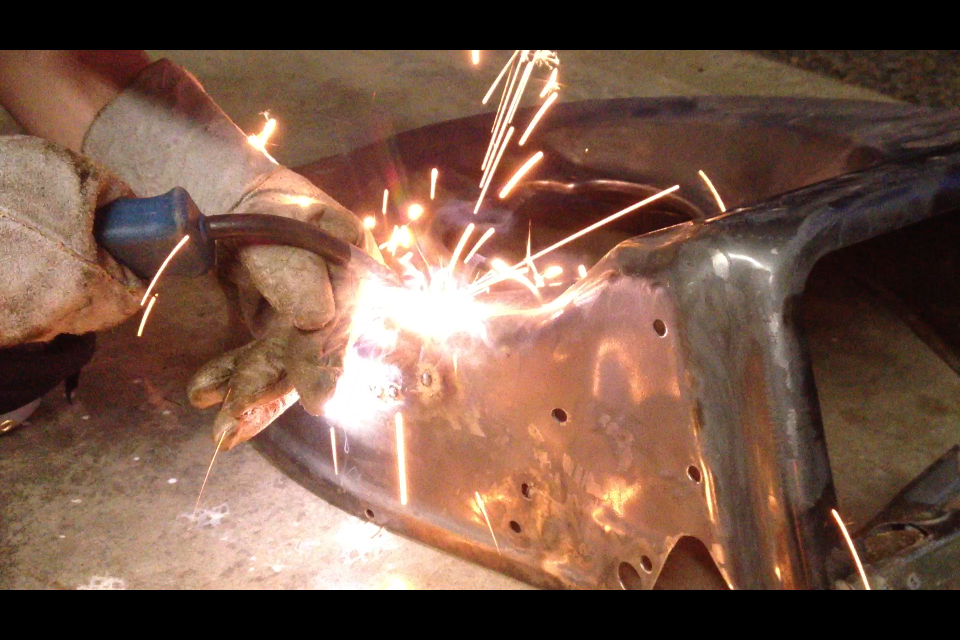
Welded up....it is not pretty!
Time to clean it up with the grinder
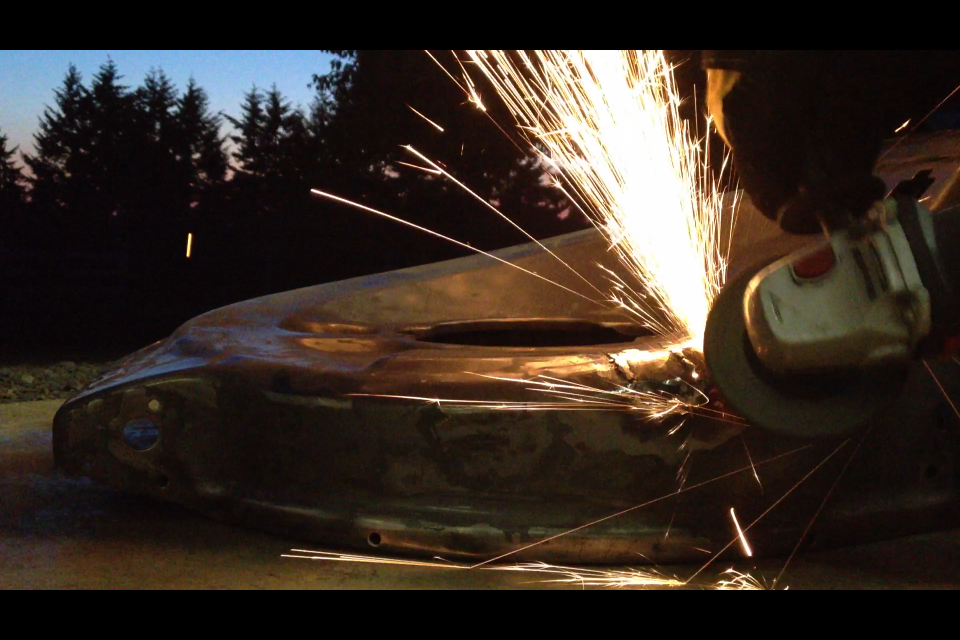
That is where I am at so far. Almost there and ready to paint the deck. Maybe in the next few days

Primed with self-etching then sandable primer

Black engine paint


Cutting out the rusted hole. Welded it up and then had some issues

Ended up needing to cut out a bit more since I was burning though and it was a bit thin. I cut out the left side a bit more.

Welded in the new small piece

Welded up....it is not pretty!

Time to clean it up with the grinder

That is where I am at so far. Almost there and ready to paint the deck. Maybe in the next few days
#27
F
freeloader700
F
freeloader700
She definitely is!
So, I don't have time right now to get the pics/vids up from today. I do have this one though for a quick confirmation I do not need a new axle. One of the inner bushing was completely missing, there was no oil either. What do you all think? You might need to turn up the volume
So, I don't have time right now to get the pics/vids up from today. I do have this one though for a quick confirmation I do not need a new axle. One of the inner bushing was completely missing, there was no oil either. What do you all think? You might need to turn up the volume
#28
R
Ryan Rognstad
R
Ryan Rognstad
That looks like a ton of fun man nice welds by the way wish I had that kind of time on my hands.
#29
F
freeloader700
F
freeloader700
Holy flap disc Batman, those things work wonders!!! I wish I would have discovered these things a lot earlier. Using 60 grit flap disc on my grinder. It just tears through the rust
Look how shiny =)
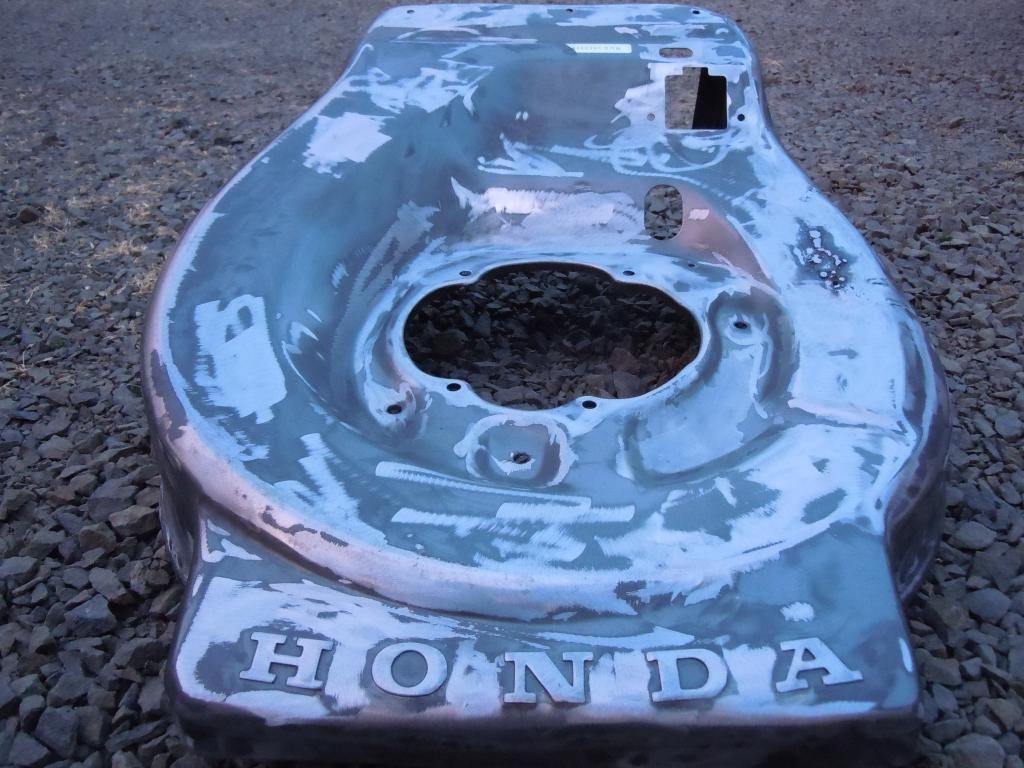
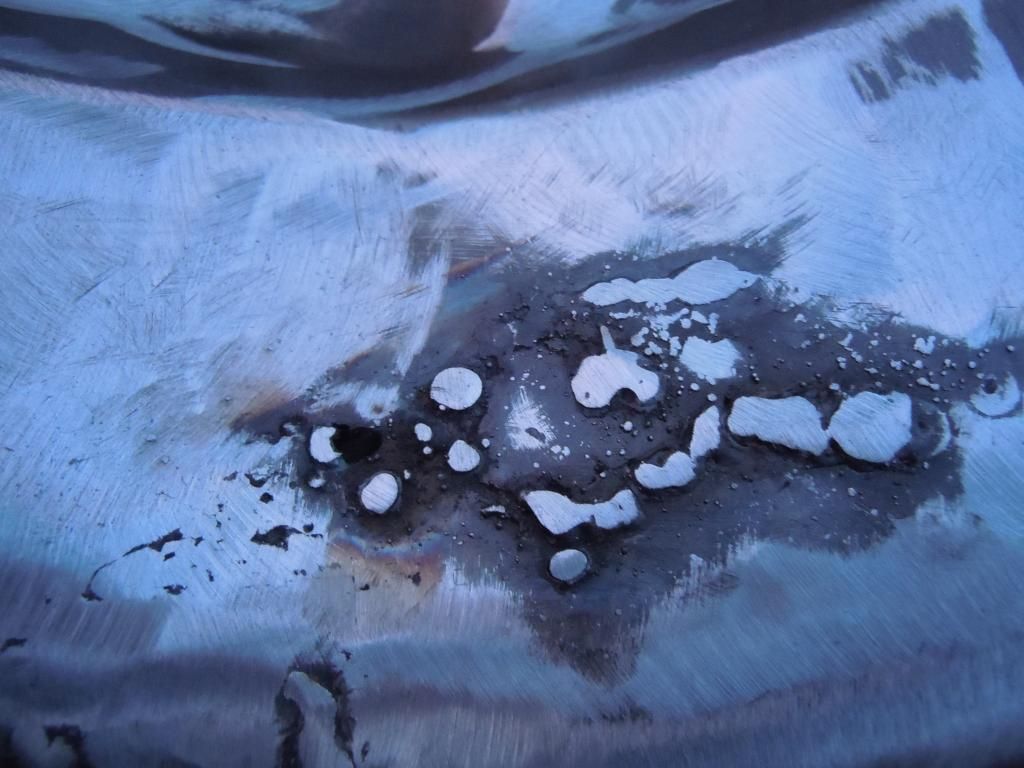
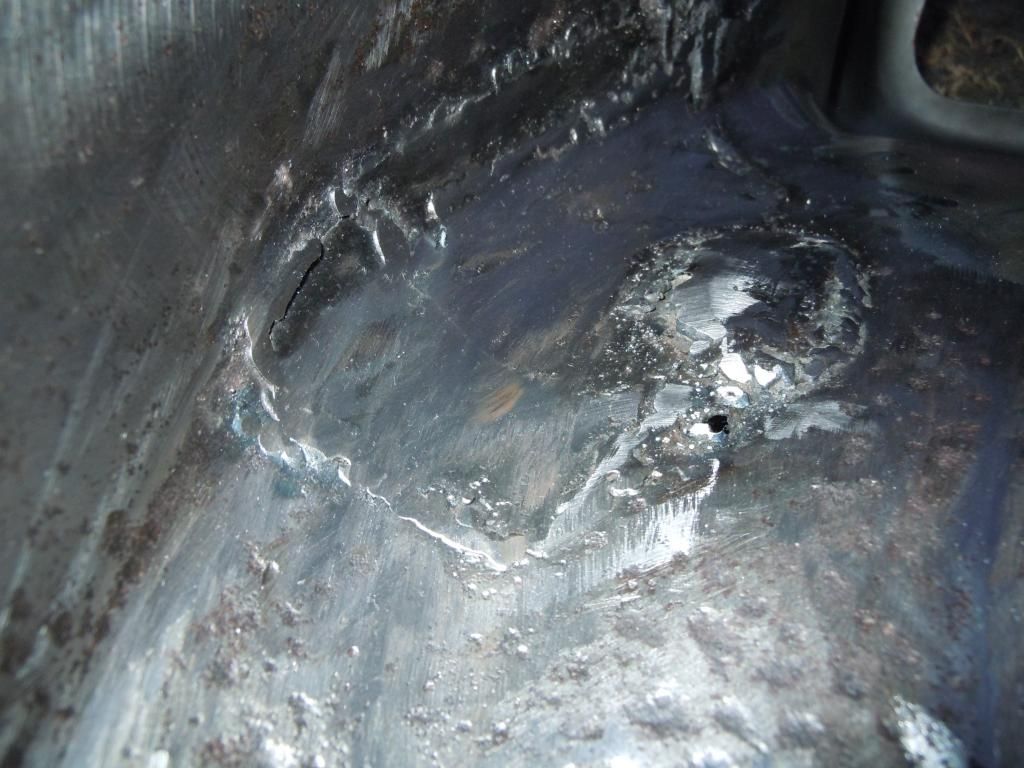
The weld is smoothed out now but....I keep burning though! I am thinking I am going to have to cut out that area and weld in some new metal.
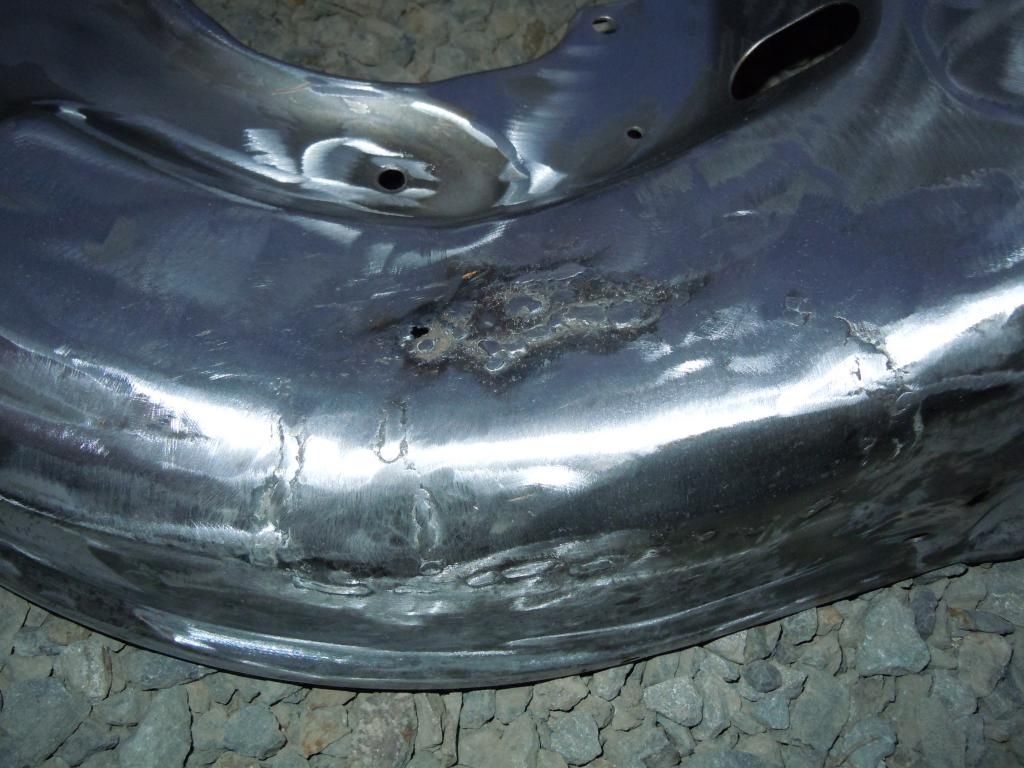
Close up
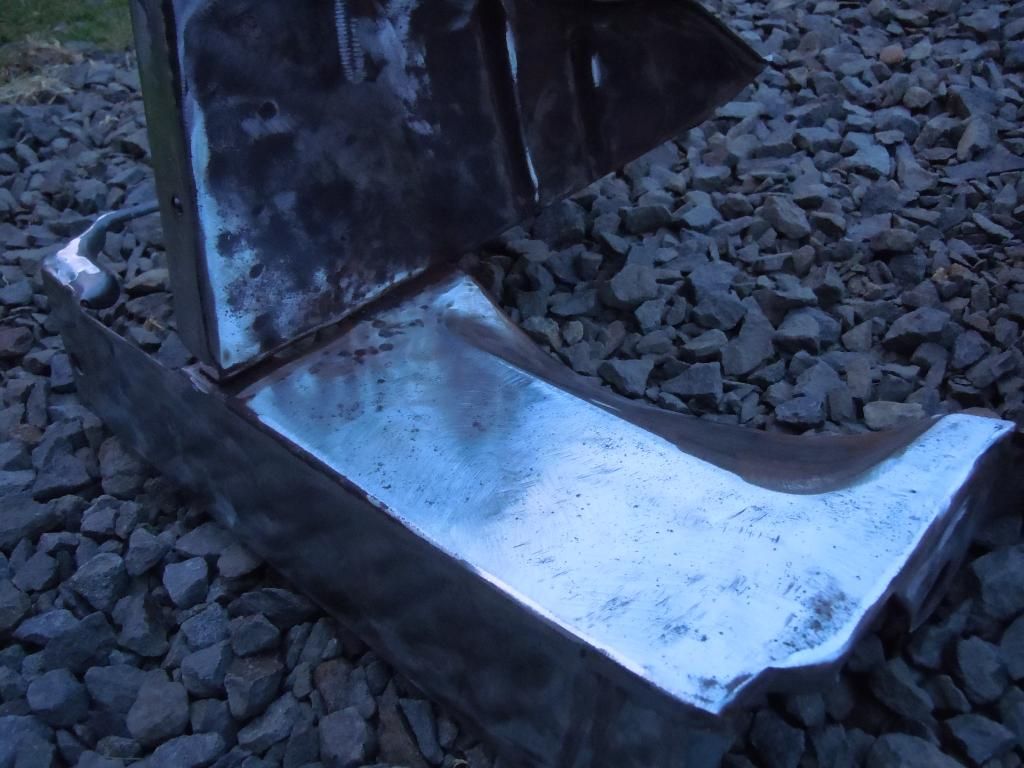
You can almost eat off the bottom of this thing
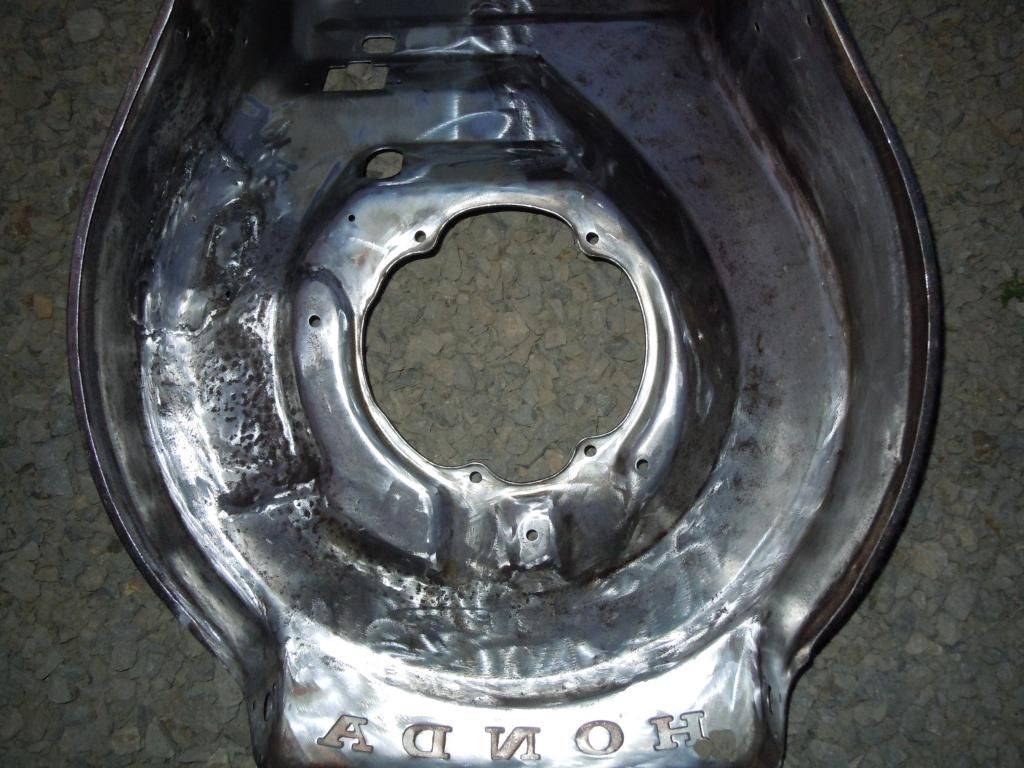
Close up of the weld underneath. I had to put another little piece for extra support. I want to smoothen it out a bit
Its incredible that the rear guard came so clean, even with how much rust was on there.
Look how shiny =)

The weld is smoothed out now but....I keep burning though! I am thinking I am going to have to cut out that area and weld in some new metal.

Close up

You can almost eat off the bottom of this thing

Close up of the weld underneath. I had to put another little piece for extra support. I want to smoothen it out a bit

Its incredible that the rear guard came so clean, even with how much rust was on there.

#30
F
freeloader700
F
freeloader700
To pull apart the case first drain the fluid. Remove the 10mm bolt. Drain. Then remove the other 8mm bolts for the case
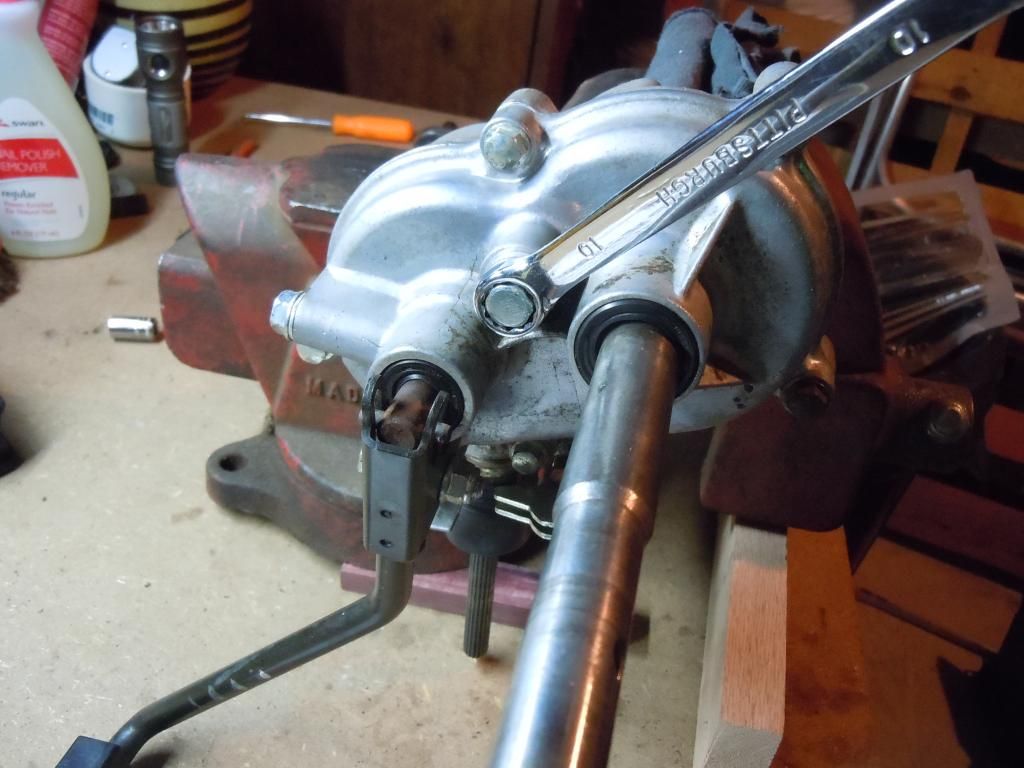
Then pry it open with a flat head screw driver or similar
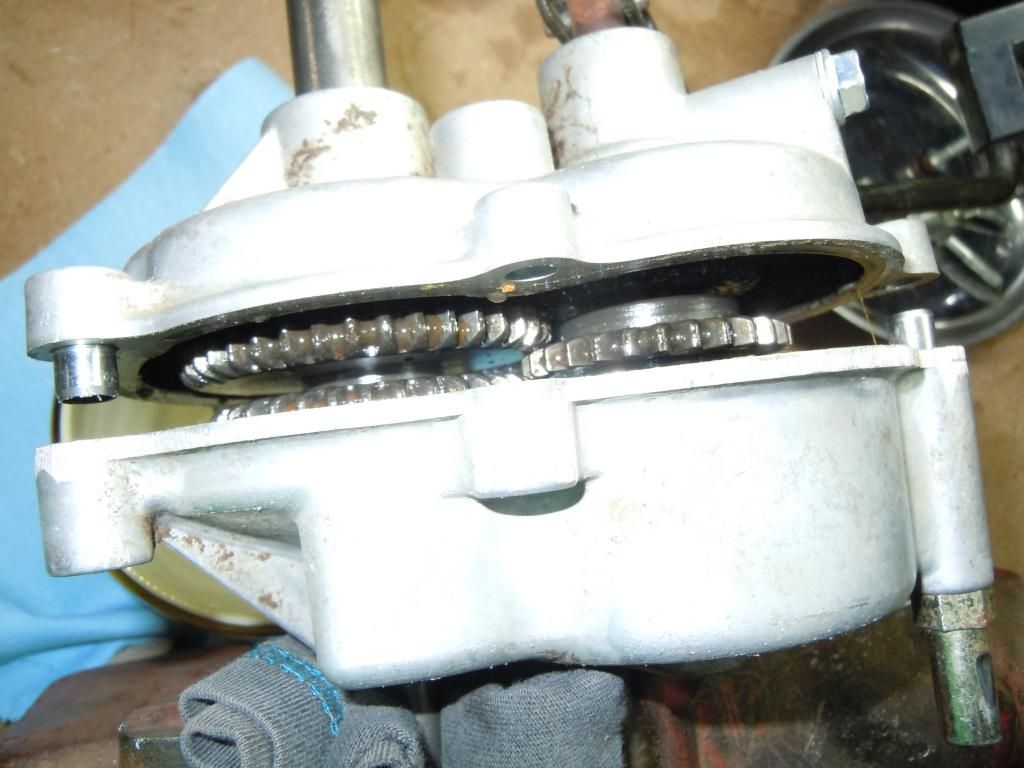
Then slide the axle out of the case. Next, remove the washers from both sides
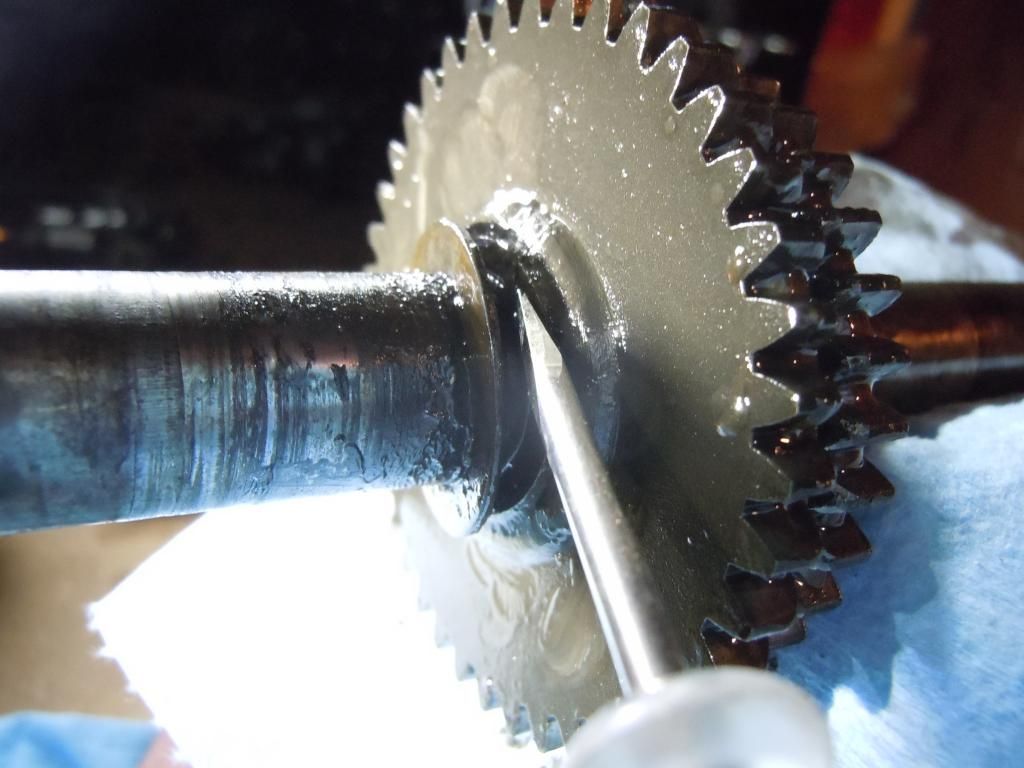
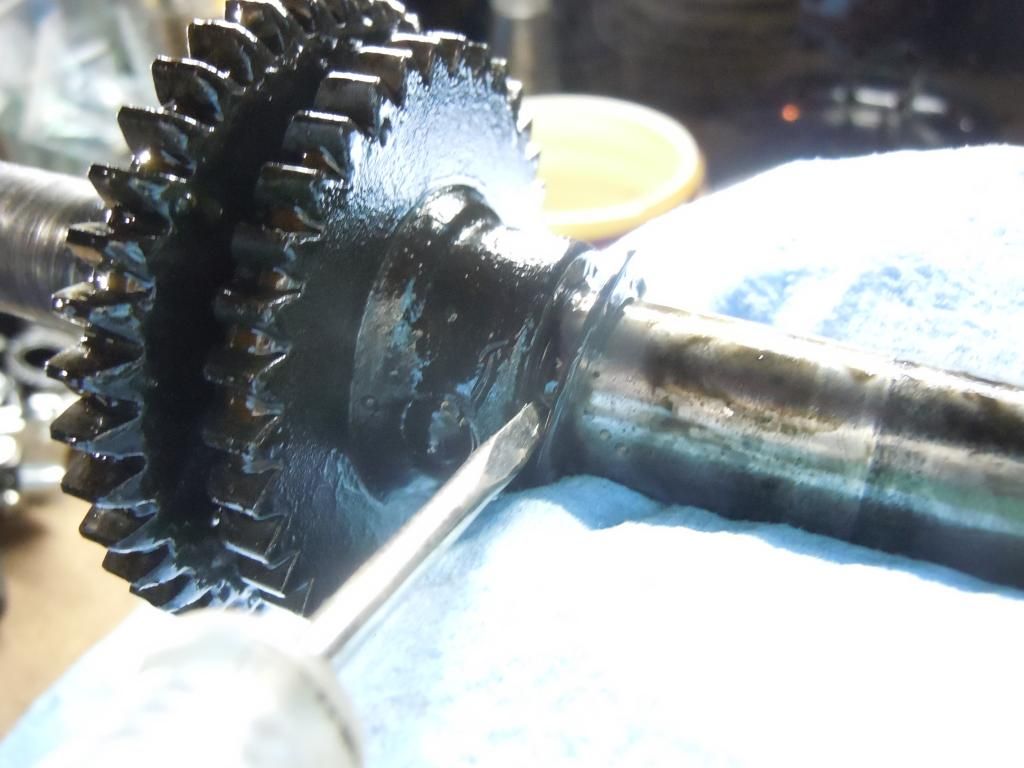
Now to work on the case itself. It had no gear oil in it. Just the residue you see is what was in it. I cleaned up the shifter side here
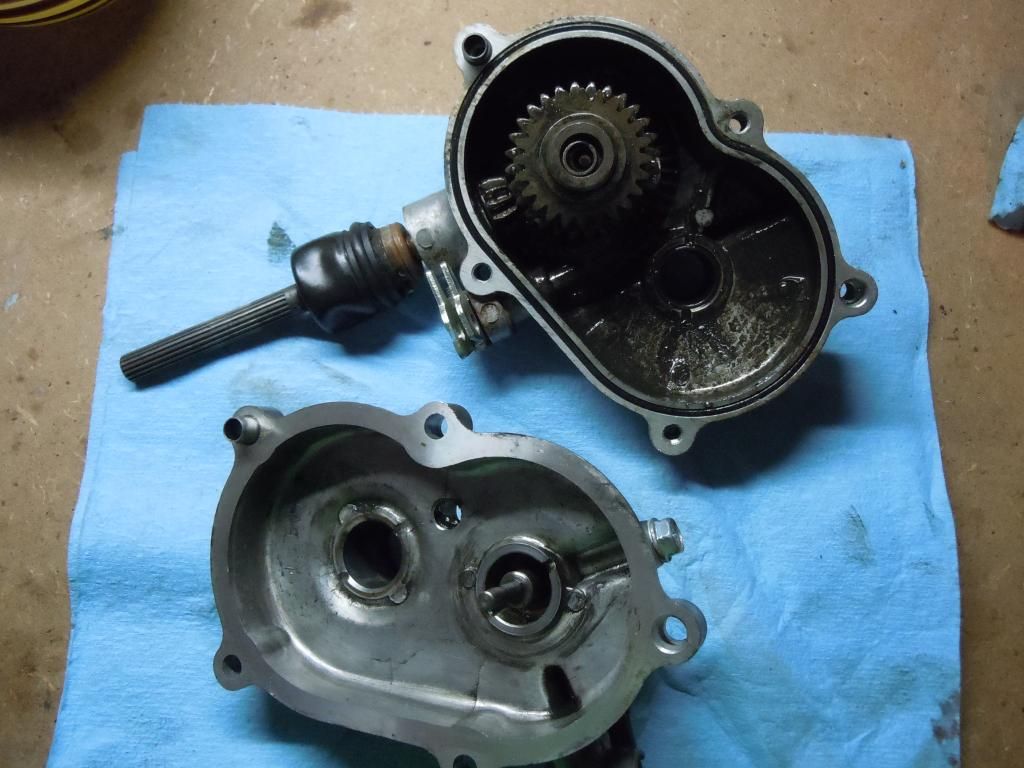
A few minor blemished from the years of use
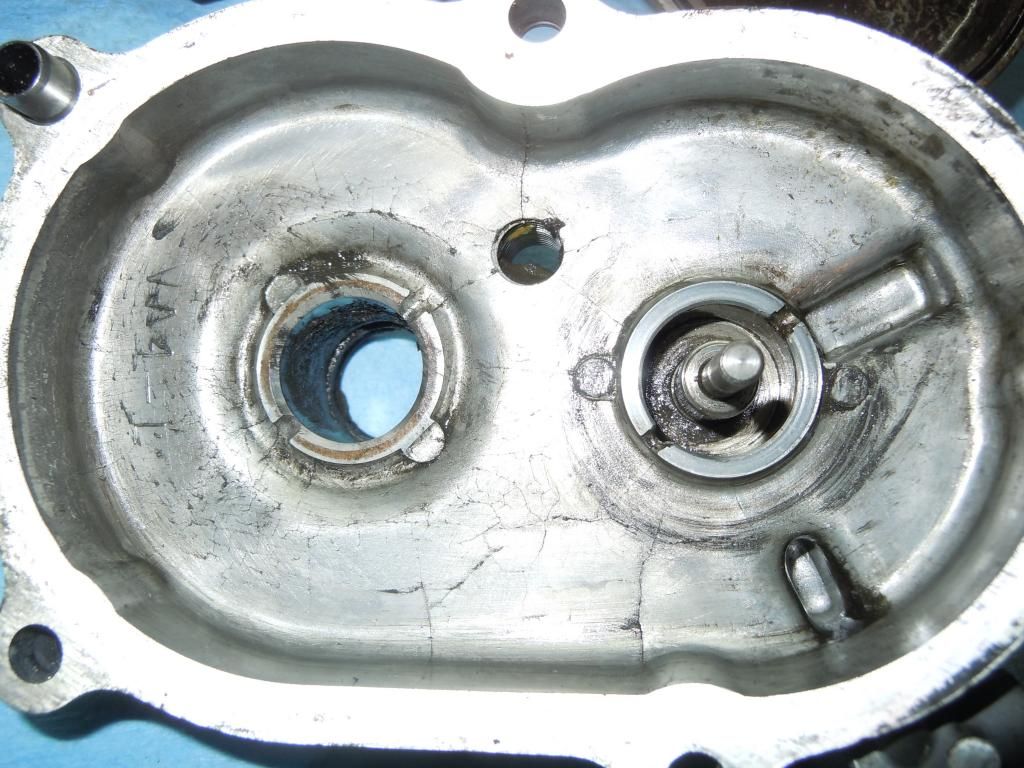
The shifter seal looks okay.
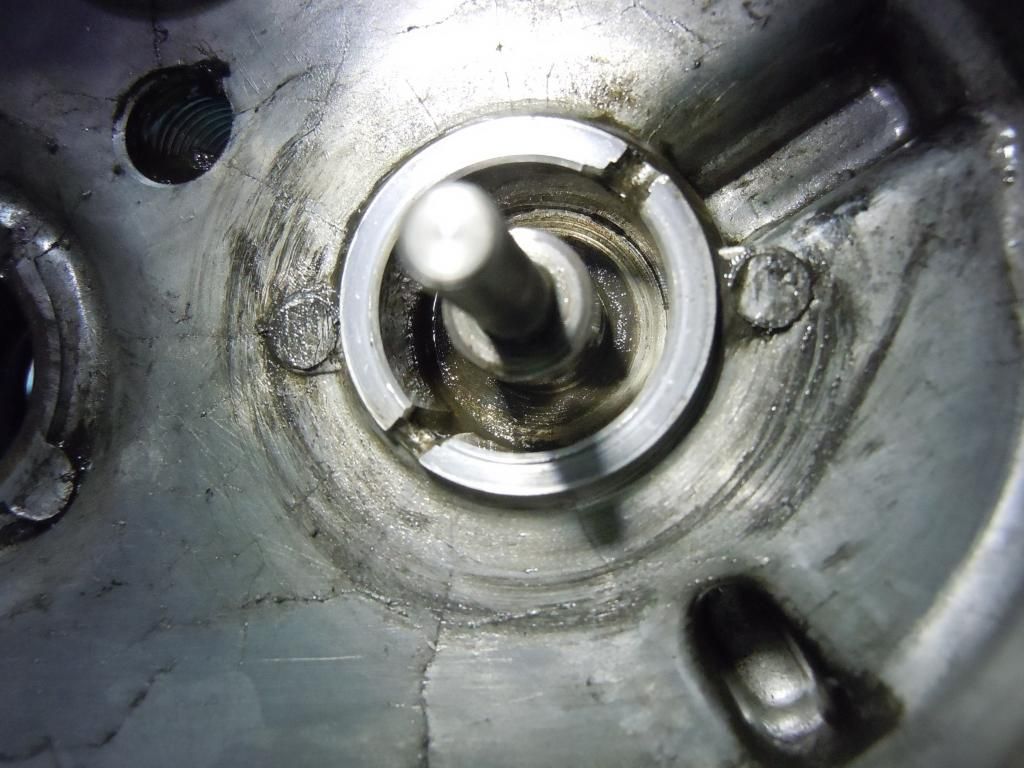
And now the gooey mess...
The rust is probably from me washing the assembly a week ago. I am guessing that it got in through the bad axle seal.
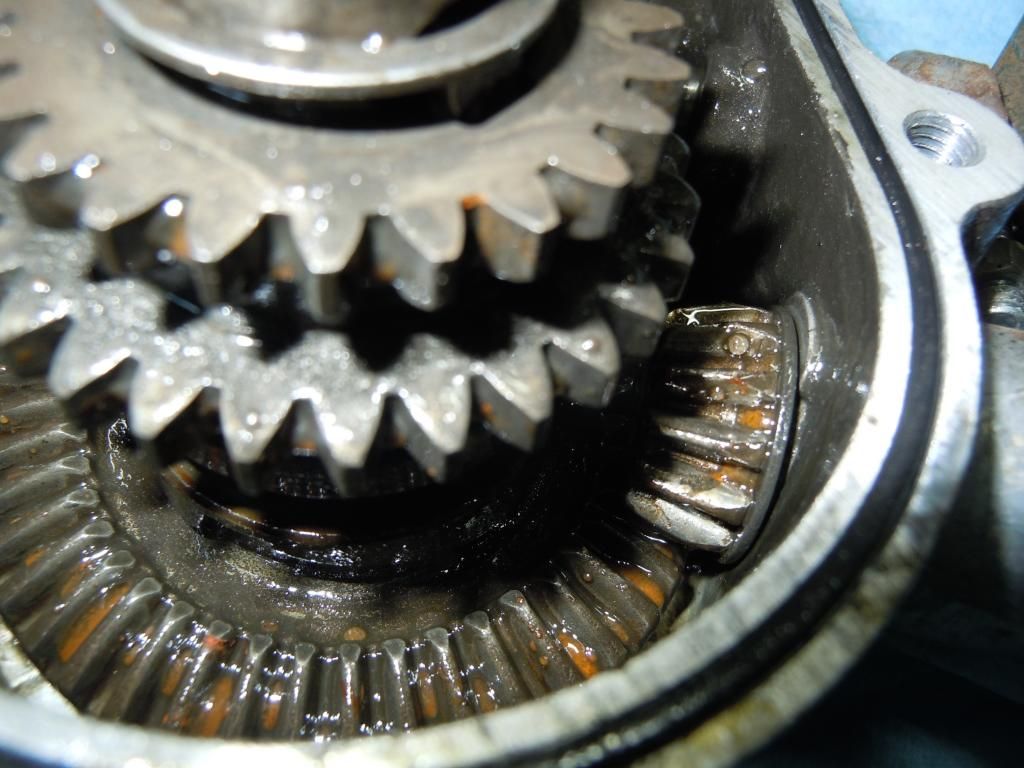
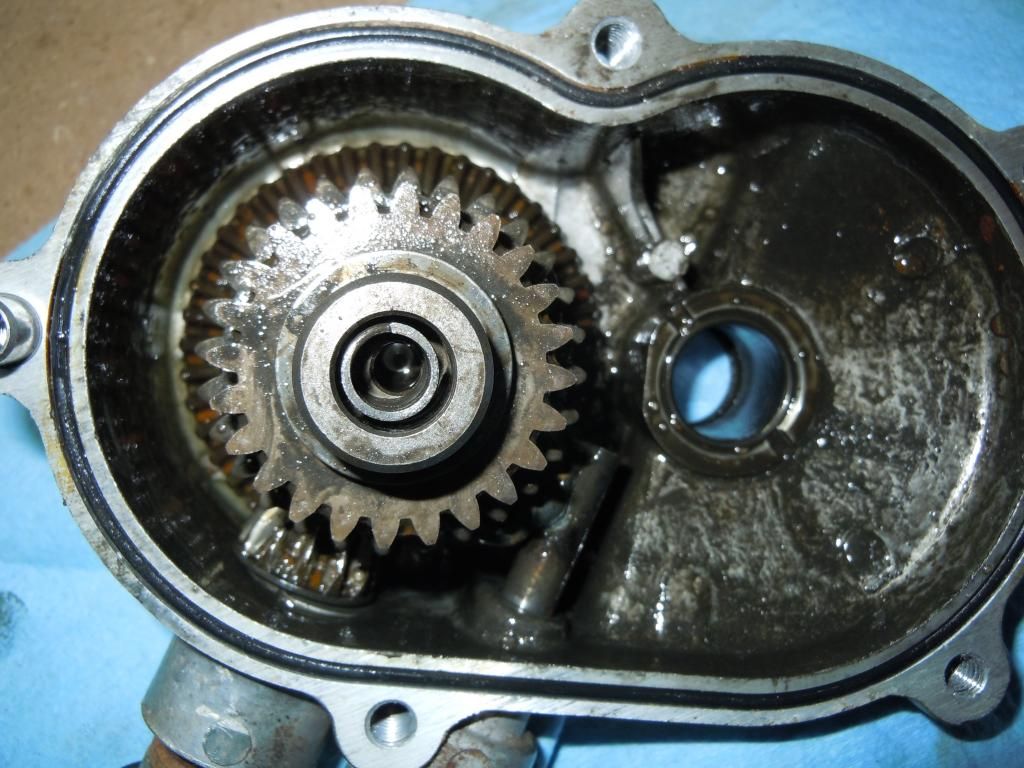
Now to remove the drive shaft from the motor, Slide the rubber o-ring away from the dust boot, then pull the boot off. Next is to remove the squeeze clip then tap out the pin that holds the assembly to the pinion
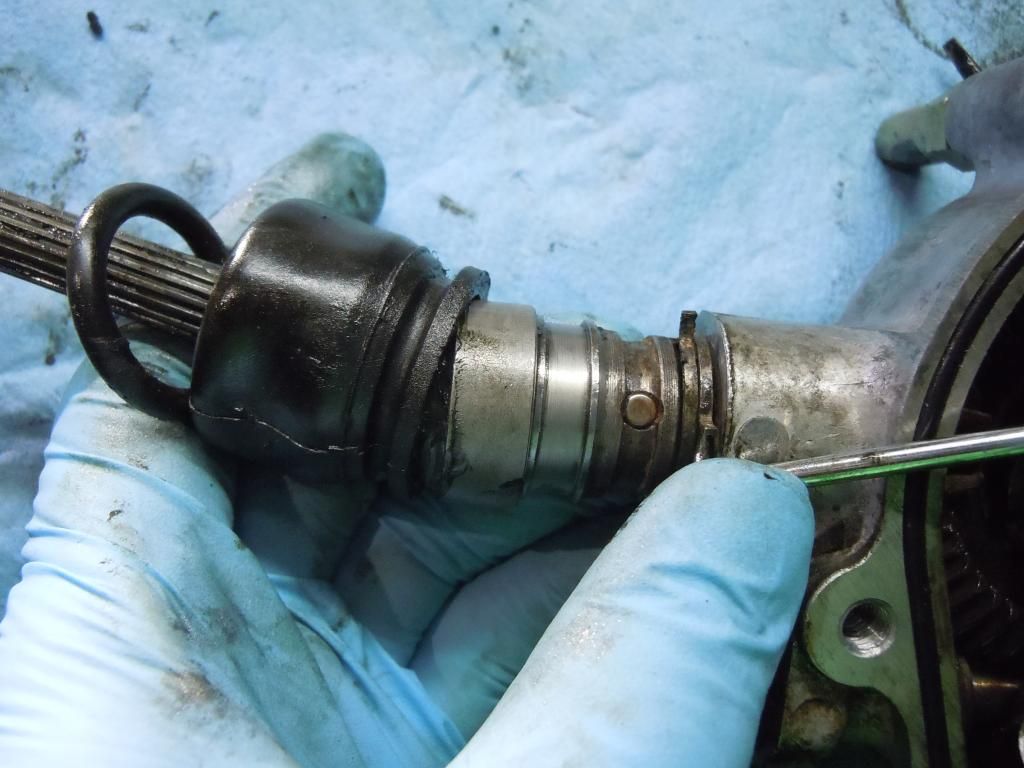
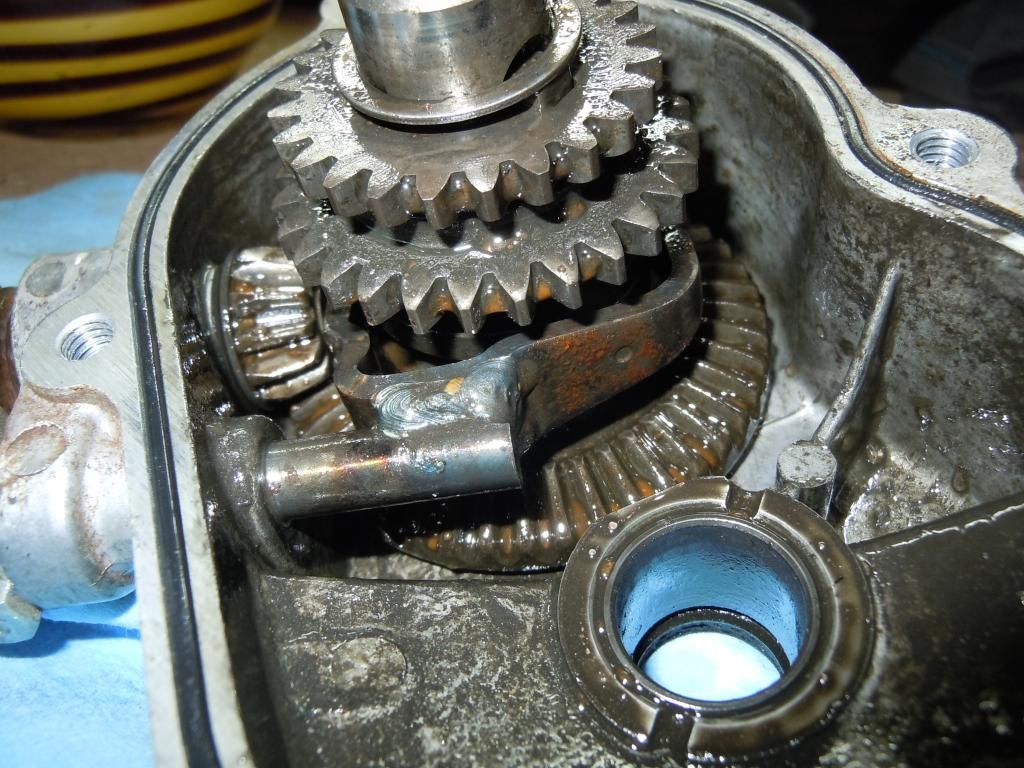
The pull out the 1st and 2nd gears with their shaft. At this point you can swing up the engagement piece and pull out the bottom gear
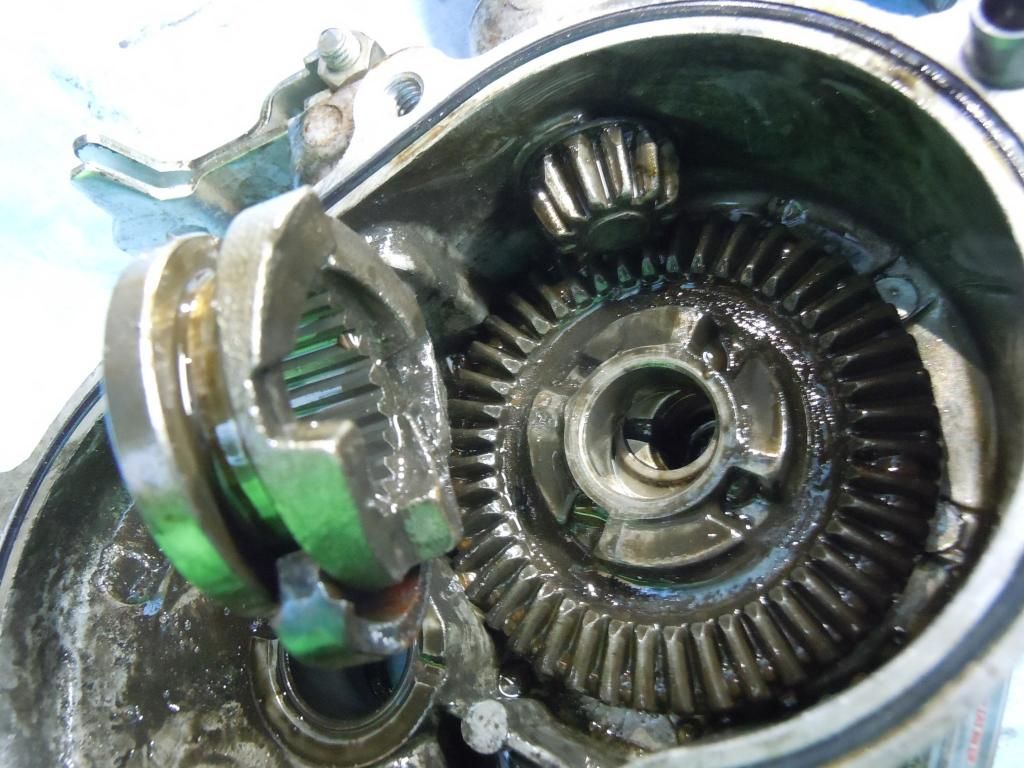
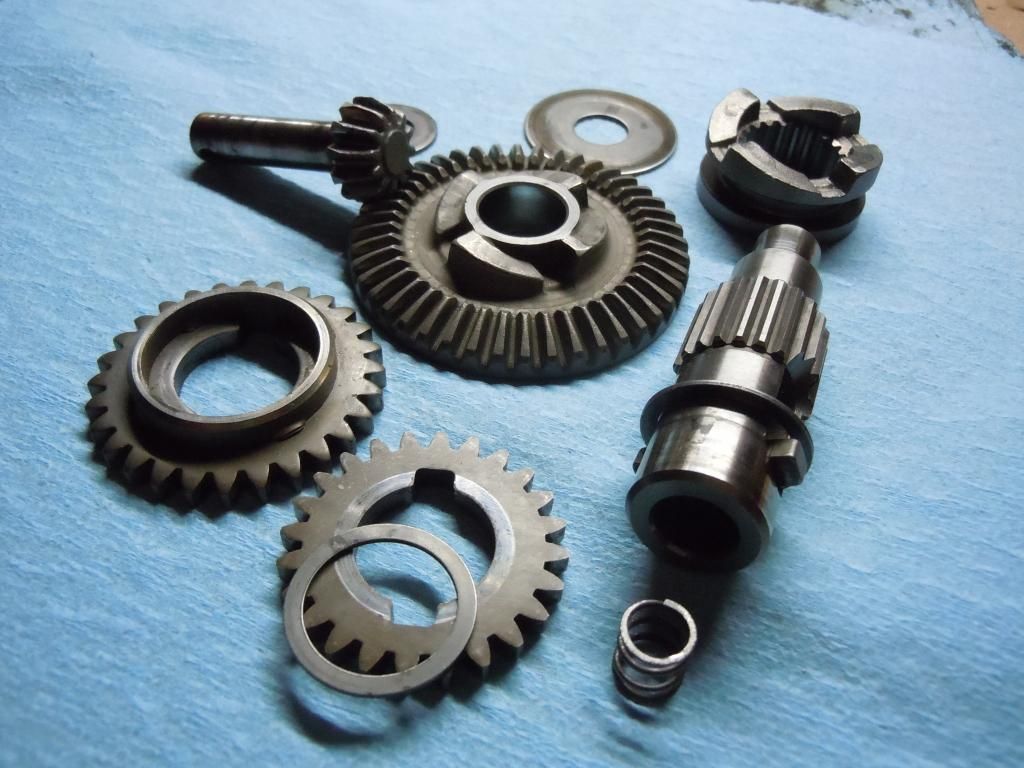
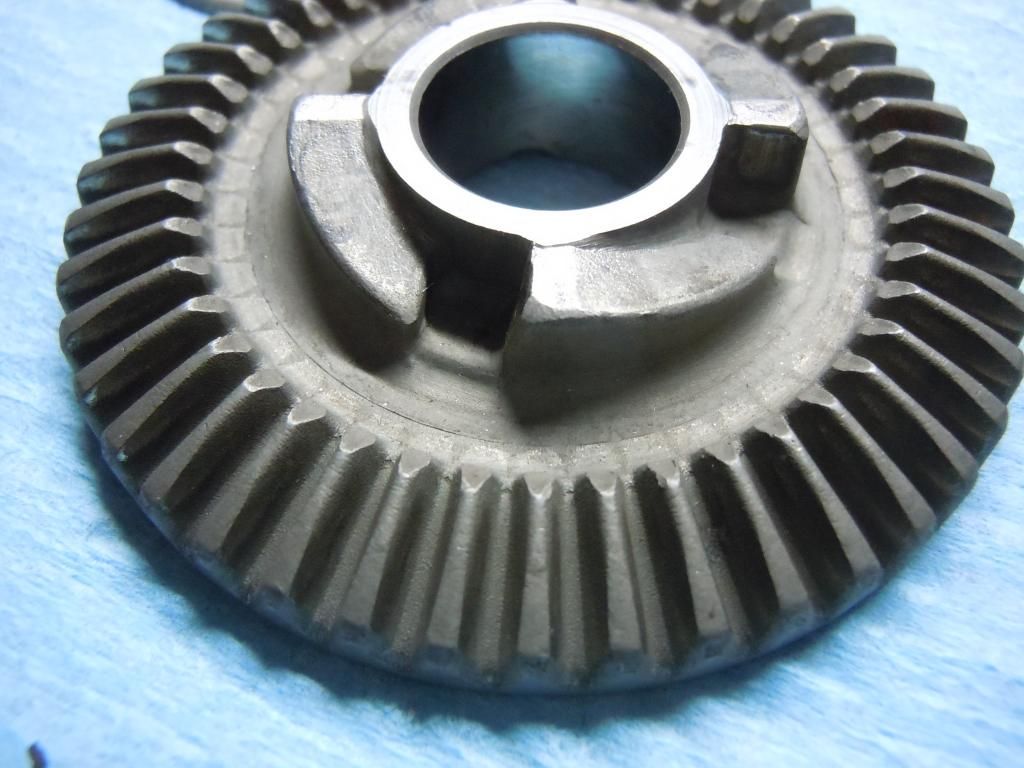
Alright! Its all out. All cleaned up. Here are some shots of the gears and what not
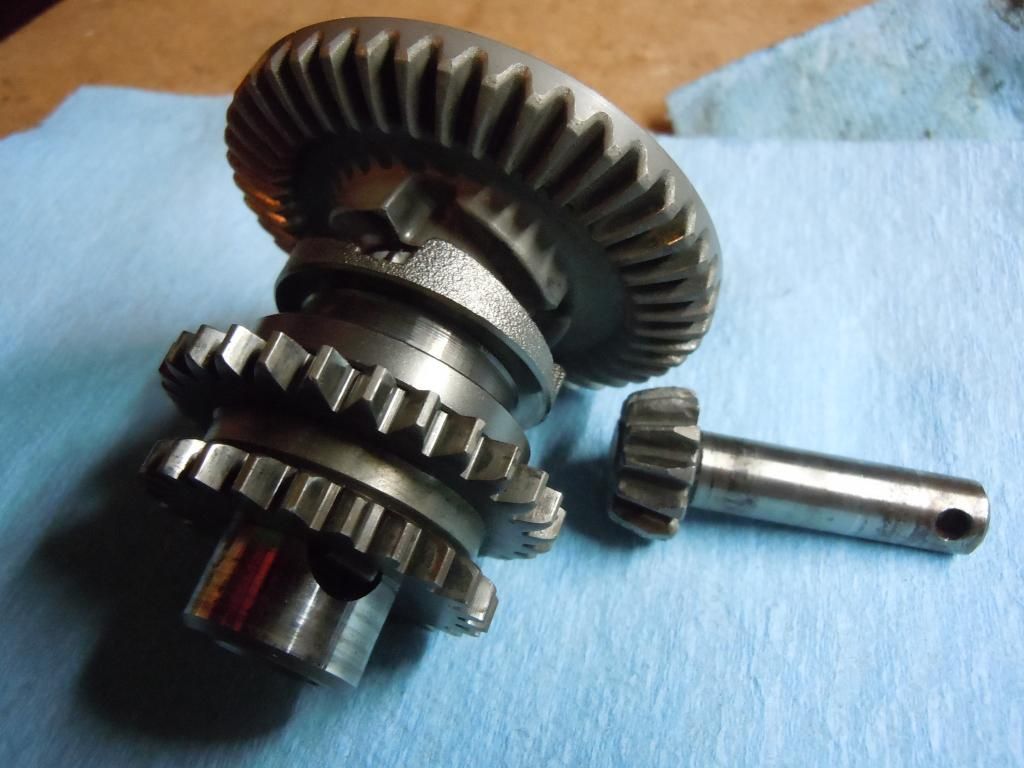
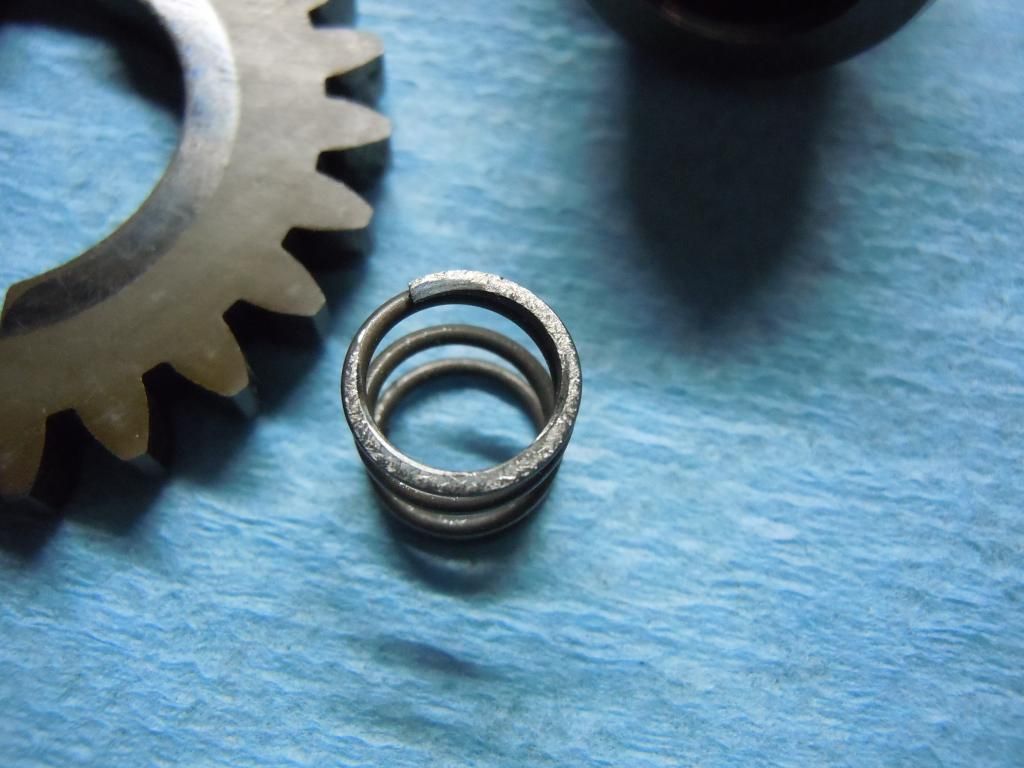
This shifter spring has seen some better days
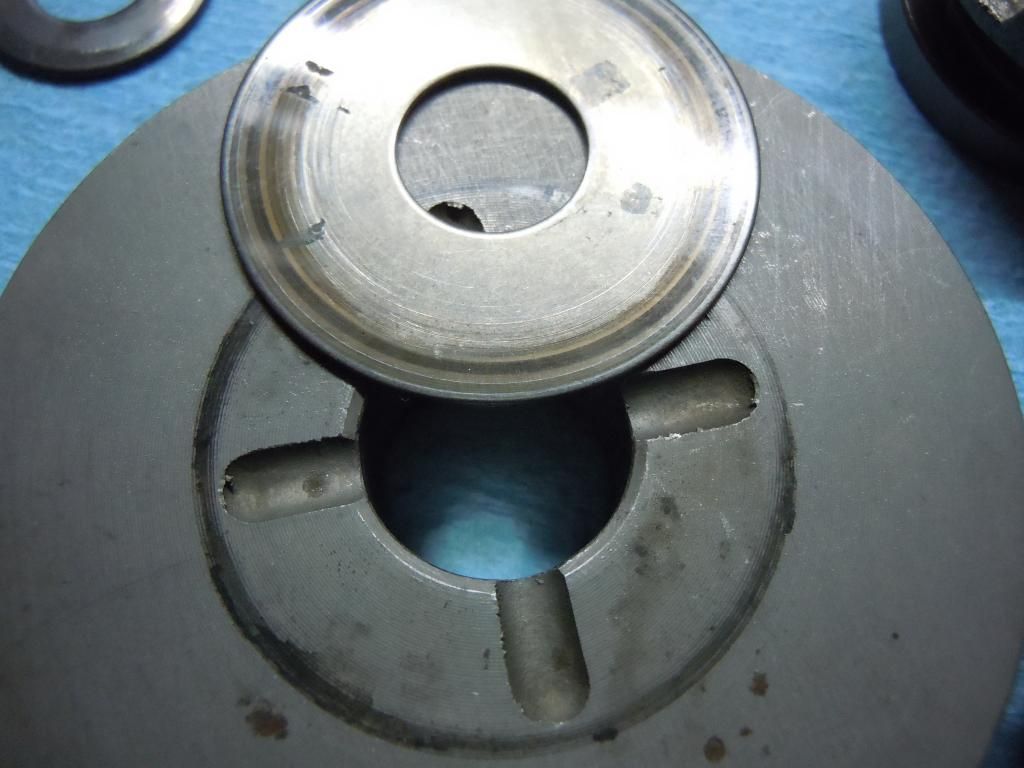
There is a little bit of wear on the washer for the main gear. I will reuse it
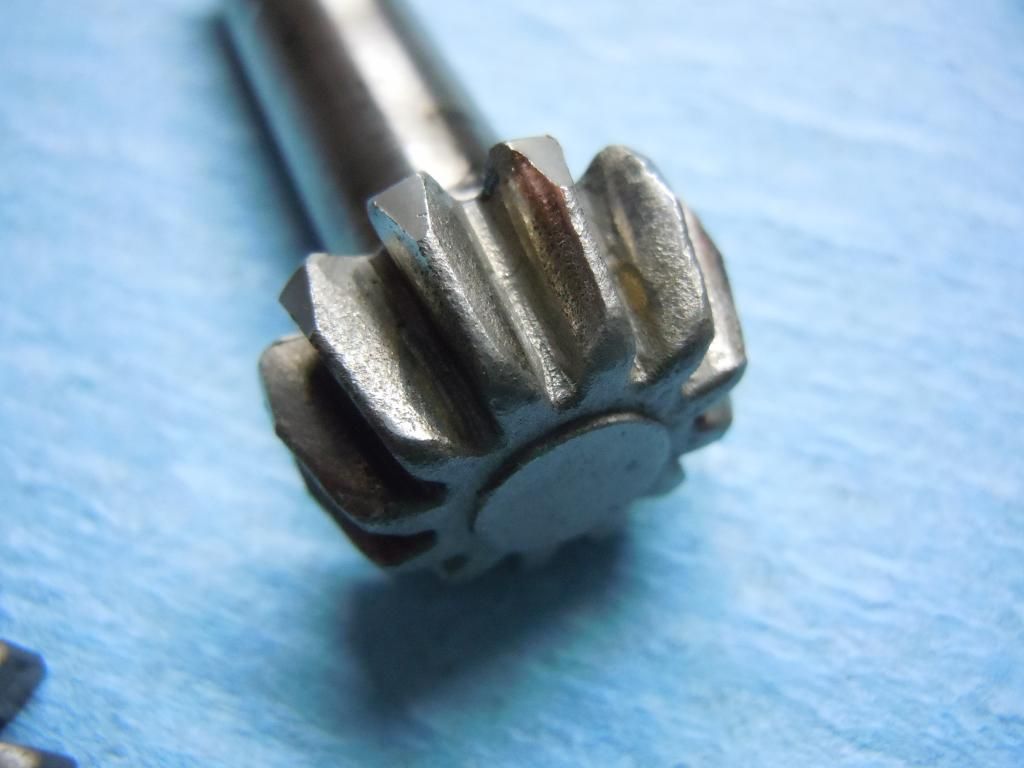
Pinion shows some wear but not too bad.
Main gear looks really good still
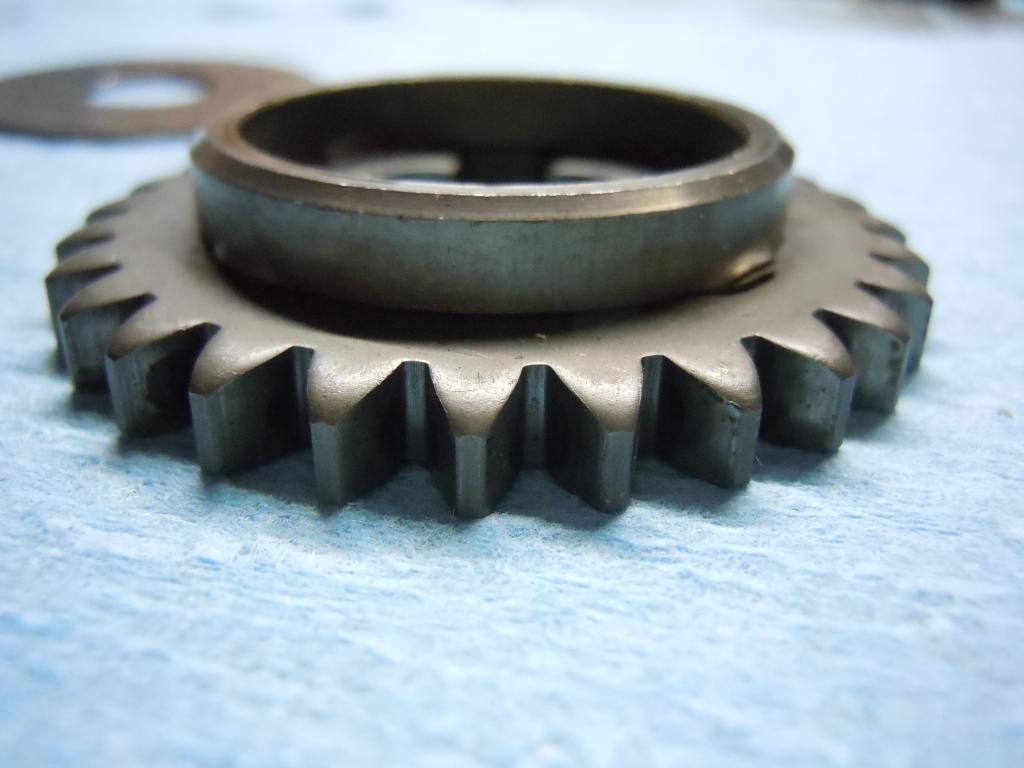
1st gear is just fine
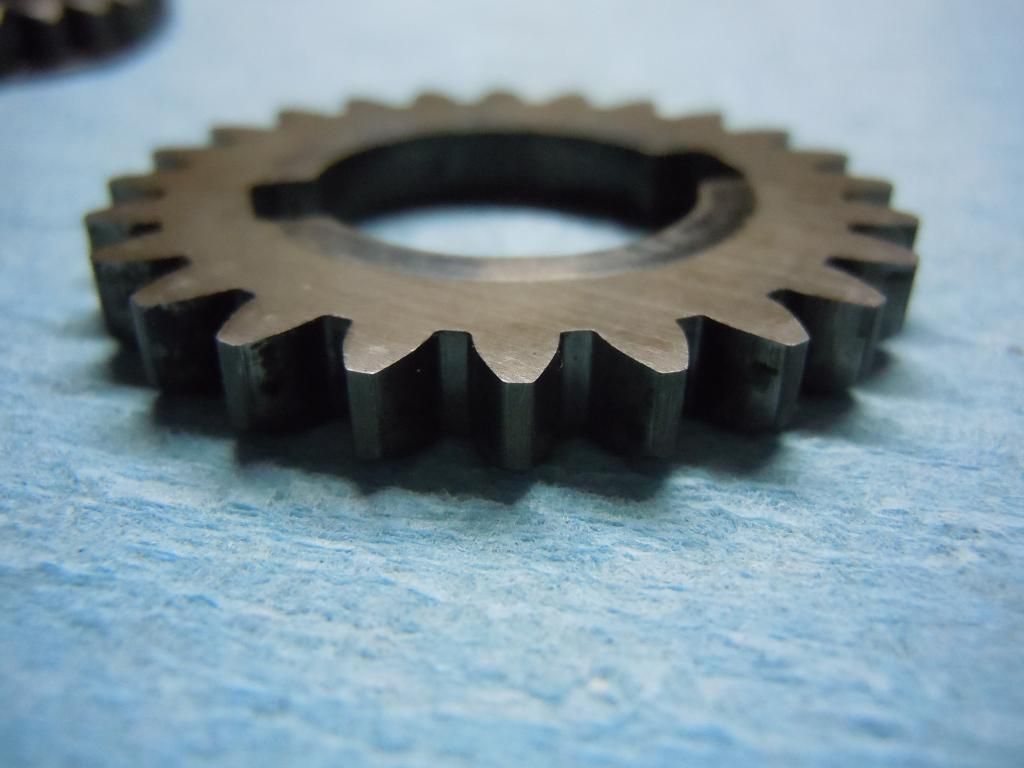
2nd gear lookis great as well. A little bit of a shine where the washer goes
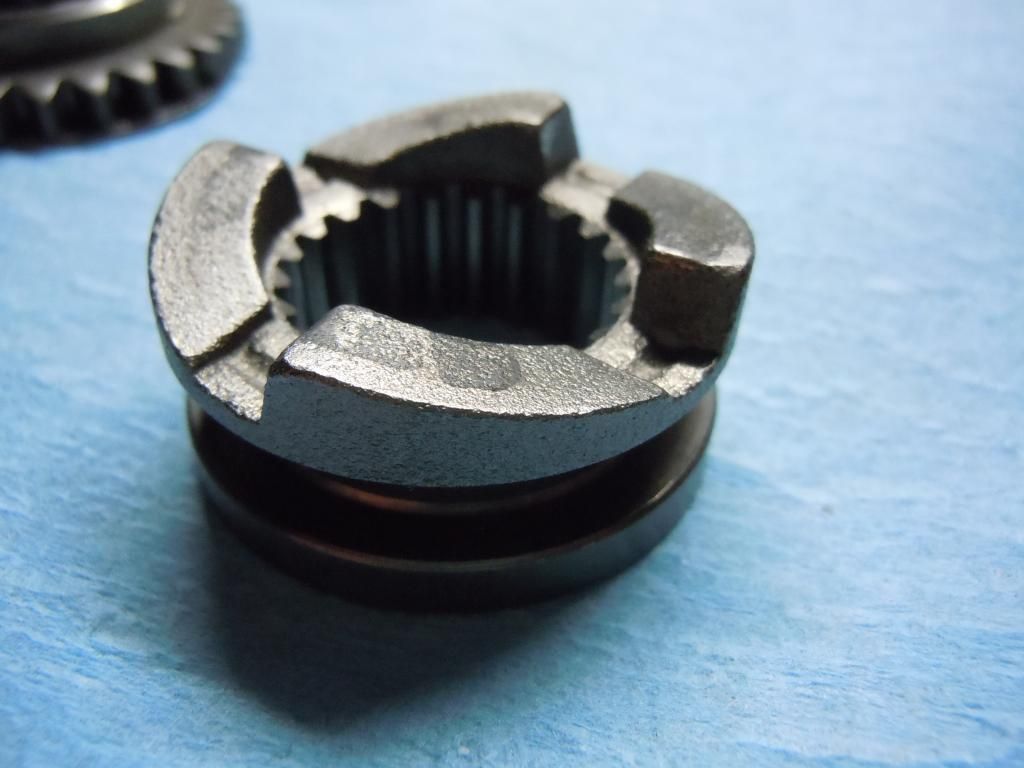
and the engagement piece
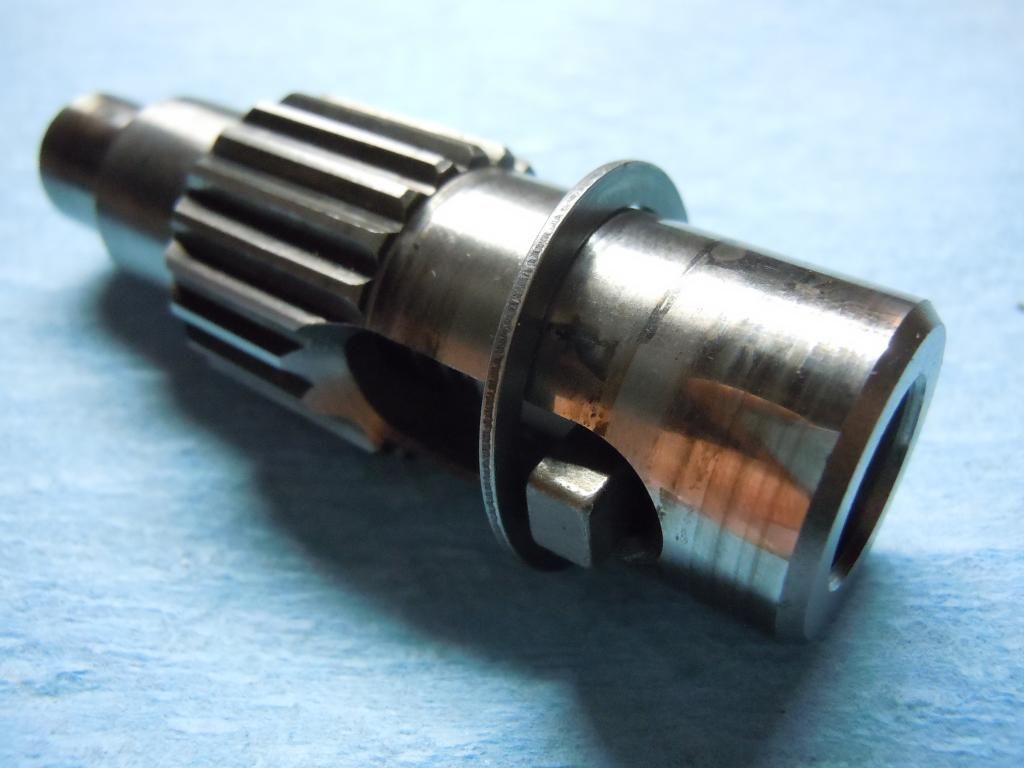
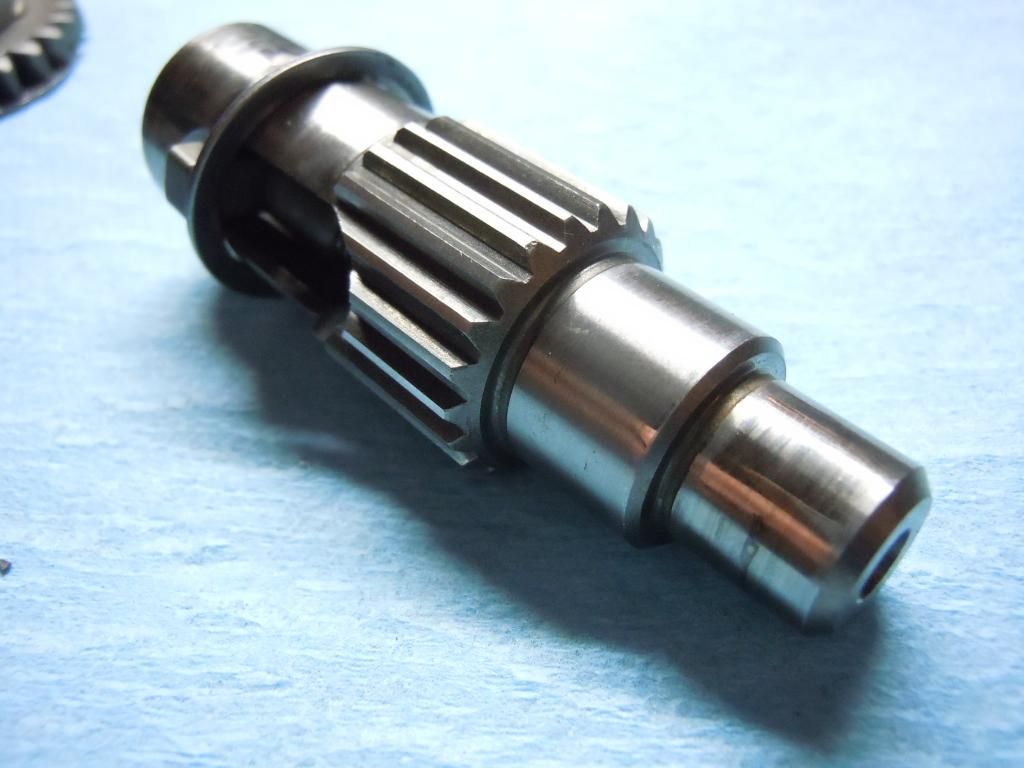
This is the remains of the bushing.......
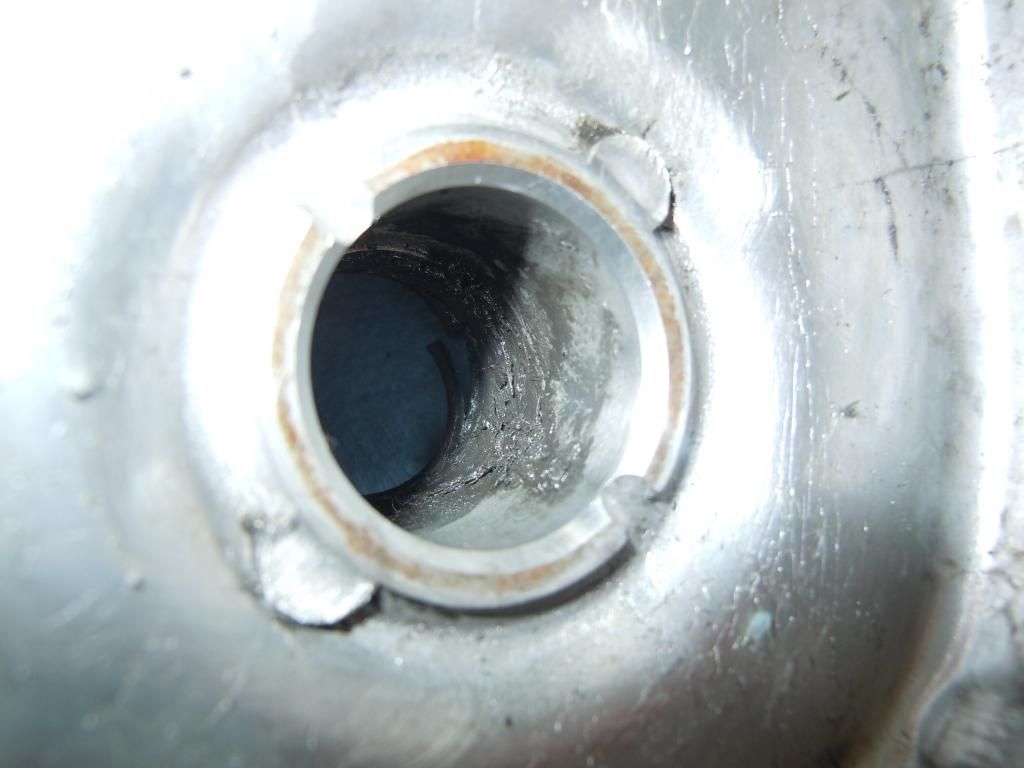
Clearly you can see a bushing on the left and one missing on the right
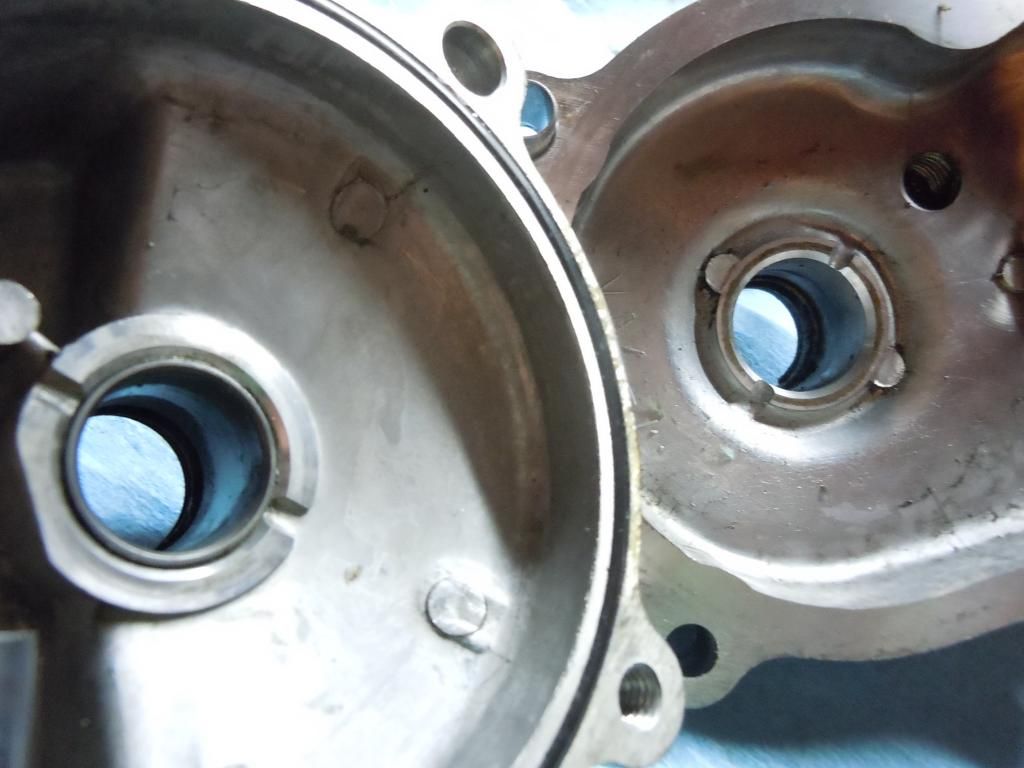
Pinion needle bearing is pretty worn. You can feel a bit of a hesitation when spinning it
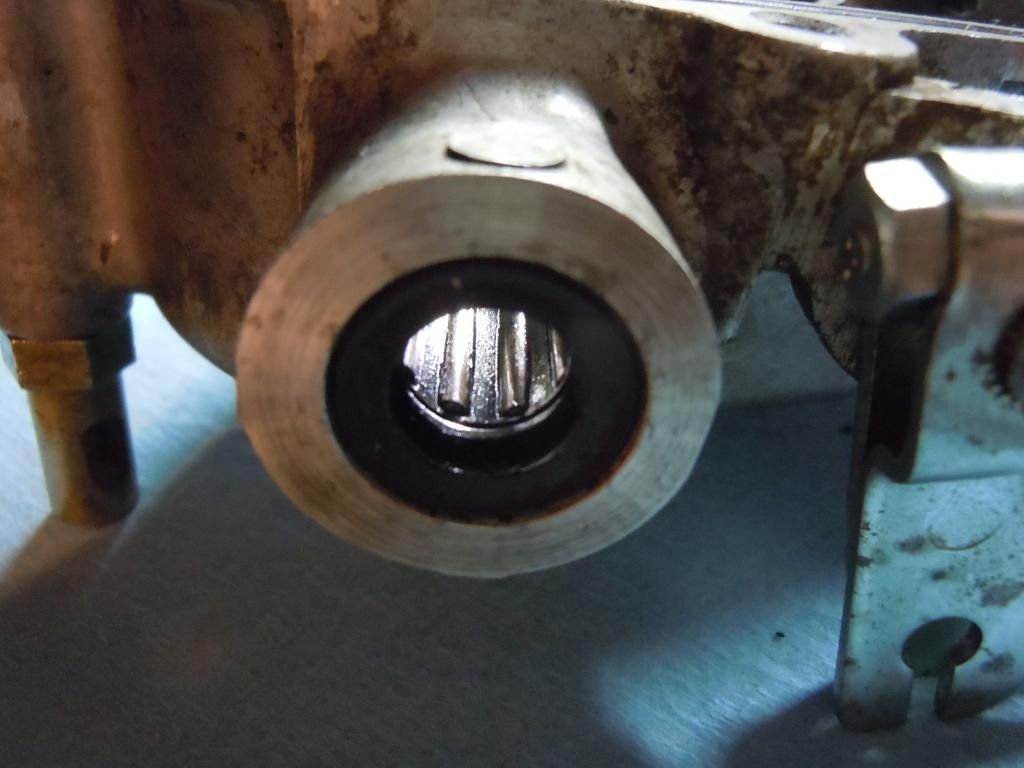
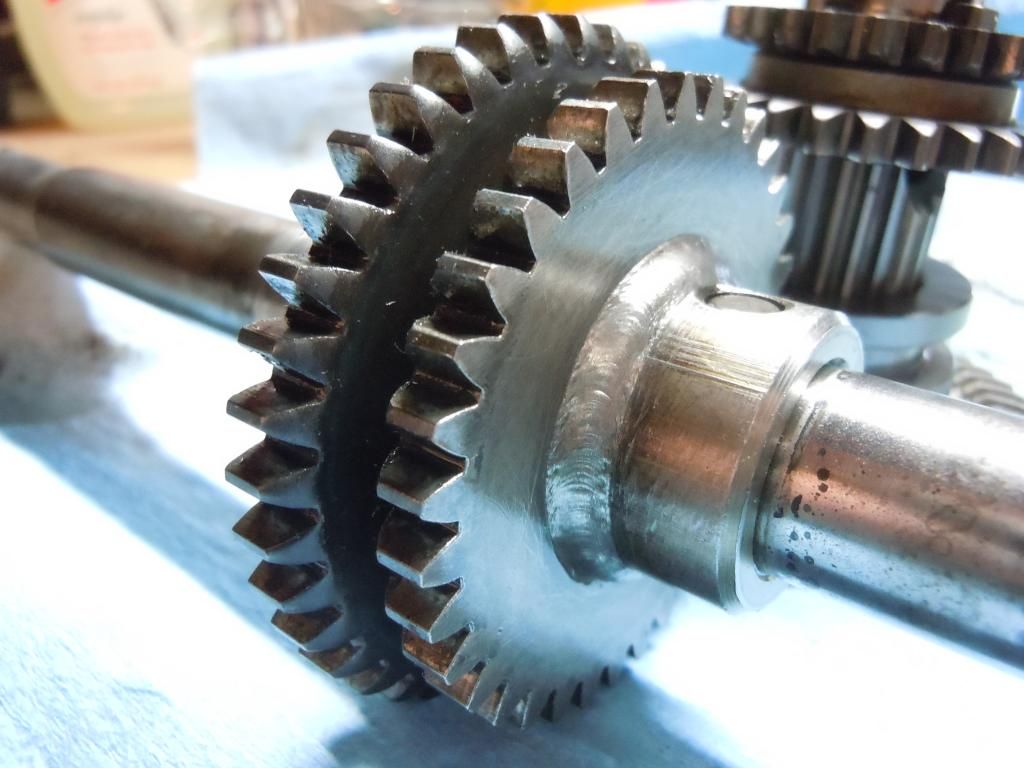
Axle gears in pretty good shape
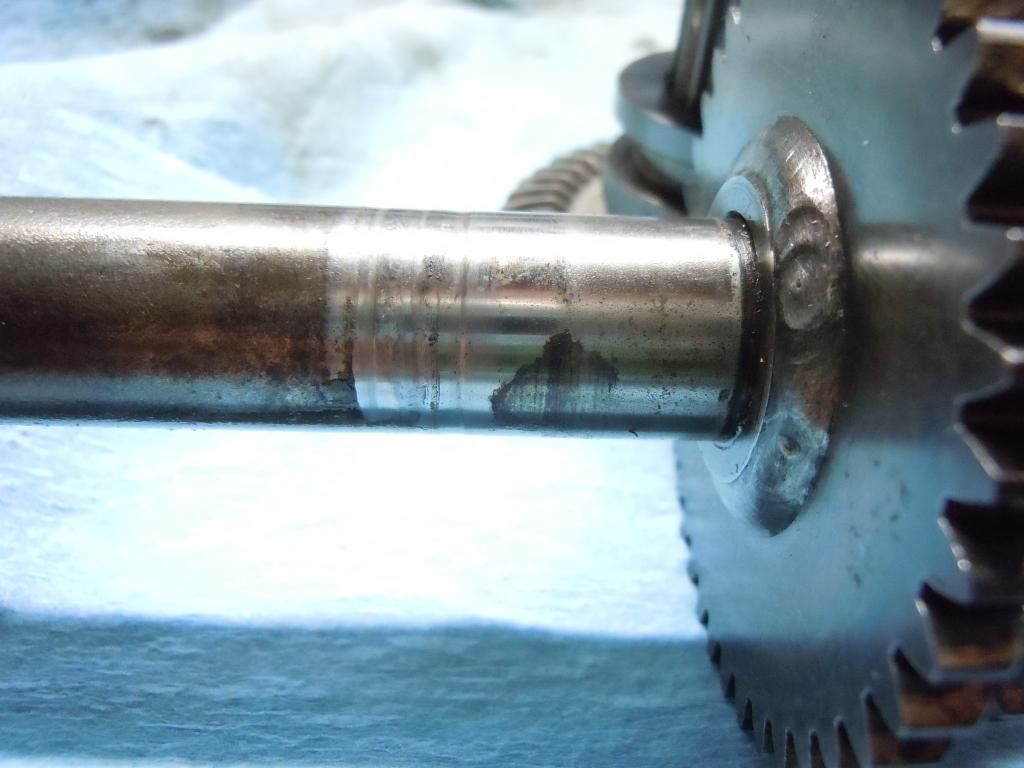
Lastly, the grooves in the axle from the destroyed bushing
All in all...this thing is coming along. I will be putting together a full tear down/rebuild of the transmission video after I get my new seals and parts in. That will be something you all might want to see. You are all now update to date on the progress. Cheers

Then pry it open with a flat head screw driver or similar

Then slide the axle out of the case. Next, remove the washers from both sides


Now to work on the case itself. It had no gear oil in it. Just the residue you see is what was in it. I cleaned up the shifter side here

A few minor blemished from the years of use

The shifter seal looks okay.

And now the gooey mess...

The rust is probably from me washing the assembly a week ago. I am guessing that it got in through the bad axle seal.


Now to remove the drive shaft from the motor, Slide the rubber o-ring away from the dust boot, then pull the boot off. Next is to remove the squeeze clip then tap out the pin that holds the assembly to the pinion

The pull out the 1st and 2nd gears with their shaft. At this point you can swing up the engagement piece and pull out the bottom gear

Alright! Its all out. All cleaned up. Here are some shots of the gears and what not


This shifter spring has seen some better days

There is a little bit of wear on the washer for the main gear. I will reuse it

Pinion shows some wear but not too bad.

Main gear looks really good still

1st gear is just fine

2nd gear lookis great as well. A little bit of a shine where the washer goes

and the engagement piece


This is the remains of the bushing.......

Clearly you can see a bushing on the left and one missing on the right

Pinion needle bearing is pretty worn. You can feel a bit of a hesitation when spinning it

Axle gears in pretty good shape

Lastly, the grooves in the axle from the destroyed bushing

All in all...this thing is coming along. I will be putting together a full tear down/rebuild of the transmission video after I get my new seals and parts in. That will be something you all might want to see. You are all now update to date on the progress. Cheers
#31

OutdoorEnvy
OutdoorEnvy
This thread is making me realize how much I don't know...
Nice work and great job documenting your work and progress. This seems very thorough, to my novice eye anyway
Nice work and great job documenting your work and progress. This seems very thorough, to my novice eye anyway
#32
F
freeloader700
F
freeloader700
When it comes to basic mechanics I know a few things, when it comes to mowers, I am a novice for sure. This is my first time ever taking apart a mower or even doing more that changing the spark plugs. I did also want this to be good documentation so that if I got stuck, I can come back to these. How do all of the gear look to you guys? The only one I have small concern for is the pinion
#33
R
Ryan Rognstad
R
Ryan Rognstad
This is one of the best documented tear downs of anything I have ever seen those are some really high quality pictures and work.
#34
F
freeloader700
F
freeloader700
Thanks everyone. All photos were taken with a Nikon Coolpix S6000, videos with iPhone 4s. A few action shots were still from the videos with the iPhone
#35
N
nbest
N
nbest
Just wanted to let you know how helpfull this thread is. I have a mower that is the exact same modle that needs alot of work. looking forword to see the end result.:thumbsup:
#36
R
Ralph
R
Ralph
Well, quality is worth preserving but we're not talking a '57 Chevy, here. Rust is why God made Bondo and Rustoleum. Take the rust down to bare metal by the most expedient means available. Prime it and restore the physical integrity of the deck with Bondo and a patch. Paint it and get back to work.:laughing:That rust makes me nervous....
#37
F
freeloader700
F
freeloader700
Hey everyone its been a bit of a busy and have not had a chance to touch the project. Right now, I still need to get the last of the deck patched and ready for paint, paint the rear guard, sand/paint the handles to deck height adjuster brackets, transmission rebuild/seal kit and then full assembly.
You think bondo wouldn't be a bad idea with all of the vibrations that the mower would see?
Well, quality is worth preserving but we're not talking a '57 Chevy, here. Rust is why God made Bondo and Rustoleum. Take the rust down to bare metal by the most expedient means available. Prime it and restore the physical integrity of the deck with Bondo and a patch. Paint it and get back to work.:laughing:
You think bondo wouldn't be a bad idea with all of the vibrations that the mower would see?
#38
W
wahhoo1
W
wahhoo1
Nice job you've been doing here. After all the work you've been putting into this I would'nt rattle can paint it....I'd have someone powder coat it....I have two of these mowers and have just finished swapping one trans into the other. both were from the late 80's. One bought new back the for over $700. Both currently have the mufflers burnt out and one the studs broke of when replacement attempted..Then extractor broke off on that one....fortunatly it had a trany with oil that I recently swapped into the doner given to be but self propelled wasn't working on that...these are great running mowers and I've used mine cutting a 1 acre place. With the bag off and the plastic deflector chute on the rear it's unstoppable in tall wet grass...I'm glad you were able to get one with a tight looking muffler and good wheels.....Most have already had the left lower handlebar connection repaired if they were used alot and a rusted deck from not cleaning out the built up grass... happy mowing to you, god knows we have plenty here in the valley...............john
#41
F
freeloader700
Hahah that made me laugh
Thanks everyone, I have been super busy and not able to work on the project. I am thinking by the weekend I will spend a little time. I am still having an issue with burning through the deck or not getting enough heat penetration. I am thinking about brazing the last of it with oxy-acetylene
F
freeloader700
Wow!! Loving the mower **** :biggrin:
Hahah that made me laugh
Thanks everyone, I have been super busy and not able to work on the project. I am thinking by the weekend I will spend a little time. I am still having an issue with burning through the deck or not getting enough heat penetration. I am thinking about brazing the last of it with oxy-acetylene
