I have a craftsman 17.5 HP lawn tractor (917 series). I had to replace my starter solenoid at one point. It was a long time following this, I noticed my headlights had quit working. You can turn the switch on and off while the mower is running and no lights. But what is odd, when you shut the ignition switch off and the engine is powering down, the headlamps turn on and fade to off as the engine quits - but the headlights have to be in the on position for this to happen. I have a light tester and the lights are both grounded. Both lights work as the mower powers off. So I can assume the wiring is intact - no shorts.
As stated, I replaced the solenoid switch but it was a long time after this that I noticed the issue with the lights. Not sure if they were related. I assumed maybe it was the ignition switch, so I replaced it as well.
There are four wires going into the solenoid. The main two positive up top that come in and out and relay to the starter. On the bottom, there is a single white wire with a female connector going into one male terminal on the solenoid. On the second male terminal of the solenoid are two black wires. I can make mistakes but I should have put this in correctly. I also noticed this morning there is a white male wire (not connected to anything) that is within distance of connecting to the white female that goes into the solenoid.
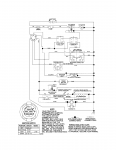
My first thought is I have some "wires crossed" so I have tried various combos of plugging and unplugging and connecting these 3 wires: the white male, white female and the two connected black females. But the mower will not crank unless they are installed in the manner mentioned above going into the solenoid. According to the wiring diagram only a white wire should be connected to the solenoid on the bottom.
I thought maybe it was a faulty headlight switch. I can bypass the switch and the same thing. I have had this mower about 7 years and I can't remember if it has always been this way but the headlight switch has to be on just to crank the mower. And last, I've noticed when the headlight switch is off and I shut the mower down, there is a delay of about 1 to 2 seconds before the engine starts to power down. It basically continues to run normal but with a delay. With the headlight switch on, when you turn the key off, the engine powers down instantly and again, the headlights come on and fade to off as the engine powers down.
Help - I like to have everything of mine work correctly.

